Table of Contents
Advertisement
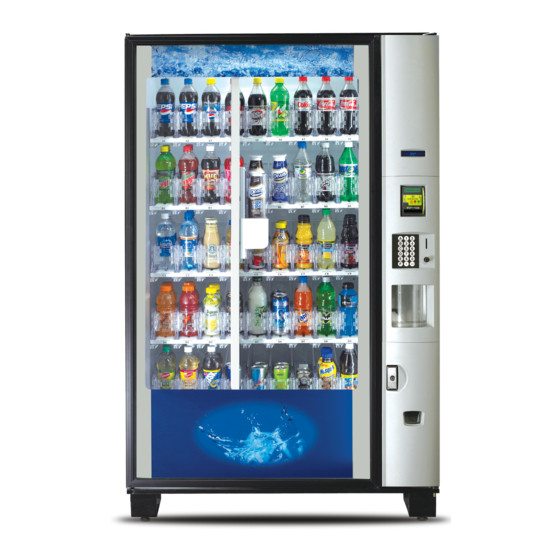
BEVMAX
MODEL 5800-6
Glassfront Vender
Models DN5800-6, DN5800-E6, DN3800-6, DN3800-E6
Production Run ####BL & higher
Manufactured by
6
BevMax 6 Keypad
Programming
st
1
Draft
Crane Merchandising Systems
P.O. Drawer 719
3330 Dixie Narco Blvd.
Williston, SC 29853-0719
803-266-5001
fax: 803-266-5049
Visit us on the web:
www.cranems.com
English ########
Advertisement
Table of Contents

Related Manuals for Crane BEVMAX 6


Summary of Contents for Crane BEVMAX 6
- Page 1 BEVMAX MODEL 5800-6 Glassfront Vender Models DN5800-6, DN5800-E6, DN3800-6, DN3800-E6 Production Run ####BL & higher BevMax 6 Keypad Programming Draft Crane Merchandising Systems P.O. Drawer 719 Manufactured by 3330 Dixie Narco Blvd. Williston, SC 29853-0719 803-266-5001 fax: 803-266-5049 Visit us on the web: www.cranems.com...
-
Page 2: Table Of Contents
Table of Contents PROGRAMMING ......1 - 82 System Setting Modes ......49 – 58 General ............1 – 2 Machine Info ..........49 – 50 Initial Programming ..........2 Time & Date ..........50 – 51 Quick Reference Menu Items ....... 3 - 4 Language .......... -
Page 3: Programming
The Pill VENDING MACHINE CONTROLLERS The Pill is what we refer to the polycarbonate front on the service door. The Pill houses the Surround Atlas Control Board Lighting, Keypad, LCD Display, Touchscreen, The Atlas Control Board is located on the inside of the Integrated Payment System, and Payment Options. -
Page 4: Initial Programming
LCD screen will display by pressing the Key. Crane, followed by a running list of all activities being checked during power up. The lights on vender will TO SET DATE/TIME cycle on and off, validator if installed will cycle, coin To set the date and time enter the “System Settings”... -
Page 5: Quick Reference Menu Items
BEVMAX MEDIA – PROGRAMMING MAP SOFTWARE VERSION 10.6.10 KEYPAD 1. Data Recall 4. Price 6. Special Vend Modes 8. System Settings 1 Non-Resettable Sales Data By Tray 1 Free vend Machine Information 1. Overall Totals By Tray 2 Winner Mode Time &... - Page 6 BEVMAX MEDIA – PROGRAMMING MAP SOFTWARE VERSION 10.6.10 KEYPAD i. Timed Events Time of Day Events 1. Price Adjust 2. Free Vend 3. Inhibit 2 Backup Events 3 Power Savings Events 0. Telemetry 1 Assign Unit 2 Ping Server 3 Get Network Status 4 Show Network Config 5 Load Network Config Machine Configuration...
-
Page 7: Data Recall Mode
BEVMAX MEDIA – PROGRAMMING MAP SOFTWARE VERSION 10.6.10 KEYPAD DATA RECALL ……………………………Press Key 1 to bring up a list. Press the 1 Key brings up a list of the groups in this function. Data Recall Press the numeric Keys to choose a group. 1) Non Resettable Sales Data >... - Page 8 BEVMAX MEDIA – PROGRAMMING MAP SOFTWARE VERSION 10.6.10 KEYPAD By Tray – Press the 2 Key to bring up a screen listing all trays. Press a numeric Key to select a tray and you will bring up a screen with a table listing data as shown.
- Page 9 BEVMAX MEDIA – PROGRAMMING MAP SOFTWARE VERSION 10.6.10 KEYPAD Cash – Press the 4 Key to bring up a table listing Cash Data. Press top and bottom of OK Key to scroll thru Cash entire list. It has multiple screens. Cash In $0.00 ______...
-
Page 10: Resettable Data
BEVMAX MEDIA – PROGRAMMING MAP SOFTWARE VERSION 10.6.10 KEYPAD Resettable Sales Data – Press the 2 Key to bring up a list Press the 1 Key will bring up a screen listing the sub-groups that contain the data in this group. - Page 11 BEVMAX MEDIA – PROGRAMMING MAP SOFTWARE VERSION 10.6.10 KEYPAD By Product – Press the 3 Key to bring up a screen listing all trays Press a numeric Key to select a tray and you will bring up a screen listing the product selections on that tray.
- Page 12 BEVMAX MEDIA – PROGRAMMING MAP SOFTWARE VERSION 10.6.10 KEYPAD Cashless – Press the 5 Key to bring up a table listing Cashless Data. Cashless Sales $0.00 Discounts $0.00 Surcharge $0.00 Revalue $0.00 Bill Data – Press the 5 Key to bring up a table listing Bill Data. The contents of the recycler unit have been listed below the table.
-
Page 13: Events
BEVMAX MEDIA – PROGRAMMING MAP SOFTWARE VERSION 10.6.10 KEYPAD EVENTS – Press the 3 Key to bring up a screen Press the 3 Key will bring up a screen which is divided into two sections. The top section of the screen allows you to view recorded data for each type of event. Events Press the numeric Keys to bring up a list for 1) Power Losses... -
Page 14: Identification Numbers
BEVMAX MEDIA – PROGRAMMING MAP SOFTWARE VERSION 10.6.10 KEYPAD 4. Identification Numbers – Press the 4 Key to bring up a screen. Press the 4 Key will bring up a screen listing the ID numbers for the devices listed. Identification Numbers Bill Validator ############# Card Reader... - Page 15 Error Description Probable Cause Possible Solutions Stuck Keys Fatal. Stuck keys on keypad or shorted connections/harness. Check connectors to be properly installed. Check harness for damage. Replace the keypad. No Monetary Device Fatal. The control board has not been able to detect a Check connectors to be properly installed.
- Page 16 Error Description Probable Cause Possible Solutions Coin Mech Tube Error. Coin mechanism not sensing a payout tube. Check for proper pay out cassette placement. Replace the payout cassette. Replace the coin mechanism. Coin Mech Disabled. Coin mechanism has been disabled by the board Power down the machine and re-start.
- Page 17 Error Description Probable Cause Possible Solutions Low Change. The coin mechanism has reported a low or Add coins to the tubes using the coins in/out screen in empty condition in one or more of the coin the monetary section of the service modes. pay out tubes.
- Page 18 Error Description Probable Cause Possible Solutions # XXX Motor Error. The board has detected a problem with a selection Check harness connection. Motor (XXX indicates the selection involved). Check for damage to the tray harnessing. Check for damage to channel harnessing if applicable. Replace the snack motor.
- Page 19 Error Description Probable Cause Possible Solutions Factory Init. An attempt to restore factory default settings has Power down, power up, try again. been unsuccessful. Power down, remove monetary devices and try again. Replace the control board and reset. Card Reader No Comms.
- Page 20 Error Description Probable Cause Possible Solutions Bill Validator Disabled. The control board has disabled the bill validator. Check for coins in the payout tubes of the coin Mechanism. Check for a fault with the bill validator. Check Winner Prize. The control board has detected a failed winner vend.
- Page 21 Condenser High Side Temperatures at or nearing 150 degrees are being Clean screens and condenser. Warning. Reported. Check to see that the machine has six inches off clearance from the wall. Replace the sensor. Condenser High Side Error. Temperatures of an unlikely nature are being Check the temperature sensor and connections.
- Page 22 Recycler Jam. The recycler is unable to function. Check for an obstruction or blockage which is preventing the recycler from completing its cycle. Replace the recycler cassette. Replace the bill validator. Recycler Checksum Error. A communications error has been reported Check the bill validator harnessing for damage.
- Page 23 Recycler Cass Jammed. The recycler cassette is not able to move. Check for an obstruction or blockage which is preventing the cassette from moving. Replace the recycler cassette. Replace the bill validator. Bill Validator Path Jammed. A blockage of the bill path has been reported. Check for an obstruction or blockage which is preventing the bills from moving thru the bill validator.
- Page 24 Cold Drink Picker Motor The control board is reporting that the picker motor Use the position test functions to test the picker motor. Failure. is not functioning. Replace the picker cup. Cold Drink Port Motor The control board is reporting that the port motor Use the port test functions to test for function Failure.
- Page 25 Cold Drink Cabinet Too Cold. The control board is reporting that the cabinet is Check for an accurate temperature reading. operating at three degrees, or more, below the Check refrigeration system for proper function allowed parameter. (clean screens, condenser also distance from rear wall). Check for proper fan operation.
- Page 26 Health Recheck Error. The control board is reporting that an error Check temperature sensors for proper function. occurred in the process of conducting a second Check the refrigeration system for function. attempt at a health check. Reset machine for another cool down period to check for proper health control function.
-
Page 27: Test Vend
TEST ………………......Press the 3 Key to bring up a screen. Press the 3 Key will bring up a screen listing the functions within the group. Press the numeric Keys to choose a function. Test 1) Test Vend > Choosing a function will bring up the first screen within each 2) Coin Return Motor >... -
Page 28: Surround Lighting Test
Surround Lighting Test – Press the 3 Key to enter the function. Press the 3 Key brings up a screen listing one option. Surround Lighting Test 1) Perform test Press the 1 Key to perform the test. The display will say “Surround Lights should change now” and the integrated payment openings lights will turn on, change colors, and turn off, then the pill light tube will turn on, change colors, then turn off. -
Page 29: Mag Teckhead Test
MagTeck Head Test – Press the 5 Key to enter the function. Press the 5 Key will bring up a screen and the top portion is asking you to swipe your card. Swiping your card will tell you if it was a good or bad swipe MagTeck Head Test Please swipe card and on which tracks data was detected. -
Page 30: Port & Cup Sensors
Port and Cup Sensors – Press the 2 Key to bring up a screen. Port and Cup Sensors Port Sensor Port Open Switch Data lists the current state concerning the Port Sensor. Port Closed Switch Sensor Vend Detect Use the numeric Keys to Change the state concerning the 1) Turn Port Sensor On >... -
Page 31: Test Mode
Keypad Test - Press the 5 Key to bring up a screen. Press the 5 Key will begin a Keypad test by asking you to press the keys in sequence to test the functionality of each key. Note: On the and OK Keys it is important to press the portion that is illuminated (top or bottom) during the test. -
Page 32: Product Configuration Mode
5. PRODUCT CONFIGURATION ……..Press the 5 Key to bring up a screen. Press the 5 Key brings up a screen listing the various functions. Product Configuration 1) Selection Configuration > Press a numeric Key will bring up the first screen in the 2) FIFO Setup >... - Page 33 Add Group Menu - Press the 1 Key to bring up a screen to create group(s). The numeric Key 1 is used to save a group of selections that Add Group Menu will operate in FIFO mode. Included selections will be listed 1) Create Group nothing selected on the right side of the Create Group window.
- Page 34 Use the numeric Keys to select the group to be deleted and a screen will come up asking if you are sure you want to delete the group. Are you sure you want to Delete group #1? Respond using the numeric Keys. Key 1 for Yes, and Key 3 for No.
-
Page 35: Uoc/Ean Codes
(continued Second Screen) Tray #1 FIFO Selections 1) 106 (repeat) √ Some lists use more than one screen, use the top and 2) 107 √ bottom of the OK Key to scroll to the desired selection. 3) 108 √ 4) 109 √... - Page 36 Tray #2 The “UPC/EAN Code” will be listed on the same line as the 1) Clear all Products > selection. The code is the same as the selection number. 2) 201 3) 202 Press the numeric Key for a selection will open a window that 4) 203 will allow you to set another code number for that selection 5) 204...
-
Page 37: View Plan-O-Gram
Maximum Fund Amount – Press the 2 Key opens a window allowing you to set the maximum value of items placed in the shopping cart. Shopping Cart Setup 1) Shopping cart size 2) Max Fund Amount $0.00 The recommended value should be calculated by multiplying the number of items allowed in the cart by the highest price set in the machine. -
Page 38: Free Vend
Free vend – Press the 1 Key. Press the 1 Key will toggle an entry in a window on the first screen between On and Off. Special Vend Modes 1) Free vend Winner Mode – Press the 2 Key to bring up a screen. Press the 2 Key will bring up a screen that will prompt you to press the 1 Key. - Page 39 Use the 1 Key to include all the selections on the tray in the group. Use Tray #2 Winner Selections 1) Set All > the 2 Key to remove all selections on the tray from the group. 2) Clear All >...
- Page 40 Edit Group Use the 1 Key to save the changes made to the group. It is 1) Save Group 101, 102 and 7 more> the save button for your group. Parameters 2) Mode Prize 3) Frequency 4) Prize Trays Use the numeric Keys to select a tray to edit. 5) Tray #1 >...
-
Page 41: Combo Vends
Combo Vends – Press the 3 Key to bring up a screen. Press the 3 Key will bring up a screen listing two options. Combo Vends Press the 1 Key will toggle the setting in a window 1) Discount Type Percent between Value and Percent. - Page 42 Selecting NO will apply the discount to only the last item in the Combo. 5. Press the 5 Key to Edit Group1 will bring up a tray list. Choosing a tray will bring up a screen listing all the selections on that tray.
- Page 43 Press once. Press 2p22p222p then once. Then 1p2p3p then OK Key on the Keypad. Press the 2 Key to Validate Entries. This step will validate the Machine ID. The 1 Key is the save button for your Combo. If you fail to save the Combo you create, your work will be lost! Once a group has been created, the original screen will be expanded to include more options for control and editing of the group.
- Page 44 Edit Promotion Use the numeric Keys to select a promotion group to 1) Save Promotion Save Promotion> edit. 2) Number of Groups in 3) Discount Percentage Once a group is selected a screen will come up that 4) Discount All will allow you to select a tray, then a screen will 5) Edit Group 1 9 Selected>...
-
Page 45: Token Enable
Token Enable – Press the 4 Key to bring up a screen. Press the 4 Key will bring up a tray list. Token Enable 1) Tray #1 > Use a numeric Key to choose a tray. 2) Tray #2 > 3) Tray #3 >... -
Page 46: Monetary Mode
When set to Yes, the display will show the below message. MultiVend Discount Press the 2 Key to open a window to allow setting 1) MultiVend Discount the percent number to discount. Use the shopping 2) Percent Discount cart key to delete last number entered. Press the All selections in a cart with two or more OK Key to say the percent you wish to Discount items will be discounted by the percent... -
Page 47: Coins In/Out
Coins In/Out – Press the 1 Key to bring up a screen. Press the 1 Key will bring up a screen divided into two sections. Coins In/Out 1) Stop dispensing > Coin Count Value 1. The top section is a table listing the type of coin, the 0.05 $ 0.00 number of coins, and the value of the coins. -
Page 48: Bill Validator
Bill Validator – Press the 2 Key to toggle the setting between MDB and No Bill Validator. Press the 2 Key will allow you to toggle the setting in the live window between MDB and No Bill Validator. The current setting is displayed at the right. Monetary Monetary 1) Coins In/Out... -
Page 49: Bill Acceptance
Bill Acceptance – Press the 6 Key to bring up a screen. Press the 6 Key will bring up a screen that allows you to select the types of bills to be accepted by the machine. Use the numeric Keys to check and un-check the type of bills that will be accepted Bill Acceptance by the machine. -
Page 50: Card Revalue
3. Accept On Low Change – Press the 3 Key to bring up a screen. Press the 3 Key will open a window allowing you to enter an amount using the numeric Keys. A. This amount is the maximum amount of money that will be accepted by the machine when the coin mechanism is low on coins and may not be able to make change for a purchase. -
Page 51: Stack Bills
Stack Bills – Press the 3 Key to bring up a screen. Press the 3 Key, will bring up a screen to allow you to check the option to Stack the Bill immediately or wait (hold the bill in escrow) until a selection is made. Use a numeric Key to check the setting you wish to set the vender. - Page 52 Lowercase alpha Uppercase Alpha Numeric Once the location has been entered, use the center section of the OK Key to accept the entry. Time and Date – Press the 2 Key to bring up a screen. Press the 2 Key will bring up a screen allowing you access to the various settings in the function. Use the numeric Keys to choose a setting to be changed.
-
Page 53: Language
Press the 3 Key will bring up a screen allowing you to select the Date Format. Use the numeric Keys to choose a format. The Time and date selected format will be checked. 3) Date Format 1) North American (MM/DD/YYYY) √... -
Page 54: Dts (Data Transfer System)
Use the numeric Keys to choose an option. The Enabled Languages chosen option will be checked. Use the center of the 1) English-UK button to accept the option selected and return to 2) English-US √ Language screen. 3) Nederlands Note: In the current version only one language present (US English). - Page 55 Press the 3 Key will bring up a screen allowing you to choose the way to display Bill Data in these files. Use the numeric Keys to select an option. The Currency setting will display bills as a monetary 3) CA304/CA308 Data Type Numeric value.
-
Page 56: Software Updates
When set to Yes, DTS Cache is enabled or turned on. Press the 2 Key to display the current interval time DTS Cache Settings and open the window to allow you to change the 1) Enable DTS Cache time. Press the numeric Key for the time interval you 2) DTS Cache Interval wish to use. -
Page 57: Clone (Copy) Config
Press the 1 Key to make a new backup file. Are you sure you want to start backup creating? It will take a Few seconds, please wait. Press the 1 Key for YES, or the 3 Key for NO. 1. Use the 1 Key to make a new backup. They are listed by number. The new backup will be a copy of the currently set prices, product codes, motor pairings and any other options you have set up in the currently loaded firmware. -
Page 58: Screen Brightness
Press the 1 Key will open a window that will allow you to give the Function clone a name using the numeric Keys. The stick can contain more than 1) Name Clone one clone. 2) Make Clone Press the 2 Key will save the clone to the memory stick using the name you have given it. Once the clone has been saved to the stick, the first screen will Function be expanded to include all the clones that are saved to the stick. -
Page 59: Idle Time Out
9. or 1. LED Color – Press the 9 or 1 Key to bring up a screen. See above. Idle Time Out – Press the 2 Key from the second screen to bring up a screen. Press the 2 Key, from the second menu screen, will open a window allowing you to enter a new time to set the time in seconds for idle time out to return to operation using the numeric Keys. -
Page 60: Nightly Reboot Settings
III. Press once to go to numeric characters. Lowercase alpha Uppercase Alpha Numeric Nightly Reboot Settings – Press the 5 Key from the Second Screen to bring up a screen. Press the 5 Key will bring up a screen listing the options for Press the 1 Key will toggle the Enable Nightly Reboot Nightly Reboot Settings between Yes and No. -
Page 61: Security Code Modes
SECURITY CODES ……………..Press the 9 key to bring up a screen. Press the 9 key will bring up a screen listing the following options. Use the numeric keys to choose an action. Security Codes 1) Enter PIN > Choosing an action will bring up a screen or open a window that will 2) Change Driver PIN allow you to complete the action. - Page 62 Press the 2 Key will bring up a screen stating that this unit is currently unassigned – please log in with a higher PIN entry to assign this unit. Telemetry This unit is currently unassigned. Please log in with a higher level PIN entry to assign this unit.
- Page 63 Added options include: In the TEST mode functions, #3 in first screen and #6 in the second screen are added reliability tests, shifting the other entries down. These tests are meant for Factory Engineering use only and should not be used in the field. Press the numeric Keys to choose a function.
- Page 64 Entering a manufacturing code of 5,5,5,5 will bring up a screen used in the factory for set up and testing. This feature is meant for Factory use only and should not be used in the field. Test Security Use the numeric Keys to choose an option. Clear Codes Choosing an option will bring up the first screen for that...
- Page 65 Factory Setup Press the 1 Key will scroll to the next item available and 1) Next Step > bring up a screen with the option. Press the 1 Key will scroll forward through the available options of settings to adjust. 2) Diagnostics >...
-
Page 66: Timed Event Modes
Press the 1 Key will scroll forward through the available options of settings to adjust. Press the 2 Key will list any errors registered. Press the 3 Key will toggle the option setting shown from No to Yes. Press the OK Key to save the setting you wish to use. Press the Key to move backward 1 step in the menu. - Page 67 Price Adjust 1) Save this event > Press the 1 Key to SAVE your settings or your work will be 2) Remove this event > lost. 3) Enable state 4) Frequency Weekly Daily Press the 2 Key to REMOVE the event from memory. 5) Start time 00:00 6) Stop time...
- Page 68 Selections for event Use the numeric Keys to choose a tray. 1) Tray 1 > Tray #2 2) Tray 2 > 1) Add all selections 3) Tray 3 > 2) 201 4) Tray 4 > 3) 202 5) Tray 5 >...
- Page 69 Days of week Press the 5 Key to open a window allowing you to use the numeric keypad to 1) Set All enter a time of day for the event to begin. 2) Clear All Press the 6 Key to open a window allowing you to use the numeric keypad to 3) Monday enter a time of day for the event to end.
- Page 70 Press the 1 Key to SAVE your settings or Inhibit Event your work will be lost. 1) Save This Event > 2) Remove This Event > Press the 2 Key to REMOVE the event from 3) Enable State memory. 4) Frequency Weekly Daily 5) Start Time 00:00...
-
Page 71: Backup Events
Press the 2 Key will bring up the first screen for Back-Up Events. Timed Events Press the 2 key will bring up a screen allowing you to set up a timed 1) Time of Day Events > back-up of events. 2) Backup Events >... -
Page 72: Telemetry Mode
Press the 5 Key to open a window allowing you to use the numeric keypad to enter a time of day for the event to begin. Press the 6 Key to open a window allowing you to use the numeric keypad to enter a time of day for the event to end. - Page 73 If any of the required parameters are different, the new parameters are loaded and the machine is re- booted so that the new parameters may take effect. Once the machine has completed the re-booting process, the user will have to re-enter the service mode function named “Telemetry” to restart the Assignment process.
-
Page 74: Ping Server
2. Pressing the 2 Key will cause the machine to attempt to Ping the Server. Telemetry If the machine is not able to do so, it will report “ Failed”. 1) Assign unit 2) Ping Server Ping Server 3) Get Network Status Failed 4) Show Network Config 5) Load Network Config... -
Page 75: Load Network Config
Heartland / Streamware Acct - Before installing the radio for intergraded wireless function, you must establish an account with Vantiv or Heartland Payment Systems and Crane Streamware. A. When the customer account is established, Crane Streamware will email the customer a configuration file for uploading and assigning the BevMax Media (referenced as BMM below). - Page 76 B. When account and machine information is established by Vantiv or Heartland and Streamware, they will email the following customer configuration file: “VixConfigData.cfg”. C. Open up the computer drive where the USB memory stick is inserted. D. Create a new folder called “atlas” on your blank USB stick. E.
- Page 77 Press button 2 to “Validate Entries”. This step will validate the Machine ID. • Machine ID is validating user information • Machine ID validated and assignment complete Press button 1 to reboot machine and complete assignment process. Upon reboot, remove USB memory stick. J.
- Page 78 TELEMETRY – How it Works Telemetry Devices come in 3 packages. 1. Clients – Telemetry units that only contain ZigBee chips installed to communicate to a Gateway Telemetry unit. 2. Gateways – Telemetry units that have both ZigBee chips for Mesh network communication and cell Radios (GSM or CDMA) for cell network communication.
- Page 79 report captures and stores all transaction data and the results of the transaction for both Credit cards and Cash transactions. The Operator receives monthly statements with detail on all transactions, Number of, Price per transaction, etc. from the Card Processing Company (Vantiv, Heartland). Daily Transactional data is sent from Vantiv or Heartland to the operators VendMAX system for automated reconciliation.
- Page 80 Operational data involves error messages, conditional alerts, and malfunction reporting. Media – Crane Merchandising Systems new equipment platform is the industry’s most advanced vending solution. Built on NAMA Open Standards, Media integrates the following capabilities in to one powerful solution: graphics, touch screens, consumer insights data, advertising, and promotions, social media, networking options (including machine to machine, cellular, &...
-
Page 81: Machine Configuration Mode
) MACHINE CONFIGURATION ..Press the Shopping Cart Button. Pressing the Shopping Cart Button brings up a screen listing the Machine Configuration. Note: Items listed below 6) Firmware Information on this initial screen is view only and cannot be changed at this point in the programming. They are for information purposes only. They may be changed at other menu locations in the programming. -
Page 82: Space To Sales
reading, or if the temperature is not below 41°F by the third recheck, the “HEALTH TIME” error will remain and selections will continue to be blocked. Refrigeration Settings 4. Press the 4 Key to bring up a screen that allows 4) Temperature Units Fahrenheit (°F) you to choose the type of Temperature Units... -
Page 83: Picker Cup Sensor
Picker Cup Sensor – Press the 3 Key. Pressing the 3 Key will bring up options for toggling the Picker (Delivery) Cup Sensor setting on and off. Machine Configuration 1) Refrigeration Settings > 2) Space To sales 3) Picker Cup Sensor Use the numeric keys to toggle the settings in a live window between ON and OFF for each option. -
Page 84: Firmware Information
Firmware Information – Press the 6 Key. Pressing the 6 Key will bring up information for firmware for different peripherals in the machine. Firmware Information Shown is a sample of what would be displayed Bill Validator in a vender with a Currenza C2 Coin Mech, SMV-US-MDB 0254 Currenza Validator, no card reader, LE... - Page 85 BevMax 6 Media IO Board (CR0014121) Port Switch Y/Z Motors X Motor Refrig Temp Coin Return Motor Power Interrupt P3 Fuse FH1 & FH2 Power BEVMAX 6 DN5800-6/3800-6/5800-E6/3800-E6 IO BOARD CONNECTIONS CONNECTION DESCRIPTION COMMENTS CONNECTION DESCRIPTION COMMENTS Power from AC Power FH1 &...
- Page 86 LCD Power J31 Boot loader J28 Service Master Reset ------- J38 Zigbee J9 Watchdog J17 Battery J37 Zigbee J8 Battery Power BEVMAX 6 DN5800-6/3800-6/5800-E6/3800-E6 ATLAS BOARD CONNECTIONS CONNECTION DESCRIPTION CONNECTION DESCRIPTION CONNECTION DESCRIPTION Blue DEX/IRDA RF ID --------- Watchdog Battery...
- Page 87 BEVMAX 6 5800-6/3800-6 TROUBLESHOOTING “XY” ISSUES 1. Selection will not vend. a. Does a different selection vend? i. Perform Test Vend in TEST Menu ensure proper selection vends. ii. Check Custom Space to Sales has been enabled. 1. Check Space to Sales configuration in Machine Configuration Menu.
- Page 88 Delivery Cup Assembly Plunger Issues. a. Plunger jam/dry vend. i. Plunger return spring bad. 1. Replace plunger return spring. ii. Syrup/dirt/broken part causing plunger to stick. 1. Replace delivery cup assembly. iii. Software did not attempt to vend 1. Check error list in Diagnostics Menu for cause & solution. b.
- Page 89 iii. Check rollers. iv. Check harness and motor. v. Replace control board. 6. Product Will Not Load From Delivery Cup Assembly To Port Assembly. a. Perform Test Vend in Test Menu to test movement. b. Check Model # is set to correct cabinet. c.
- Page 90 XY not Is P1 connected to I/O Control board? Is vender plugged in? working Go to Test Plug in Vender. Is P3 connected to I/O Menu, Platform Control board? Movement. Visual check. Where is picker cup located? Plug in connector. HOME NOT HOME Check top left door switch working?
- Page 91 Picker Motor Failure = In Test menu, Platform Movement, Picker Motor message? Check X Home On Visual check. Where is picker cup Message with XY all located? the way to home position to the left. HOME NOT HOME In Test Menu, Platform Movement. Press “3”...
- Page 92 X Motor Failure = In Test Menu, Platform Movement, is X Home message? X Home On message with XY all the way to the home Manually activate the switch and message cycles on and off. position to the bottom left. Manually move cup to A9 and pull top door switch out.
- Page 93 Y Motor Failure = In Test Menu, Platform Movement, is Y Home message? Y Home On message with XY all the way to the home position to the bottom left. Manually activate the switch and message cycles on and off. Manually move cup to A9 and pull top door switch out.
- Page 94 XY Slams to Top/ Right 0r Left Go to Test Menu, Platform Movement, Motor Positions. Do a test vend with door closed. Do the Encoder counts increase & decrease when moving the Manually move XY manually? Pull top door Picker Cup to “A9” switch out.
- Page 95 Is vender plugged in? Is P1 connected to I/O Picker Go to Test Menu, Control board? Platform Movement. Cup not working Plug in Vender. Plug in connector. Visual check. Where is picker cup located? HOME NOT HOME Is plunger below target? Is plunger touching target? Is plunger Go to “A”...
- Page 96 CUP AT WRONG LOCATION HIGH/LOW or Y AXIS Is shelf setting correct? Go to Test Menu, Platform Movement. Check motor Positions.. Send to home, does Y Home say On? See XY Not Send cup to “A” Working shelf. Is cup in troubleshooting.
- Page 97 CUP AT WRONG LOCATION LEFT /RIGHT or X AXIS Go to Test Menu, Platform Movement. Send to home, does X Home say On? See XY Not Send cup to home Working position. Does it go troubleshooting. home? Send cup to “E2-E8” See X Axis positions.
- Page 98 DELIVERY PORT DOOR WORKS IN FACTORY DIAGNOSTICS BUT NOT IN SALES MODE Close door and do a test vend with money. Does it work? Open service door. Pull top door switch out and do a test vend with money. Does it work? Check, repair, and replace door switch components: mounting...
- Page 99 COIN ACCEPTANCE ISSUES PROBLEM CAUSE Coins Returned to Customer 1. Coin Jam in Mech 1. Clear Jam and Test With No Credit Issued 2. Flight Deck Dirty 2. Clean Flight Deck 3. No Power to Mech 3. Check Harness, Changer to Atlas Board.
- Page 100 These charts are intended as a guide to isolate and correct most problems you might encounter. Should your machine show ‘OUT OF SERVICE”, go in the TEST MODE and press “B” to list errors. ALL COINS ARE REJECTED All coins are rejected. Main Power Off / Apply power.
- Page 101 ALL BILLS ARE REJECTED All bills are rejected. Main power Off / Apply power. disconnected. Blown I/O Board fuse. Check fuse replace as necessary. Machine is out of See Diagnostics Errors service. list to determine cause of out of service. Loose connection.
- Page 102 INCORRECT CHANGE DISPENSED Incorrect change dispensed. Vend prices set Check price and reset if incorrectly. necessary. Coins not laying flat in Check coin tubes, clear tubes. and reload coins.. Defective Coin Mech. Replace. Defective Atlas board. Replace. BevMax_Media_Programming_10_6_10 Page 100 of 106 08/15/2013...
- Page 103 SELECTION WILL NOT VEND Selection will not vend. Vend price set Check price and reset if incorrectly. necessary. Insufficient credit. Check price, ensure credit is equal to or greater. Product and gate mis- Check for correct matched. product set up. Gate sticking.
- Page 104 ICE / FROST ON EVAPORATOR Ice / frost on evaporator. Condensate drain Clear drain. plugged. Vender not level. Level vender. Air leak. Check product door seal and harness openings in cabinet. Check gasket seals on refrigeration unit. CONDENSATE ON OUTSIDE OF PRODUCT DOOR Condensate on outside of product door.
- Page 105 COMPRESSOR WILL NOT START Compressor will not start. Service door open. Close service door. Compressor is Plug Compressor in unplugged. outlet on face of AC Distribution Box. Defective Door interlock Replace. Switch. Low voltage. Check power source. Defective thermostat / Replace.
- Page 106 MACHINE NOT COOLING Machine not cooling. Dirty or clogged Clean. condenser. Defective thermostat / Replace. temp semsor. Restricted airflow. Check rear screen for obstructions. Ensure rear of cabinet is at least 4” (10cm) away from wall. Machine in direct Move machine. sunlight.
Need help?
Do you have a question about the BEVMAX 6 and is the answer not in the manual?
Questions and answers