Exmark LAZER Z Series Setup Instructions
Air cooled models
Hide thumbs
Also See for LAZER Z Series:
- Operator's manual (76 pages) ,
- Parts manual (44 pages) ,
- Operator's manual (56 pages)
Table of Contents
Advertisement
Quick Links
Loose Parts
Use the chart below to verify that all parts have been shipped. Part numbers not shown are available on the dealer
extranet.
Dealer Pack
Part #
323-6
98-5975
3290-357
32128-20
1-303335
—
103-2106
1-603511
Literature Pack
Part #
—
—
—
Installing the Rollover Protection
System (Roll Bar)
1. Remove sides and top of crate from the base.
2. Remove roll bar components from the crate.
3. Remove roll bar tubes from sides of crate.
4. Remove the two brackets used to mount the bottom
of the upper roll bar tube to the crate.
5. Remove the 1/2-13 x 3 1/4 inch capscrews and
1/2-13 inch hex flange lock nuts from the two
brackets at each end of the upper roll bar tube and
retain for later use (Figure 1).
6. Remove the four 1/4 inch lag screws holding the
wheel hub brackets to the crate bottom and discard.
© 2004–2007—Exmark Mfg. Co., Inc.
P.O. Box 808
Beatrice, NE 68310
Description
Cap Screw, Hex 3/8-16 x 1 inch
Washer, Spring Disc
Nut, Hex Flange 3/8-16 inch
Nut, 5/16-18 inch Whizlock
Tie, Plastic
Warranty Registration Form
Key, Exmark Logo
Key, Standard
Description
Manual, Operator's
Manual, Parts
DVD, Exmark Safety Video
Qty.
8
Installing the Rollover Protection
8
System (Roll Bar).
8
4
2
1
Fill out warranty registration form and
1
place keys into literature pack.
1
Qty.
1
Read before operating the machine.
1
1
View before operating the machine.
1. 1/2-13 x 3 1/4 inch
Capscrew
2. 1/2-13 inch hex flange lock
nuts
7. Raise the rear of the unit approximately 10–12 inches
and support it with jack stands or equivalent support.
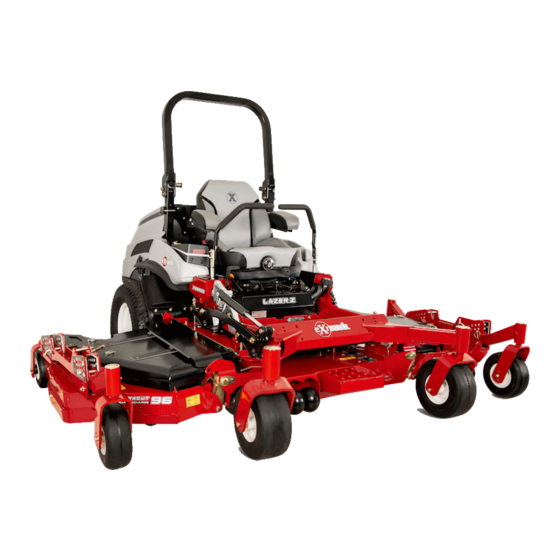
LAZER Z
Air Cooled Models
Setup Instructions
For Serial Nos. 720,000 & Higher
Use
Use
Figure 1
3. Upper roll bar tube
Part No. 4500-290 Rev. A
Printed in the USA.
All Rights Reserved
®
Advertisement
Table of Contents

Related Manuals for Exmark LAZER Z Series


Summary of Contents for Exmark LAZER Z Series
- Page 1 2. 1/2-13 inch hex flange lock nuts 7. Raise the rear of the unit approximately 10–12 inches and support it with jack stands or equivalent support. © 2004–2007—Exmark Mfg. Co., Inc. Part No. 4500-290 Rev. A P.O. Box 808 Printed in the USA.
- Page 2 Caution Raising the rear of the unit for assembly relying solely on mechanical or hydraulic jacks could be dangerous. The mechanical or hydraulic jacks may not be enough support or may malfunction allowing the unit to fall, which could cause injury.
- Page 3 latch pin from outer surface of roll bar assembly and 4. 31 HP Briggs & Stratton Units Only: secure with the hairpin to the inside. A. Remove the 5/16-18 inch whizlock nuts used to 16. Torque all lower roll bar hardware attached to the hold seat stops on seats for shipping.
- Page 4 D. Using one of the two wire ties included secure Percent Voltage Maximum Charging the wire near where the seat hold up rod is Reading Charge Charger Interval connected to the seat frame. Settings E. Using the second wire tie, secure the wire again to 12.6 or 100% No Charging...
- Page 5 the valve covers. Reinstall valve cover screws through the air cleaner mounting base, rotate the air cleaner air cleaner bracket and torque to 70 in-lb (4.9 N-m). body accordingly. Re-assemble the metal bracket to the air cleaner base. Repeat if necessary. 4.
- Page 6 Positioning the Discharge Chute Loosen two 5/16 inch nyloc nuts attaching discharge chute. Lower the discharge chute into position. Retighten nyloc nuts until chute is snug but can pivot freely. Servicing the Engine Refer to Engine Owner’s Manual. Servicing the Hydraulic Oil The machine is shipped with hydraulic oil in the Figure 6 reservoir.
Need help?
Do you have a question about the LAZER Z Series and is the answer not in the manual?
Questions and answers