Table of Contents
Advertisement
English
P70/P45
High Speed Document Scanner
[For Windows]
USER GUIDE
All trademarks are
the property of their
respective owners
a n d a l l r i g h t s a r e
acknowledged.
Images and screenshots
shown inside this User
Guide are example only,
which may vary according
to the devices used and its
operating system.
"PXXX" mentioned In this Guide
refers to the model number P70 or
P45.
All contents and specifications of this User
Guide are subject to change without notice.
V1.1
Advertisement
Table of Contents

Related Manuals for Mustek iDocScan P70


Summary of Contents for Mustek iDocScan P70
- Page 1 English P70/P45 High Speed Document Scanner [For Windows] USER GUIDE All trademarks are the property of their respective owners a n d a l l r i g h t s a r e acknowledged. Images and screenshots shown inside this User Guide are example only, which may vary according to the devices used and its...
-
Page 2: Safety And Precautions
SAFety AND PRecAUtIONS General Precautions Never store the unit in hot, or very cold, or humid or dusty places. • For an extended storage period, we recommend storing the unit in a cool and dry place. • If the Scanner is left in extreme cold or hot conditions, allow it to adjust to normal room temperatures before use. •... -
Page 3: Table Of Contents
cONteNtS SAFety AND PRecAUtIONS ...........2 loading the Protective Sheet ............20 Protective Sheet Attentions ............21 cONteNtS ................3 SettING IDOcScAN tOUch ...........22 UNPAckING AND ASSemblING the ScANNeR .....5 Adjusting the Setting tabs ............23 Package contents .................5 Destination (Scan to Folder) ...........23 Attaching and extending the tray ..........6 Destination (Scan to email) ............25 Detaching the Input tray ...............7 Destination (Scan to Print) .............26... - Page 4 cONteNtS (cONtINUeD) ScANNING USING tWAIN INteRFAce ........55 Accessing the tWAIN Interface ............55 Previewing and Scanning .............56 cancelling a Scan .................58 creating a New Scan Profile ............59 Renaming a Scan Profile ............60 Deleting a Scan Profile ............60 tWAIN Settings and Preview controls ..........61 mAINteNANce ................64 cleaning the Scanner ..............64 cleaning Outside of the Scanner..........65...
-
Page 5: Unpacking And Assembling The Scanner
UNPAckING AND ASSemblING the ScANNeR Package Contents make sure following items are included in this package. Input tray Ac Adapter Power cord USb cable Scanner (see Attaching and extending (see connecting the (see connecting the (see connecting the tray) Scanner) Scanner) Scanner) Installation DVD... -
Page 6: Attaching And Extending The Tray
UNPAckING AND ASSemblING the ScANNeR (cONtINUeD) Attaching and Extending the Tray 3. Pull the Output tray completely out, and lift up the Stopper at the end of the Output tray. When you unpack this package first time you will need to assemble the Input tray prior to use. -
Page 7: Detaching The Input Tray
UNPAckING AND ASSemblING the ScANNeR (cONtINUeD) Detaching the Input Tray 3. Pull away the Input tray from the Scanner. 1. Retract the Input tray extension and the Support Flap back into the Input tray. 2. Gently push it backward to release the Input tray from the Scanner. -
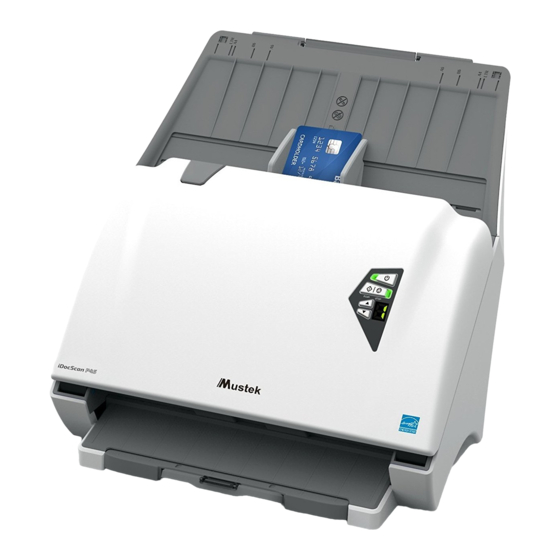
Page 8: Scanner Parts
ScANNeR PARtS Open tab Pull this tab to open the ADF cover. Automatic Feed paper stack from the Input tray Document Feeder automatically for scanning. Open the ADF (ADF) and cover cover when maintenance is required. Output tray Pull the tray out to hold paper as it exits extension from the ADF. -
Page 9: Status Led Indicators
StAtUS leD INDIcAtORS Power LED Operation LED Names Light State Status Description Indicates the power is turned off. Solid green Indicates the power is turned on. Power leD Solid red Indicates the ADF cover is open. Indicates no scanning activity. Solid blue Indicates the Scanner is in operation. -
Page 10: System Requirements
SyStem ReqUIRemeNtS Following minimum system requirements are recommended to achieve the best performance from iDocScan PXXX scanner. computer with Intel core Duo 2.4 Ghz cPU or higher • XGA (1024 x 768) color screen • 4Gb RAm or greater • USb 2.0 high-speed port •... -
Page 11: Installation
INStAllAtION Installing the Scanner Software the Scanner comes with the Scanner driver and associated applications for operating the Scanner. Please install all of the applications to ensure all functions of the Scanner work properly. Please complete all software installation before connecting the Scanner. NOTE 2. - Page 12 INStAllAtION (cONtINUeD) d. clean calibration: Run this tool to clear the calibration data left from the previous scanner, when you use another same model scanner on the same computer with a previous driver. e. calibration: Run this tool when the scanned image’s colors did not match the original colors over time in use of the Scanner.
-
Page 13: Connecting The Scanner
INStAllAtION (cONtINUeD) Turning Power On/Off NOTE Turning Power On Return to the main menu of the Installation DVD to install all other applications in order to obtain complete scanning functions. Follow the Press <Power> until Power leD turns green. onscreen instructions of the wizard to complete the installation. your computer then recognizes that the Scanner has been plugged into Connecting the Scanner the USb Port and automatically loads iDocScan touch [ ] in the system... -
Page 14: Power Saving Mode
INStAllAtION (cONtINUeD) Power Saving Mode 3. the Information dialog box appears. you can set the time interval to “5 min.”, “10 min.”, “15 min.”, “30 min.”, “45 min.”, “1hr.”, and “Never” from the Auto Power Off drop-down list. by default, when the Scanner has been no operation for 15 minutes, the Scanner will automatically turn off. -
Page 15: Showing/Hiding Tooltips
INStAllAtION (cONtINUeD) Showing/Hiding Tooltips you can show (default) or hide the tooltips for the iDocScan touch panel and the settings page when you are familiar with the instructions. Right-click on the Scanner icon [ ] from the system tray to bring up the following menu, then click on Show Tooltips to uncheck it. -
Page 16: Loading The Input Tray
lOADING the INPUt tRAy Preparation Loading the Paper Stack 1. Flex the paper stack back and forth, then fan the paper to loosen Please read below NOte before scanning to prevent misfeeds, paper them. jams and protect your originals. NOTE Do not load paper other than those with the paper size, type, and •... -
Page 17: Loading Business Cards Or Plastic Cards
lOADING the INPUt tRAy (cONtINUeD) Loading Business Cards or Plastic Cards 3. load the paper stack with the front page face down and the top edge first. Slide the paper stack straight into the Scanner until it meets resistance. 1. Use the same techniques to loosen and straighten the card stack as the “loading the Paper Stack”. -
Page 18: Loading Long Paper
lOADING the INPUt tRAy (cONtINUeD) Loading Long Paper NOTE 1. Pull out the Input tray extension and then unfold the Support Flap. embossed cards may not be scanned properly due to the • embossment. Plastic cards with glossy surfaces may not scan properly. •... - Page 19 lOADING the INPUt tRAy (cONtINUeD) 2. load a long sheet of paper one at a time with the front page face NOTE down and the top edge first. Slide the paper straight into the Scanner until it meets resistance. Select “long Sheet” from the Scan Size setting when scanning •...
-
Page 20: Loading The Protective Sheet
Protective Sheet, please contact your local supplier or visit and center Fold line http://www.mustek.com. you can scan the paper that is bigger than b4 size up to A3 size using the merge scanning method. 1. For the first time use, please remove the thin transparent film on both sides of the Protective Sheet. -
Page 21: Protective Sheet Attentions
NOTE to purchase the Protective Sheet, please contact our local • to scan the folded paper with the Protective Sheet, select “ADF authorized supplier or visit us online at www.mustek.com.tw. (Duplex)” (see Adjusting the Setting tabs > Scan Settings (For All Scan-to Options) >... -
Page 22: Setting Idocscan Touch
SettING IDOcScAN tOUch All the Scan-to options on the iDocScan touch panel can be changed with various settings through the Settings. click the Scanner icon [ ] from the system tray to bring up the iDocScan touch panel. click [ Job Settings on the iDocScan touch panel to open the Job Settings dialog box. -
Page 23: Adjusting The Setting Tabs
SettING IDOcScAN tOUch (cONtINUeD) Adjusting the Setting Tabs check to automatically save the scan image to the specified folder after scanning finishes. Auto save after there are 3 setting tabs including Destination, Scan Settings, and Uncheck to trigger the Preview and Save scan Image Adjustments which can be used to configure the Scan-to dialog box after scanning finishes (see... - Page 24 SettING IDOcScAN tOUch (cONtINUeD) Indicates the folder where image files are check this function to open the file or the Open after saved. click Browse to specify a file folder to folder automatically after scanning or saving Scanning/Saving save the scanned image. completes.
-
Page 25: Destination (Scan To Email)
SettING IDOcScAN tOUch (cONtINUeD) Destination (Scan to Email) Indicates the folder where image files are saved. click Browse to specify a file folder to click the Destination tab to bring up the setting page for the Scan-to save the scanned image. option selected. -
Page 26: Destination (Scan To Print)
SettING IDOcScAN tOUch (cONtINUeD) Destination (Scan to Print) check this function to open the file or the Open after folder automatically after scanning or saving Scanning/Saving click the Destination tab to bring up the setting page for the Scan-to completes. option selected. -
Page 27: Destination (Scan To Pdf)
SettING IDOcScAN tOUch (cONtINUeD) Destination (Scan to PDF) Indicates the folder where image files are saved. click Browse to specify a file folder to click the Destination tab to bring up the setting page for the Scan-to save the scanned image. option selected. - Page 28 SettING IDOcScAN tOUch (cONtINUeD) you can create a filename format for the this setting is available with the Scan to OcR scanned image with either one of this setting. option. yyyymmddhhmmss: the filename is OcR language • ensure to select the correct language of the created in the “yyyymmddhhmmss”...
-
Page 29: Destination (Scan To Application)
SettING IDOcScAN tOUch (cONtINUeD) Destination (Scan to Application) Indicates the folder where image files are saved. click Browse to specify a file folder to click the Destination tab to bring up the setting page for the Scan-to save the scanned image. option selected. -
Page 30: Destination (Scan To Ocr)
SettING IDOcScAN tOUch (cONtINUeD) Destination (Scan to OCR) you can create a filename format for the scanned image with either one of this setting. click the Destination tab to bring up the setting page for the Scan-to yyyymmddhhmmss: the filename is •... -
Page 31: Destination (Scan To Bcr)
SettING IDOcScAN tOUch (cONtINUeD) Destination (Scan to BCR) It displays the supplied bcR application bcR Application that has been installed on your computer to click the Destination tab to bring up the setting page for the Scan-to perform business card recognition. option selected. -
Page 32: Destination (Scan To Dropbox)
SettING IDOcScAN tOUch (cONtINUeD) Destination (Scan to Dropbox) you can create a filename format for the scanned image with either one of this setting. click the Destination tab to bring up the setting page for the Scan-to yyyymmddhhmmss: the filename is •... -
Page 33: Destination (Scan To Google Drive)
SettING IDOcScAN tOUch (cONtINUeD) Destination (Scan to Google Drive) this setting is available with the Scan to OcR option. click the Destination tab to bring up the setting page for the Scan-to OcR language ensure to select the correct language of the option selected. - Page 34 SettING IDOcScAN tOUch (cONtINUeD) you can create a filename format for the check this function to convert document into a scanned image with either one of this setting. Searchable PDF text-searchable PDF file when selecting multi- Page PDF, multi-Page PDF/A in the File type. yyyymmddhhmmss: the filename is •...
-
Page 35: Scan Settings (For All Scan-To Options)
SettING IDOcScAN tOUch (cONtINUeD) Scan Settings (For All Scan-to Options) choices: “ADF (Duplex)”, “ADF (back Side)”, “ADF (Front Side)” click the Scan Settings tab to bring up the setting page for the Scan-to you can specify the side of originals to be option selected. - Page 36 SettING IDOcScAN tOUch (cONtINUeD) Select a mode to scan your originals. choices: “Gray”, “b/W” choices: “color”, “Gray”, “b/W”, “multi-color When the “Auto color Detection” is selected, Output”, “Auto color Detection” the Scanner can automatically detect and Select “color” to scan the color determine if the image should be scanned •...
- Page 37 SettING IDOcScAN tOUch (cONtINUeD) Select the output size of the image to be Select the resolution of the image to be scanned. scanned. choices: “Auto”, “A4(210x297mm)”, choices: “100dpi”, “200dpi”, “300dpi”, “A5(148x210mm)”, “A6(105x148mm)”, “400dpi”, “600dpi”. Scan Resolution “b5(182x257mm)”, “b6(128x182mm)”, the higher the resolution, the bigger the •...
- Page 38 SettING IDOcScAN tOUch (cONtINUeD) this function is only available when scanning Brightness: use the slider to increase or in b/W, or multi-color Output (b/W) mode. you decrease the value (-127 ~ +127) and to adjust can convert the scanned image in black and the image brighter or darker.
-
Page 39: Image Adjustments (For All Scan-To Options)
SettING IDOcScAN tOUch (cONtINUeD) Image Adjustments (For All Scan-to Options) this setting removes a single color (Red, Green or blue) such as marks, stamps and click the Image Adjustments tab to bring up the setting page for the retains the black text. If “None” is selected, No Scan-to option selected. - Page 40 SettING IDOcScAN tOUch (cONtINUeD) check this function to automatically remove this will trigger the continue Scanning dialog the blank pages from the scanned image. after all pages are scanned, allowing you to continue scanning for more pages. If blank pages are still scanned, use the Sensitivity slider to set to a higher level.
- Page 41 SettING IDOcScAN tOUch (cONtINUeD) Image skew generally occurs when the A multi-feed occurs when two or more sheets originals are loaded at a skew angle in the stuck together when being fed through the Input tray. check this function to automatically Scanner.
- Page 42 SettING IDOcScAN tOUch (cONtINUeD) this function can prevent originals from Descreening helps to reduce moire patterns damage when they are fed in a skew angle in magazines or other printed materials. After descreening, the image may appear blurry. at the leading edge. the Scanner will automatically stop with a dialog box when it example: detects the skew angle of the paper.
- Page 43 SettING IDOcScAN tOUch (cONtINUeD) this function helps to emphasize edges in this function can remove the round-shaped the image more clearly for an overall sharper punch holes around the edges of the originals. image. the punch holes around the edges are replaced with the color closest to the originals.
- Page 44 SettING IDOcScAN tOUch (cONtINUeD) this function reverses the colors of the this function fills the missing edges with a scanned image to the opposite colors. color that match to the image as closer as possible. example of black text with white background to be inverted: example: edge correction...
-
Page 45: Using The Preview Window
USING the PReVIeW WINDOW Previewing the Image 2. click Preview to preview the image. the image will display on the right side of the window. the Preview window allows you to preview the image before scanning the final image. the preview image will update immediately while you NOTE make any changes to the image with the settings. -
Page 46: Preview Window Controls
USING the PReVIeW WINDOW (cONtINUeD) Preview Window Controls 4. When you are satisfied with the results, you can load all originals in the Input tray and click the Scan button in the Setting window to there are several useful tools in the Preview toolbar to assist you to start scanning with the settings. - Page 47 USING the PReVIeW WINDOW (cONtINUeD) Display the preview image. click and drag to Preview Area move the image in the Preview Area. click to switch between the color, gray, b/W preview image when selecting multi-color Output in the Scan mode. Availability will vary according to your selection in multi-color Output.
-
Page 48: Scanning Operation
ScANNING OPeRAtION Scanning Using iDocScan Touch Panel 3. click the Up and Down arrows or use a mouse wheel to scroll up and down through the Scan-to options (1~9) in the iDocScan 1. load the originals into the Scanner (see loading the Input tray). - Page 49 ScANNING OPeRAtION (cONtINUeD) the scanned image opens automatically in the the specified folder opens automatically with Scan to Folder specified application (default: mS Paint). the scanned image in it. the default email application opens up with NOTE the scanned image attached in a blank email. Scan to Applications that do not support multi- •...
- Page 50 ScANNING OPeRAtION (cONtINUeD) • you cannot scan when the Information dialog box is opened. the Dropbox shared folder opens automatically click [ ] or OK to close the dialog box before scanning. with the scanned image in it. NOTE Scan to Dropbox to use this function, you must have a •...
-
Page 51: Scanning Using The Scanner Buttons
ScANNING OPeRAtION (cONtINUeD) Scanning Using the Scanner Buttons the “Processing...” bar appears showing the current scan status. 1. load the originals into the Scanner (see loading the Input tray). 2. Press Up/Down arrows to select a preferred scan job (1 through 9) from the Job Display. -
Page 52: Preview And Save Dialog
ScANNING OPeRAtION (cONtINUeD) Preview and Save Dialog NOTE by default, after scanning completes, the Preview and Save dialog will If you want to disable the Preview and Save dialog and automatically appear with image just scanned, where you can specify a new folder to save the scanned image in the specified folder, check the “Auto save save them. -
Page 53: Stopping A Scan
ScANNING OPeRAtION (cONtINUeD) Stopping a Scan to end scanning process, click Stop Scanning. you can stop the scanning process any time during scanning with using A dialog box will appear asking if you want <Scan/Stop> button. to save the already scanned image. click No Stop Scanning to exit without saving. -
Page 54: Continue A Scan
ScANNING OPeRAtION (cONtINUeD) Continue a Scan When “continue Scanning After last Page” is checked in the Setting, a dialog box appears after the previous scan finishes asking if you want to scan the next document. to continue the next scan, place the next continue document on the Scanner, then click Continue Scanning... -
Page 55: Scanning Using Twain Interface
ScANNING USING tWAIN INteRFAce this scanner includes a tWAIN interface for use within applications iDocScan PXXXX which are compatible with tWAIN standards. Following is an example of using Presto! Pagemanager included with this scanner to acquire images using the tWAIN interface. NOTE 3. -
Page 56: Previewing And Scanning
ScANNING USING tWAIN INteRFAce (cONtINUeD) Previewing and Scanning 5. click File, Acquire Image Data. the tWAIN interface allows you to preview the image, so you can adjust the settings until you are satisfied with the preview image before scanning the final image. NOTE make sure to load one sheet at a time when using the preview 6. - Page 57 ScANNING USING tWAIN INteRFAce (cONtINUeD) • Grayscale Document: this profile is used to scan the image in 4. you can make changes in the settings as necessary. your changes grayscale using varying shades of gray. are automatically reflected in the preview window. • Black and White Document: this profile is used to scan text- only originals or line drawings.
-
Page 58: Cancelling A Scan
ScANNING USING tWAIN INteRFAce (cONtINUeD) Cancelling a Scan the “Image Processing...” bar will appear showing the scan status. 1. click Cancel in the scanning progress dialog, or press <Scan/Stop> on the Scanner if you want to cancel the scanning. the scanning process will be stopped and the currently scanning 6. -
Page 59: Creating A New Scan Profile
ScANNING USING tWAIN INteRFAce (cONtINUeD) Creating a New Scan Profile 3. click the arrow to open the dropdown menu, then select “Save as”. you cannot change the settings of the default profiles in the tWAIN Interface; however, you can create new profiles with your settings and save them for future use. -
Page 60: Renaming A Scan Profile
ScANNING USING tWAIN INteRFAce (cONtINUeD) Renaming a Scan Profile Deleting a Scan Profile you cannot rename the default profiles in the tWAIN Interface. you can you cannot delete the default profiles in the tWAIN Interface. you can only rename the profiles you created. only delete the profiles you created. -
Page 61: Twain Settings And Preview Controls
ScANNING USING tWAIN INteRFAce (cONtINUeD) TWAIN Settings and Preview Controls click to open the function menu including Scan Profile “Save as”, “Delete”, and “Rename”. these 3 the tWAIN interface comes with the same settings and controls on function menu functions are available according to the scan iDocScan touch that can be used to configure the scan profiles. - Page 62 ScANNING USING tWAIN INteRFAce (cONtINUeD) Blank Page Removal Specify a paper size including “Auto”, “A4(210x297mm)”, “A5(148x210mm)”, Remove the blank pages from the scanned “A6(105x148mm)”, “b5(182x257mm)”, image. Scan Size “b6(128x182mm)”, “letter(216x279mm)”, Sensitivity Page Settings “legal (216x356mm)”, “long Sheet (max. If blank pages are still scanned, use the 3000mm)”.
- Page 63 ScANNING USING tWAIN INteRFAce (cONtINUeD) Descreen Zoom out of the image. the image will reduce every time you click. Reduces moire patterns from the scanned images. Zoom in on the image. the image will be Invert enlarged every time you click. Reverses the colors of the scanned image to Zoom Ratio Displays the zoom in or zoom out ratio.
-
Page 64: Maintenance
mAINteNANce Cleaning the Scanner NOTE Dust and residues can build up on the Scanner’s rollers and glasses to be sure to always disconnect the power cord before cleaning the • affect image quality. clean the inside of the Scanner periodically to get Scanner. -
Page 65: Cleaning Outside Of The Scanner
mAINteNANce (cONtINUeD) Cleaning Outside of the Scanner 2. Use a clean, lint-free cloth moistened with some isopropyl rubbing alcohol (95%) to clean below parts. Use a clean, soft cloth moistened with water or mild detergent to clean the outside of the Scanner. NOTE Never spray the cleaner directly onto the Automatic Document Feeder. - Page 66 mAINteNANce (cONtINUeD) Separation Pad - Wipe the Separation Pad from top to bottom. be Plastic Rollers and Pinch Roller - Wipe these rollers from side • • careful not to snag the cloth on the springs of the pad. to side. Rotate the rollers to clean around the surfaces. Scanning Glasses - Wipe both Scanning Glasses from side to side •...
-
Page 67: Calibrating The Scanner
mAINteNANce (cONtINUeD) Calibrating the Scanner Scanner Sensors - If the Scanner Sensors are blocked by dust or • other particles, clean below sensor holes (highlight areas) using a When the scanned image’s colors did not match the original colors, cotton swab moistened with the isopropyl alcohol (95%). and vertical lines appear in the image as shown in example below, calibration can help to correct these problems by compensating variations in the Scanner components that happens over time. - Page 68 mAINteNANce (cONtINUeD) 1. turn on the power of the Scanner. 4. Go to the “Start” menu, select “All Programs”, “iDocScan PXXX”, and then “calibration” to open the calibration dialog box. 2. Remove the plastic foil on both sides of the calibration Sheet. 3.
-
Page 69: Replacing Consumable Items
300,000 sheets Separation Roller 300,000 sheets Assembly 6. click Close after “calibration Done.” dialog box appears. Feed Roller 1 Assembly 300,000 sheets Feed Roller 2 Assembly 300,000 sheets For information about consumable items, please contact your local supplier or visit http://www.mustek.com. -
Page 70: Checking Consumable Items Status
mAINteNANce (cONtINUeD) Checking Consumable Items Status Replacing Separation Pad 1. check the consumable items counter by clicking [ ] (information) 1. Pull the cover tab to open the ADF cover. at the bottom right of the iDocScan touch panel to display the information of consumable items status. -
Page 71: Replacing Separation Roller Assembly
mAINteNANce (cONtINUeD) Replacing Separation Roller Assembly 3. Grip the new Separation Pad and align the tabs with the mounting holes. Push the tabs into place, and then close the ADF cover. 1. Pull the cover tab to open the ADF cover. 4. - Page 72 mAINteNANce (cONtINUeD) 3. Grip the Separation Roller Assembly to pull it out from the 5. close the Separation Roller cover back into place, and then close compartment. the ADF cover. 4. Install the new Separation Roller Assembly. 6. click [ ] (information) from the iDocScan touch panel, then click Insert the Separation Roller Assembly by aligning the flat pin Reset next to the counter of Separation Roller count to set the...
-
Page 73: Replacing Feed Roller Assembly
mAINteNANce (cONtINUeD) Replacing Feed Roller Assembly there are 2 sets of the Feed Roller Assembly. the top Feed Roller Assembly is marked with number 1, where the bottom Feed Roller Assembly is marked with number 2. be sure to match the number on the Roller Assembly and the compartment respectively for replacement. - Page 74 mAINteNANce (cONtINUeD) 4. lift the Feed Roller Assembly out of the compartment. 6. close the feed path cover back into place, and then close the ADF cover. 5. Install the new Feed Roller Assembly. Insert the long pin of Roller Assembly in the mounting hole of 7.
-
Page 75: Clearing Paper Jams
mAINteNANce (cONtINUeD) Clearing Paper Jams At the pop-up dialog box, you may take either of the following actions: When a double feed, skewed feeding, exceeded long paper limit, or any (Paper skew dialog) (Paper jam, misfeed dialog) misfeed occurs, scanning stops unexpectedly with alert sound and the error dialog box appears, asking if you want to continue scanning (after clearing the jam). -
Page 76: Adjusting Multi-Feed Detection Sensitivity
mAINteNANce (cONtINUeD) Adjusting Multi-Feed Detection Sensitivity • check if the long paper exceeds the maximum length of 118” (3000 mm) in the long Sheet mode. If the multi-Feed detection operates incorrectly, click [ ] (information) • Remove any sticky notes, tape, or other objects on paper before at the bottom right of the iDocScan touch panel, then adjust the “multi- starting a new scan. -
Page 77: Troubleshooting
tROUbleShOOtING Problems Solutions check the power supply and cable are connected correctly. • my computer can’t detect the Scanner or the Scanner doesn’t be sure to restart your computer after the Scanner driver is installed. • start scanning. check if the power of the Scanner is turned on . •... - Page 78 tROUbleShOOtING (cONtINUeD) Problems Solutions Use the Paper Guides to keep paper straight when feeding. • Do not exceed the Input tray capacity. • Double-feeds or scanned image clean the rollers and document sensors. • appear skewed, incomplete or Open and close the Scanner cover to get the paper lever in the ADF back in position if the paper •...
- Page 79 tROUbleShOOtING (cONtINUeD) Problems Solutions be sure that you have a default email client installed and configured, in order to use the email • function on the iDocScan touch. Scanned image cannot be sent as email attachments. ensure the scanned image do not exceed email attachment size limitations. •...
-
Page 80: Specifications
SPecIFIcAtIONS model Scanner type color Duplex ADF (Automatic Document Feeder) Sheetfed Scanner 45 ppm / 90 ipm (color) 35 ppm / 70 ipm (color) max. Scan Speed 70 ppm / 140 ipm (Gray, b/W) 45 ppm / 90 ipm (Gray, b/W) (A4 Portrait, 200 dpi) Scan media types: Plain Paper... - Page 81 SPecIFIcAtIONS (cONtINUeD) model Image Sensor contact Image Sensor (cIS) * 2 Multi-feed Detection Ultrasonic sensor detection Document Feeding ADF (Automatic Document Feeder) light Source leD (R,G,b) Scanning Side Front, back, Duplex Optical Resolution 600 dpi Daily Duty cycle 9000 Sheets Input tray Width 9.5”...
- Page 82 P70/P45...
Need help?
Do you have a question about the iDocScan P70 and is the answer not in the manual?
Questions and answers