Table of Contents
Advertisement
English
PageExpress 4800 Pro
High Speed Document Scanner
[For Windows & Mac]
USER GUIDE
A l l t r a d e m a r k s
are the property
of their respective
owners and all rights
are acknowledged.
Images and screenshots
shown inside this User
Guide are example only,
which may vary according
to the devices used and its
operating system.
All contents and specifications of
this User Guide are subject to change
without notice.
V1.4
Advertisement
Table of Contents

Related Manuals for Mustek PageExpress 4800 Pro


Summary of Contents for Mustek PageExpress 4800 Pro
-
Page 1: User Guide
English PageExpress 4800 Pro High Speed Document Scanner [For Windows & Mac] USER GUIDE A l l t r a d e m a r k s are the property of their respective owners and all rights are acknowledged. Images and screenshots... -
Page 2: Safety And Precautions
sAfety And precAUtIons General Precautions • Keep away from water or moisture and dusty areas. • never store in hot and very cold areas. • only use attachments/accessories specified by the manufacturer. • no objects filled with liquids, such as vases, shall be placed on the scanner. •... -
Page 3: Table Of Contents
contents sAfety And precAUtIons ............. 2 delete the Backup files ..............38 contents ..................3 scAnnInG UsInG tWAIn InterfAce In WIndoWs ....... 39 UnpAcKInG the scAnner .............. 4 Acquire the scanner tWAIn Interface ..........39 BUndled drIVers And softWAre ..........5 the tWAIn Interface ................ -
Page 4: Unpacking The Scanner
UnpAcKInG the scAnner make sure following items are included in this package. Installation dVd Ac Adapter scanner quick start Guide (see Installing drivers and (see connecting the scanner) software) -
Page 5: Bundled Drivers And Software
BUndled drIVers And softWAre [Mac] yoU mUst fIrst InstAll scAnner drIVer In order to Use the scAnner on yoUr compUter. 1. ImageAcquire - this tWAIn-compliant application serves as a host [Windows] application that enables image scanning via the tWAIn interface. for detailed instructions of ImageAcquire, see the pdf file inside 1. -
Page 6: System Requirements
system reqUIrements following minimum system requirements are recommended to achieve the best performance from the scanner. Windows processor Intel core duo or faster Intel core duo or faster support os Windows Xp (service pack 3) / Vista / 7 / 8 / 8.1 /10 mac os X 10.7 to 10.11 and above color display 1024 x 768 resolution or above... -
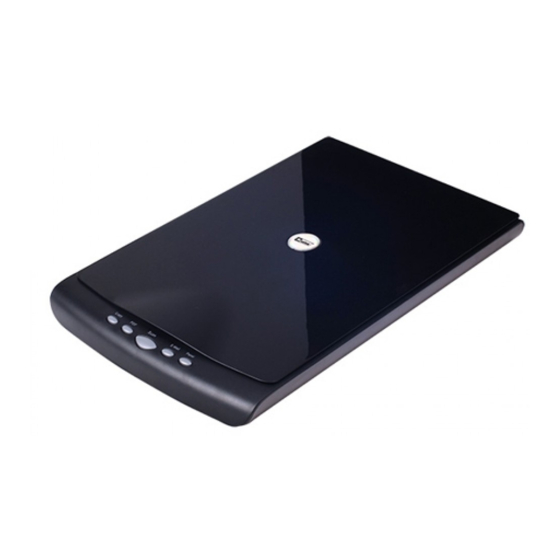
Page 7: Scanner Parts
scAnner pArts scanner lid opens to reveal the flatbed Glass. flatbed Glass Used to scan single pages or book pages. scan directly to your printer to make copies of a scan. scan directly to your email program. for Windows, you can select either email or application (default: ms paint) as the destination of your scan. -
Page 8: Installing Drivers And Software
InstAllInG drIVers And softWAre [Mac] pleAse complete the drIVers And softWAre InstAllAtIon Before connectInG the scAnner. do not connect the UsB 1. Insert the Installation dVd into the dVd-rom drive of the mac. cABle to the scAnner or compUter At thIs moment. The Autorun disc icon appears on your desktop. -
Page 9: How To Uninstall The Drivers And Software
2. exit all running applications. tooltips 3. Go to the “start” menu, select “(All) programs”, “pageexpress 4800 pro”, and then click “Uninstall”. 4. follow the on-screen instructions to remove the scanner driver. [Mac] 1. Unplug the UsB cable connecting from the computer. -
Page 10: Connecting The Scanner
• If your Windows computer does not appear the scanner icon [ ] in the system tray, from the “start” menu, click “(All) programs” > “pageexpress 4800 pro” > “idocscan touch(pe4800 pro)”. • If your mac computer does not appear the scanner icon [ ] in the menu bar, open “finder”and then click “Applications”. -
Page 11: Placing The Originals
plAcInG the orIGInAls 1. open the scanner lid. NOTE • do not place heavy items on the scanner Glass or press on the scanner Glass with too much force as this will cause damage to the glass surface. • do not place any objects which may scratch the glass on the scanner. 2. -
Page 12: Scanning Procedures In Windows
scAnnInG procedUres In WIndoWs Setting iDocScan Touch and Buttons Scan to Folder Settings Scan to PDF Settings you can setup the scanner buttons to perform certain actions within the idocscan touch software. 1. click the scanner icon [ ] from the system tray to bring up the idocscan touch panel. - Page 13 scAnnInG procedUres In WIndoWs (contInUed) Scan to Print Settings select the output size of the image to be scanned with following choices: “Auto”, “A4”, “B5”, “letter” • select “Auto” to automatically detect the paper size scan size and crop scanned image. When scanning darker originals (i.e.
- Page 14 scAnnInG procedUres In WIndoWs (contInUed) descreening helps to reduce moire patterns in this function reverses the colors of the scanned image magazines or other printed materials. After descreening, to the opposite colors. the image may appear blurry. example of black text with white background to be example: inverted: descreen...
- Page 15 scAnnInG procedUres In WIndoWs (contInUed) this function helps to emphasize edges in the image Use the slider to increase or decrease the value (-127 more clearly for an overall sharper image. ~ +127) and to adjust the contrast higher or lower. the bigger the value is to set towards +127, the more example: contrast is between lighter and darker areas.
- Page 16 scAnnInG procedUres In WIndoWs (contInUed) select a file format to save scanned image with When JpeG, pdf or tIff (compression: JpeG) file following choices: “JpeG”, “Bmp”,“tIff (single-page)”, is selected in the file type, the compression quality “tIff (multi-page)”, “pdf (single-page)”, “pdf (multi- slider is enabled.
- Page 17 scAnnInG procedUres In WIndoWs (contInUed) select "open with Application" (default: ms paint) as this function is enabled when scan to Application the destination of your scan. (email) or scan to print is selected. to add a new application, click Add and navigate to the check this option to trigger the delete backup file .exe files in the program folder, then select it to add in dialog box after the scanning process completes,...
-
Page 18: Scanning Using Idocscan Touch And Buttons
scAnnInG procedUres In WIndoWs (contInUed) Scanning Using iDocScan Touch and Buttons the “processing...” bar appears showing the current scan status. 1. place the original on the flatbed Glass (see placing the originals). 2. click a scan-to function from the idocscan touch panel to start scanning to the destination with the settings you previously configured (see setting idocscan touch and... -
Page 19: Setting Idocscan Touch (Advanced Scan)
scAnnInG procedUres In WIndoWs (contInUed) • Applications that do not support multi-page scanning will open and display only the first page of the originals. • If the application cannot support the file type selected, an error message will appear. refer to the instructions of the application for the formats supported. - Page 20 scAnnInG procedUres In WIndoWs (contInUed) click the Destination tab to display the When tIff file is selected in the file type, the destination tab settings options. compression format is enabled with following choices: Indicates the folder where image files are •...
- Page 21 scAnnInG procedUres In WIndoWs (contInUed) this function is checked by default when select "scan to folder" as the destination of scan to folder selecting pdf (multi-page) and pdf (single- your scan. page) file in the file type. It can recognize and select "open with Application (default: ms convert your scanned image into a text based paint)"...
-
Page 22: Scan Settings Tab
scAnnInG procedUres In WIndoWs (contInUed) Scan Settings Tab select "send to print" as the destination of your scan. select an available printer from the dropdown sent to print menu as the destination of your scan. the system can detect and display the default printer which is connected to your computer. - Page 23 scAnnInG procedUres In WIndoWs (contInUed) tick the checkbox to select the modes select the resolution of the image to be including: “color”, “Gray”, “B/W”. you can scanned with following choices: “100dpi”, make a single scan to be saved up to 3 “200dpi”, “300dpi”, “600dpi”, “1200dpi”, separate images simultaneously.
- Page 24 scAnnInG procedUres In WIndoWs (contInUed) Brightness: use the slider to increase or this function is only available when scanning decrease the value (-127 ~ +127) and to adjust in B/W, or multi-color output (B/W) mode. you the image brighter or darker. can convert the scanned image in black and example: white using following method:...
- Page 25 scAnnInG procedUres In WIndoWs (contInUed) this setting removes a single color (red, this function reverses the colors of the Green or Blue) such as marks, stamps and scanned image to the opposite colors. retains the black text. If “None” is selected, no example of black text with white background color is dropped out.
- Page 26 scAnnInG procedUres In WIndoWs (contInUed) correct the skew image approximately +/-15 descreening helps to reduce moire patterns degrees. (the results of deskew do not appear in magazines or other printed materials. After in the preview image, only in the scanned descreening, the image may appear blurry.
- Page 27 scAnnInG procedUres In WIndoWs (contInUed) this function helps to emphasize edges in click to scan the final image using the current scan the image more clearly for an overall sharper settings. image. click to preview the image using the current preview example: settings.
-
Page 28: Scanning In Advanced Scan Mode
scAnnInG procedUres In WIndoWs (contInUed) Scanning in Advanced Scan Mode • move the cursor within the cropping frame (the cursor will change to ). click and drag the cursor to move the entire the Advanced scan mode includes a preview Window allowing you to cropping frame to the desired area. - Page 29 scAnnInG procedUres In WIndoWs (contInUed) 5. When you are satisfied with the results, click the Scan button to NOTE start scanning with the settings. If the application cannot support to open the file type, an error message may appear. the scanned image is saved, but cannot be opened.
-
Page 30: Preview Window Controls
scAnnInG procedUres In WIndoWs (contInUed) Preview Window Controls select all cropping frames. this is available when two or more cropping there are several useful tools in the preview toolbar to assist you to frames are created. All frames turns into thick check the details of the preview image. -
Page 31: Continue To Scan More Pages
scAnnInG procedUres In WIndoWs (contInUed) Continue to Scan More Pages Cancel a Scan When “continuous scanning” is checked in the setting, a dialog box to stop the scanning process, click Cancel during scanning. appears after the previous scan finishes, asking if you want to scan the next document. -
Page 32: Scanning Procedures In Mac
scAnnInG procedUres In mAc Setting ScanMust and Buttons Scan to Folder Scan to PDF you can setup the scanner buttons to perform certain actions within the scanmust software. 1. click the scanner icon [ ] in the menu bar of your computer to bring up the scanmust menu. - Page 33 scAnnInG procedUres In mAc (contInUed) Indicates the folder where image files are saved. select a file format to save scanned image. click Browse to specify a file folder to save the Availability of the file type may vary in different scanned image.
- Page 34 scAnnInG procedUres In mAc (contInUed) check this option to trigger the continuous the system detects and displays the applications scanning dialog box after the current page is installed in your computer which support to open scanned, allowing you to continue scanning for the file type.
- Page 35 scAnnInG procedUres In mAc (contInUed) Scan Settings the file size is calculated based on the scan size and scan resolution you select. the file size click the Scan Settings tab to bring up the setting page for the scan-to file size given here is only an estimate.
-
Page 36: Scanning Using Scanmust And Buttons
scAnnInG procedUres In mAc (contInUed) Scanning Using ScanMust and Buttons Apply the selected scan-to function with the settings you changed. 1. place the original on the flatbed Glass (see placing the originals). 2. click a scan-to function from the scanmust menu to start scanning NOTE to the destination with the settings you previously configured (see If you did not apply the changes to the currently... -
Page 37: Continue To Scan More Pages
scAnnInG procedUres In mAc (contInUed) the “processing...” bar appears showing the current scan status. Scan to Email the default email application opens automatically with the scanned image attached in a blank email. Use the send email method of the email application to send the scanned image. NOTE 3. -
Page 38: Cancel A Scan
scAnnInG procedUres In mAc (contInUed) to continue the next scan, place the next original on the scanner, then click Scan. to finish the scan, click Finish to complete the scanning process. the scanned image will be saved to the folder specified in the Destination tab. -
Page 39: Scanning Using Twain Interface In Windows
1. open the “start” menu, then open “presto! pagemanager” from “All program” list. 2. click file, then select source. select pageexpress 4800 pro from the tWAIn interface contains control settings, which you must set prior the select source list. -
Page 40: The Twain Interface
scAnnInG UsInG tWAIn InterfAce In WIndoWs (contInUed) The TWAIN Interface The Main Tab Scan Mode the tWAIn interface is divided into two sections: the left section where determines how the scanner will read most of the control settings are located, and the right section, which is the image and refers to how the image the preview Area. -
Page 41: The Enhance Tab
scAnnInG UsInG tWAIn InterfAce In WIndoWs (contInUed) The Enhance Tab Resolution sets the resolution in dots per inch Brightness/Contrast Control (dpi). Descreen sets the media type of the document Brightness/Contrast Control to be scanned to reduce image noise. Thumbnails Color Matching Control Are used to see the effects of any color matching allows the scanner changes in the control settings. - Page 42 scAnnInG UsInG tWAIn InterfAce In WIndoWs (contInUed) Level Control Curve Control Curve Control Level Control Thumbnails Thumbnails Are used to see the effects of any Are used to see the effects of any changes in the control settings. changes in the control settings. Channel Selector Control Channel Selector Control Allows you to select the channel layers...
-
Page 43: The Filters Tab
scAnnInG UsInG tWAIn InterfAce In WIndoWs (contInUed) The Filters Tab Hue/Saturation Control the filters tab allows you to adjust the individual effects of the scanned Hue/Saturation Control image by applying various filters to the image, prior to scanning. Thumbnails Thumbnails Are used to see the effects of any Are used to see the effects of any changes in the control settings. -
Page 44: The Preview Window And Controls
scAnnInG UsInG tWAIn InterfAce In WIndoWs (contInUed) The Preview Window and Controls Batch Scan Button Allows creation of up to 30 scan Cropping Tool regions (or crop frames) for multiple selects the area in the preview scanning. Window that will be used as the final scan. -
Page 45: Prescan The Image
scAnnInG UsInG tWAIn InterfAce In WIndoWs (contInUed) Prescan the Image 2. Select the scan source. since we are going to scan a color photograph, choose reflective. A preview is a quick low-resolution scan of the entire original image. from this low-resolution Reflective: scan you can get a clearer idea of the image when scanning paper-based documents such as photographs or text... -
Page 46: Execute The Scan Command
scAnnInG UsInG tWAIn InterfAce In WIndoWs (contInUed) The Batch Scan Dialog Box 4. Select the desired resolution. resolution is a measure of how much image detail information the Batch scan dialog box contains several controls that make batch the scanner is to capture in a scan. A higher resolution results to a scanning simple and easy to use. - Page 47 scAnnInG UsInG tWAIn InterfAce In WIndoWs (contInUed) • Cancel Batch Button the Batch Box contains the thumbnail image, dpI, click on this button to cancel batch scan and exit the scan mode and image size of each batch scan. the Batch scan dialog box.
-
Page 48: Scanning Using Twain Interface In Mac
scAnnInG UsInG tWAIn InterfAce In mAc Acquire the Scanner TWAIN Interface 3. the tWAIn interface appears as following. the tWAIn driver is the scanning module provided with your scanner. It is easily accessed from within the bundled scanner software or from within any tWAIn-compliant program, such as ImageAcquire, photoshop. -
Page 49: The Twain Interface
scAnnInG UsInG tWAIn InterfAce In mAc (contInUed) The TWAIN Interface The Main Tab the tWAIn interface is divided into two sections: the left section where the main folder contains the control settings needed for specifying the most of the control settings are located, and the right section, which is scanning parameters such as scan mode, resolution, etc. -
Page 50: The Enhance Tab
scAnnInG UsInG tWAIn InterfAce In mAc (contInUed) The Enhance Tab The Filters Tab the enhancement folder contains preprocessing controls you can apply the filters folder contains preprocessing controls that allow you to to the image before making your final scan. apply special effects to the image before making your final scan. -
Page 51: The Preview Window
scAnnInG UsInG tWAIn InterfAce In mAc (contInUed) The Preview Window Prescan the Image the preview Window is where you can view the prescanned image. the A preview is a quick low-resolution scan of the entire original image. first time you want to scan a document, it is better that you do a precan. from this low-resolution scan you can get a clearer idea of the image area you want to include when you click scan. -
Page 52: Execute The Scan Command
scAnnInG UsInG tWAIn InterfAce In mAc (contInUed) 2. Select the scan source. 4. Select the desired resolution. since we are going to scan a color photograph, choose reflective. resolution is a measure of how much image detail information the scanner is to capture in a scan. A higher resolution results to a Reflective: sharper image but requires more disk space for file saving. - Page 53 scAnnInG UsInG tWAIn InterfAce In mAc (contInUed) The Batch Scan Dialog Box to do a batch scan, the steps are: 1. click the Batch scan button. the Batch scan dialog box appears. the Batch scan dialog box contains several controls that make batch 2.
-
Page 54: Cleaning The Scanner
cleAnInG the scAnner dust and residues can build up on the scanner’s flatbed Glass to affect image quality. clean the scanner periodically to get the best scanning performance. CAUTION • never spray the cleaner directly onto the scanner. • do not use any abrasive surfaces to clean the scanner. doing so may damage it. -
Page 55: Troubleshooting
troUBleshootInG Problems Solutions the "found new hardware" appears on • Unplug the UsB cable from the computer, and click “cancel” button to close it. ensure to install your Windows screen. scanner driver before connecting the scanner. • make sure that the UsB cable between the scanner and your computer is connected firmly. cannot scan. -
Page 56: Specifications
specIfIcAtIons Model PE4800 Pro scanning element contact Image sensor (cIs) light source three-color (rGB) leds color: 48-bit, 24-bit Gray: 16-bit, 8-bit line art: 1-bit scan mode * color (48-bit) and Gray (16-bit) are available in the tWAIn interface only. * color (48-bit) and Gray (16-bit) are disabled when the tWAIn-compliant program you used does not support 48-bit color and 16-bit output. - Page 58 PageExpress 4800 Pro...
Need help?
Do you have a question about the PageExpress 4800 Pro and is the answer not in the manual?
Questions and answers
how to download page express 4800 pro software driver