Zoom H4n Pro Operation Manual
Handy
Hide thumbs
Also See for H4n Pro:
- Operation manual (151 pages) ,
- Quick manual (25 pages) ,
- Manual (10 pages)

Related Manuals for Zoom H4n Pro


Summary of Contents for Zoom H4n Pro
- Page 1 Handy Recorder © 2016 ZOOM CORPORATION Copying or reprinting this manual in part or in whole without permission is prohibited.
- Page 2 Please read this manual carefully to fully understand the functions of the H4n Pro so that you can make the most of it for many years. After reading this manual, please keep it with the warranty in a safe place.
- Page 4 Contents H4n Pro features ..................001 Setup: INPUT 1/2 connections and phantom power ..... 030 The H4n Pro is ideal for these applications ..........002 Using as a USB audio interface ............. 031 Contents ....................... 003 Setup: Using as a USB SD card reader ......... 033 Safety precautions for users ................
- Page 5 1-07 Settings/recording: TRACK MENU ..........057 3-03-5 EFX module editing (EFFECT EDIT: EFX) ........086 1-08-1 Settings/recording: Automatic re-recording (PUNCH IN/OUT) ..059 3-03-6 EFFECT EDIT: LEVEL/RENAME............. 087 1-08-2 Settings/recording: Manual re-recording (PUNCH IN/OUT) ..061 3-03-7 EFFECT EDIT: STORE ..............088 2-01-1 Recording functions: AUTO REC ...........
- Page 6 Settings available in each mode..............140 5-12 Editing/Output: DIVIDE ..............116 ............141 5-13 Editing/Output: MOVE ..............117 H4n Pro patch list ..................147 5-14 Editing/Output: NEW PROJECT ............ 118 ................. 149 5-15 Editing/Output: PROJECT SELECT ..........119 Troubleshooting ................... 150 5-16 Editing/Output: PROJECT DELETE ..........
- Page 7 Take care not to drop or bump it, and Use a soft, dry cloth to clean the H4n Pro. If necessary, AC adapter operation do not subject it to shock or excessive pressure, slightly moisten the cloth.
- Page 8 (including, for example, play- ing them in a concert hall or other location and altering songs) could be a violation of copyright laws. Zoom Corporation will not assume any responsibility related to infringements of copyrights. Trademarks: •...
- Page 10 you can select which recording mode and audio quality setting is right for the situation. Connect audio P.017 In addition to the built-in mic, you can use the external stereo mic input jack and INPUT 1 and 2 You can select among 4 modes Set the recording level and other external input jacks.
- Page 11 Record Use these convenient ways to In MTR mode punch-in/out func- swiftly review/playback parts of tions allow you to re-record only and projects, and can be edited in recordings. sections you want to correct. various ways. P.094- P.059- P.105- 〉 〉 〉 〉 〉...
- Page 12 The following are basic recording instructions using the built-in stereo mic and built-in speaker in STEREO mode. stereo Input from built-in mic Press Blinks Recording Stereo mode top screen standby Blinks MIC button lit Monitor level meters *Input from built-in mic Left side Front panel MIC button lit...
- Page 13 Play Stop Increase ー + Press Press Press Press Unlit Counter Counter returns to 00:00:00:000 Recording advances Built-in speaker output Remaining recording time decreases Adjust input level Back Right panel Counter does not return to 0 P.094 〉 〉 〉 〉 P.047 〉...
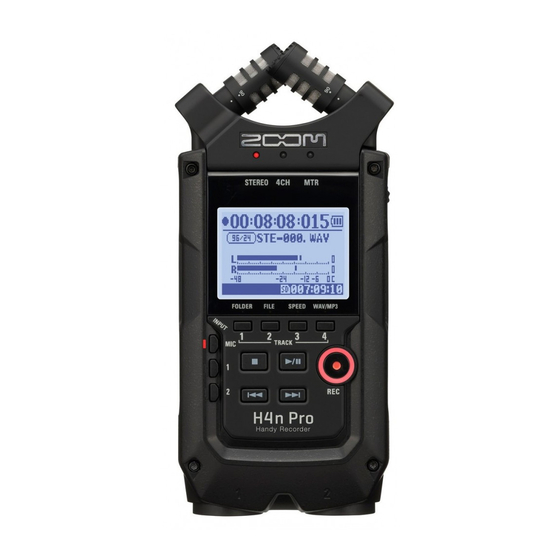
- Page 14 Front 90/120° stereo XY mic (built-in) Input jack for external stereo mic that uses plug-in power STEREO/4CH/MTR mode indicators Built-in mono speaker Display with backlight Threaded tripod mount shortcut buttons 1 FOLDER Battery cover 2 FILE 3 SPEED (Stereo mode) 4 WAV/MP3 STAMINA switch (Stereo/4CH mode)
- Page 15 DC 5V AC adapter jack DIAL Optional remote control jack LINE/PHONE output MENU button Strap stereo mini jack attachment hole XLR/standard phone XLR/standard phone input jack 2 input jack 1 USB jack SD card slot POWER/HOLD switch...
- Page 16 The H4n Pro can be powered by a standard power outlet or batteries. Install two AA batteries. open the battery compartment cover or connect/disconnect the AC adapter. Failure to do so could damage recording data. (Follow the +/– orientation.) : Ordinary use...
- Page 17 Connect a USB cable that is already connected to the FULL USB bus power and the unit will turn on automatically. This function is only available when the H4n Pro is used as an SD card reader or an audio interface. EMPTY...
- Page 18 • Before turning the power on, lower the volume of instruments and monitors connected to the H4n Pro. • If the display reads “No Card” when starting up, make sure that an SD card is inserted correctly. • If the display says “Reset DATE/TIME”...
- Page 19 The H4n Pro features a HOLD function that disables button operation to prevent misop- eration during recording. Slide the POWER switch toward HOLD. If you press any button while HOLD is active, the screen will display “Key Hold” for two seconds. To deactivate HOLD, slide the POWER switch away from HOLD.
- Page 20 The functions of the REC, STOP, PLAY/PAUSE, FF and REW buttons depend on the mode. Front (Only when a track is in recording standby) Enter recording standby and reset counter Stopped Stopped Enter recording standby Recording standby Start recording and counter Recording/standby Stop recording (playback continues) Recording...
- Page 21 Front Switch between track recording and playback. When you start recording, press the track number you want to record and the track becomes Recording Standby status. That track button will then become illuminated. Make track and the input source settings After selecting the track, use the input source buttons to select These operations are not available during the input for that track.
- Page 22 Note: If the selected input clips, its button will blink. When you switch to 4CH, the H4n Pro will receive two stereo inputs: one from MIC and one from 1 and 2 together. When you press a lit button, the channel input level is shown and you can adjust its recording level (REC LEVEL).
- Page 23 These keys allow you to adjust the levels of recording input and output volume. (All the modes are the same.) The recording levels for INPUT 1 and 2 can be adjusted Recording level Press the INPUT MIC, 1 or 2 button to select an input 1–100 source to adjust its...
- Page 24 The DIAL and the MENU button are used for various settings while recording and during playback. Here are explanations about their basic operations. DIAL Rotate the DIAL, and the cursor on the display will move with the DIAL When there are additional selections, press to move to the next screen. Press When you complete selection, the screen returns to the previous one.
- Page 25 Turn the DIAL to move the cursor DIAL moves on the top screen. When the item is Press to enable highlighted, rotate counter adjust- the DIAL to change ment or open the setting menu. the numbers and let- (Only in MTR mode.) ters.
- Page 26 SD card 380 minutes (stereo track) has not been formatted in the H4n Pro. To This warning will appear if an format it, press the DIAL and select YES. SD card is not in a recognized 44.1kHz/128kbps MP3...
- Page 27 MONTH Select SYSTEM and press. Turn the DIAL to select the item. Select DATE/TIME and press. If “Reset DATE/TIME” appears during startup, date/time needs to be set. Turn the DIAL to Select OK and press. set the value. • If no power source is connected for more than three minutes, the DATE/TIME setting will reset to The cursor appears again.
- Page 28 Monitors...
- Page 29 (opposite angles), the H4n Pro can cover a wide area and capture Sounds reach both mics simultaneously, so no phase cancellation occurs between right and left channels.
- Page 30 The input jack for the external microphone is suitable for microphones that require plug-in power. Press the MENU button for more than 2 seconds, and start Put the H4n Pro 30-50 cm from the sound When you use an external microphone, be operation from the top screen.
- Page 31 Use INPUT 1 and 2 to connect to a guitar, bass or keyboard, for example. Press the MENU button for more than 2 seconds, and start You can directly plug a guitar operation from the top screen. or a bass into either INPUT 1 or INPUT 2.
- Page 32 The H4n Pro can be used as a two-in/two-out USB interface at 44.1 or 48 kHz. Connect H4n Pro to Input or output levels Connect H4n Pro to computer with USB cable. Two channels can be sent and received at 44.1 or 48 kHz while connected to a computer.
- Page 33 • In this mode, you can use the signals if the sampling rate is set to 44.1kHz. • use the H4n Pro as a USB audio When you select an input the corresponding To monitor input signals, you must turn interface.
- Page 34 When you use the H4n Pro as an SD card reader, make the following settings. • Before physically unplugging the USB cable (and H4n Pro) from the computer, be sure to use the “Safely Remove Hardware” Unplugging the USB cable (and H4n Pro) without doing this could •...
- Page 35 The H4n Pro is equipped with a built-in mono speaker. This is a mono speaker for playback. Use it to easily play and listen to recorded data without connecting headphones to the LINE/PHONE jack. • When the LINE/PHONE jack is •...
- Page 36 The H4n Pro has four operation modes: STEREO, STAMINA, 4CH (4-channel) and MTR (multitrack). Choose the mode according to your need. You can easily create a stereo recording This mode enables longer battery life. In 4CH mode, you can record two...
- Page 37 Be sure to select the appropriate mode for your application. • The current mode is indicated by a mode indicator LED on the front panel. • The H4n Pro will power up in the same mode it was in • STEREO.
- Page 38 In STEREO mode, you can select 2 different inputs In 4CH MODE, the H4n Pro records two stereo You can record tracks in MONO or STEREO from either INPUT MIC or INPUT 1 and 2, and record and INPUT 1, INPUT 2 and a stereo microphone.
- Page 39 Recorder status Counter Elapsed recording or playback time (hours): (minutes): (seconds): (milliseconds) If “Low Battery” appears on the display, it is time Blinks REC button REC button to change the batteries. blinks lights Paused Blinks playing back The clip indicators “light” if the recording or play- Optional setting indicators ends or the stop button is pressed.
- Page 40 Counter Recorder status Elapsed recording or playback time (hours): (minutes): (seconds): (milliseconds) If “Low Battery” appears on the display, it is time to Blinks REC button REC button change the batteries. blinks lights Paused Blinks playing back Optional setting indicators The clip indicators “light”...
- Page 41 ➀ ➁ ➂ ➃ ➀ Counter Recorder status Elapsed recording or playback time Counter function: P.102 (hours): (minutes): (seconds): (milliseconds) Specify a time REC button lights Cursor ALWAYS NEW Blinks recording only Paused REC button Blinks ALWAYS NEW blinks recording only If “Low Battery”...
- Page 42 This is a list of the menu items that appear for each mode when the MENU button is pressed. the MENU after the unit is started or the mode is switched. After the menu has been opened previously, the last used...
- Page 43 On menu pages where recording and playback are possible, the current status is shown at the bottom left of the screen. The current folder number is shown at the bottom right of the screen, (in Ste- reo, 4CH and Stam- ina modes).
- Page 44 You can operate the H4n Pro from a distance with the optional remote control. Recording and placing marks. Enter recording standby and reset counter Stopped to 0. Start recording and counter. Recording standby Recording Playing 0-100 +: increase (raise) This can be used only when a track is in recording standby.
- Page 46 Make recording settings for the built-in mics and external input jacks. Use either MIC or INPUT 1 and 2 as the stereo input source. Use both MIC and INPUT 1 and 2 as stereo inputs. Connecting an external microphone Connecting an external microphone at once sets input automatically sets input automatically...
- Page 47 All tracks can be independently set for mono or stereo input. + TRACK 1 TRACK 2 TRACK 3 TRACK 4 In MTR mode, you can record multiple tracks sepa- Mono Stereo Mono Mono rately. You can also select any input for each track Stereo Mono Mono...
- Page 48 These are the steps to record in STEREO or STAMINA mode. Recording process STEREO MODE TOP The counter and remaining time start changing. name Blinks Blinks source Record Press MIC to use the built-in mics, or press INPUT 1 or 2 to use external The counter inputs.
- Page 49 In STEREO mode you can When the recording format automatically. Choose from is WAV, you can mark a Blinks two formats. The default Press recording format must be format is DEFAULT. button while recording. You selected before recording DEFAULT: STE-xxx can move swiftly to marked DATE: 090531-xxx positions during playback.
- Page 50 Set the recording format (REC FORMAT) before recording. REC FORMAT STEREO mode • 44.1kHz/16bit high-quality sound recording. Since data is not 44.1kHz/24bit 48kHz/16bit • 48kHz/24bit data compression, but are useful to save SD card 96kHz/16bit capacity and record more. 96kHz/24bit 48kbps 56kbps 64kbps...
- Page 51 File Name STEREO mode STE/MONO--xxx.wav/mp3 (STE: stereo, MONO: mono; XXX: DEFAULT 3-digit number; wav/mp3 extension) 090531-xxx.wav/mp3 (yymmdd; 3-digit number; wav/mp3 exten- DATE sion) 4CH mode 4CH-xxxM.wav File recorded using the built-in microphones No change 4CH-xxxI.wav File recorded using the external input MTR mode Stereo and TRK1-××.wav (TRK: track number;...
- Page 52 This is the method to record 4 channels (2 stereo) from the built-in mic and the external input jacks. Recording process STEREO MODE TOP The counter and remaining time start changing. Blinks name Blinks source Record The counter resets to 0. Select mic for the built-in microphones Select INPUT 1 or 2 for external Unlit...
- Page 53 In 4CH mode the input from the Change before recording. When the recording format is Blinks built-in and the external inputs Press are saved separately as stereo pressing the REC button while recording. You can move swiftly to marked positions during play- managed as a pair and named back.
- Page 54 Using multiple tracks, you can combine mono and stereo recordings. Pause *You can record without making these settings.
- Page 55 1. Input source is either INPUT 1 or INPUT 2 1. Input source is either INPUT 1 or INPUT 2 The same signal is sent to both tracks. 2. Input source is MIC or INPUT 1 and 2 2. Input source is MIC or INPUT 1 and 2 Recording is created by mixing signals from both sources...
- Page 56 You can select from two recording modes. Input setting ... P.054 Recording functions ... P.057– mode top The selected TRACK lights Shows input level Unlit Counter does not reset to 0. PAUSE button to listen to what you have just recorded. Counter will not reset to 0.
- Page 57 Input setting ... P.054 Recording functions ... P.057– mode top The selected TRACK lights Shows input level Unlit Counter does not reset to 0. Blinks Blinks Counter will not reset to 0.
- Page 58 This menu to set tracks is available only in MTR mode. Select a project and start ……P.119 Set the track output level Set the left–right position of the track. Setting values: L100 – C – R100 Default: 0.0dB Default: C (Center) On the top screen select a track menu icon and press.
- Page 59 MTR mode only STEREO LINK, FILE and • You cannot record on the KARAOKE track. KARAOKE settings are not • If LINK is turned ON automatically when set to a mono track, available during recording “NO DATA” will result. or playback for tracks that track, so “NO DATA”...
- Page 60 Here we explain how to use PUNCH IN and PUNCH OUT automatically. On the top screen select the track menu icon and press. Track menu icon Select the punch in/out icon and press. Punch in/out icon Find the desired punch in point and press. Icon changes...
- Page 61 MTR mode only Setting available only for OVER WRITE recording in MTR mode. Press the desired punch out point. 1 When in punch in/out mode, PUNCH setting the track button lights during recording and blinks in record- ing standby. → ● ...
- Page 62 Using OVER WRITE recording in MTR mode, you can manually punch in and out. Press the REC button during playback to start re-recording from that point. On the top screen select the track menu icon and press.
- Page 63 MTR mode only Unlit → PLAY PLAY...
- Page 64 The H4n Pro can detect when the input level exceeds a preset level and automatically start recording from recording standby. If the AUTO REC function is ON, “Wait for Signal” appears when in recording standby. The unit is sensing whether the input level exceeds the recording start level.
- Page 65 When AUTO REC is ON and the H4n Pro is recording, it will automatically stop when the input level goes below the preset level. Set the input level at which recording will stop When AUTO STOP is on, a stop level indicator appears during recording.
- Page 66 When PRE REC is ON, up to 2 seconds before the REC button is pressed will automatically be captured in the recording. When PRE REC is ON, the H4n Pro will pre-record audio two seconds before the record button is pressed.
- Page 67 • 80, 98, 115, 133, 150, 168, 185, 203, 220, and 237 Hz. recording. •...
- Page 68 input signals are lowered when recording.
- Page 69 Output level Attack time Release time Type Explanation Threshold (dB) Ratio (dB) (ms) (ms) Compressor and limiter OFF COMP1 (GENERAL) -48.7 +6.0 Standard compressor These compressors reduce COMP2 (VOCAL) This compressor is good for vocals. -8.4 16:1 high-level sounds and raise the minimum level.
- Page 70 This function automatically sets the level for recording. When REC LEVEL AUTO is used, the unit automatically sets recording levels using signals present during recording standby. If the volume surpasses 6 dB during recording, the input level is automatically adjusted with the new level shown on the screen for two seconds.
- Page 71 Turning on the MONITOR function allows you to monitor input signals at all times. You can always monitor the input source through the LINE/ PHONE stereo out mini jack when in recording standby. You cannot monitor input sounds through the built-in speaker.
- Page 72 The recording levels for INPUT 1 and 2 can be set separately. This function can be used in STEREO, 4CH and STAMINA modes only when MS MATRIX and MONO MIX are OFF.
- Page 73 • like “MONO-xxx”. • You cannot use this function together with MS STEREO MATRIX. • You cannot use this setting during recording and playback.
- Page 74 ON/OFF Set MS STEREO MATRIX to ON or OFF. Set the level of the directional MID mic that is pointed at the recording target. Default: +0.0dB...
- Page 75 You cannot use this function Set the level of the bidirectional SIDE mic, Set the input used (only in 4CH mode). Assign the MID and SIDE inputs to the left together with MONO MIX. which is perpendicular to the MID mic. (INPUT 1) and right (INPUT 2) channels.
- Page 76 The H4n Pro features a tuner with multiple tuning modes. The indicators show whether the input signals are higher or lower than the note shown. Both marks light when the input signal matches the note. High These dots show how between the input signal and the note .
- Page 77 In addition to CHROMATIC, the other tuning modes are GUITAR, BASS, OPEN A, OPEN D, OPEN E, OPEN G and DADGAD. The indicators show whether the input signals are higher or lower than the note shown. Both marks light when the input signal matches the note. High These dots show how between the input signal...
- Page 78 This function allows you to calibrate the tuner. • The default setting is 440Hz. • Set this between 435Hz and 445Hz in 1Hz increments. This cannot be used during recording and playback.
- Page 79 4CH mode only In 4CH mode you can select the input source for the tuner. String number/note name Tuner type GUITAR BASS When pitch is low OPEN A OPEN D OPEN E OPEN G DADGAD When pitch is high No input sound (chromatic) This cannot be used during recording and playback.
- Page 80 The metronome has convenient functions such as a pre-count. Set the count used before recording starts. ing recording, playback or both. This setting This cannot be set if PRE REC or AUTO REC must be made before recording or playback. is ON.
- Page 81 The metronome starts at the beginning of recording and playback. If you start in the middle of a song or track, the metronome beats may not be in sync with the song. Set the metronome speed. Set the metronome tone. Set the pattern of the metronome.
- Page 82 P.036 P.083 Select the preset that is closest to the desired sound P.089 Edit modules Adjust the patch level Change the patch name Select modules: P.087 P.087 P.085 P.086 Adjust parameters P.141 Save the edited patch (STORE) P.088 Record P.053...
- Page 83 MTR mode only change according to the input sources and recording tracks.
- Page 84 MTR mode only Patch number: patch name. Turn EFFECT ON or OFF IMPORT: Import a patch from another project EDIT: Create a new patch or edit a patch P.141 Patch list P.147 PATCH saved as a patch. 60 patches are available with 50 already programmed.
- Page 85 MTR mode only The PRE AMP module has Adjust the patch level. guitar and bass amp model- Change the patch name. The EFX module has modula- Save the edited patch.
- Page 86 MTR mode only Icons PRE AMP module ON/OFF status Set effect AMP type ZNR icon PRE AMP module parameters P.141...
- Page 87 MTR mode only Icons EFX module ON/OFF status Press OFF/ON to turn To select PRE AMP and EFX modules, make setting after changing the module status Set effect EFX type Default: When a module is OFF, no parameters or settings are shown. Various parameters EFX module parameters P.143...
- Page 88 MTR mode only Adjust the patch level and change the patch name. Select STORE to save the patch. To return to the top without saving change, select MENU.
- Page 89 MTR mode only the STORE operation. Not stored Selecting “YES” will over- write the current patch. To save without over- writing an existing patch, select an empty patch during the STORE opera- tion. Patches are saved by project.
- Page 90 Press IMPORT on All the patches from the project selected at step 4 are imported into the current project.
- Page 91 MTR mode only The patch selected in step 6 is imported into the current project. If there is no other project when you press IMPORT, “No Other Project!” will appear. Import mode Import project Start importing Current PROJECT...
- Page 92 Karaoke process ………P.118 project folder ……P.037 • Use the MOVE function ……P.117 (Prepare tracks for karaoke)
- Page 93 MTR mode only The KARAOKE track menu has tracks. LEVEL CNT CANCEL FINE FILE KARAOKE...
- Page 94 MTR mode only Press the INPUT button corresponding to the connected input jack. Press the REC button to enter recording standby. You cannot use this function + button to start recording. together with the EFFECT. TRACK MENU P.057...
- Page 95 You can select the top screen. Press TRACK on the top screen. name. • On the top screen you can move directly to step 3, by pressing the TRACK 2 button.” • If you press the PLAY/PAUSE button after selecting •...
- Page 96 Select a play mode and press. PLAY ALL PLAY ONE REPEAT ONE REPEAT ALL Select the desired mode. You cannot change this setting during recording and playback.
- Page 97 You can move easily to those points during playback. Press the FF and REW buttons to move • • • Once a mark has been created it cannot be deleted. • Press the REC button during recording to add a mark. •...
- Page 98 Point A moves. Select AB REPEAT and press. A mark is placed at point A, then mark B appears and moves until set. Playback repeats between the points. You can also set point A and B while stopped.
- Page 99 During recording and playback, you cannot make any settings after Step 3 of AB REPEAT. When moving around using FF and REW buttons, if you press the button for less than 2 seconds (quick press), it will move to the next mark.
- Page 100 STEREO mode only Press TRACK on the top screen. You can set the playback speed between 50% and 150% in increments of 5%. During recording and playback, you cannot make any settings after Step 3 of SPEED. • You can open this menu quickly by pressing the TRACK 3 button on the top screen of the mode.
- Page 101 4CH mode only +12.0dB (default: 0.0dB) L 100 – C – R 100 Shows if you are setting a (default: C (center)) Name of parameter where cursor is MIC or INPUT track positioned and its setting value Fader icon Pan pot icon The cursor cycles on the MIXER screen from MIC LEVEL to MIC PAN to INPUT...
- Page 102 MTR mode only back simultaneously. Press + Press + Press + Press + Press + OVER WRITE Press Press P.057 TRACK MENU...
- Page 103 MTR mode only Using the counter, you can specify any desired point in a recording. Counter...
- Page 104 Press TRACK on the top screen. • You cannot use this setting during recording and playback. • You can select any one of ten folders in STEREO, STAMINA and 4CH modes. You can open the FOLDER SELECT screen by pressing the Current folder TRACK 1 button on the top screen.
- Page 105 Press TRACK on the top screen. • DIAL on the top screen. • You can press the TRACK 2 button on the top screen to...
- Page 106 NAME DATE ated by a computer or other device) FORMAT (in MTR mode, MONO or STEREO shown) SIZE File size (kB or MB) TIME...
- Page 107 File to delete recovered.
- Page 108 The name of the folder or in it will be deleted. recovered.
- Page 109 MTR mode only This function is useful when you want to preserve the original copy. You can change it if necessary. FILE RENAME P.109...
- Page 110 a character and press. Select a character with the DIAL Select a character and press. Select a character to change change. Press the DIAL to highlight the character...
- Page 111 When changing letters, they appear in the following order. would have the same name, “This File Name Already (space)!#$%&()+,-01234 more than 12 characters, Exists!” appears 56789;=@ABCDEFGHIJ a triangle mark appears display, and the previous KLMNOPQRSTUVWXYZ showing that letters that screen reopens and you will ^_`abcdefghijklmnopqrst need to change the name.
- Page 112 STEREO mode only • • with the same name. If the screen says, “File Name Exists!” select RENAME and Bit rate that can be 48, 56, 64, 80, 96, 112, 128, 160, 192, 224, selected (kbps) 256, 320, VBR (default: 128 kbps) P.109 FILE RENAME...
- Page 113 and audio consistency. WAV format...
- Page 114 Enable the MIXER before encoding. P.100 MIXER ENABLE Use MIXER settings. DISABLE mixed equally.
- Page 115 4CH mode only Select the STEREO mode folder where with the same name. If the screen says “File Name Exists!” select RENAME and change the name. the folder. given is the same as the one in 4CH mode but M/I is changed to MIX.
- Page 116 Heavy WAV44.1kHz/24bit REC FORMAT to a WAV96kHz/16bit WAV48kHz/16bit lighter setting. WAV44.1kHz/16bit WAV48kHz/24bit WAV44.1kHz/24bit WAV48kHz/16bit The H4n Pro will automatically place a WAV44.1kHz/16bit P.049 REC FORMAT mark at point where sound drops out Light P.096 Setting marks during recording.
- Page 117 STEREO mode only DIVIDE Holding for more than one second to search forward/ backward one second or jump to the next mark in a...
- Page 118 • moved to a stereo folder. to stereo folders. • moved to 4CH folders. • be moved MTR projects. • in another format, “44.1 kHz/16 bit WAV Format Only!” will appear on the screen. To move a folder to an MTR project, a project folder must exist.
- Page 119 MTR mode only • The H4n Pro numbers new projects automati- cally. • You cannot change this Select PROJECT and press. number. • You can use the same name in multiple projects Select NEW PROJECT and press. Select EXECUTE and press.
- Page 120 MTR mode only Select a project stored on the SD card.
- Page 121 MTR mode only This function will delete a project. Once deleted, you cannot restore a project. cannot delete protected project. You need to end protection before deletion. P.125 PROTECT...
- Page 122 MTR mode only You can change the name of a project. Characters are changed in the following • The H4n Pro numbers new order. projects automatically. • You cannot change (Space)!”#$%&()*+,-./0123456789:;= number. ?@ABCDEFGHIJKLMNOPQRSTUVWXY • You can use the same name Z \ ^_`abcdefghijklmnopqrstuvwxyz{¦}˜...
- Page 123 MTR mode only You can copy a project to create a new project with a new number. Select a project and start operation. . . P.119 Automatically shows the lowest unused number P.121 PROJECT (RENAME)
- Page 124 You can combine tracks created in MTR mode and mix them down to one mono or stereo track. Select a project and start operation. . . P.119 Proceed to next step if no change. given a name in “BOUNCEXX” format. BOUNCE icon P.109 FILE RENAME...
- Page 125 MTR mode only “Bouncing” means combine various music data 5 min Track 1 BOUNCE Track 2 5 min Track 3 Track 4 the same project. STEREO MONO You cannot use this function during recording or playback.
- Page 126 MTR mode only Select a project and start operation . . . P.119 The mark shows the project is protected. assigned in a track, “Project Protected” will appear on the display. PROTECT is useful to prevent completed music from being accidentally changed.
- Page 127 You can set the time that the display backlight stays lit. The backlight stays on all the time. 15sec The backlight stays on for 15 seconds after (default) the last key operation. The backlight stays on for 30 seconds after 30sec the last key operation.
- Page 128 Even without an SD card, the built-in memory can record up to 35 seconds. This is useful for voice memos, for example. Switch to MEMORY REC mode Record P.047 Playback P.094 Each time you record will erase the previous contents. Please be aware of these restrictions.
- Page 129 STEREO mode only already exists in the destina- tion folder, a screen where you can select RENAME or CANCEL appears. The destination folder is a stereo mode folder. deletes it from the built-in memory.
- Page 130 Follow these steps to adjust the display contrast. This can be set from 1 to 8. The higher the number, the greater the contrast (default: 5). Low contrast High contrast You cannot change this setting during recording and playback.
- Page 131 By setting the battery type, the H4n Pro can accurately display the remaining battery life. ALKALINE Alkaline batteries ( default) Nickel metal hydride rechargeable Ni-MH batteries • Use alkaline batteries or NiMH rechargeable batteries. • You cannot change this setting during recording and playback.
- Page 132 After startup, you can check the H4n Pro version. System version Boot program version You cannot use this during recording and playback.
- Page 133 This function restores all settings to their original defaults. Press the MENU button for more than 2 seconds, and start operation from the top screen. • You cannot use this function during recording and play- back. • Warning: if you use the FACTORY RESET function, all the settings stored in this unit will be deleted.
- Page 134 Press the MENU button for more than 2 seconds, and start operation from the top screen. Remaining capacity meter Remaining space (MB) Remaining recording time with the current recording format. You cannot use this during recording and playback.
- Page 135 Use this function to format SD cards for the H4n Pro. Press the MENU button for more than 2 seconds, and start operation from the top screen. “Format Card?” appears during startup if the loaded SD card is not formatted for the H4n Pro.
- Page 136 If the H4n Pro (with an SD card) is connected to a computer (PC) that has access to the internet, you can download H4n Pro software upgrades. You can check the H4n Pro Main system version on the SYSTEM version...
- Page 137 H2/H4 again. • The projects are move in order from the lowest numbered to the highest numbered. • If the H4n Pro has more than 1000 projects in the unit after transfer, “Project Full!” appears and transfer stops.
- Page 139 Reference...
- Page 140 STEREO STAMINA Stereo WAV: 44.1/48/96kHz, 16/24-bit Stereo MP3: Stereo WAV × 2: 44.1kHz/16-bit stereo and mono Recording formats 48, 56, 64, 80, 96, 112, 128, 160, 44.1/48kHz, 16/24-bit WAV (4 tracks total) 192, 224, 256 and 320 kbps, VBR 44.1kHz Maximum simultaneous 2 (one stereo track) 4 (two stereo tracks)
- Page 141 STEREO STAMINA STEREO STAMINA STEREO STAMINA DATE/TIME LO CUT — NEW PROJECT — — — LIGHT COMP/LIMIT — — SELECT — — — LCD CONTRAST MONITOR RENAME — — — BATTERY TYPE REC LEVEL AUTO COPY — — — — FACTORY RESET MONO MIX DELETE...
- Page 142 (6) LEVEL 1–100 module. SD+XTASY Combination of Bogner Ecstasy and SweetDrive. (7) ZNR Adjusts the sensitivity of ZOOM's original ZNR OFF, 1–16 TS+FDcmb Combination of Fender Combo amp and Ibanez TS-808. (ZOOM Noise Reduction) GD+MSstk Combination of Marshall JCM800 and GoldDrive.
- Page 143 (7) LEVEL 1–100 signal amount. module. Sets the level of the signal after the PREAMP (8) ZNR OFF, Adjusts the sensitivity of ZOOM's original ZNR (7) LEVEL 1–100 module. (ZOOM Noise Reduction) 1–16 (8) ZNR Adjusts the sensitivity of ZOOM's original ZNR OFF, 1–16...
- Page 144 Compressors reduce high-level signals and raise the AUTO WAH RackComp minimum level. strength. Sets the base level from which the compressor Before, Sets the insertion point of the EFX module. (1) THRSHOLD 0–50 (1) POSITION operates. After Select before or after the PREAMP. (2) RATIO 1–10 Sets the compression ratio.
- Page 145 RING MOD FLANGER drastically change the tone. sound. Before, (1) DEPTH 0–100 Adjusts the modulation depth. Sets the insertion point of the EFX module. (1) POSITION After Select before or after the PREAMP. 0–50, (2) RATE Adjusts the speed of modulation. (2) FREQ 1–50 (See P.146)
- Page 146 room and provides spatial depth. (1) RANGE 1–10 (1) SIZE 1–100 Sets the size of the space. (2) RESONANC 0–10 Sets the amount of resonance. (2) REFLEX 0–10 (3) SENSE (3) TONE 0–10 Adjusts the tone. 1–10 (4) MIX 0–100 (4) BALANCE 0–100 the original sound.
- Page 147 RvsDelay This delay supports long delay times of up to 2500 ms. Note durations 10–2500 ms,* (1) TIME Sets the delay time. Parameters with values allow you to make settings in note units (See P.146) based on the metronome tempo. The lengths of the notes are as (2) FEEDBACK 0–100 Adjusts the amount of feedback.
- Page 148 The patches in this list can be used in 4CH mode and when the H4n Pro is functioning as an audio interface (at 44.1kHz sampling rate). Guitar Tweed Clean This FD TWEED clean sound goes great with Stratocasters. FD TWEED...
- Page 149 Bass This is the perfect Ampeg SVT rock sound. The SWR SM-900 modeling provides a tight sound. LIMITER BASSMAN This classic sound uses Fender BASSMAN 100 modeling. BASSMAN SUP-BASS The showy drive sound of a Marshall Super Bass. SUP-BASS SANSAMP The SansAmp sound plays well with other instruments.
- Page 150 128× oversampling USB functions can be powered using USB bus power Recording media SD cards (16MB – 2GB), SDHC cards (4GB – 32GB) Power DC 5V 1A AC adapter (ZOOM AD-14), 2 AA batteries WAV format STEREO mode Quantization: 16/24-bit Using built-in mics at 44.1kHz/16-bit without headphones connected...
- Page 151 P033) • The operation mode must be set on the H4n Pro to allow the computer to rec- • If a project is protected, recording is not possible. Use another project or turn ognize it. ( P031) protection off.
- Page 152 EDIT (RENAME) P87 EDIT (STORE) P88 P141 Details 35·37 Copyright warnings P7 Mode and top screen P39 CANCEL operation P23 IMPORT P89 Mode selection P36 CARIB/TUNER P77 Patch List P147 Playback operation P94 CHROMATIC/TUNER P75 EFX module/EFFECT P86 Recording operation P51 COMP/LIMIT P67 Connections P30 FACTORY RESET P132...
- Page 153 HOLD switch P17 Manual PUNCH IN/OUT P61 NEW PROJECT P118 MARK P96 NORMALIZE P112 MARK LIST P115 MAIN MENU P41 IMPORT/EFFECT P89 MENU button operations P23 INPUT MIC12 buttons operations P21 METRONOME P79 INPUT/TUNER P78 On-mic recording P29 MIXER P100 Over write recording mode P55 Mixing P57 MODE...
- Page 154 Recording (stereo/stamina mode) P47 Mode setting P15·36 Recording (4CH mode) P51 Playback operation P94 H4n Pro used as a SD card reader P33 Recording (MTR mode) P53 Recording operation P47 H4n Pro used as an Audio Interface P31 Recording track selection P45...
- Page 155 This equipment has been tested and found to comply with the limits harmful interference to radio communications. However, there is no for a Class B digital device, pursuant to Part 15 of the FCC Rules. guarantee that interference will not occur in a particular installation. If These limits are designed to provide reasonable protection against this equipment does cause harmful interference to radio or televi-sion harmful interference in a residential installation.
- Page 156 ZOOM CORPORATION 4-4-3 Kanda-surugadai, Chiyoda-ku, Tokyo 101-0062 Japan Website http://www.zoom.co.jp Z2I-2675-01...
Need help?
Do you have a question about the H4n Pro and is the answer not in the manual?
Questions and answers