Zoom H4n Pro Quick Manual
Handy recorder
Hide thumbs
Also See for H4n Pro:
- Operation manual (164 pages) ,
- Manual (10 pages) ,
- Operating instructions manual (9 pages)
Table of Contents
Advertisement
QUICK GUIDE
You must read the Usage and Safety Precautions before use.
The Operation Manual can be downloaded from the ZOOM website (www.zoom.jp/docs/h4n_pro).
This page has files in PDF and ePub formats.
The PDF file format is suitable for printing on paper and reading on a computer.
The ePub format can be read with electronic document readers and is designed for reading on
smartphones and tablets.
© 2020 ZOOM CORPORATION
Copying or reprinting this manual in part or in whole without permission is prohibited.
Product names, registered trademarks and company names in this document are the property of their respective
companies.
All trademarks and registered trademarks in this document are for identification purposes only and are not intended
to infringe on the copyrights of their respective owners.
You might need this manual in the future. Always keep it in a place where you can access it easily.
The contents of this manual and the specifications of the product could be changed without notice.
Handy Recorder
Advertisement
Table of Contents

Related Manuals for Zoom H4n Pro


Summary of Contents for Zoom H4n Pro
- Page 1 QUICK GUIDE You must read the Usage and Safety Precautions before use. The Operation Manual can be downloaded from the ZOOM website (www.zoom.jp/docs/h4n_pro). This page has files in PDF and ePub formats. The PDF file format is suitable for printing on paper and reading on a computer.
-
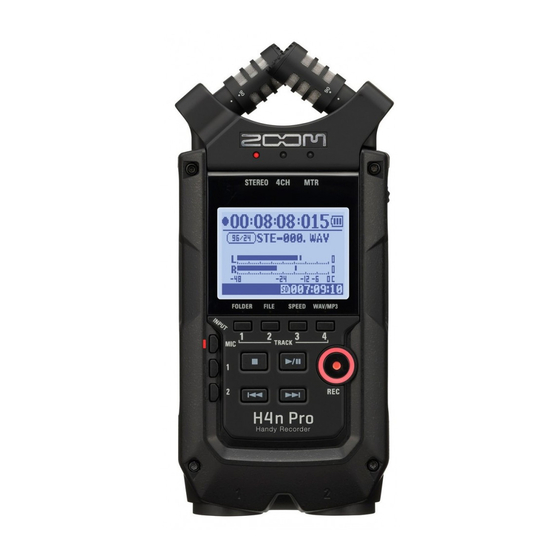
Page 2: Names And Functions Of Parts
Names and functions of parts Front Back 90/120° stereo XY mic (built-in) Input jack for external stereo mic that uses plug-in power STEREO/4CH/MTR mode indicators Built-in mono speaker Display with backlight Threaded tripod mount • STEREO/4CH mode shortcut buttons 1 FOLDER Battery cover 2 FILE 3 SPEED... - Page 3 Right side Left side Bottom DC 5V AC adapter jack DIAL Optional remote control jack LINE/PHONE output MENU button Strap stereo mini jack attachment hole VOLUME (+/−) REC LEVEL (+/−) XLR/standard phone XLR/standard phone input jack 2 input jack 1 USB jack (Mini-B) SD card slot...
-
Page 4: Battery/Power Setting
Battery/Power setting The H4n Pro can be powered by a standard power outlet or batteries. • Using a standard power outlet • Using batteries Open the battery compartment cover. Always use the specified AC adapter. Install two AA batteries. NOTE:... -
Page 5: Loading An Sd Card
SD card 44.1 kHz/16-bit WAV 25 hours (stereo track) has not been formatted in the H4n Pro. To This warning will appear if an format it, press the DIAL and select YES. SD card is not in a recognized 44.1kHz/128kbps MP3... - Page 6 Turn all connected equipment off fi rst. • Before turning the power on, lower the volume of instruments and monitors connected to the H4n Pro. • If the display reads “No Card” when Insert an SD card. starting up, make...
- Page 7 HOLD Function Turn the monitoring system and connected instruments off in that order fi rst. The H4n Pro features a HOLD function that disables button operation to prevent misoperation during recording. Slide the POWER switch to turn the power off.
-
Page 8: Setting The Date And Time
Setting the date and time Each fi le will automatically record the date/time. To facilitate searching for fi les by date, be sure to set the date/time after every battery change. Set YEAR ➝ MONTH ➝ DAY ➝ TIME Press. (hour: minute: second) Select the item on DATE/TIME: Select SYSTEM and press. - Page 9 Setup: Connecting external devices The H4n Pro offers versatile connectivity with options for any recording application. Remote control (optional) Stereo mic Headphones Monitors SD card INPUT: instrument Mixer INPUT: mic INPUT: instrument Personal computer (PC) AC adapter specified for H4n Pro...
- Page 10 The H4n Pro utilizes an XY stereo mic configuration. By placing two microphones in a crossed pattern (opposite angles), the H4n Pro can cover a wide area and capture sound sources in the center with clarity and definition. Sounds reach both mics simultaneously, so no phase cancellation occurs between right and left channels.
- Page 11 Setup: INPUT 1/2 connections and phantom power Use INPUT 1 and 2 to connect to a guitar, bass or keyboard, for example. Setting PHANTOM power Connecting instruments Press the MENU button for more than 2 seconds, and start You can directly plug a guitar operation from the top screen.
-
Page 12: Mode Overview
Mode overview The H4n Pro has four operation modes: STEREO, STAMINA, 4CH (4-channel) and MTR (multitrack). Choose the mode according to your need. • STEREO mode • STAMINA mode • 4CH mode • MTR mode You can easily create a stereo recording This mode enables longer battery life. - Page 13 • The current mode is indicated by a mode indicator LED on the front panel. • The H4n Pro will power up in the same mode it was in when turned off. Press. • When starting up for the fi rst time, the default mode is STEREO.
-
Page 14: Mode Details
STAMINA MODE In STEREO mode, you can select 2 different inputs In 4CH MODE, the H4n Pro records two stereo You can record tracks in MONO or STEREO from either INPUT MIC or INPUT 1 and 2, and record and WAV files: one stereo WAV file for the built-in INPUT 1, INPUT 2 and a stereo microphone. -
Page 15: Mode Screens: Stereo And Stamina Modes
Mode screens: STEREO and STAMINA modes • Explanation of the top screen Recorder status Counter Remaining battery life (when battery used) Elapsed recording or playback time Stopped (hours): (minutes): (seconds): (milliseconds) Recording standby Recording If “Low Battery” appears on the display, it is time Blinks REC button REC button... - Page 16 Mode screens: 4CH mode • Explanation of the top screen Counter Recorder status Remaining battery life (when battery used) Elapsed recording or playback time Stopped (hours): (minutes): (seconds): (milliseconds) Recording standby Recording If “Low Battery” appears on the display, it is time to Blinks REC button REC button...
- Page 17 Mode screens: MTR mode • Explanation of the top screen DIAL operations on top screen Counter Recorder status Elapsed recording or playback time Counter function: Recording Stopped (hours): (minutes): (seconds): (milliseconds) Specify a time REC button Recording Standby lights Cursor ALWAYS NEW Blinks Remaining battery life (when battery used)
- Page 18 Settings/recording: Recording in STEREO and STAMINA modes These are the steps to record in STEREO or STAMINA mode. Recording process Adjust the recording level of Press the MENU button for more than 2 seconds, and start the input source. operation from the top screen. Confirm the mode is STEREO.
- Page 19 See the Operation Manual for details about MTR mode. HINT: Recording format File naming Marks Pausing In STEREO mode you can Recorded fi les are named When the recording format record in 19 different WAV automatically. Choose from is WAV, you can mark a Blinks and MP3 fi le formats.
- Page 20 Settings/recording: 4CH mode recording This is the method to record 4 channels (2 stereo) from the built-in mic and the external input jacks. Recording process Adjust the recording level of Press the MENU button for more than 2 seconds, and start the input source.
- Page 21 See the Operation Manual for details about MTR mode. HINT: File naming Recording format Marks Pausing In 4CH mode the input from the Change before recording. When the recording format is Blinks built-in and the external inputs WAV, you can mark a fi le by Press are saved separately as stereo pressing the REC button while...
- Page 22 Settings/recording: Recording format Set the recording format (REC FORMAT) before recording. NOTE: Press the MENU button for more than 2 seconds, and start REC FORMAT operation from the top screen. How to use WAV and MP3 format STEREO mode • WAV fi les with no compression are used for 44.1kHz/16bit high-quality sound recording.
-
Page 23: File Select
Playback (STEREO, 4CH and STAMINA modes) Immediately after recording, you can play the fi le by pressing the PLAY/PAUSE button. Follow these steps to call up a fi le later for playback. Press the MENU button for more than 2 seconds, and start operation from the top screen. - Page 24 ZOOM CORPORATION 4-4-3 Kanda-surugadai, Chiyoda-ku, Tokyo 101-0062 Japan zoomcorp.com Z2I-4047-02...
Need help?
Do you have a question about the H4n Pro and is the answer not in the manual?
Questions and answers