
Related Manuals for HT MPP300


Summary of Contents for HT MPP300
- Page 1 ENGLISH User manual 中国总代理:Nano电子商城 Tel: 4006609565 E-mail:19mro@19mro.com http://www.19mro.com Copyright HT ITALIA 2012 Version EN 2.00 - xx/xx/2012...
-
Page 3: Table Of Contents
MASTER instrument ......................6 4.3.1. Displaying the status of MPP300 by means of MASTER instruments of Type 1 ....7 4.3.2. Displaying the status of MPP300 by means of MASTER instruments of Type 2 ....7 SETTINGS ON MASTER INSTRUMENTS .............. -
Page 4: Precautions And Safety Measures
The instrument may be used for measuring CURRENT by means of external clamp transducers Only original HT accessories guarantee safety standards. They must be in good conditions and replaced with identical models, when necessary Before connecting the measuring cables to the circuit being measured, check that the... -
Page 5: During Use
MPP300 1.2. DURING USE Please carefully read the following recommendations and instructions: CAUTION Failure to comply with the notes and/or instructions may damage the instrument and/or its components or be a source of danger for the operator The red flashing “POWER” LED indicates that the internal rechargeable batteries are almost flat. -
Page 6: General Description
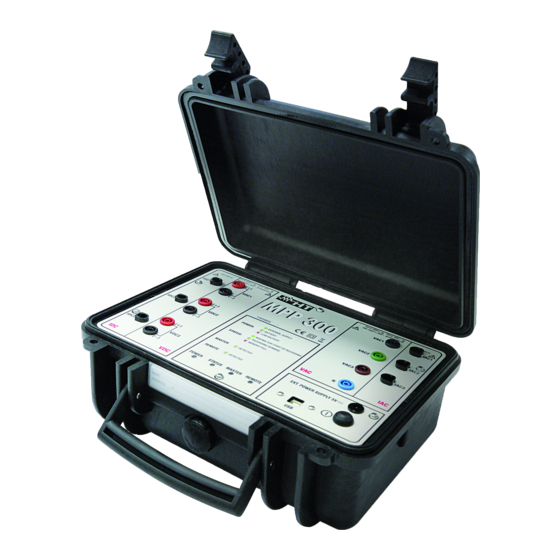
MASTER instrument (see par. 4.3), for the purpose of carrying out testing operations on single-phase and three-phase PV systems. Together with a MASTER instrument, MPP300 is the ideal solution for testing and analyzing the possible problems linked to possible low efficiency values of photovoltaic systems 2.2. -
Page 7: Preparation For Use
MPP300 3. PREPARATION FOR USE 3.1. INITIAL CHECKS Before shipping, the instrument has been checked from an electric as well as mechanical point of view. All possible precautions have been taken so that the instrument is delivered undamaged. However, we recommend checking it to detect any damage possibly suffered during transport. -
Page 8: Overview
Table 2. This information is present in the initial screen shown when switching on the MASTER instrument. The results of the measurements carried out by MPP300 are sent to the MASTER instrument to which it is connected and shown on the master instrument’s display. -
Page 9: Displaying The Status Of Mpp300 By Means Of Master Instruments Of Type 1
4.3.1. Displaying the status of MPP300 by means of MASTER instruments of Type 1 In case the MASTER instrument is near MPP300, it is possible to display the general parameters and obtain information about a possible error state of MPP300 (STATUS LED red steady). -
Page 10: Settings On Master Instruments
Further in this manual, a brief description is provided of the settings of the MASTER instrument for use together with MPP300. For an exhaustive description of the controls and functions of the MASTER instrument, please refer to the User Manual of the instrument itself. -
Page 11: Operating Instructions
MPP300 6. OPERATING INSTRUCTIONS Further in this manual, a brief description is provided of the use of MPP300 together with the MASTER instrument. For an exhaustive description of the controls and functions of the MASTER instrument, please refer to the User Manual of the instrument itself. - Page 12 Fig. 3: Connection of MPP300 for testing a three-phase PV system CAUTION When SOLAR I-V is set in order to use MPP300 as a remote unit, ALL connections relevant to electrical quantities (voltages and currents) must be carried out on unit MPP300. SOLAR I-V must have no voltage nor current connected to its inputs ...
- Page 13 MASTER and REMOTE LEDs flashing green on unit MPP300 7. Connect the VDC1(+) and VDC1(-) inputs of unit MPP300 to the output terminals of the string, respecting the polarities and the colors indicated in Fig. 2 or Fig. 3.
- Page 14 On MPP300, the STATUS LED turns on green (not flashing) R e c . S t a r t W a i t i n g Select M P P EN - 12...
- Page 15 23. Now it is possible to bring the unit SOLAR-02 near the PV strings to measure irradiation and temperature by means of the relevant probes. When the distance between unit SOLAR-02 and MPP300 does not allow the RF connection, on the display of SOLAR-02 the symbol “...
- Page 16 MPP300 32. To stop testing, press the GO/STOP key on instrument 15/05/10 15:35:00 SOLAR I-V and confirm with ENTER that you want to stop 0 . 8 2 P R p recording 9 7 1 I r r W / m 2 P n o m 3 .
-
Page 17: Pv System Testing For Instruments Of Type 1 (Solar 300N)
PV fields (with the same direction and inclination), each connected to an MPPT of the inverter (see § 9.1) and single-phase or three-phase output. The remote unit MPP300 is capable of communicating with SOLAR300N via USB cable (to manage data... - Page 18 MASTER and REMOTE LEDs flashing green on unit MPP300 7. Connect the VDC1(+) and VDC1(-) inputs of the MPP300 unit to the output terminals of the string, paying attention to the polarity and the colours indicated in Fig. 4 or Fig. 5.
- Page 19 MPP300 9. Connect the output connector of the DC clamp to the IDC1 input of unit MPP300. CAUTION BEFORE CONNECTING THE DC CLAMPS TO THE CONDUCTORS Switch on the clamp, check the LED indicating the status of the clamp’s internal batteries (if present), select the correct range, press the ZERO key on the DC clamp and check on the display of SOLAR300N the actual zeroing of the corresponding Idc value (values up to 0.02A are acceptable).
- Page 20 The display of SOLAR-02 shows the message “HOLD” and the time, expressed in seconds, remaining before the recording is started b. On MPP300, the STATUS LED turns on green (not flashing) 21. Upon reaching the instant “00” after pressing the F1 key, the test is started and the three units are synchronized with each other.
- Page 21 23. Now it is possible to bring the unit SOLAR-02 near the PV strings to measure irradiation and temperature by means of the relevant probes. When the distance between unit SOLAR- 02 and MPP300 does not allow the RF connection, on the display of SOLAR-02 the symbol “...
- Page 22 MPP300 32. To stop recording, press the GO/STOP key on the instrument SOLAR300N and confirm with ENTER that you want to stop recording. 33. The display of SOLAR300N will show various messages indicating the different phases of data transfer to the main unit. The transferred data will be saved automatically.
-
Page 23: Maintenance
STATUS OF THE INTERNAL RECHARGEABLE BATTERIES The status of the POWER LED provides indications about the operating/charge status of the instrument’s internal rechargeable batteries POWER: GREEN steady: MPP300 supplied by external power supply GREEN flashing: MPP330 supplied by internal batteries RED flashing:... -
Page 24: Technical Specifications
MPP300 8. TECHNICAL SPECIFICATIONS 8.1. TECHNICAL SPECIFICATIONS FOR TEST ON PV SYSTEMS Uncertainty is indicated as [%reading + (no. of digits) * resolution] at 23°C ± 5°C, <80%HR DC voltage Range [V] Resolution [V] Uncertainty 10.0 999.9 (0.5rdg + 2dgt) -
Page 25: Reference Standards
MPP300 8.2. REFERENCE STANDARDS Instrument safety: IEC/EN61010-1 Safety of measuring accessories: IEC/EN61010-031 Technical documentation: IEC/EN61187 Insulation: double insulation Mechanical protection: IP 40 Pollution level: Measurement category: CAT III 1000V DC, Max 1000V between DC inputs CAT IV 300V AC to earth, max 600V between AC inputs 8.3. -
Page 26: Appendix - Theoretical Outline
MPP300 9. APPENDIX – THEORETICAL OUTLINE 9.1. TESTING PHOTOVOLTAIC SYSTEMS According to the requirements of the laws in force, the result of the test depends on settings about Temperature effects compensation and PRp calculations (see MASTER instrument settings): Corr.Typ Guidelin... -
Page 27: Notes On Mppt (Maximum Power Point Tracker)
MPP300 9.2. NOTES ON MPPT (MAXIMUM POWER POINT TRACKER) Solar irradiation on a surface such as the surface of a photovoltaic system has extremely variable characteristics, since it depends on the position of the sun with respect to the surface and on atmospheric conditions (typically, on the presence of clouds). A... -
Page 28: Service
MPP300 10. SERVICE 10.1. WARRANTY CONDITIONS This instrument is warranted against any material or manufacturing defect, in compliance with the general sales conditions. During the warranty period, defective parts may be replaced. However, the manufacturer reserves the right to repair or replace the product Should the instrument be returned to the After-sales Service or to a Dealer, transport will be at the Customer’s charge.
Need help?
Do you have a question about the MPP300 and is the answer not in the manual?
Questions and answers