Midea FP-92LFC100GMTH-W2 User Manual

Midea FP-92LFC100GMTH-W2 User Manual

Washer - spinner - dryer

Advertisement

Washer - Spinner - Dryer
USER'S MANUAL
Model: FP-92LFC100GMTH-W2
FP-92LFC120GMTH-W1
Read this Manual
Use all instructions and explanations
on installation before use. Follow the
instructions carefully. Keep the operation
instructions handy for later use. If the
product is sold or passed on then ensure
that the new owner always receives this
manual.
CAUTION: HOT SURFACE !
CAUTION: RISK OF FIRE !

Advertisement

Table of Contents
loading

Summary of Contents for Midea FP-92LFC100GMTH-W2

  • Page 1 Washer - Spinner - Dryer USER’S MANUAL Model: FP-92LFC100GMTH-W2 FP-92LFC120GMTH-W1 Read this Manual Use all instructions and explanations on installation before use. Follow the instructions carefully. Keep the operation instructions handy for later use. If the product is sold or passed on then ensure that the new owner always receives this manual.
  • Page 2: Table Of Contents

    CONTENTS SAFETY INSTRUCTIONS Safety Instructions INSTALLATION Product Description Installation OPERATION Quick Start Before Each Wash Detergent Dispenser Control Panel Options Other Functions Programs Washing Program Table MAINTENANCE Cleaning and Care Troubleshooting Technical Specifications...
  • Page 3: Safety Instructions

    SAFETY INSTRUCTIONS Safety Instructions For your safety,the information in this manual must be followed to minimize the risk of fire or explosion, electric shock, or to prevent property damage, personal injury or loss of life. Explanation of the symbols: Warning! This combination of symbol and descriptive words indicates a potentially dangerous situation which may result in death or serious injuries unless it’s avoided.
  • Page 4 SAFETY INSTRUCTIONS • Always unplug the machine and turn off the water supply after use. The standard inlet water pressure: 0.05MPa~1MPa. • This appliance must be grounded. In the event of malfunction or breakdown, grounding will reduce the risk of electric shock by providing a path of at least resistance for electric current.
  • Page 5 SAFETY INSTRUCTIONS • The glass door may be very hot during the operation. Keep children and pets far away from the machine during operation. • Remove all the packaging materials and transport bolts before using the appliance. Otherwise, serious damage may result Risk of Explosion! •...
  • Page 6 SAFETY INSTRUCTIONS • Plug must be accessible after installation. • The appliance must not be installed behind a lockable door, a sliding door or a door with a hinge on the opposite side to that of the washer dryer. • The appliance shall not be installed in humid places. •...
  • Page 7 SAFETY INSTRUCTIONS • Before washing the clothes for the firs time, the product should be operated without clothes, using AUTO CLEAN as the suggested program. • Flammable and explosive or toxic solvents are forbidden. Gasoline and alcohol etc. shall not be use as detergents. Please only select the detergents suitable for machine washing, especially for front load washing machines.
  • Page 8 SAFETY INSTRUCTIONS • Items such as foam rubber (latex foam), shower caps, waterproof textiles, rubber backed articles and clothes or pillows fitted with foam rubber pads should not be dried in the machine. • Fabric softener or similar products should be used as specified in the fabric softener instruction guide.
  • Page 9: Installation

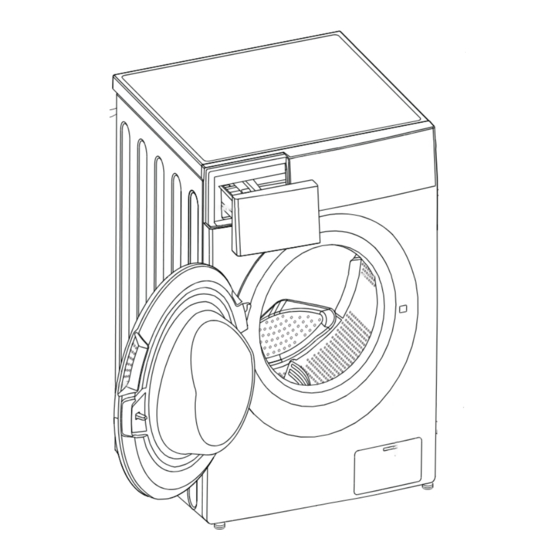
    INSTALLATION Product Description Top cover Water supply hose Control panel Power supply cord Detergent dispenser Drum Door Service filter Drain hose Note • The product line chart is for reference only, please refer to the actual product as standard. Accessories Transport Supply hose Drain hose support...
  • Page 10: Installation

    INSTALLATION Installation Installation Area Warning! • Stability is important to prevent the product from moving. • Make sure that the product does not stand on power cord. > Before installing the machine, the location characterized as follows shall be selected: 1.
  • Page 11 INSTALLATION Levelling the washing machine Warning! • The lock nuts on all four feet must be screwed tightly against the housing. 1.Check if the legs are closely attached to the cabinet. If not, please turn them to their original position then tighten the nuts. 2.Loosen the lock nut then turn the feet until it closely contacts with the floor.
  • Page 12 INSTALLATION Connect the other end of inlet water supply hose water Inlet valve pipe to the inlet valve at the back of the product and fasten the pipe tightly clockwise. Drain Hose Warning! Warning! • Do not kink or protract the drain hose. •...
  • Page 13: Operation

    OPERATION Quick Start Caution! • Before washing, please make sure that the unit is installed properly. • Before washing at first time, the washing machine shall be operated without clothes using RAPID (at SPEED WASH setting) as the suggested program. 1.
  • Page 14: Before Each Wash

    OPERATION Before Each Wash Please check the labels and the explanation of using detergent before wash. Use non-foaming or less-foaming detergent suitable for machine washing properly. Take items out of the Tie tassels into knots; fasten Check the label pockets zippers and buttons Put small clothes into a Turn the following clothes...
  • Page 15: Detergent Dispenser

    OPERATION Detergent Dispenser Pre wash detergent Main wash detergent Softener Barrier Barrier Liquid detergent Powder detergent Pull out the dispenser Caution! Detergent only needs to be added in “case I” after selecting pre-washing (for models with this function).
  • Page 16 OPERATION P rogram P rogram Dry O nly E C O W as h Delicate C otton S ilent Duvet Antiallergic Normal J eans T owel S tain W as h S hoes R apid Auto C lean S pin O nly Means required Means optional ○ ...
  • Page 17: Control Panel

    OPERATION Control panel ECO Wash Rapid My Cycle 15 Min Wash |59Min Wash And Dry Stain Wash Delicate Jeans Silent Antiallergic Normal On |Off Soft Duvet Towel Cotton Shoes Auto Spin Start | Pause Only Clean Only Add Clothes Extra Delay Temperature Spin...
  • Page 18: Options

    OPERATION Options PREWASH The PREWASH function provides an extra wash before the main wash is executed. It’s suitable for cleaning soiled clothes and needs detergent in case 1. Extra Rinse This setting provides an extra rinse, when selected. Speed Wash The function decreases the washing time.
  • Page 19 OPERATION P rogram Option Delay Pre Wash Extra Wash Speed Wash Extra Rinse E C O W as h Delicate S ilent Antiallergic T owel S hoes Auto C lean S pin O nly Dry O nly C otton Duvet Normal J eans S tain W as h...
  • Page 20: Other Functions

    OPERATION Users can choose Soft drying, Normal drying and Timer drying when using the drying function. Among them, Soft drying and Normal drying are conventional drying, and Timer drying offers customized drying time. 1. The drying function is only available for programs with drying symbol “...
  • Page 21 OPERATION My Cycle Frequently – used programs can be stored here. After choosing the setting for your customized program, press [ ] for 3 seconds to store it in the memory. The default program stored is Cotton. Child Lock To avoid mis operation by children Extra Function Select...
  • Page 22 OPERATION P rogram Default S peed( rpm) P rogram Default S peed( rpm) 1200 1200 E C O W as h Dry O nly 1200 Delicate C otton S ilent Duvet Antiallergic Normal T owel J eans S hoes S tain W as h 1200 ---- Auto c lean...
  • Page 23 OPERATION Press the Dry button continually to choose the dry level: Extra Dry / Normal Dry (Normal) / Gentle Dry (Soft) / Time / Air Dry Extra Dry: When you need to wear the clothes immediately after drying is finished Normal Dry: When clothes will be ironed and stored Gentle Dry: For light clothes Air Dry: Clothes are spun without heat, to remove peculiar smell...
  • Page 24: Programs

    OPERATION Programs Programs are availanle according to the laundry type. Program Descrip�on Uses room-temperature water, preserving original colors, saving ECO Wash energy, and s�ll delivering great cleaning performance For light, washable tex�les such as silk, sa�n, synthe�c fiber, or Delicate blended fabrics In this program, the bu�on sound is deac�vated, thereby, allowing a Silent...
  • Page 25: Washing Program Table

    OPERATION Washing Program Table Washing/Drying Load Program °C Temp. Default Time (H) (kg) 10.0 12.0 10.0 12.0 Default 1200 1200 2.0/2.0 2.0/2.0 E C O W as h Cold 0:58 0:58 Delicate 0:50 0:50 S ilent 10.0/7.0 12.0/8.0 2:10 2:10 Antiallergic 10.0 12.0...
  • Page 26: Maintenance

    MAINTENANCE Cleaning and Care Warning! • Before proceeding with maintenance of the unit, disconnect the power plug C leaning the Cabinet Proper maintenance on the washing machine can extend its lifespan. The surface can be cleaned with diluted non-abrasive neutral detergents when necessary. If there is immediately.
  • Page 27 MAINTENANCE Cleaning the inlet filter Note! • unit decreases. Washing the filter at the faucet side 1. Close the faucet. 2. Remove the water supply hose from the faucet 4. Reconnect the water supply hose 1. Remove the inlet pipe from the back of the machine and reinstall it after washing.
  • Page 28 MAINTENANCE Cleaning the Drain Pump Filter Warning! Beware of hot water! • Allow detergent solution to cool down • • Unplug the machine to avoid electrical shock before washing. • matter from the wash load. • Clean the lter periodically to ensure the normal operation of the washing machine.
  • Page 29: Troubleshooting

    MAINTENANCE Troubleshooting a solution to the problem. If there is none, contact the service center. Description Reason Solution Washing machine estart after the door is closed Door is not closed properly. cannot start Check if clothes are stuck. Door cannot be Washer's safety protection Disconnect the power, restart design is activated.
  • Page 30: Technical Specifications

    MAINTENANCE Technical Specifications Maximum Current S tandard Water P ressure 0 . 0 5 MP a~ 1MP a Model FP-92LFC120GMTH-W1 FP-92LFC100GMTH-W2 Power supply 220V~, 60Hz 220V~, 60Hz Washing Capacity 12.0kg 10.0kg Drying Capacity 8.0kg 7.0kg Dimension ( W*D*H) mm 595*595*850...

This manual is also suitable for:

Fp-92lfc120gmth-w1

Table of Contents