Table of Contents

Related Manuals for Midea MAE50-S1102


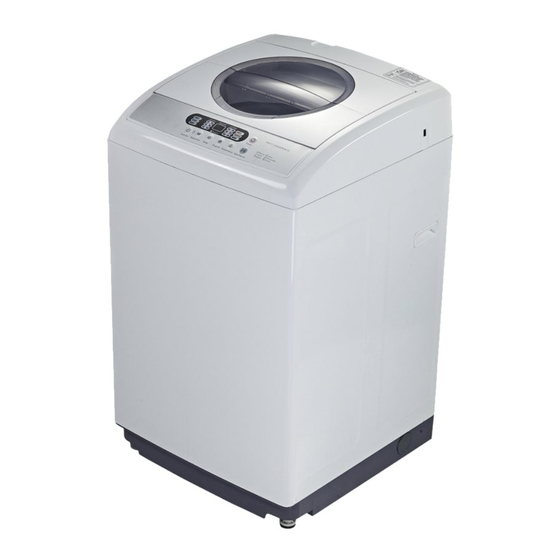
Summary of Contents for Midea MAE50-S1102
- Page 1 1.6/2.1 CU. FT. 11/15LBS. PROTABLE TOP LOAD WASHER USER MANUAL MODEL MAE50-S1102 & MAE70-S1402 Midea America Corp. 4 Campus Drive Parsippany, NJ 07054, U.S.A Cusomer Service 1866-646-4332 www.mideaamericacorp.com...
-
Page 2: Table Of Contents
CONTENTS Important Safeguards..........................3 Installation Instructions........................8 Before Washing Preparation......................10 Parts and Features..........................11 Washing Cycle Guide..........................13 Maintenance and Care / Error Codes....................17 Troubleshooting...........................18 Warranty Information...........................19 Reqistration info and registratton card....................20 Before using your washing machine, please read this manual carefully and keep it for future reference. -
Page 3: Important Safeguards
IMPORTANT SAFEGUARDS WARNING To reduce the risk of fire, electric shock, or personal injury when using your appliance, follow these basic precautionary guidelines, which includes the following: 1. If your old appliance is not being used, we recommend that you remove the door or properly dispose your old appliance according to local law ordinances. - Page 4 Do not operate this washer unless all enclosure panels are properly installed. Do not tamper with the controls. Do not allow any children to play on or in the appliance. Close supervision of children is necessary when the appliance is used around them. This appliance must be connected to a proper electrical outlet with the correct amount of electrical supply, as specified on the rating label.
- Page 5 SAFETY AND PRECAUTIONS In order to prevent injury to yourself and others, or property damage, observe the following items: Warning This symbol indicates the possibility of death or serious injuey. This symbol indicates the possibility of injury or property damage. Caution Observe the following visual guidelines: NEVER DO THIS.
- Page 6 Warning & Caution Prohibit from washing clothes that Do not let children climb onto the came in contact with kerosene, machine or peer into the spinning gasoline,alcohol, or any other tub, in order to avoid injury. flammable chemicals. Do not place any incense, flammable Do not damage the power cord orplug items, and other heating sources to avoid electric shock, fire, and/or...
- Page 7 Please do not wash down raincoat, Please use correct power source. fishing coat and similar clothes in the washer. Pull out the 3-pronged plug from Regularly clean the power plug the socket when the machine is toremove dust and dirt, in order not in use.
-
Page 8: Installation Instructions
INSTALLATION INSTRUCTIONS REMOVE PACKAGING Remove packaging, foam cushions, and bottom cardboard. • • Open the washer door and take out the accessories. • Use of washer with the foam cushion is strictly prohibited. Foam Cushion B ase PLACEMENT OF UPPER WATER DRAIN HOSE T he height of the drain hose (A ) should be betw een ~34 to 40”.Its diameter (B ) should not be less than 1.20”, and its 34~40''... - Page 9 QUICK SINK ADAPTER INSTALLATION QUICK SINK ADAPTER INSTALLATION QUICK SINK ADAPTER INSTALLATION QUICK SINK ADAPTER INSTALLATION When installing the quick sink adapter to the sink faucet, follow these guidelines: Remove the aerator from your faucet nozzle and determine the size and type of the faucet (Outside Threaded End or Inside Threaded End).
-
Page 10: Before Washing Preparation
PREPARATION BEFORE WASHING PREPARATION BEFORE WASHING PREPARATION BEFORE WASHING PREPARATION BEFORE WASHING ADJUST THE FOOT TO STABILIZE INSTALL THE WATER THE WASHING MACHINE. INLET HOSE. Adjustable foot. Rotating clockwise will extend the foot, and rotating counterclockwise will shorten the foot. Slightly incline the washer first and loosen the adjustable foot knob TWO WATER INLET HOSES prior to rotating. -
Page 11: Parts And Features
PARTS AND FEATURES PARTS AND FEATURES PARTS AND FEATURES PARTS AND FEATURES POWER LINE WATER INLET TOP LID FRAME DRAIN HOSE (UPPER DRAIN ONLY) CONTROL PANEL CABINET ADJUSTABLE LEG WATER INLET HOSE INCLUDED WITH WASHING MACHINE FOR LOWER DRAIN SYSTEM USE ONLY... - Page 12 CONTROL PANEL CONTROL PANEL CONTROL PANEL CONTROL PANEL START/PAUSE DELAY Press this button after program Press this button to preset the selection to start the washer. delay function. For less than WATER LEVEL Press this button again to pause 24 hours, each time the button the current program.
-
Page 13: Washing Cycle Guide
QUICK START GUIDE QUICK START GUIDE QUICK START GUIDE QUICK START GUIDE 1. Install the Washing Machine 9. Press the START/PAUSE Button 8. Select the Desired 2. Load the Washer Wash Cycle Program 7. Plug-in the Power 3. Add Measured Supply Detergent 6. - Page 14 MAIN WASHING PROCEDURE MAIN WASHING PROCEDURE MAIN WASHING PROCEDURE MAIN WASHING PROCEDURE INSTRUCTIONS FOR NORMAL WASH PROGRAM • The NORMAL wash cycle program is the easiest, most convenient and common wash cycle program to use. When the user presses the POWER button and then immediately presses the START/PAUSE button, the NORMAL wash cycle program is activated.
- Page 15 SPECIAL FUNCTIONS SPECIAL FUNCTIONS SPECIAL FUNCTIONS SPECIAL FUNCTIONS DELAY FUNCTION DELAY FUNCTION LAYOUT The washing machine can be delayed by using this preset feature: Press the DELAY button to add ONE HOUR to the digital delay indicator. Switch the power to ON. After the number reaches 24, press the DELAY button to add SIX HOURS Open the water tap and hang the drain hose.
- Page 16 FULL AUTOMATIC WASH PROGRAM GUIDE FULL AUTOMATIC WASH PROGRAM GUIDE FULL AUTOMATIC WASH PROGRAM GUIDE FULL AUTOMATIC WASH PROGRAM GUIDE WASHER WATER LEVEL WASH TIME RINSE SPIN TOTAL NOTES FUNCTION TIME TIME TIME DEFAULT SCOPE WASH TIME NORMAL 11 MIN 30 SEC 2 MIN 5 MIN 42 MIN...
-
Page 17: Maintenance And Care / Error Codes
MAINTENANCE AND CARE MAINTENANCE AND CARE MAINTENANCE AND CARE MAINTENANCE AND CARE / ERROR CODES ERROR CODES ERROR CODES ERROR CODES END OF PROGRAM MAINTENANCE The washing machine will sound off a buzz at Use gentle wash cloths to wipe off any water the end of any program operation to remind and dirt residues from the surface of the the user to take out the laundry or to operate it... -
Page 18: Troubleshooting
TROUBLESHOOTING TROUBLESHOOTING TROUBLESHOOTING TROUBLESHOOTING When the washing machine needs servicing, please contact our customer service department, and a representative will try and diagnose issues regarding your appliance. Please do not dismantle the washing machine without prior permission. Doing so will void your warranty. If the washing machine fails to operate properly, or it sounds an alarm, please check the follow guidelines for possible solutions to common problems or alarm indicators. -
Page 19: Warranty Information
LIMITED WARRANTY Midea Amerca corp Corporation warrants each new 1.6 / 2.1 CU. FT. Washing Machine to be free from defects in material and workmanship, and agrees to remedy any such defect or to furnish a new part(s), at the company’s option, for any part(s) of the unit that has failed during the warranty period. -
Page 20: Reqistration Info And Registratton Card
Midea America Corp. 11800 NW 100th Rd. Suite 4 Medley, FL 33178 Protect your product: We will keep the model number and date of purchase of your new Midea product on file to help you refer to this information in the event of an insurance claim such as fire or theft. - Page 21 Lavadora portatil de 1.6/2.1 pies cubicos MANUAL DEL USUARIO MODELO MAE50-S1102 & MAE70-S1402 Midea America Corp. 4 Campus Drive Parsippany, NJ 07054, U.S.A Cusomer Service 1866-646-4332 www.mideaamericacorp.com...
- Page 22 ÍNDICE Indicaciones de seguridad importantes......................23 Instruccionesde instalación..........................28 Preparación antes del lavado........................30 Partes y características..........................31 Guía de ciclos de lavado..........................33 Cuidado y mantenimiento / Códigos de error....................36 Solución de problemas..........................37 Información de la garantía..........................38 Antes de usar su lavadora, lea con cuidado este manual y guárdelo para su consulta posterior. LEA ESTE MANUAL DEL USUARIO En este manual encontrarámucha información útil para mantener y usar correctamente su lavadora.
- Page 23 INDICACIONES DE SEGURIDAD IMPORTANTES INDICACIONES DE SEGURIDAD IMPORTANTES INDICACIONES DE SEGURIDAD IMPORTANTES INDICACIONES DE SEGURIDAD IMPORTANTES Para reducir el riesgo de incendio, choque eléctrico o lesiones personales al usar su electrodoméstico, siga estas pautas básicas de precaución, que incluyen lo siguiente: Lea todas las instrucciones antes de usar este aparato.
- Page 24 No sabotee los controles. No permita que los niños jueguen dentro o encima del aparato. Mantenga una vigilancia estricta del aparato cuando se use cerca de niños. Este aparato debe conectarse a un tomacorriente adecuado con la capacidad eléctrica correcta según se especifica en la etiqueta con el valor nominal.
- Page 25 SEGURIDAD Y PRECAUCIONES SEGURIDAD Y PRECAUCIONES SEGURIDAD Y PRECAUCIONES SEGURIDAD Y PRECAUCIONES Con el fin de evitar lesiones a usted y otras personas, o daños materiales, siga estas indicaciones: Siga estas indicaciones visuales: No introduzca su mano ni saque No desensamble ni ensamble la prendas de la tina giratoria antes de lavadora sin autorización .
- Page 26 Advertencia & Precaucion No lave prendas que hayan estado Evite lesiones: no permita que los en contacto con keroseno, gasolina, niños se suban a la máquina ni se alcohol ni otros químicos inflamables. asomen a la tina giratoria. No coloque incienso, artículos No dañe el cable ni el enchufe inflamables ni otras fuentes de calor eléctrico para evitar una descarga,...
- Page 27 No lave: Impermeables, ropa de pesca, Utilice una fuente eléctrica correcta. chaquetas pesadas ni otras prendas Tomacorriente trifásico similares. (sin adaptadores). Quite el enchufe trifásico del Limpie con regularidad el enchufe tomacorriente cuando la máquina no eléctrico para eliminar polvo y suciedad esté...
- Page 28 INSTRUCCIONES DE INSTALACI INSTRUCCIONES DE INSTALACIÓ Ó Ó Ó N N N N INSTRUCCIONES DE INSTALACI INSTRUCCIONES DE INSTALACI DESEMBALAJE • Quite el embalaje, los cojines de espuma y el cartón de la parte inferior. Base de • Abra la puerta de la lavadora y saque los accesorios. cojín de espuma •...
- Page 29 INSTALACI INSTALACIÓ Ó Ó Ó N R N RÁ Á Á Á PIDA CON EL ADAPTADOR PARA PIDA CON EL ADAPTADOR PARA INSTALACI INSTALACI PIDA CON EL ADAPTADOR PARA PIDA CON EL ADAPTADOR PARA FREGADERO FREGADERO FREGADERO FREGADERO Cuando instale el adaptador para fregadero al grifo del fregadero, siga estos pasos: Quite el aireador de la boquilla del grifo y determine el tamaño y tipo de grifo (roscado interior o exterior) Cuando determine el tamaño y el tipo del grifo, coloque la arandela de goma del tamaño correcto...
- Page 30 PREPARACI PREPARACIÓ Ó Ó Ó N ANTES DEL LAVADO PREPARACI PREPARACI N ANTES DEL LAVADO N ANTES DEL LAVADO N ANTES DEL LAVADO AJUSTE LA PATA PARA INSTALE LA ESTABILIZAR LA LAVADORA. MANGUERA DE ENTRADA DE AGUA. Pata ajustable. Al girar en el sentido de las manecillas del reloj se extenderá...
- Page 31 PARTES Y CARACTER PARTES Y CARACTER PARTES Y CARACTER PARTES Y CARACTERÍ Í Í Í STICAS STICAS STICAS STICAS LÍNEA ELÉCTRICA ENTRADA DE AGUA TAPA SUPERIOR MARCO MANGUERA DE DRENADO (SOLO DRENADO SUPERIOR) PANEL DE CONTROL GABINETE PATA AJUSTABLE MANGUERA DE ENTRADA DE AGUA INCLUIDA CON LA LAVADORA SOLO PARA EL SISTEMA DE DRENADO...
- Page 32 PANEL DE CONTROL PANEL DE CONTROL PANEL DE CONTROL PANEL DE CONTROL INICIO/PAUSA RETARDO Presione este botón para Presione este botón después de preestablecer la función de seleccionar el programa para NIVEL DE AGUA retardo. Para menos de 24 iniciar el ciclo de la lavadora. horas, cada vez que oprima Presione este botón de nuevo Presione este botón para...
- Page 33 GUÍ Í Í Í A DE INICIO R A DE INICIO R A DE INICIO R A DE INICIO RÁ Á Á Á PIDO PIDO PIDO PIDO 9. Presione el botón START/PAUSE 1. Instale la lavadora (INICIO/PAUSA) 8. Seleccione el programa 2.
- Page 34 PROCEDIMIENTO DE LAVADO PRINCIPAL PROCEDIMIENTO DE LAVADO PRINCIPAL PROCEDIMIENTO DE LAVADO PRINCIPAL PROCEDIMIENTO DE LAVADO PRINCIPAL INSTRUCCIONES PARA UN PROGRAMA DE LAVADO NORMAL • El programa de ciclo de lavado NORMAL es el más sencillo, cómodo y común de los programas de ciclo de lavado.
- Page 35 FUNCIONES ESPECIALES FUNCIONES ESPECIALES FUNCIONES ESPECIALES FUNCIONES ESPECIALES CONFIGURACIÓN DE LA FUNCIÓN DE FUNCIÓN DE RETARDO RETARDO La lavadora se puede retardar usando esta función preestablecida: Presione el botón DELAY (RETARDO) y agregue UNA HORA en el indicador digital de ENCIENDA la máquina.
- Page 36 GUÍ Í Í Í A DE PROGRAMAS DE LAVADO AUTOM A DE PROGRAMAS DE LAVADO AUTOMÁ Á Á Á TICO TICO A DE PROGRAMAS DE LAVADO AUTOM A DE PROGRAMAS DE LAVADO AUTOM TICO TICO COMPLETOS COMPLETOS COMPLETOS COMPLETOS FUNCIÓN DE LA NIVEL DE AGUA TIEMP DE LAVADO TIEMPO DE...
- Page 37 CUIDADO Y MANTENIMIENTO CUIDADO Y MANTENIMIENTO / C C C C Ó Ó Ó Ó DIGOS DE ERROR CUIDADO Y MANTENIMIENTO CUIDADO Y MANTENIMIENTO DIGOS DE ERROR DIGOS DE ERROR DIGOS DE ERROR MANTENIMIENTO FIN DE PROGRAMA La lavadora sonará un timbre al final de cualquier Use paños suaves para limpiar el agua y los residuos programa para recordarle al usuario que debe sacar de suciedad de la superficie de la lavadora después...
- Page 38 SOLUCI SOLUCIÓ Ó Ó Ó N DE PROBLEMAS SOLUCI SOLUCI N DE PROBLEMAS N DE PROBLEMAS N DE PROBLEMAS Cuando la lavadora necesite servicio, comuníquese con nuestro departamento de servicio al cliente y un representante buscará y diagnosticará los problemas que tenga su aparato. No desmonte la lavadora sin permiso previo.
- Page 39 Midea America garantiza que todas las lavadoras nueves de 1.6/2.1 pies cúbicos carecen de defectos en el material y la mano de obra y acuerda solucionar cualquierade estos defectos o instalar la(s) parte(s) nueva(s) (a elección de la compañía) en caso de que la unidad haya fallado durante el periodo de garantía. Las partes y gastos de reparación están cubiertos en esta unidad por un periodo de un año a partir de la fecha de compra.
Need help?
Do you have a question about the MAE50-S1102 and is the answer not in the manual?
Questions and answers