
Related Manuals for Sencore Impulse 100E


Summary of Contents for Sencore Impulse 100E
- Page 1 Impulse 100E Network Encoder and Streamer User Manual July 2020 www.sencore.com | 1.605.978.4600 Revision 1.0...
- Page 2 This document may also have links to third-party web pages that are beyond the control of Sencore. The presence of such links does not imply that Sencore endorses or recommends the content on those pages. Sencore acknowledges the use of third-party open source software and licenses in some Sencore products.
- Page 3 Impulse 100E– User Manual Revision History Date Version Description Author 05/28/2020 Initial Release Page 3 (48)
- Page 4 Impulse 100E– User Manual Safety Instructions Read these instructions Keep these instructions Heed all warnings Follow all instructions Do not use this apparatus near water Clean only with dry cloth Do not block any ventilation openings. Install in accordance with the manufacturer’s instructions...
- Page 5 (at the breaker) and send your equipment to be serviced by a qualified technician. To reduce the risk of shock the Impulse 100E must be connected to a mains socket outlet with a protective earthing connection. ...
- Page 6 Note: If any option cables were ordered with the Impulse 100E, they will be contained in the box as well. If any of these items were omitted from the packaging of the Impulse 100E please call 1- 800-SENCORE to obtain a replacement. Manuals for Sencore products can be downloaded at www.sencore.com...
-
Page 7: Table Of Contents
Impulse 100E Front Panel Overview ................. 17 Section 4 Operating the Web Interface ............19 Impulse 100E Web Interface Overview ..............20 4.1.1 Logging in to the Impulse 100E Web Interface ............ 20 4.1.2 Status Page ......................21 Live Mode ........................22 4.2.1... -
Page 8: Section 1 Overview
Impulse 100E– User Manual Section 1 Overview Introduction This section includes the following topics: Product Introduction ..................... 9 Front Panel Overview ....................9 Rear Panel Overview ....................9 Page 8 (48) -
Page 9: Product Introduction
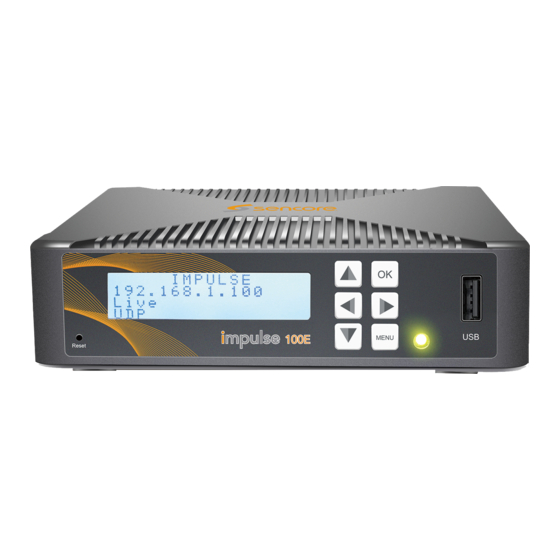
Front Panel Overview The Impulse 100E can be controlled from the front panel with the LCD screen and buttons that are shown below in Figure 1. A detailed description of using the front panel can be found in Section 3. - Page 10 Figure 2: Impulse 100E Unit Back Panel 1. SMA Antenna 2. SDI In (exclusive to the Impulse 100E-01) 3. RF out – for QAM modulation (exclusive to Impulse 100E-02) 4. YPbPr In 5. AV/CCIN – Audio/Video or closed caption input 6.
-
Page 11: Section 2 Installation
Impulse 100E– User Manual Section 2 Installation Introduction This section includes the following topics: Installation Preparation ....................12 Equipment Wiring and Connection ................12 Maintenance ......................12 Network Setup via Front Panel .................. 12 Page 11 (48) -
Page 12: Installation Preparation
Equipment Wiring and Connection Only use the supplied power connector or a 12V, 2A equivalent. Connect to the RJ45 port with a CAT5 cable. Access the Impulse 100E management interface with a PC on the same network or directly connected to the Impulse. - Page 13 Impulse 100E– User Manual Work Mode 3. Use the buttons to move the cursor to System “Setting”, and then press the button to enter the system menu. Network 4. Use the buttons to move the cursor to “Network”, then press the...
-
Page 14: Dhcp
The IP will now be accessible on the network it was configured to! DHCP 2.4.2 The Impulse 100E can be configured to use DHCP to obtain an IP address/Subnet Mask/Gateway. 1. The native screen on the Impulse 100E is the “Status” IMPULSE 100E 192.168.1.100... - Page 15 6. If the DHCP setting is currently set to “Disable”, press the DHCP: Disable DNS: Static OK button to enable DHCP. Note: It may take up to a minute for the Impulse 100E to obtain an IP address. Page 15 (48)
-
Page 16: Section 3 Operating The Front Panel
Impulse 100E– User Manual Section 3 Operating the Front Panel Introduction This section includes the following topics: Impulse 100E Front Panel Overview ................. 17 Page 16 (48) -
Page 17: Impulse 100E Front Panel Overview
Figure 3: Front Panel Navigation Keys The screen below is the idle screen of the Impulse 100E. This idle screen shown in Figure 4 displays the management IP address of the unit as well as the status of the input/output. - Page 18 Impulse 100E– User Manual Press the button in order to view and change additional configuration or exit from additional menus. Use the arrow keys to cycle through the options and to enter additional menus and toggle settings. Figure 5 on the next page shows the first front panel menu after the idle screen.
-
Page 19: Section 4 Operating The Web Interface
Impulse 100E– User Manual Section 4 Operating the Web Interface Introduction This section includes the following topics: Impulse 100E Web Interface Overview ..............20 Live Mode ........................22 Playback Mode ......................30 Recording Mode ......................31 System Settings Menu ....................32... -
Page 20: Impulse 100E Web Interface Overview
Impulse 100E Web Interface Overview Logging in to the Impulse 100E Web Interface 4.1.1 To open the Impulse 100E web interface, use one of the following supported browsers and navigate to the unit’s IP address: Firefox 3.5 & above ... -
Page 21: Status Page
Impulse 100E– User Manual Status Page 4.1.2 After logging into the web interface of the Impulse 100E, the user will be taken to the Status page as seen in Figure 7 below. Figure 7: Status Page Impulse 100E provides 3 working modes: Live, Playback and Recording. Click to enter the desired working mode. -
Page 22: Live Mode
Impulse 100E– User Manual Live Mode To set the parameters for HD/SD channel encoding, as well as the broadcasting mode parameters. Basic Setting Figure 8: Live Mode This interface provides the main parameters of encoding and broadcasting. Please check and set the parameters according to the following items: ... - Page 23 Impulse 100E– User Manual UDP setting User can set the IP address and port parameters. Figure 9: UDP Setting RTSP setting User can view RTSP URL (Ethernet) and RTSP URL (Wireless) parameters. Figure 10: RTSP Setting Page 23 (48)
- Page 24 Impulse 100E– User Manual HLS setting User can view HLS URL (Ethernet) and HLS URL (Wireless) parameters. Figure 11: HLS Setting Modulation setting User can set the Frequency from 66000 to 858000 kHz. Figure 12: Modulation Setting QAM mode supports 64/256QAM output.
- Page 25 Impulse 100E– User Manual The output Level Range is 90-116 dBu. Figure 14: Output Level Range Page 25 (48)
-
Page 26: Advanced Settings
Impulse 100E– User Manual Advanced Settings 4.2.1 To configure the advanced setting for encoding and streaming, please click the “Advance Settings”. It will reflect to the new page to set the detailed parameters for Live Mode. It includes three parts of configuration: Stream info, Video info and Audio info... - Page 27 Impulse 100E– User Manual Video Info Figure 17: Video Info Page 27 (48)
- Page 28 Impulse 100E– User Manual Audio Info Figure 18: Audio Info Setting Range Description Video Source HDMI, AV, YPbPr, SDI Based on the source User selected on the basic setting page Video PID 32-8190 Video Encoding Mpeg-2, H.264 Mode Video Resolution...
- Page 29 Audio Sampling Automatic, 48, 44.1, 32 (kHz) Specifies audio sampling rate the Rate Impulse 100E will encode to. Live Video Status Click the icon on the right-bottom corner to direct User to the Live Video Status page. The page displays and updates the real-time status of encoding and streaming.
-
Page 30: Playback Mode
Basic Settings Tab 4.3.1 1. Plug one USB disk in the USB port on the front panel of the Impulse 100E to play the TS from the disk. 2. Click the Playback icon to get to the playback page, which will list all the available TS from the USB Disk. -
Page 31: Recording Mode
3. Click the status icon to reflect to the Status Page. Figure 21: Recording Mode Page Note: After exceeding the minimum available free USB space of 10MB, the Impulse 100E will overwrite the oldest file created by it. This unit will not overwrite pre-existing files on the USB. -
Page 32: System Settings Menu
System Settings Menu The system settings page, as seen in Figure 23, contains information and operations regarding the Impulse 100E’s base system. On this page, the software version and licensing can be viewed and upgraded, network settings can be configured and the Impulse can be defaulted or rebooted remotely. - Page 33 Impulse 100E– User Manual Ethernet To set up equipment management access IP address, Subnet Mask, Gateway and DNS. The Impulse 100E can be configured to use DHCP to obtain an IP address/Subnet Mask/gateway. Figure 25: Ethernet Page Wi-Fi Hotspot This page shows how to set a Wi-Fi Hotspot which enables PC, Hand phone or Tablet to log in to the device via wireless connection.
- Page 34 Impulse 100E– User Manual Wi-Fi Enable Impulse 100E Wi-Fi function to connect to wireless LAN. Figure 27: Wi-Fi Page Note: Wi-Fi hotspot and Wi-Fi reception have the same range. When it is used as a hotspot, Wi-Fi reception is disabled automatically, vice versa.
- Page 35 Impulse 100E– User Manual Upgrade To upgrade the software, select a file and click the Arrow button. It will take several minutes to finish the upgrading and after that, it will reboot automatically. Figure 29: Upgrade Page Development To export and clear the logs, check the debug info, export configuration, upgrade license, and view system information.
- Page 36 Impulse 100E– User Manual Debug: User can check the debug info which is usually used by R&D for troubleshooting. Figure 32: Debug Page Configuration: User can export configuration (including system and service configuration) in this tab. Figure 33: Configuration Page License: User can export and upgrade license, please do reboot to activate the uploaded license.
- Page 37 Impulse 100E– User Manual System Information: User can check system info in this tab. Figure 35: System Information Page Page 37 (48)
-
Page 38: Section 5 Appendix
Impulse 100E– User Manual Section 5 Appendix Introduction This section includes the following appendices: – Acronyms and Glossary ............39 Appendix A – Using Manual RTMP Streaming for YouTube ...... 41 Appendix B Page 38 (48) -
Page 39: Appendix A - Acronyms And Glossary
Impulse 100E– User Manual Appendix A – Acronyms and Glossary AAC: Advanced Audio Coding AC-3: Also known as Dolby Digital AV: Audio Video Bit Rate: The rate at which the compressed bit stream is delivered from the channel to the input of a decoder. - Page 40 Impulse 100E– User Manual MPEG: Refers to standards developed by the ISO/IEC JTC1/SC29 WG11, Moving Picture Experts Group. MPEG may also refer to the Group. MPEG-2: Refers to ISO/IEC standards 13818-1 (Systems), 13818-2 (Video), 13818-3 (Audio), 13818-4 NTSC: National Television System Committee PCR: Program Clock Reference PID: Packet Identifier.
-
Page 41: Appendix B - Using Manual Rtmp Streaming For Youtube
7) Enter the stream key from the receiving website into the “Stream” field. 8) Click “Start”. The Impulse 100E may take up to five minutes to prepare the stream. 9) It will display “RTMP Normal” if the connection was successful. - Page 42 Impulse 100E– User Manual Figure 37: Live Service: RTMP Normal 10) The Impulse 100E is now streaming to the receiving website and is ready for viewing. Manual YouTube RTMP Streaming This procedure outlines the steps from “General RTMP Streaming”, using YouTube as the receiving website with emphasis on collecting the “Uploading Node”...
- Page 43 Impulse 100E– User Manual Figure 39: YouTube Studio Dashboard Overview 5) Click the “Go Live” icon as indicated in Figure 39 above. 6) The YouTube Studio “Go Live” menu has options for managing all current streams as well as scheduling upcoming streams. Click the icon in the upper left corner as indicated in Figure 40 to expand the navigation pane.
- Page 44 Impulse 100E– User Manual Figure 42: Stream Creation Prompt 9) Enter a title in the “Create a title” field and choose an “Audience” similarly to Figure 43, and then click “Create Stream”. Page 44 (48)
- Page 45 10) The “Stream Menu” that follows, displayed in Figure 44 on the next page, contains analytics about the incoming stream as well as necessary information to link the Impulse 100E encoder to the YouTube stream instance. Click to select the “Stream Settings” option, underneath the icon to display the “Stream Key”.
- Page 46 11) As shown in Figure 45, copy and paste the randomly generated “Stream key” from YouTube to the “Uploading Node” on the Impulse 100E, then copy and paste the “Stream URL” from YouTube to the “URL” on the Impulse 100E. Click Apply.
- Page 47 Impulse 100E– User Manual Figure 45: Stream Key and Stream URL Locations 12) On the Impulse, click “Start”. The Impulse 100E may take up to five minutes to prepare the stream. 13) It will display “RTMP Normal” if the connection was successful.
- Page 48 Impulse 100E– User Manual Figure 47: Stream Menu Receiving RTMP Page 48 (48)
Need help?
Do you have a question about the Impulse 100E and is the answer not in the manual?
Questions and answers