Sencore Impulse 200E User Manual
Network encoder and streamer
Hide thumbs
Also See for Impulse 200E:
- Quick start (4 pages) ,
- Quick start (2 pages) ,
- User manual (103 pages)

Related Manuals for Sencore Impulse 200E


Summary of Contents for Sencore Impulse 200E
- Page 1 Impulse 200E Network Encoder and Streamer User Manual July 2020 www.sencore.com | 1.605.978.4600 Revision 1.3...
- Page 2 This document may also have links to third-party web pages that are beyond the control of Sencore. The presence of such links does not imply that Sencore endorses or recommends the content on those pages. Sencore acknowledges the use of third-party open source software and licenses in some Sencore products.
- Page 3 Impulse 200E– User Manual Revision History Date Version Description Author 10/10/2018 Initial Release 07/11/2019 Update for RTMPS Feature 04/06/2020 Rework for YouTube/Facebook Update BCR 04/30/2020 Proof-reading/Changing pictures/Updating Unit Model Name Page 3 (68)
- Page 4 Impulse 200E– User Manual Safety Instructions • Read these instructions. • Keep these instructions. • Heed all warnings. • Follow all instructions. • Do not use this apparatus near water. • Clean only with dry cloth. • Do not block any ventilation openings. Install in accordance with the manufacturer’s instructions.
- Page 5 • For the Impulse 200E, the mains plug is the main disconnect and should remain readily accessible and operable at all times. Warning: Changes or modifications to this unit not expressly approved by the party responsible for compliance could void the user’s authority to operate the...
- Page 6 Impulse 200E– User Manual Package Contents The following is a list of the items that are included along with the Impulse 200E: 1. Quick Start Guide 2. AC Power Supply 3. A/V Adapter Cable Note: If any option cables were ordered with the Impulse 200E, they will be included in the box as well.
-
Page 7: Table Of Contents
Static IP Address/Subnet Mask/Gateway ............. 12 2.4.2 DHCP ........................14 Section 3 Operating the Front Panel ............... 15 Impulse 200E Front Panel Overview ................. 16 Section 4 Operating the Web Interface ............18 Impulse 200E Web Interface Overview ..............19 4.1.1 Logging into the Impulse 200EWeb Interface ............ -
Page 8: Section 1 Overview
Impulse 200E– User Manual Section 1 Overview Introduction This section includes the following topics: Product Introduction ..................... 9 Front Panel Overview ....................9 Rear Panel Overview ....................10 Page 8 (68) -
Page 9: Product Introduction
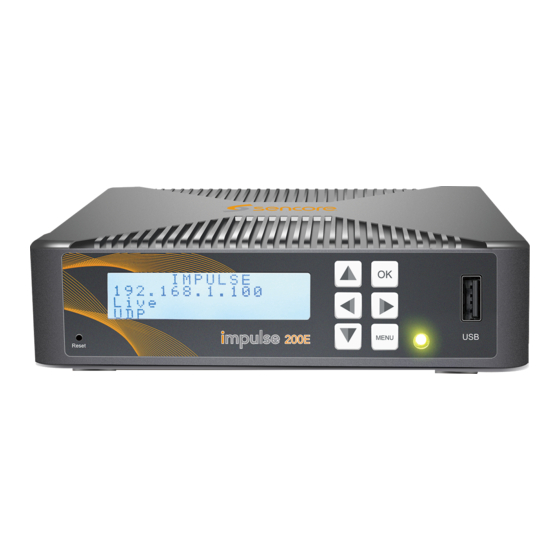
Front Panel Overview The Impulse 200E can be controlled from the front panel with the LCD screen and buttons that are shown below in Figure 1. A detailed description of using the front panel can be found in Section 3. -
Page 10: Rear Panel Overview
Impulse 200E– User Manual Rear Panel Overview The Impulse 200E comes standard with all of the hardware back panel features shown and listed below except where noted as an Impulse 200E-01 exclusive option. Refer to the Figure 2 at the top of the next page. -
Page 11: Section 2 Installation
Impulse 200E– User Manual Section 2 Installation Introduction This section includes the following topics: Installation Preparation ....................12 Equipment Wiring andConnection ................12 Maintenance ......................12 Network Setup via Front Panel .................. 12 Page 11 (68) -
Page 12: Installation Preparation
Equipment Wiring and Connection Only use the supplied power connector or a 12V, 2A equivalent. Connect to the RJ45 port with a CAT5 cable. Access the Impulse 200E management interface with a PC on the same network or directly connected to the Impulse. - Page 13 Impulse 200E– User Manual NetMode 5. Use the buttons to move the cursor to Host IP “NetMode”, then press the button. Host GateWay Host Mask DHCP: Disable 6. Confirm that the unit is currently set to “DHCP: Disable”. DNS: Static If it is, press the MENU button to return to the network menu.
-
Page 14: Dhcp
Host Mask DHCP: Disable 6. If the DHCP setting is currently set to “Disable”, press DNS: Static button to enable DHCP. Note: It may take up to a minute for the Impulse 200E to obtain an IP address. Page 14 (68) -
Page 15: Section 3 Operating The Front Panel
Impulse 200E– User Manual Section 3 Operating the Front Panel Introduction This section includes the following topics: Impulse 200E Front Panel Overview ................. 16 Page 15 (68) -
Page 16: Impulse 200E Front Panel Overview
Impulse 200E– User Manual Impulse 200E Front Panel Overview The Impulse 200E front panel allows the user to configure all settings that are present in the web interface using the buttons indicated in Figure 3. Figure 3: Front Panel Navigation Keys The screen below is the idle screen of the Impulse 200E. - Page 17 Impulse 200E– User Manual The highlighted line indicates the cursor, which can be moved with the arrow keys. The button will select the highlighted line and proceed to the next menu. Pressing the will go back to the previous menu, in this case returning to the idle screen.
-
Page 18: Section 4 Operating The Web Interface
Section 4 Operating the Web Interface Introduction This section includes the following topics: Impulse 200E Web Interface Overview ..............19 Live Service/Streaming Settings Menu ..............22 Record Settings Menu ....................29 Playback Settings Menu .................... 33 Overlay Settings Menu ....................38 System Settings Menu .................... -
Page 19: Impulse 200E Web Interface Overview
Impulse 200E– User Manual Impulse 200E Web Interface Overview 4.1.1 Logging into the Impulse 200E Web Interface To open the Impulse 200E web interface, use one of the following supported browsers and navigate to the unit’s IP address: • Firefox 3.5 & above •... -
Page 20: Status Page
4.1.2 Status Page After logging into the web interface of the Impulse 200E, the user will be taken to the Status page as seen in Figure 7 below. This screen can be used to view the information about the HDMI or SDI input, the current progress on a recording and also the status of the encoder or playback output. -
Page 21: Menu Navigation Tab
Impulse 200E– User Manual 4.1.3 Menu Navigation Tab To access additional menus, click the icon in the upper left corner. A dropdown menu will appear, displaying the menu options shown in Figure 8. Figure 8: Menu Navigation Tab Clicking any of these options will direct the user to different pages for viewing and changing configuration. -
Page 22: Live Service/Streaming Settings Menu
The Live Service/Streaming Setting page in Figure 9 is used to configure the encoding and streaming settings for the Impulse 200E. It is divided into two categories: Basic Settings and Advanced Settings. The Basic Settings are primarily used for quick setup using preset configuration, while the Advanced Settings are able to control low level encoder settings. -
Page 23: Basic Settings Tab
Setting Range Description Input HDMI Used to specify which baseband output is to be encoded SDI (only available on Impulse 200E- Mode Manual Which type of RTMP(S) streaming to perform. Selecting Manual will YouTube add more settings to the Basic Facebook Settings tab. - Page 24 Impulse 200E– User Manual Figure 14: Basic Settings Tab – Manual RTMP(S) Setting Range Description Input HDMI Used to specify which baseband output is to be encoded SDI (only available on Impulse 200E-01) Output Determines what streaming type the Impulse 200E will output...
- Page 25 Impulse 200E– User Manual Figure 16: Basic Settings Tab – UDP Setting Range Description Input HDMI Used to specify which baseband output is to be encoded SDI (only available on Impulse 200E-01) Output Determines what streaming type the Impulse 200E will output...
- Page 26 Impulse 200E– User Manual Figure 18: Basic Settings Tab – HLS Setting Range Description Input HDMI Used to specify which baseband output is to be encoded SDI (only available on Impulse 200E-01) Output Determines what streaming type the Impulse 200E will output...
- Page 27 User defined name for the stream RTSP URL Destination address for the RTSP output. Address will be influenced by management IP of the Impulse 200E and “Stream Name” (row above). Video Profile Video Resolution: 1080p, 720p, 576p This option will choose a preset...
-
Page 28: Advanced Settings Tab
“Audio IN” port on the back panel (see section 1.3). Enable / Disable Impulse 200E-00: enabling this will add Line 21 captions from an external composite source routed through the “CC IN” port on the back panel (see section 1.3). -
Page 29: Record Settings Menu
This Record Setting page in Figure 24 is used to configure the recording settings for the Impulse 200E. Here the user can specify options such as the storage device to hold the recording as well as the size, name and format of the file. - Page 30 Impulse 200E– User Manual *Note: The Impulse 200E only supports FAT32 file systems for USB and SD cards. For exFAT and other file systems that cannot be reformatted through conventional means, https://www.diskpart.com/articles/format- use the AOMEI executable found at this link: 128gb-usb-fat32-0310.html...
-
Page 31: Basic Settings Tab
The “Basic Settings” tab, as shown in Figure 27, is where to choose configurations for recording. By default, the Impulse 200E is set to record in “Loop” mode, which creates a series of 2~3 minute recordings until reaching the maximum USB or SD storage space. - Page 32 Impulse 200E– User Manual For “Record Mode”, choosing “Size” will add new dropdown options, “Record Size” and “Loop”, as seen in Figure 29 below. A description of each new option can be found in Figure 30. Figure 29: Record Settings Page - Size...
-
Page 33: Playback Settings Menu
The Playback Settings menu, in Figure 33 below, is for configuring settings to stream captures recorded by the Impulse 200E (see section 4.3) from a USB or SD storage device over RTMP, UDP, RTSP and HLS. There are two sub-menus: “Playlist” for choosing files to playback and “Output Settings”... -
Page 34: Playlist Settings
USB or SD storage device; selecting a capture and clicking “OK” will add it to the playlist. Figure 37 on the next page is an example of a newly created playlist, named “Sencore” with a file named “SencoreRecording”,... -
Page 35: Output Settings
The Output Settings tab as seen in Figure 38 is used to configure the streaming type and destination for the recorded file. By default, the Impulse 200E is configured for Automatic RTMP streaming through YouTube. The table in Figure 39 describes these settings. - Page 36 Impulse 200E– User Manual Figure 40: Output Settings Tab – Manual RTMP Setting Range Description Mode Manual / YouTube YouTube is for Automatic RTMP streaming to YouTube (see Appendix B). Manual is for configuring the stream to an alternative RTMP receiver (see Appendix D).
- Page 37 HLS URL Destination address for the HLS output. Address will be influenced by management IP of the Impulse 200E. Figure 45: Output Settings Description – HLS When the output settings are changed to RTSP, the dropdown options will change to match Figure 46.
-
Page 38: Overlay Settings Menu
User defined name for the stream RTSP URL Destination address for the RTSP output. Address will be influenced by management IP of the Impulse 200E and “Stream Name” (row above). Figure 47: Output Settings Description – RTSP Overlay Settings Menu The “Overlay Settings”... -
Page 39: Picture Overlay
Impulse 200E– User Manual Setting Range Description Overlay Mode Enables the text overlay feature Title Only Text User defined text to superimpose on the output Color White, Yellow, Green Color of the text Font Size 20~100 Size of the text... - Page 40 Scaled width of the picture Size Height 10~200 Scaled height of the picture Figure 53: Text Overlay Descriptions Click the icon and then upload the image to use. Figures 54 and 55 show an example of an uploaded Sencore logo. Page 40 (68)
- Page 41 Impulse 200E– User Manual Figure 54: Uploaded Image Select the uploaded picture, then click “Apply”, and the uploaded image will overlay the stream output as seen in Figure 54 below. This example uses the settings from Figure Figure 55: Picture Overlay Example...
-
Page 42: System Settings Menu
Figure 57 at the top of the next page. In these tabs, the software and licenses can be upgraded, and preset configurations can be saved and applied. The unit can also be rebooted or reset to factory settings. In addition, logs of the Impulse 200E’s activities can be exported for troubleshooting and viewing of overall performance. - Page 43 Impulse 200E– User Manual Figure 57: System Operations Page 43 (68)
-
Page 44: Section 5 Appendices
Impulse 200E– User Manual Section 5 Appendices Introduction This section includes the following appendices: Appendix A – Acronyms and Glossary .............. 45 Appendix B – Using Automatic YouTube Streaming ......... 47 Appendix C – Using Automatic Facebook Streaming ........52 Appendix D –... -
Page 45: Appendix A - Acronyms And Glossary
Impulse 200E– User Manual Appendix A – Acronyms and Glossary AAC: Advanced Audio Coding AC-3: Also known as Dolby Digital AV: Audio Video Bit Rate: The rate at which the compressed bit stream is delivered from the channel to the input of a decoder... - Page 46 Impulse 200E– User Manual Mbps: 1,000,000 bits per second MPEG: Refers to standards developed by the ISO/IEC JTC1/SC29 WG11, Moving Picture Experts Group. MPEG may also refer to the Group. MPEG-2: Refers to ISO/IEC standards 13818-1 (Systems), 13818-2 (Video), 13818-3...
-
Page 47: Appendix B - Using Automatic Youtube Streaming
YouTube and bypassing the need for manual entry of the URL or Stream Key on the Impulse 200E. It is necessary to authorize the device with YouTube before streaming (note: the “Automatic YouTube”... - Page 48 Impulse 200E– User Manual 6) Copy the randomly generated code from Figure 59 on the previous page (the code shown in this manual is only an example and should not be used). 7) Click on the URL shown in Step 2 in Figure 59, and paste the randomly generated code in resemblance to Figure 60 below.
- Page 49 This tab is no longer needed and can be closed. Figure 62: Successful Device Connection 11) Return to the Impulse 200E “Live Service/Streaming Settings” page, and confirmation of authentication will display as seen in Figure 63. Figure 63: Successful Authentication 12) Click “Continue”...
- Page 50 Figure 65 below. Figure 65: Impulse 200EStreaming to YouTube 14) The Impulse 200E is now streaming to YouTube. Clicking the icon from Figure 65 on the previous page will navigate to the newly created RTMP stream on YouTube.
- Page 51 Impulse 200E– User Manual Figure 66: Output Status 15) Navigate to the “Status Page” (section 4.1.2) and confirm the “Output Status” is now “Good” as seen above in Figure 66. Page 51 (68)
-
Page 52: Appendix C - Using Automatic Facebook Streaming
The Impulse 200E can interface with Facebook and set up an RTMPS stream automatically, creating a new stream instance with Facebook and bypassing the need for manual entry of the URL or Stream Key on the Impulse 200E. It is necessary to authorize the device with Facebook before streaming. - Page 53 Impulse 200E– User Manual 6) Copy the randomly generated code from Figure 68 on the previous page (the code shown in this manual is only an example and should not be used). 7) Click on the URL in Step 2 in Figure 68 and paste the randomly generated code similarly to Figure 69 below.
- Page 54 Impulse 200E– User Manual Figure 71: Successful Device Connection 10) Return to the Impulse 200E “Live Service/Streaming Settings” page and confirmation of authentication will display as seen in Figure 72. Figure 72: Successful Authentication 11) Click “Continue” on the prompt from Figure 72; the newly authorized Impulse 200E will display information about the status of the stream as well as new options for stream configuration (Figure 73 on the next page, see section 4.2.1...
- Page 55 When finished, it will resemble Figure 74 below. Figure 74: Impulse 200EStreaming to Facebook 13) The Impulse 200E is now streaming to Facebook. Clicking the icon from Figure 74 above will navigate to the newly created RTMPS stream on Facebook.
- Page 56 Impulse 200E– User Manual 14) Navigate to the “Status Page” (section 4.1.2) and confirm the “Output Status” is now “Good” as shown above in Figure 75. Page 56 (68)
-
Page 57: Appendix D - Using Manual Rtmp Streaming
Impulse 200E– User Manual Appendix D – Using Manual RTMP Streaming The Impulse 200E can be configured for streaming to any website capable of receiving RTMP. It is necessary to create a new stream instance on the intended receiving platform and enter the corresponding URL and stream key on the Impulse 200E (note: the “Manual RTMP”... - Page 58 Impulse 200E– User Manual Figure 77: Output Status 11) The Impulse 200E is now streaming to the receiving website and is ready for viewing. Manual YouTube RTMP Streaming This procedure outlines the steps from “General RTMP Streaming”, using YouTube as the receiving website with emphasis on collecting the “Uploading Node”...
- Page 59 Impulse 200E– User Manual Figure 80: Navigation Pane Icon 7) On the dropdown tab, confirm that “Stream” is selected (see Figure 81 below). Figure 81: Stream Option 8) On the prompt that follows, displayed in Figure 82, click “New Stream”.
- Page 60 10) The “Stream Menu” that follows, displayed in Figure 84 on the next page, contains analytics about the incoming stream as well as necessary information to link the Impulse 200E encoder to the YouTube stream instance. Click to select the “Stream Settings” option, underneath the icon to display the “Stream Key”.
- Page 61 11) As shown in Figure 85, copy and paste the randomly generated “Stream key” from YouTube to the “Uploading Node” on the Impulse 200E, then copy and paste the “Stream URL” from YouTube to the “URL” on the Impulse 200E. Click “Apply”.
- Page 62 Impulse 200E– User Manual 12) On the Impulse 200E, click “Start Streaming”. The Impulse 200E may take up to five minutes to prepare the stream. 13) Navigate to the “Status Page” (section 4.1.2) and confirm the “Output Status” is now “Good” similarly to Figure 86.
-
Page 63: Appendix E - Using Manual Rtmps Streaming
Impulse 200E– User Manual Appendix E – Using Manual RTMPS Streaming The Impulse 200E can be configured for streaming to any website capable of receiving RTMPS. It is necessary to create a new stream instance on the intended website and enter the corresponding URL and stream key on the Impulse 200E. - Page 64 Impulse 200E– User Manual 11) The Impulse 200E is now streaming to the receiving website and is ready for viewing. Manual Facebook RTMPS Streaming This procedure outlines the steps from “General RTMPS Streaming”, using Facebook as the receiving website with emphasis on collecting the “Uploading Node” and “URL” fields for the Impulse 200E.
- Page 65 6) Under “Live API”, the Server URL corresponds to the “URL” field on the Impulse 200E and the “Stream Key” corresponds to the “Uploading Node”. Copy and paste the items from Facebook to the fields on the Impulse 200E as shown in Figure 93 below.
- Page 66 Impulse 200E– User Manual Figure 93: Server URL and Stream Key Locations 7) On the Impulse 200E, click “Start Streaming”. The Impulse 200E may take up to five minutes to prepare the stream. 8) Navigate to the “Status Page” (section 4.1.2) and confirm the “Output Status” is now “Good”...
- Page 67 Impulse 200E– User Manual Figure 94: Output Status 9) Return to the “Stream Setup Page” on Facebook. Similarly to Figure 95 below, a thumbnail of the stream appears on the bottom right to indicate good connection. Figure 95: Stream Setup Page Receiving RTMPS...
- Page 68 Sencore Inc. 3200 Sencore Drive Sioux Falls, SD 57107 USA www.sencore.com Copyright © 2020 Sencore Inc. 1.605.978.4600...
Need help?
Do you have a question about the Impulse 200E and is the answer not in the manual?
Questions and answers