Table of Contents
Advertisement
Available languages
Available languages
en
USER MANUAL
Window Type
WWK
Frequency: 60Hz
Capacity: 5000BTU/h
Warning notices: Before using
this product, please read this
manual carefully and keep it
for future reference.
The design and specifications
are subject to change without
prior notice for product
improvement. Consult with
your dealer or the manufacturer
for details.
WWK05CR01N-B
version A - 10 - 2018
version B - 10 - 2018 (PREVIEW01)
www.midea.com
Advertisement
Table of Contents

Related Manuals for Arctic King WWK Series


Summary of Contents for Arctic King WWK Series
- Page 1 USER MANUAL Window Type Frequency: 60Hz Capacity: 5000BTU/h Warning notices: Before using this product, please read this manual carefully and keep it for future reference. The design and specifications are subject to change without prior notice for product improvement. Consult with your dealer or the manufacturer for details.
- Page 2 Owner’s Manual Safety Precautions ..................3 Operating Instructions ................. 8 Installation Instructions ................13 Care and Cleaning ..................18 Troubleshooting Tips .................. 19 Remote Control Instructions ..............21 and Return Policy ... Warranty ..............28 Read This Manual Inside you’ll find many helpful hints on how to use and maintain your air conditioner properly.
- Page 3 Safety Precautions To prevent injury to the user or other people and property damage, the instructions shown here must be followed. Incorrect operation due to ignoring of instructions may cause harm or damage. The level of risk is shown by the following indications. This symbol indicates the possibility of death or serious injury.
- Page 4 WARNING • Do not use the socket if it is loose or damaged. It may cause fire and electric shock. • Do not place the power cord close to heating appliances. It may cause fire and electric shock • Do not disassemble or modify unit. It may cause failure and electric shock.
- Page 5 CAUTION • When used near a stove or other gas burning device, be sure the room is properly ventilated. Otherwise an oxygen shortage may occur. • Do not use for any purpose other than room comfort. Do not use this air conditioner to preserve precision devices, food, pets, plants, and art objects.
- Page 6 NOTE WARNING - Electrical Information The complete electrical rating of The power supply cord with this air conditioner contains a current your new room air conditioner is detection device designed to reduce stated on the serial plate. Refer to the rating when checking the electrical the risk of fire.
- Page 7 WARNING - Prevent Accidents To reduce the risk of fire, electrical shock, or injury to persons when using your air conditioner, follow basic precautions, including the following: • Be sure the electrical service is adequate for the model you have chosen. This information can be found on the serial plate, which is located on the side of the cabinet and behind the grille.
- Page 8 Operating Instructions Normal Sounds High Pitched Chatter Trickling Sound Sound of Rushing Air In front of the unit, you may hear the sound of during normal rushing air being moved by the fan. Gurgle/Hiss Vibration Gurgling or hissing Unit may vibrate and noises may be heard due to refrigerant evaporator during...
- Page 9 TO BEGIN OPERATING THE AIR CONDITIONER, FOLLOW THESE STEPS: Set the lowest number (coldest setting). 2. Set the selector control to the highest COOL setting. 3. Adjust the louver for comfortable air flow (see Air Directional Louvers). 4. Once the room feels colder, adjust the setting you find most comfortable. 5.
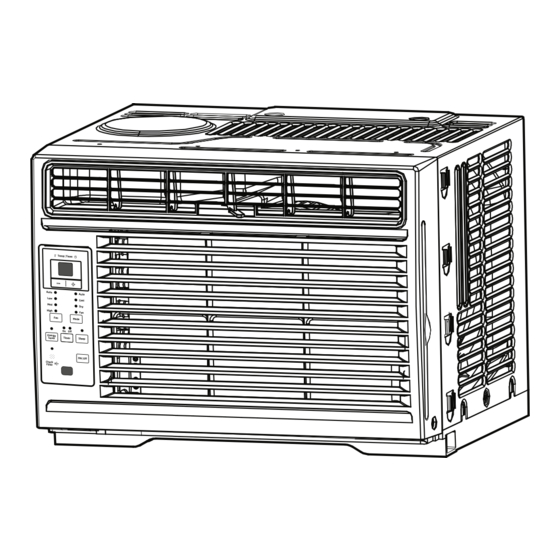
- Page 10 Air Conditioner Features ELECTRONIC CONTROL OPERATING INSTRUCTIONS Before you begin, thoroughly familiarize yourself with the control panel as shown below and all its functions, then follow the symbol for the functions you desire. The unit can be controlled by the unit control alone or with the remote controller. TO TURN UNIT ON OR OFF: DISPLAYS TEMPERATURE...
- Page 11 SLEEP FEATURE: TO SELECT THE OPERATING MODE: Sleep Press Sleep button to initiate the To choose operating mode, press Mode sleep mode. In this mode the selected Mode button. Each time you press the temperature will increase by 2°F/1 button the unit cycles through the modes, (or 2)°C 30 minutes after the mode Auto, Cool, Dry, and Fan.
- Page 12 TIMER: AUTO START/STOP FEATURE: ES - Evaporator temperature sensor error - Unplug the unit and plug it back in. If • When the unit is on or off, first press error repeats, call for service. the Timer button. The TIMER ON Timer indicator light illuminates indicating the NOTE...
- Page 13 Installation Instructions Your air conditioner is designed to install WARNING - Before You Begin in standard double hung windows with opening widths of 23 to 36 inches (584mm Read these instructions completely and to 914mm) (See Fig. D). carefully. • IMPORTANT - Save these Fig.
- Page 14 NOTE Save carton and these Installation Instructions for future reference. The carton is the best way to store unit during winter, or when not in use. 1. PREPARE THE WINDOW Lower sash must open sufficiently to allow a clear vertical opening (see dimension H in Table 1).
- Page 15 C: Align the hole in the top rail with those in the top of the unit as shown in Fig. F. D: Secure the top rail to the unit with the 3/8” (9.5mm) screws as shown in Fig. G. Fig.C Fig .B NOTE For safety reasons, all...
- Page 16 2. While keeping a firm grip on the air Measure from the cabinet edge conditioner, carefully place the unit into the window opening so the bottom of H: About ” to ” the air conditioner frame is against the window sill (Fig. 5). Carefully close the window behind the top rail of the unit.
- Page 17 B2: For Vinyl-Clad windows: Fig. 8B Drive 1/2” (12.7 mm) locking screws through the frame lock and into the window sash (Fig. 8B). NOTE: Before driving the screws, use a drill to drill 5 holes through the holes in the frame lock and frame Temp Timer Auto Auto...
- Page 18 Care and Cleaning CAUTION Clean your air conditioner occasionally to keep it looking new. Be sure to unplug the unit before cleaning to prevent shock or fire hazards. Air Filter Cleaning The air filter should be checked at least once a month to see if cleaning is necessary.
- Page 19 Troubleshooting Tips Before calling for service, review this list. It may save you time and expense. This list includes common occurrences that are not the result of defective workmanship or materials in this appliance. Problem Solution Wall plug disconnected. Push plug firmly into wall outlet. House fuse blown or circuit breaker tripped.
- Page 20 Problem Solution Air movement sound. This is normal. If too loud, set to a slower FAN setting. Noise when unit is cooling Window vibration - poor installation. Refer to installation instructions or check with installer. Water dripping Improper installation. Tilt air conditioner slightly to the outside to INSIDE when allow water drainage.
- Page 21 Remote Control Instructions Handling the Remote Controller LOCATION OF THE REMOTE CONTROLLER Use the remote controller within a distance of 16.4 ft (5 meters) from the air conditioner, pointing it towards the receiver. Reception is confirmed by a beep. CAUTION •...
- Page 22 Remote Control Specifications Model RG15A4(B)/E Rated Voltage 3.0V (Lithium battery CR2025) Lowest Voltage of CPU Emitting Signal 2.4 V Signal Receiving Range 16.4 ft (5 m) Environment -5 °C ~ 60 °C (23°F ~ 140°F) NOTES • Button design is based on typical model and may vary slightly from the actual one you purchased.
- Page 23 Function Buttons ON/OFF Button MODE Button Operation starts when Press this button to this button is pressed select the desired and stops when the operation mode. button is pressed again. NOTE: The unit will TEMP UP Button automatically initiate Press this button to Energy Saver mode increase the indoor under Cool, Dry, and...
- Page 24 How to Use the Buttons AUTO OPERATION Ensure the unit is plugged in and power is available. Press the ON/OFF button to start the air conditioner. 2. Press the MODE button to select Auto. 3. Press the TEMP UP (+)/DOWN (-) button to set the desired temperature.
- Page 25 DEHUMIDIFYING OPERATION Ensure the unit is plugged in and power is available. Press the ON/OFF button to start the air conditioner. 2. Press the MODE button to select Dry. 3. Press the TEMP UP (+)/DOWN (-) button to set the desired temperature. NOTES In the Dehumidifying mode, you cannot adjust the fan speed, as it is controlled automatically.
- Page 26 COMBINED TIMER (Setting both ON and OFF timers simultaneously) AUTO STOP >AUTO START (On > Stop > Start operation) This feature is useful when you want to stop the air conditioner after you go to bed, and start it again in the morning when you wake up or when you return home.
- Page 27 ENERGY SAVER OPERATION In this mode, the fan will continue to run for 3 minutes after the compressor shuts off. The fan then cycles on for 2 minutes at 10 minute intervals until the room temperature is above the set temperature, at which time the compressor turns back on and cooling resumes.
- Page 28 Warranty Air Conditioner Limited Warranty Your product is protected by this Limited Warranty: Warranty service must be obtained from Midea Consumer Services or an authorized Midea servicer. Warranty • One year full warranty from original purchase date. Midea, through its authorized servicers will: •...
- Page 29 RETURN POLICY Return policy save your Questions about installing or operating your Arctic King product? receipt If you still need assistance, please call Customer Service at 1-866-646-4332. Have your sales receipt, serial number and product model mumber available when you call.
- Page 31 MANUAL DEL USUARIO TIPO DE VENTANA/PARED AIRE ACONDICIONADO DEL CUARTO Frecuencia: 60Hz Capacidad: 5000BTU/h Avisos de advertencia: antes de usar este producto, lea atentamente este manual y consérvelo para futuras referencias. El diseño y las especificaciones están sujetos a cambios sin previo aviso para la mejora del producto.
- Page 32 Lista de Contenidos Instrucciones Importantes de Seguridad ..........31 Instrucciones de Operación ..............36 Instrucción de Instalación ................41 Mantenimento Y Limpieza ................ 46 Soluciones de Problemas ................. 47 Instrucciones del Control Remoto ............49 Garantía y Política de Devoluciones ............56 Lea este manual Dentro de este manual podría encontrar muchos consejos ayudables diciendo cómo usar y mantener su aire acondicionado correctamente.
- Page 33 Instrucciones Importantes de Seguridad Para evitar los daños a los usuarios u otra persona, deben seguir las instrucciones siguientes. Las operaciones incorrectas por la ignora de las instrucciones puede causar lesiones o daños. El grado de seriedad está clasificado por lo que indica siguiente. Este símbolo indica la posibilidad de muerto o lesiones graves.
- Page 34 WARNING • No modifique la longitud del cable eléctrico ni compartir el enchufe con otros aparatos. Podría causar una descarga eléctrica o incendio por la generación del calor. • Si emite sonido, olor o humo extraño, desenchúfelo. Podría causar incendio u descarga eléctrica. •...
- Page 35 CAUTION • Apaque el interruptor principal de la alimentación cuando la unidad ni hace ruido un largo tiempo. Podría causar fallo del producto o incendio. • No coloque obstáculos alrededor de la entrada de aire o dentro de la salida del aire. Podría causar fallos de aplicación o accidente.
- Page 36 Riesgo de incendio/ NOTA IMPORTANTE: Lea este manual materiales inflamables detenidamente antes de instalar o utilizar (Requerido para unidades su nueva unidad de aire acondicionado. R32 / R290 solamente) Asegúrese de guardar este manual para futuras consultas. WARNING - Para su seguridad NOTA El cable de energía con el aire No guarda o usar gasolina u otros...
- Page 37 WARNING - Evitar accidentes Para reducer el riesgo de incendio, descarga eléctrica o lesiones a la gente cuando usted usa el aire acondicionado, siga las precauciones básicas, incluyendo las siguientes: • Asegúrese de que sel servicio eléctrico sea adecuado para el modelo elegido. Esta información podría ser encontrado en la placa de serie, los cuales están situado en un lado del gabinete y detrás de la rejilla.
- Page 38 Instrucciones de Operación Sonidos Normales Sonido Agudo Sonido del Corriente Un compresor con alta del Aire En la frontera de la sonido agudo durante su El Sonido de Ping o unidad, podría oir un el Conmutador ciclo de refrigeración. sonido del corriente Las gotas del agua del aire debido al cayendo sobre el...
- Page 39 PARA COMENZAR A OPERAR RÁPIDAMENTE EL ACONDICIONADOR DE AIRE, SIGA ESTOS PASOS: Ajuste una configuración de temperatura más fría. 2. Ajuste el control del selector en la configuración más alta de COOL. 3. Ajuste la rejilla para un flujo de aire cómodo (consulte rejillas direccionales de aire). 4.
- Page 40 Características del Aire Acondicionado INSTRUCCIONES DE LA OPERACIÓN DEL CONTROL ELECTRÓNICO Antes de empezar, debe familiarizarse completamente con el panel de control y todas sus funciones como se muestra abajo, despúes sigue los símbolos para las funciones que desea. La unidad podría ser controlado por el control sólo o con el remoto. Muestra la PARA ENCENDER O APAGAR LA temperatura o...
- Page 41 FUNCIÓN DURMIENTA: La luz del indicador ilumina y mantiene una vez que selecciona el modo. La Sleep Presiona el botón durmiento a iniciar unidad empieza la función de ahorrar la el modo durmiento. Bajo este modo la energía bajo los modos de Frío, Seco, temperatura selecciona incrementará...
- Page 42 RELOJ: FUNCIÓN DE AUTO EMPEZAR O ES - Sensor de error del evaporador de la TERMINAR temperatura. Desenchufe la unidad y conéctala otra vez. Si el error repite, • Cuando enciende la unidad, primero llama al servicio. presiona el botón reloj , el indicador Timer TIMER ON ilumina.
- Page 43 Instrucciones de Instalación Requisitos de la Ventana WARNING - Antes de Empezar Su aire acondicionado es diseñado para Lea esta instrucción completamente y instalar en ventanas estandar de doble con mucho cuidado. panel con un ancho de apertura de 23 a 36 pulgadas (584mm a 914mm).
- Page 44 Fig. A NOTE Guarde los cartones y estas instrucciones de instalación para el uso futuro. El carton es la major manera a almacenar la unidad en el invierno o cuando no lo use. 1. PREPARE LA VENTANA El marco inferior debe poder abrirse un espacio suficiente para la limpieza con una Embalaje Carril superior...
- Page 45 NOTAS Para su seguridad, todos los cuatro (4) tornillos DEBEN estar bien sujetos. El hardware del carril superior y la Fig. A, Fig. B y Fig. C no son aplicables para la unidad más que 10000 Btu/h. Antes de instalarla, el carril superior debe ser montado en la unidad (Sólo para el modelo de <10000 Btu/h).
- Page 46 4. INSTALA LOS PANELES DE ACORDEÓN 2. Agarre firme al aire acondicionado, ponga Mida desde el borde del gabinete la unidad en la apertura de la ventana con mucho cuidado para que el fondo del marco del aire acondicionado está contra H:Aproxima ”...
- Page 47 B2: Para ventanas de vinil-revestido: Fig. 8B Pase los tornillos de bloqueo de 1/2“ (12.7mm) a través del cierre del marco y en el marco de la ventana (Fig. 8B). NOTE: Antes de conducir los tornillos, utilice un Temp Timer Auto Auto Cool...
- Page 48 Mantenimiento y Limpieza CAUTION Limpie su aire acondicionado de vez en cuando para mantenerlo en buen aspecto. Asegúrese de desenchufar la unidad antes de limpiarla para evitar el riesgo de cuña o incendio. Limpieza del Filtro de Aire El filtro de aire debe ser revisado al menos una vez al mes para ver si es necesario a limpiarlo.
- Page 49 Soluciones de Problemas Antes de llamar al servicio, revisa esta lista. Le podría ahorrar tiempo y molestia. Esta lista incluye las ocurrencias communes, los cuales no son resultado por un defecto del hechura o los materiales de la fábrica. Problema Solución Enchufe de pared desconectado.
- Page 50 Problema Solución El agua que gotea La instalación incorrecta. Inclina acondicionador de aire ligeramente hacia el INTERIOR cuando exterior para permitir el drenaje del agua. Consulte las instrucciones de instalación - unidad está consulte con el instalador. enfriando El agua que gotea EXTERIOR cuando Unidad eliminar gran cantidad de humedad del ambiente húmedo.
- Page 51 Instrucciones del Control Remoto Manejo del Control Remoto UBICACIÓN DEL CONTROL REMOTO Use el control remoto a una distancia de 16.4 pies (5 metros) del acondicionador de aire, apuntándolo hacia el receptor. La recepción se confirma con un pitido. CAUTION •...
- Page 52 Especificaciones de Control Remoto Modelo RG15A4(B)/E Voltaje nominal 3.0V (Batería de Litio CR2025) El voltaje más bajo de la CPU que emite 2.4 V la señal Alcance de recepción de señal 16.4 ft (5 m) Ambiente -5 °C ~ 60 °C (23°F ~ 140°F) NOTES •...
- Page 53 Botones de Función Botón ON/OFF La operación se inicia cuando se presiona Botón MODE este botón y se detiene cuando se presiona el Presione este botón para seleccionar el botón nuevamente. modo de operación NOTE: La deseado. unidad iniciará automáticamente Botón TEMP UP el modo de Ahorro de Energía en los...
- Page 54 Cómo usar los Botones OPERACIÓN EN MODO AUTO Asegúrese de que la unidad esté enchufada y de que haya energía disponible. Presione el botón ON / OFF para encender el aire acondicionado. 2. Presione el botón MODE para seleccionar Auto. 3.
- Page 55 OPERACIÓN EN MODO DESHUMIDIFICACIÓN Asegúrese de que la unidad esté enchufada y de que haya energía disponible. Presione el botón ON / OFF para encender el aire acondicionado. 2. Presione el botón MODE para seleccionar Deshumidificación. 3. Presione el botón TEMP UP (+) / DOWN (-) para establecer la temperatura deseada.
- Page 56 OPERACIÓN COMBINADA DEL TIMER (Configuración del Timer ON y OFF simultáneamente) AUTO STOP >AUTO START (Encendido > Apagado > Iniciar la operación) Esta función es útil cuando desea detener el aire acondicionado después de acostarse y volver a encenderlo por la mañana cuando se despierta o cuando regresa a casa.
- Page 57 OPERACIÓN DEL ENERGY SAVER En este modo, el ventilador continuará funcionando durante 3 minutos después de que el compresor se apague. Luego, el ventilador enciende en ciclos durante 2 minutos a intervalos de 10 minutos hasta que la temperatura de la habitación está...
- Page 58 Garantía y Politica de Devolución Garantía de Acondicionador de Aire Su producto está protegido por esta garantía: El servicio de garantía debe ser obtenido de Servicios al Consumidor de Midea o prestador de servicio autorizado Midea. Garantía • Garantía limitada de uno año a partir de la fecha de compra original. Midea, a través de sus servicios autorizados, deberá: •...
- Page 59 POLITICA DE DEVOLUCION Política de devolución guarde su Preguntas sobre la instalación o el funcionamiento producto Arctic King? comprobante Sitodavía necesita asistencia, por favor llame al Atención al Cliente en 1-866-646-4332. Tenga disponible su recibo de compra número de serie y el múmero de modelo del producto cuando llame.
Need help?
Do you have a question about the WWK Series and is the answer not in the manual?
Questions and answers
In the louvers area on the bottom there is a tab that pushes in and pull out. What is that for?
In the louvers area on the bottom there is a tab that pushes in and pull out. What is that for?
Where can I purchase a thermostat for an Arctic King 8000 BTU wwko8 cr?