
Related Manuals for Faema Emblema R


Summary of Contents for Faema Emblema R
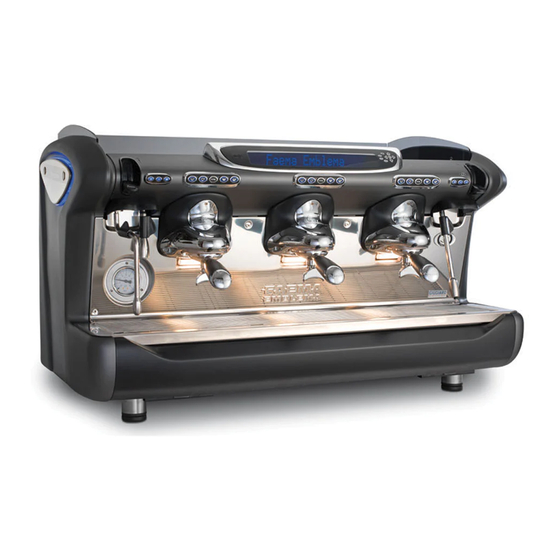
- Page 1 USO E INSTALLAZIONE USE AND INSTALLATION UTILISATION ET INSTALLATION GEBRAUCH UND INSTALLATION USO E INSTALACIÓN USO E INSTALAÇÃO Emblema R Code 974-047-000 (rev. 1745)
- Page 2 Istruzioni originali Italiano ............Translation of the original instructions English ............Traduction du manuel d’origine Français ............Übersetzung der Originalanleitung Deutsch ............Traducción de las instrucciones originales Español ............Tradução das traduções originais Português ..................................
-
Page 3: Table Of Contents
Dear Madam, Dear Sir Congratulations on your new Faema! With this purchase, you have chosen an advanced espresso coffee machine built using the most cutting edge technology. This machine not only offers you a perfect combination of ef ciency and functionality, but also provides you with all the tools you need to do your job in the best possible way. -
Page 4: General Rules
1. General Rules Please read the warnings and rules in this User’s Manual carefully before using or handling the machine in any way because they provide important information regarding safety and hygiene when operating the machine. Keep this booklet handy for easy reference. •... -
Page 5: Transport And Handling
WARNING Installation, dismantling, and ad ustments must only be performed by quali ed and authorized technicians. Carefully read the warnings and rules in this manual because they provide important information regarding safe installation, use and maintenance of the machine. Keep this booklet handy for easy reference. 2.1 Transport and handling Packaging •... -
Page 6: Installation Rules
2.2 Installation Rules • Before plugging in the machine, make sure that the information on the nameplate (voltage, etc.) matches that of the electrical and water systems. • Check the condition of the power supply cord; if it is damaged it must be replaced. •... -
Page 7: Electrical Installation Rules
3. Electrical Installation Rules Prior to installation, make sure there is a circuit breaker installed with a distance between the contacts that allows for complete disconnection when there is a category III overload and that provides protection against current leakage equal to 30 mA. The circuit breaker must be installed on the power supply in compliance with installation rules. -
Page 8: Installation Check-Up
5. Installation Check-up WARNING: AFTER INSTALLATION, CHECK TO SEE IF THE MACHINE IS WORKING PROPERLY (see the Installation Module C). WATER CONNECTIONS • No leaks from the connections or tubes FUNCTIONING • Boiler and operating pressures are normal. • The pressure gauge is working properly. •... -
Page 9: Rules For The Worker Operating The Machine
6. Rules for the worker operating the machine BEFORE YOU START WARNING: BEFORE YOU START OPERATING THE MACHINE, WASH THE INTERNAL COMPONENTS FOLLOWING THE INSTRUCTIONS INDICATED BELOW. THESE STEPS MUST BE REPEATED AT LEAST ONCE A DAY AND WHEN THE MACHINE HAS NOT BEEN OPERATED FOR MORE THAN 8 HOURS. -
Page 10: Caution
7. Caution Danger of burns WARNING: Hot surface The areas marked with this sign become ACHTUNG: Heisse Ober hot. Great care should be taken when ATTENTION: Surface chaude in the vicinity of these areas. ATTENZIONE: Super cie calda GENERAL drained before placing them on the cup-warming plate. -
Page 11: Dismantling The Machine
9. Dismantling the machine ursuant to European Directi e UE on Suitable differentiated waste disposal so electrical aste WEEE users in the Europe an that the machine can then be recycled, unit are ad ised o the ollo in treated and disposed of in an environmentally friendly manner contributes Electrical equipment cannot be disposed of as to avoiding possible negative effects on the... -
Page 12: Use
10. Day-to-day operation “Before setting the machine at work, make sure that: • the main electric power switch is on; • the mains water cock has been turned on". MANUAL POWERING During this phase the boiler is loaded 11 October 2013 and the heating 15:40:51 phase begin. -
Page 13: Description Display Symbols
Description display symbols This symbol indicates the boiler water level. This symbol indicates that the machine is pre-heating During the loading phase, the dark bottom part or the boiler pressure has dropped below 0.5 bar. of the icon blinks. This also indicates the boiler heating situation, When the optimum level is reached, the symbol meaning that it appears if one or more boilers are looks like this:... -
Page 14: Changing The Water In The Boiler
11. Changing the water in the boiler Before operating the machine change the water in the boiler.” Ensure that the indication on the display corresponds to the working pressure value. Keep a hot water distributor key (13a - 13c) pressed down for approximately 5 seconds. -
Page 15: Delivery Of The Coffee
13. Drinks distribution - coffee Remove the lter carrier (21 or 25), clean it of the used coffee grounds and re ll it with 1 or 2 doses of ground coffee, according to the lter carrier used. Uniformly press the ground coffee in the lter holder by means of the pressing disc of the grinder. -
Page 16: Steam Dispensing
15. Drinks distribution - steam Scalding hazard! appropriate insulating devices (A) to move the water and steam wands. Insert the steam nozzle (9a) into a suitable container, making sure the bulb is completely immersed in the milk. Dispensing with the Autosteam selector (11) (where contemplated) Select the type of milk you prefer (heated or frothed) by changing the position of the "steam selector lever"... -
Page 17: Data Ow Chart
PROGRAMMING - USER MODE 16. Data ow chart - Customer programming To ACCESS menu " + " press PRG To EXIT menu press RES " - " Only if "Prog. cliente" is YES and “Program. block” is NO CUSTOMER PROG. Press DATA MENU CUSTOMER... -
Page 18: Clock Adjustment
17. Clock adjustment Use the “+” (30) and “-” (31) keys to adjust the clock. The time increases (or decreases) one minute each time 11 October 2013 the key is pressed. 15:40:51 If one of the keys ( 30 or 31) is pressed and held down for more than 10 seconds, the minutes setting stops and the hours setting increases (or decreases). -
Page 19: Service Time Menu
Service time menu Pressing the “PRG” (29), the following message will General indications appear on the display: If there is no day off (i.e. the enterprise never closes), enter “none” for the “day off” item. Enter the same time for the “ON time” and “OFF time” parameters (for example: SERVICE TIME ON time 22:00... -
Page 20: Data Menu - Counter Display And Zeroing
19. DATA menu - Counter display and zeroing Counters can be zeroed by aligning the cursor on the Counters are displayed by pressing the (27) key. selected entry, pressing the “PRG” key (29), and then The following message appears on the display (14): pressing the “+”... -
Page 21: Key Menu - Coffee Selection
21. Key menu - Coffee selection Press one of the coffee dispensing keys on the selection panel (the relative led will remain on, not ashing). The following message will appear on the display: KEY MENU Type 1 coffee Each dispensing unit is controlled by a panel that permits programing the amount of desired dispensing for each button. -
Page 22: Programming Measures Using The "Self-Learning" Function
Programming measures using the “SELF-LEARNING” function The water doses for coffee and the hot water doses can Hot water measures also be set using the "SELF-SETTING' function: 1 - Press the button to be programed and keep it pressed until the desired level is reached in the cup. press and hold the STOP button for at least 8 seconds or until you hear a buzzer sound that will keep sounding During this phase the time in seconds (top right of... -
Page 23: Key Menu - Steam And Air Selection
23. Key menu - Steam and air selection Select the position of the "steam selector lever" (11) and press the "AUTOSTEAM automatic steam key" (12a) . The following will appear on the display: KEY MENU Type Steam and air TS.. The following parameters can be modi ed: - T stop steam (“xxx°C”... -
Page 24: Cleaning And Maintenance
24. Cleaning and maintenance For correct application of the food safety system (HACCP), please follow the instructions in this paragraph. Washing must be carried out using original “Service Line” products, see details on the last page. Any other product could make the materials in contact with food unsuitable. Procedure to effect at the end of the work day on all groups or when signaled by the machine. -
Page 25: Simultaneous Washing
SIMULTANEOUS WASHING Hold down the coffee circuit washing key (26) for a few seconds. The simultaneous washing screen (preset mode) will appear on the display. to change sel. to con rm Using a brush, clean the Remove the filter holder cover gasket. -
Page 26: Sequential Washing
SEQUENTIAL WASHING Hold down the coffee circuit washing key (26) for a few seconds. The simultaneous washing screen (preset mode) will appear on the display. to change sel. to con rm Using a brush, clean the Remove the filter holder cover gasket. -
Page 27: Single Washing
SINGLE WASHING: Cannot be carried out if the machine launches a warning message. Hold down the coffee circuit washing key (26) for a few seconds. The simultaneous washing screen (preset mode) will appear on the display. to change sel. to con rm Using a brush, clean the Remove the filter holder cover gasket. -
Page 28: Block Function
Block function When the machine is blocked, a warning message appears If the coffee wash circuit key (26) is pressed, the previous on the display: if the key corresponding to the requested message will be integrated as shown: wash cycle is pressed (key 26) or key (28)) and the instructions on the display are followed, the wash cycle is GROUP 1 LOCKED... -
Page 29: Steam And Hot Water Dispensing Pipes
STEAM AND HOT WATER DISPENSING PIPES - This operation must be made at the end of each working day Using a clean sponge, wash with hot water removing any organic residue present. Rinse carefully. To clean the inside of the steam nozzles, follow these steps: Turn the nozzle towards the cup tray and carefully activate steam dispensing at least once. -
Page 30: Defects - Malfunctions
25. Defects - Malfunctions Direct action by the customer Before calling service personnel, to avoid useless expense, check whether the machine problem corresponds to one of the cases listed below. DEFECT CAUSE REMEDY The coffee machine does not work and No electricity.
Need help?
Do you have a question about the Emblema R and is the answer not in the manual?
Questions and answers