Table of Contents
Advertisement
Advertisement
Table of Contents

Subscribe to Our Youtube Channel
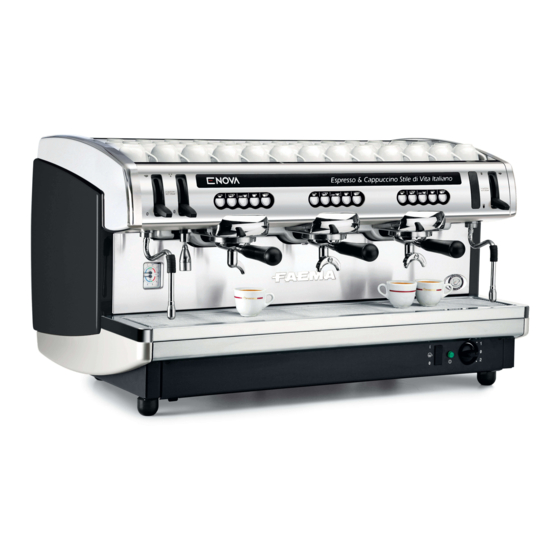
Related Manuals for Faema Enova


Summary of Contents for Faema Enova
- Page 2 Gentile Signora, Egregio Signore Dear Customer, ci congratuliamo con Lei per la Sua nuova Faema. We congratulate with you for your new Faema. Con questo acquisto Lei ha scelto una macchina per caffè With this purchase you’ve chosen an up to date machine, espresso d'avanguardia costruita secondo i più...
- Page 3 Manuale - Manual - Manuel - Handbuch - Manual - Manual Enova Leggere attentamente le avvertenze contenute nel Read the instructions in this manual carefully before presente manuale, prima di utilizzare o manipolare in using or handling the machine in any way. The...
-
Page 4: Table Of Contents
Indice - Index - Index - Inhaltsverzeichnis - Indice - Indice Pag. - Page Page - Seite Pag. Descrizione - Description - Description Beschreibung - Descripcíon - Descição Installazione - Installation - Installation Installation - Instalación - Instalação Messa fuori servizio definitiva - Dismantling the machine Mise hors service definitive - Endgültige Ausserbetriebstellung Interrupción definitiva del servicio - Colocação fora de serviço definitiva Uso - Dichiarazione di Conformità... - Page 5 Enova Macchine 1 gruppo 1 Dispenser unit machines Machines à 1 groupe Modelle mit 1 Abgabeeinheit Máquinas 1 grupo Máquinas de 1 grupo...
- Page 6 Legenda - Legend - Legende - Legende - Leyenda - Legenda LEGENDA LEGEND LEGENDE Interruttore generale Main ON/OFF switch Interrupteur général. Pulsantiera Pushbutton Panel Clavier Spia luminosa macchina accesa Machine “ON” indicator light Témoin lumineux de la machine en Lancia vapore orientabile Swivel steam jet pipe marche Leva/Pulsante regolazione vapore...
-
Page 7: Installazione - Installation - Installation
Installazione - Installation - Installation - Installation - Instalación - Instalação ! ! ! ! ! ! ! ! ! ! ATTENZIONE ATTENTION L'installazione, lo smontaggio e le Installation, disassembly and setting should regolazioni devono essere eseguite be carried out by qualified technical esclusivamente da personale tecnico personnel only. - Page 8 Installazione - Installation - Installation - Installation - Instalación - Instalação INDICAZIONI PER L'INSTALLAZIONE NOTICE FOR THE SERVICEMAN ! ! ! ! ! ! ! ! ! ! ! ! ! ! ! ! ! ! ! ! 1. Leggere attentamente le avvertenze contenute nel presente libretto 1.
- Page 9 Installazione - Installation - Installation - Installation - Instalación - Instalação INDICATIONS POUR L'INSTALLATION ANGABEN ZUR INSTALLATION ! ! ! ! ! ! ! ! ! ! ! ! ! ! ! ! ! ! ! ! 1. Lire attentivement les avertissements contenus dans le présent 1.
- Page 10 Installazione - Installation - Installation - Installation - Instalación - Instalação INDICACIONES PARA LA INSTALACIÓN ! ! ! ! ! ! ! ! ! ! ! ! ! ! ! ! ! ! ! ! INDICAÇÕES PARA A INSTALAÇÃO 1. Leer atentamente las advertencias contenidas en el presente 1.
- Page 11 Installazione - Installation - Installation - Installation - Instalación - Instalação Dati tecnici Vedere la targa dati della macchina Technical data See the machine's nameplate Données techniques Voir la plaque signalétique de la machine Technische Daten Siehe Datenschild der Maschine Datos técnicos Ver la placa con los datos de la máquina Datos técnicos...
- Page 12 Installazione - Installation - Installation - Installation - Instalación - Instalação COLLEGAMENTI IDRAULICI Fig. 1 Posizionare l'apparecchio in perfetto piano orizzontale agendo sui piedini, indi fissarli. MACCHINA Eseguire i collegamenti idraulici come indicato in figura 1, MACHINE rispettando le vigenti norme di sicurezza idraulica del paese di installazione.
- Page 13 Installazione - Installation - Installation - Installation - Instalación - Instalação CONNECTION HYDRAULIQUE Fig. 1 Positionner l'appareil parfaitement horizontal en agissant sur les pieds. MACHINE Faire les connections hydrauliques comme indiqué dans la MASCHINE fig. 1, respectant les normes en vigueur de sécurité hydraulique du pais d'installation.
- Page 14 Installazione - Installation - Installation - Installation - Instalación - Instalação CONEXIONES HIDRAULICAS Fig. 1 Posicionar el aparato en un perfecto plano horizontal, obrando sobre los piés, luego fijarlos. MÁQUINA Efectuar las conexiones hidràulicas según lo indicado en la MÁQUINA figura 1, respectando las vigentes normas de siguridad hidráulica del país de instalación.
- Page 15 Installazione - Installation - Installation - Installation - Instalación - Instalação COLLEGAMENTO ELETTRICO 3NPE ! Prima del collegamento verificare se l'impianto elettrico predisposto a cura del Cliente rispetta le norme vigenti e se ha la messa a terra regolamentare. Ricordiamo che il Gruppo Cimbali Spa non risponde dei danni provocati da un non corretto collegamento elettrico.
- Page 16 Installazione - Installation - Installation - Installation - Instalación - Instalação STROMANSCHLUSS 3NPE ! Überprüfen Sie vor der Erstellung des Stromanschlusses, ob die vom Kunden vorbereitete Elektroanlage den einschlägigen Bestimmungen entspricht und über eine vorschriftsmäßige Erdung verfügt. Wir weisen erneut darauf hin, daß...
- Page 17 Installazione - Installation - Installation - Installation - Instalación - Instalação COLLEGAMENTO EQUIPOTENZIALE Questo collegamento previsto da alcune norme, ha la funzione di evitare le differenze di livello di potenziale elettrico, tra le masse delle apparecchiature installate nello stesso locale. Questo apparecchio è...
- Page 18 Installazione - Installation - Installation - Installation - Instalación - Instalação CHECK UP FUNZIONAMENTO CHECK-UP OPERATIONS Verificare le condizioni per un buon funzionamento For correct operation, check these conditions: 1) ALLACCIAMENTO IDRAULICO 1) HYDRAULIC CONNECTION assenza di perdite dagli allacciamenti o dai tubi Absence of leaks from the connection or from the tubes 2) FUNZIONAMENTO 2) OPERATION...
- Page 19 Installazione - Installation - Installation - Installation - Instalación - Instalação ATTENZIONE:TERMINATA L'INSTALLAZIONE ATTENTION: AFTER INSTALLING THE MACHINE PRIMA DI INIZIARE IL LAVORO ESEGUIRE UN AND BEFORE STARTING TO OPERATE IT, CLEAN ! ! ! ! ! ! ! ! ! ! LAVAGGIO DEI COMPONENTI INTERNI ALL THE INTERNAL COMPONENTS AS SEGUENDO LE ISTRUZIONI SOTTOINDICATE:...
- Page 20 Messa fuori servizio definitiva - Dismantling the machine - Mise hors service definitive L’apparecchiatura elettrica non può essere smaltita Lo smaltimento inadeguato o abusivo delle apparecchiature, come un rifiuto urbano, ma è necessario rispettare la oppure un uso improprio delle stesse, in considerazione raccolta separata introdotta dalla disciplina speciale per lo delle sostanze e dei materiali contenuti può...
- Page 21 Endgültige Ausserbetriebstellung - Interrupción definitiva del servicio Colocação fora de serviço definitiva Elektrische Geräte dürfen nicht in den normalen von elektrischen Materialien beinhaltet die Verhängung von Haushaltsmüll gegeben sondern müssen Geldbußen u/o strafrechtlichen Maßnahmen. entsprechend der Bestimmungen zur Abfalltrennung als Industrieabfall gesondert entsorgt werden.
-
Page 22: Ce Declaration Of Conformity
Cautions Defects - Malfunctions Certification for materials in contact with food used in FAEMA products We, GRUPPO CIMBALI S.P.A. hereby certify that the cleaning materials (used as specified in the manual) and the materials used in our products in contact with food, are suitable for foodstuff or substances for personal use, in compliance with law CE n° 1935/2004. - Page 23 English English Daily Switch-On “Before switching on the machine, ensure the ! ! ! ! ! following: The mains switch is on. The water mains tap is open”. Turn the master switch (1) to position 1. The indicator light “machine on” (5) switches on. If the water level in the boiler is less than the minimum required, the boiler is filled up to the correct level.
-
Page 24: Steam Dispensing
English English Delivery of the coffee Remove the filter holder (10), empty out any coffee grouts and fill it up with 1 or 2 servings of ground coffee, depending on the filter holder used. Press the ground coffee in filter down uniformly, using the grinder/doser presser. -
Page 25: Hot Water Dispensing
English English Hot water dispensing Dosed function After having positioned the appropriate container under the hot water nozzle (8), raise the hot water dispensing lever (9): afterwards, the lever automatically returns to the original position. The hot water will be dispensed and will stop automatically. - Page 26 English English Programming the coffee measures “ Before programming the coffee dispensing push buttons fill the filter holder with the correct serving ! ! ! ! ! of ground coffee. Don’t use coffee grouts for programming servings.” Fit and tighten the filter holder (10) on the coffee dispenser unit, positioning the cup (or cups) under the nozzle (or nozzles) of the filter holder (10).
-
Page 27: Cleaning And Maintenance
English English Cleaning and maintenance ! ! ! ! ! For correct application of the HACCP system, please follow the instructions in this paragraph. Cleaning dispensing unit This operation must be made on all the groups at the end of each working day 1) Using a brush, clean the cover gasket. - Page 28 English English Cautions Danger of burns WARNING: Hot surface The areas marked with this sign become hot. ACHTUNG: Heisse Oberfläche ! ! ! ! ! Great care should be taken when in the vicinity ATTENTION: Surface chaude of these areas. ATTENZIONE: Superficie calda GENERAL MAINTENANCE AND REPAIR...
- Page 29 English English Defects - Malfunctions Direct action by the customer Before calling service personnel, to avoid useless expense, check whether the machine problem corresponds to one of the cases listed below. PROBLEM CAUSE SOLUTION The coffee machine is not working. No electricity supply.
-
Page 30: Smontaggio - Disassembly - Demontage
Smontaggio - Disassembly - Demontage - Abmontierung - Desmontaje - Desmontagem FIANCATE Svitare le viti B e la vite C, quindi rimuovere la fiancata. SIDES Unscrew screws B and screw C, then remove side panel. COTES Dévisser les vis B et la vis C, puis enlever le flanc. SEITENWÄNDE Lösen Sie die Schrauben (B) und die Schraube (C), und nehmen Sie das Seitenteil ab. - Page 31 PANNELLO POSTERIORE Lo smontaggio del pannello posteriore deve essere eseguito solo dopo aver rimosso lo scaldatazze. Svitare le 4 viti di fissaggio (P) (2 per le macchine 1 gruppo) e rimuovere il pannello. BACK PANEL The back panel may be removed only after the cup warmer has been removed.
-
Page 32: Regolazioni - Setting - Reglages
SCATOLA ELETTRICA Togliere la bacinella appoggiatazze e la protezione scatola elettrica sottostante. Svitare la vite (C) e togliere il coperchio (D) della scatola elettrica facendolo scorrere verso l'interno macchina. JUNCTION BOX Remove the cup tray and the electric box protection below. - Page 33 POMPA VOLUMETRICA CON FILTRO All'insorgere della rumorosità pulire il filtro F BY- PASS: A - Dado di regolazione pressione pompa VOLUMETRIC PUMP WITH FILTER If there is noise, clean the filter F BY-PASS: A - Nut for adjusting the pump pressure POMPE VOLUMETRIQUE AVEC FILTRE Nettoyer le filtre lorsqu'elle commence a devenir bruyante F BY-PASS: A - Ecrou de réglage pression pompe...
- Page 34 N.B.: in caso di errate operazioni, per ripristinare le condizioni 2 Vite di regolazione 2. Adjusting screw di partenza, come fornite da Faema, chiudere tutta la vite di 3 Foro rilievo 3. Temperature detection regolazione (2) fino al punto di fermo 0, poi riposizionare la...
- Page 35 N.B.: em caso de operações erradas, para restabelecer as Faema, cierre todos los pernos de regulación (2) hasta el condições de partida, como fornecidas pela Faema, fechar punto de parada 0 y luego coloque el perno en la regulación completamente o parafuso de regulação (2) até...
-
Page 36: Tarjeta Unificada - Ficha Unificada
MACHINES - MASCHINEN Dip 1 Dip 2 Dip 3 Dip 4 CN1A CN11 MÁQUINAS - MÁQUINAS SI/YES SI/YES Enova A 2, 3, gr. OFF ON OFF ON CN10/CN11 “OFF” nessun ponticello CN10/CN11 “OFF” no bridge CN10/CN11 “OFF” aucun pont (elettrovalvole 24V) - Page 37 Schema elettrico - Wiring diagram - Schema electrique - Elektrischer Schaltplan - Esquema electrico - Esquéma electrico...
- Page 38 Schema elettrico - Wiring diagram - Schema electrique - Elektrischer Schaltplan - Esquema electrico - Esquéma electrico...
- Page 39 Schema elettrico - Wiring diagram - Schema electrique - Elektrischer Schaltplan - Esquema electrico - Esquéma electrico...
- Page 40 Schema elettrico - Wiring diagram - Schema electrique - Elektrischer Schaltplan - Esquema electrico - Esquéma electrico...
- Page 41 Schema elettrico - Wiring diagram - Schema electrique - Elektrischer Schaltplan - Esquema electrico - Esquéma electrico...
- Page 42 Schema elettrico - Wiring diagram - Schema electrique - Elektrischer Schaltplan - Esquema electrico - Esquéma electrico...
- Page 43 Schema elettrico - Wiring diagram - Schema electrique - Elektrischer Schaltplan - Esquema electrico - Esquéma electrico...
-
Page 44: Circuito Idraulico - Hydraulic Circuit - Circuit Hydraulique
Circuito idraulico - Hydraulic circuit - Circuit hydraulique - Hydraulikplan - Circuito hidraulico - Circuito hidraulico... - Page 45 Circuito idraulico - Hydraulic circuit - Circuit hydraulique - Hydraulikplan - Circuito hidraulico - Circuito hidraulico...
- Page 46 Legenda - Legend - Legende - Legende - Leyenda - Legenda LEGENDE LEGEND LEGENDA 6 = Lance débit vapeur 6 = Steam dispensing nozzle = Lancia erogazione vapore 8 = Lance débit eau chaude 8 = Hot water dispensing nozzle = Lancia erogazione acqua calda 14 = Manomètre chaudière/pompe 14 = Boiler/pump pressure gauge...
- Page 48 Tel. ..39 2 90.04.91 / 90.04.81 Tel. ..39 2 90.04.91 / 90.04.81 Fax ..39 2 90.54.818 / 90048486 Fax ..39 2 90.54.818 / 90048486 www.faema.it www.faema.it GRUPPO CIMBALI si riserva il diritto di apportare GRUPPO CIMBALI reserves the right to make changes...
-
Page 49: Service Line
Order directly from your local distributor and refer to the particular item you require by its number, as shown above. FAEMA et la "SERVICE LINE" La service d'assistance de la société FAEMA, dans l'intention d'être à côté de ses clients, dans le choix des produits et en vue d'une meilleure utilisation de la machine à café, propose la ligne:...
Need help?
Do you have a question about the Enova and is the answer not in the manual?
Questions and answers