Advertisement
Table of Contents
- 1 What's in the Box
- 2 Spacer Installation
- 3 Installing Touchscreen
- 4 Testing Operation
- 5 Installing Handles
- 6 Lock Activation
- 7 Creating User Codes
- 8 Deleting User Codes
- 9 Unlocking Door with Code
- 10 Replacing Batteries
- 11 Resetting Lock to Factory Default
- 12 Setting Definitions
- 13 Feature Programming through Menu Mode Using Master PIN Code
- 14 Programming Troubleshooting
- 15 Hardware Troubleshooting
- Download this manual
Patio and Entry Doors
Assure Lock for Andersen
®
Installation and Programming Instructions
This manual will walk you through all the required steps to add your
new Yale Assure Lock for Andersen patio and entry doors.
Yale Assure Lock is not fully functional on Andersen 200 and 400 Series
hinged patio doors. The patio door hookbolts must be manually locked before
the Yale Assure lock can lock the patio door's deadbolt.
• Remove Existing Door Hardware
• Prepping your Door
• Install your Assure Lock
• Program your Assure Lock
• Add your Assure Lock to your smart home system or August App
Tools needed:
1/8" 5/16" 3/8"
Drill
1/2" 3/4" Drill Bits
Standard Phillips
Head Screwdriver
Scissors
FAILURE TO FOLLOW THESE INSTRUCTIONS COULD RESULT IN DAMAGE TO THE LOCK
AW 9184499 BA
P/N YRM276/YRM476-INST-FUL Rev C
Advertisement
Table of Contents

Related Manuals for Assa Abloy Yale Assure


Summary of Contents for Assa Abloy Yale Assure
- Page 1 This manual will walk you through all the required steps to add your new Yale Assure Lock for Andersen patio and entry doors. Yale Assure Lock is not fully functional on Andersen 200 and 400 Series hinged patio doors. The patio door hookbolts must be manually locked before the Yale Assure lock can lock the patio door's deadbolt.
-
Page 2: What's In The Box
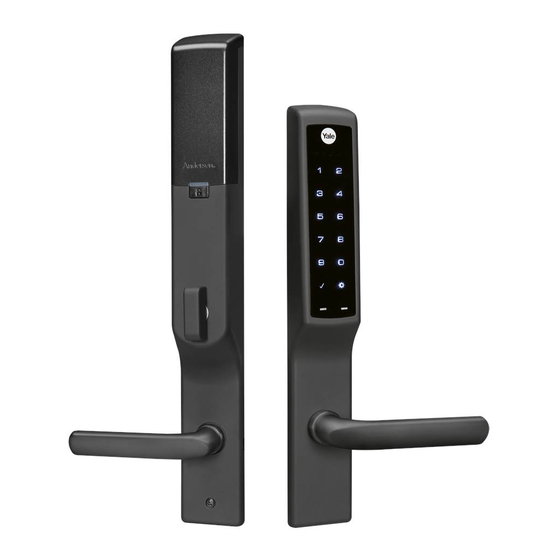
What's In The Box Optional 4 AA Batteries Network Module Battery Cover Cylinder Magnet Block Magnet Door Position Sensor Spacers Battery Inside Mounting Touchscreen Through Bolts #8x8 PHM Cover Key Lock Plate Handle Kit Decorative Screw P/N YRM276/YRM476-INST-FUL Rev C... - Page 3 Remove Existing Hardware If Any Prepping Door Enlarge existing top hole with 3/8" to 1/2" drill bit to accommodate cable. 3/8" to 1/2" Drill hole from both sides of door; approximately 1" deep from one side then completely through from other side.
- Page 4 Preparing Inside Lock Insert battery removal tool into hole to release cover. Selecting Correct Spacer A spacer may be required to correctly install lock. There are three (3) options in your lock kit. See chart to select the correct spacer for your application. Spacer Color Spacer Door Type...
-
Page 5: Spacer Installation
Spacer Installation Insert spacer into hole. Push spacer in for one click. As you continue installing lock, the spacer will tightened to required position. Inside of Door Spacer is installed between door and mounting plate gasket. Do not over tighten. Installing Touchscreen Outside of Door... - Page 6 Installing Inside Mounting Plate Spindle Inside of Door 1. Place spindle into lock. 2. Pull cables through mounting bracket. Inside of Door Through Bolts 3. Install mounting bracket with though bolts. Ensure bracket is straight and tighten bolts. P/N YRM276/YRM476-INST-FUL Rev C...
- Page 7 Installing Optional Door Position Sensor This step is optional and only needed when using Door Position Sensor. Remove both tabs from gasket if installing optional Door Position Sensor. Do not remove tabs if optional Door Position Sensor is not installed. Attach Door Position Sensor assembly.
- Page 8 Attaching Cable Assemblies Ensure cables are securely fastened into connector Inside of Door P/N YRM276/YRM476-INST-FUL Rev C...
- Page 9 Installing Inside Lock Top of thumbturn must face away from latch Store excess cable in interior lock cavity. #8x8 PHM Tighten Decorative Screw Tighten P/N YRM276/YRM476-INST-FUL Rev C...
-
Page 10: Testing Operation
Testing Operation Inside of Door Ensure thumbturn moves freely P/N YRM276/YRM476-INST-FUL Rev C... - Page 11 Installing Handle Spindle & Bushing Bottom View Push spindle to full depth into interior handle. Set screw must enter v-slot in spindle when securing handle. P/N YRM276/YRM476-INST-FUL Rev C...
-
Page 12: Installing Handles
Installing Handles Spindle v-slot and handle set screw must face floor for proper installation. Inside of Door Outside of Door P/N YRM276/YRM476-INST-FUL Rev C... - Page 13 Testing Handle Operation Inside of Door P/N YRM276/YRM476-INST-FUL Rev C...
- Page 14 a Installing Door Position Sensor Accessory Magnet For DOUBLE Operating OUTSWING Patio Doors Only Cylinder Magnet Cylinder Magnet Cap As viewed from exterior Inside of Door Mark magnet location across from Door Position Sensor. Astragal 5/16" Drill Bit 5/16" Dia. Hole 1"...
- Page 15 b Installing Door Position Sensor Accessory Magnet For DOUBLE Operating INSWING Patio Doors Only Block Adhesive Magnet Cap Liner Block Magnet Adhesive Liner As viewed from exterior Inside of Door Position magnet flush to edge and centered across from Door Position Sensor arrow.
- Page 16 Installing Door Position Sensor Accessory Magnet For SINGLE Operating OUTSWING Patio Doors Only As viewed from exterior Inside Panel of Door Stop Mark magnet location across from Door Position Panel Stop Sensor. 1/4" 5/16" Drill Bit 5/16" Dia. Hole 1" Deep 1/4"...
- Page 17 d Installing Door Position Sensor Accessory Magnet For SINGLE Operating INSWING Patio and Entry Doors Only As viewed from exterior 5/16" Drill Bit 5/16" Dia. Hole 1" Deep At Marked Location P/N YRM276/YRM476-INST-FUL Rev C...
- Page 18 Installing Optional Yale Smart Module *Yale Smart Modules can be purchased separately P/N YRM276/YRM476-INST-FUL Rev C...
-
Page 19: Lock Activation
Installing Batteries & Cover “Welcome to Yale Real Living” Bolt must be in retracted (unlocked) position before installing batteries. Congratulations, you've installed your new smart lock! Continue for Programming Instructions. Lock Activation Touch the lock with your entire palm to wake the lock. You will be guided to set up your lock by following the audio instructions on the lock. - Page 20 Using Your Lock Touchscreen Press to return to previous settings menu Interior Lock Enter master Press to enter Entry Code and Battery Cover press to access or unlock settings menu. Low Battery Indicator Privacy Button & Speaker Inside Notification Lockout Light Mode Battery back-up.
- Page 21 Creating Master PIN Code The Master PIN Code is used to change lock settings. A security best practice is to set your master code with 6 or more digits and create a separate code that is used daily to lock and unlock the door. "Enter Master Code.
-
Page 22: Creating User Codes
Creating User Codes Master PIN Code must be created first. *Max user codes = 250 with Yale Smart Module. "Menu Mode, enter Max user codes = 25 without. number, press the gear key to continue." Enter Master PIN Code Press Press Press Press... -
Page 23: Deleting User Codes
Deleting User Codes "Menu Mode, enter number, press the gear key to continue." Enter Master Entry Code Press Press Press Press Press Deleting one entry code: To delete all entry codes To delete one entry code, (Does not delete Master Entry Code): you must enter the entry code you wish to delete. -
Page 24: Unlocking Door With Code
Unlocking Door with Code Enter Code Press Replacing Batteries: NOTE TO INSTALLER AND CONSUMER While Yale has included several features to prevent lockout (9-Volt battery jumper, low battery ® warnings), it is still possible for a lockout situation to occur. Because this product does not have a mechanical override (a key), Yale recommends to use this product in an environment where ®... -
Page 25: Resetting Lock To Factory Default
Enabling Door Position Sensor Functionality WARNING: Enabling this feature could cause lock to be unable to lock electronically in the event of a Door Position Sensor failure. WARNING: Enabling this feature could allow someone to tamper with your lockset Door Position Sensor preventing lock from being locked electronically. -
Page 26: Setting Definitions
Setting Definitions Settings Default Setting Definition The Master PIN Code is used for programming and for feature Creation Master PIN Code settings. It must be created prior to programming the lock. required* The Master PIN code will also operate (unlock/lock) the lock. After a successful code entry or manual unlock with the key, the lock will automatically re-lock after each unlock in an Automatic Re-lock... -
Page 27: Feature Programming Through Menu Mode Using Master Pin Code
Feature Programming Through Menu Mode Using Master PIN Code* 1. Touch screen with back of hand or palm to activate. 2. Enter 4-8 digit master PIN code* followed by key. Lock Response: "Menu mode, enter number, press key to continue." 3. -
Page 28: Programming Troubleshooting
Programming Troubleshooting Symptom Suggested Action Touchscreen becomes active when pressed w/whole hand. Use a larger area of the hand or fingers and verify contact with at least 3 areas. Lock does not respond – If touchscreen numbers are visible, check to see if they respond door is open and when pressed. -
Page 29: Hardware Troubleshooting
Confirm which Andersen door unit is in the home. If an Andersen 200 Series or 400 Series hinged patio door, the hookbolts must be manually engaged before the Yale Assure lock can lock the patio door's deadbolt. Bolt does not extend or retract smoothly a. - Page 30 Consult the dealer or an experienced radio/TV technician for help. Warning: Changes or modifications to this device, not expressly approved by ASSA ABLOY Residential Group could void the user's authority to operate the equipment. Industry Canada: This Class A digital apparatus meets all requirements of the Canadian Interference Causing Equipment Regulations.
Need help?
Do you have a question about the Yale Assure and is the answer not in the manual?
Questions and answers