Table of Contents
Advertisement
Quick Links
Advertisement
Table of Contents

Subscribe to Our Youtube Channel
Related Manuals for Gliderol Storm Safe


Summary of Contents for Gliderol Storm Safe
- Page 1 C2 Rated Sectional Garage Door Installation & User Guide...
-
Page 2: Table Of Contents
FOLLOWING INSTRUCTIONS. FAILURE TO COMPLY WITH THE FOLLOWING INSTRUCTIONS AND SAFETY WARNINGS MAY RESULT IN SERIOUS PERSONAL INJURY AND/OR PROPERTY DAMAGE. NO GUARANTEE WILL BE GIVEN OR RESPONSIBILITY ACCEPTED BY THE MANUFACTURER IF THE DOOR IS NOT INSTALLED BY AN AUTHORISED GLIDEROL INSTALLER. Contents Installation Overview Storm·Safe Sectional Door Overview... -
Page 3: Installation Overview
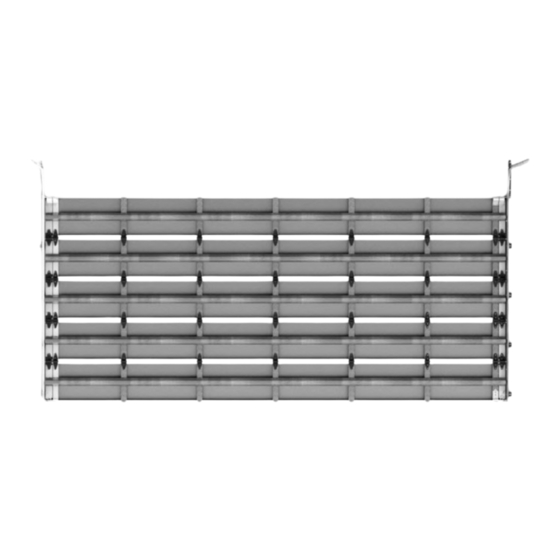
1.0 Installation Overview 1.1 Storm·Safe Sectional Door Overview... -
Page 4: Parts List
1.2 Parts List... -
Page 5: Fixing Guide
1.3 Fixing Guide... -
Page 6: Clearances Diagrams
1.4 Clearances Diagrams... -
Page 7: Installation Instructions
2.0 Installation Instructions 2.1 Installing Aluminium Uprights Measure the opening size, side room and headroom dimensions to ensure the sectional door fits the opening. Refer to various dimensions and clearances (available on previous pages) before proceeding with installation. Determine panel overlap on either side of the daylight opening (minimum 30mm per side) and mark two evenly spaced perpendicular lines from floor level on either end of the opening 8mm from the panel overlap. -
Page 8: Installing Vertical Tracks
2.2. Installing Vertical Tracks Loosely fasten the wall fix brackets to each vertical track using the 1/4’ x 5/8’ screws and nuts as shown. The screw heads must be inside the track. The smaller wall bracket is fixed to the bottom of the track, with the larger bracket above. - Page 9 Attach the flag brackets to the top of the track with the 1/4’ screw using the # 1 hinge attach a hinge to each rigid x 5/8’ screws and nuts, once again screws heads must be in a vertical section of the panel. Ensure hinge is face down and inside the track level with top edge of the panel.
-
Page 10: Preparing The Door Panels
2.3 Preparing the Door Panels Select door panel with weather seal pre-installed to bottom edge. Place this panel face down on a soft support (eg two padded saw horses). Attach the Bottom Cable Bracket and Inner Bottom Bracket to each bottom corner of the panel using 1/4’... -
Page 11: Attach Nylon Hinges
2.4 Attach Nylon Hinges Attach Side Hinges #1 to top side of bottom panel and all center stiles using 1/4’ metal screws. Feed the roller through both hinges to get the alignment right while attaching hinges. Secure only middle holes on the exterior hinges to ensure screws don’t penetrate on the Aluminium Windlock side. -
Page 12: Attach Bracing/Struts
2.5 Attach Bracing/Struts Doors above and equal to 4951mm will be provided with at least one Gliderol strut per panel which must be installed at the centre of each panel covering the entire door width. If the Strut is longer than the door width it must be cut to exact door width size (including the aluminium stile). - Page 13 2.6 Installing Panels cont... Make sure front face of panels do not touch wall and have a minimum clearance of 3mm when closed. IMPORTANT- Do not force the track too tightly against the rollers as this will cause the door to bind when in operation.
-
Page 14: Torsion Spring Assembly
2.7 Torsion Spring Assembly WARNING: Springs under tension may cause damage or injury if handled incorrectly and should only be attempted by a person with sound knowledge of springing mechanisms. IMPORTANT: Door must always be in closed position when adjusting tension. Attach the bearing plate to each horizontal angle on both tracks using carriage bolts and nuts. - Page 15 WARNING: Always ensure that your body and face are to the side of the winding bars. Congratulations you have now successfully commissioned your Gliderol sectional overhead garage door. If installing an automatic operator, please refer to the Giderol Operator installation instructions provided.
-
Page 16: Certified Drawings
3.0 Certified Drawings... - Page 17 3.0 Certified Drawings cont...
-
Page 18: Warranty
In addition, we offer our Gliderol Warranty as set out below. The benefits given to you by our Gliderol Warranty are in addition to other rights and remedies you may have under the Australian Consumer Law. - Page 19 Australian Consumer Law or other applicable laws, which may not be excluded. 4. Our Gliderol Warranty does not apply to any defect, loss or damage arising or caused directly or indirectly by or as a result of:-...
- Page 20 NOTE: THIS FORM MUST BE COMPLETED BY THE INSTALLER AND PRODUCED AS PROOF OF PURCHASE DATE WHEN MAKING A SERVICE CALL UNDER WARRANTY, OTHERWISE CALLS ARE LIABLE TO SERVICE CHARGES. FOR SALES & SERVICE CONTACT GLIDEROL INTERNATIONAL PTY LTD (ABN 92 007 928 949) Head Office...
Need help?
Do you have a question about the Storm Safe and is the answer not in the manual?
Questions and answers