Advertisement
Quick Links
1 Centennial Avenue Piscataway, NJ 08855
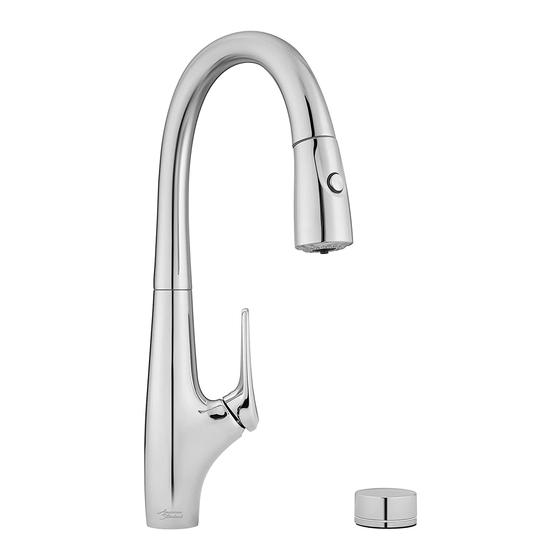
Saybrook
™
Filtered Kitchen Faucet
Thank you for selecting American Standard...
the benchmark of fine quality for over 140 years.
To ensure that your installation proceeds smoothly-please read
these instructions carefully before you begin.
RECOMMENDED TOOLS
Flashlight
1
INSTALL FAUCET WITH OR WITHOUT DECK ESCUTCHEON
NOTE: There are several different options to choose from on page 2. Pick according to your countertop hole configuration
and whether or not the filter will be above or below the countertop.
(A) Installation without DECK ESCUTCHEON
• Make certain the SEAL (10) is properly seated in bottom recess of the SPOUT (2). Insert supply HOSES (3), SPRAY HOSE (4)
and SHANK (5) through mounting hole and seat SPOUT BASE onto sink or mounting surface. Do not use putty.
• Insert HOSES (3) through RUBBER WASHER (6), BRASS WASHER (7), and threaded LOCKNUT (8) under sink or mounting
surface.
• Assemble RUBBER WASHER (6), BRASS WASHER (7), and threaded LOCKNUT (8) onto SHANK (5) from underside
of sink or mounting surface. Hand tighten LOCKNUT (8).
• Use a screwdriver to tighten SCREWS (9) on LOCKNUT (8). Work your way around LOCKNUT (8), tightening the screws
slightly each time until all are snug to ensure even pressure.
(B) Installation with DECK ESCUTCHEON (optional)
• Make certain the SEAL (10) is properly
seated in top recess of DECK
ESCUTCHEON (1) and SEAL (11) is
properly seated in bottom recess of
DECK ESCUTCHEON (1).
Do not use putty.
• Insert SUPPLY HOSES (3), SPRAY
HOSE (4) and SHANK (5) through
hole of DECK ESCUTCHEON (1),
and mounting surface.
• Follow mounting instructions above
to secure faucet to mounting surface.
Product names listed herein are trademarks of AS America, Inc.
© AS America, Inc. 2020
INSTALLATION
INSTRUCTIONS
4902330.XXX
Phillips Screwdriver
A
SPOUT BASE
5
3
4
6
7
8
9
- 1 -
Adjustable Wrench
CAUTION
2
10
SINK OR
MOUNTING
SURFACE
Certified to comply with ANSI A112.18.1M
Safety Glasses
Turn off water at
main supply
B (OPTIONAL)
10
SPOUT BASE
5
3
4
6
7
8
9
M985028 (3/20)
1
11
Advertisement

Subscribe to Our Youtube Channel
Related Manuals for American Standard Saybrook 4902330 Series


Summary of Contents for American Standard Saybrook 4902330 Series
- Page 1 4902330.XXX Saybrook ™ Filtered Kitchen Faucet Thank you for selecting American Standard... the benchmark of fine quality for over 140 years. To ensure that your installation proceeds smoothly-please read these instructions carefully before you begin. Certified to comply with ANSI A112.18.1M...
- Page 2 FILTER BELOW COUNTERTOP FILTER BELOW COUNTERTOP FILTER IN COUNTERTOP FILTER BELOW COUNTERTOP 2 Hole deck plate 4902882 purchased separately FILTER IN COUNTERTOP FILTER IN COUNTERTOP M985028 (3/20) - 2 - - 2 -...
- Page 3 MAKE WATER SUPPLY CONNECTIONS • Turn off hot and cold water supplies. • Thread RED SUPPLY HOSE (1) onto HOT WATER SUPPLY (3). • Thread BLUE SUPPLY HOSE (2) onto T-CONNECTOR (4). • Thread T-CONNECTOR (4) onto COLD WATER SUPPLY (5). •...
- Page 4 FILTER INSTALLATION INSTALL FILTER ON COUNTERTOP • Insert FILTER (3) through mounting hole in countertop. • Hand tighten MOUNTING NUT (2) to secure FILTER (3). • Firmly push the WHITE HOSE (4) into PORT (5) labelled “CONNECT TO FAUCET”. • Firmly push the BLUE HOSE (6) into PORT (7) labelled “CONNECT TO FILTER”.
-
Page 5: Battery Pack Connections
BATTERY PACK CONNECTIONS • Install BATTERY PACK (1) below the countertop with velcro on the back of BATTERY PACK (1). The BATTERY PACK (1) should be close to the faucet and filter so that the wired connections can be made. OPTIONAL: Instead of Velcro the battery pack can be hung from a nail or hook from LOOP (7). -
Page 6: Filter Installation
FILTER INSTALLATION • Remove FILTER COVER (1) by pulling up. • Unthread FILTER CAP (2) from FILTER HOUSING (4). • Insert FILTER (3) into FILTER HOUSING (4). • Thread FILTER CAP (2) onto FILTER HOUSING (4). • Push FILTER COVER (1) onto FILTER CAP (2). M985028 (3/20) - 6 -... - Page 7 PREPARE FAUCET & CHECK CONNECTION FOR LEAKS • Move HANDLE (1) into “off” position. • Turn on water supplies and check connections for leaks. • With HANDLE (1) in “off” position, unthread AERATOR (4) from SPRAY HEAD (2) with AERATOR KEY (5). •...
-
Page 8: Replace Filter
OPERATIONAL GUIDE SPRAY OPERATION STREAM (AERATOR) • With FAUCET on, press TOGGLE BUTTON (4) on SPRAY (3) to switch from stream to spray. SPRAY BATTERY AND FILTER LIFE INDICATORS • FILTER BUTTON (1) illuminates indicating filter and battery life as detailed below: —... - Page 9 MAINTENANCE & SERVICE FAUCET DRIPS • Turn VALVE to OFF position. • Operate HANDLE several times from OFF to ON position. Do not apply excessive force. • If drips persist call customer service 1 (800) 442-1902. LOW FLOW RATE • Remove aerator and flush faucet. •...
Need help?
Do you have a question about the Saybrook 4902330 Series and is the answer not in the manual?
Questions and answers
Where are the locations for O-Rings? We have a finger size O-Ring and don't know where it belongs.