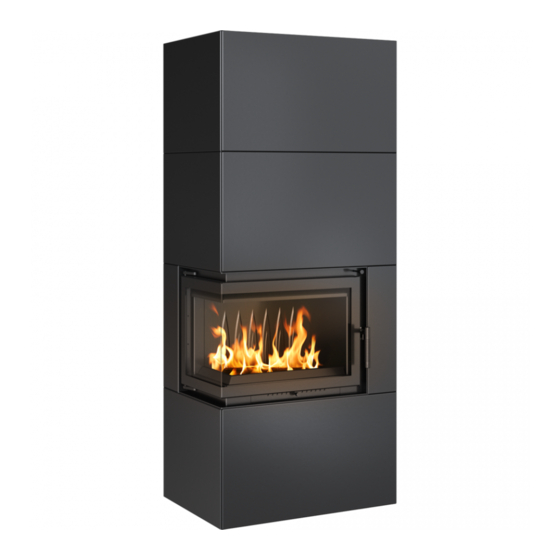
Kratki SIMPLE BOX Instructions Manual
Hide thumbs
Also See for SIMPLE BOX:
- Installation and operating instructions manual (34 pages) ,
- Instructions manual (98 pages)

Subscribe to Our Youtube Channel
Related Manuals for Kratki SIMPLE BOX


Summary of Contents for Kratki SIMPLE BOX
- Page 1 SIMPLE BOX Instrukcja instalacji i obsługi SIMPLE BOX / Instructions (EN) SIMPLE BOX / Bedienungsanleitung (DE) Producent: www.kratki.com Kratki.pl Marek Bal ul. W. Gombrowicza 4 26-660 Wsola/Jedlińsk...
- Page 2 Wspieramy kampanię Nie Rób Dymu www.nierobdymu.com, fb/nierobdymu DLA INSTALATORA: Zostawić instrukcję razem z urządzeniem. WŁAŚCICIEL (KONSUMENT): Zachowaj niniejszą instrukcję do przyszłego użytku.
- Page 3 Przeczytaj instrukcję do końca i udostępnij ją każdemu ewentualnemu użytkownikowi urzą- dzenia zanim podejmie się jego obsługi, montażu lub demontażu. Dziękujemy za zaufanie i wybór naszego urządzenia SIMPLE BOX. To urządzenie zostało zapro- jektowane z myślą o Państwa bezpieczeństwie i komforcie. Wyrażamy pewność, że będą Pań- stwo zadowoleni ze swojego wyboru ze względu na zaangażowanie jakie włożyliśmy w pracę...
-
Page 4: Ogólne Informacje
INSTALACJA UWAGA: UCHYLENIE SIĘ OD ZALECEŃ NINIEJSZEJ INSTRUKCJI W ODNIESIENIU DO INSTA- LACJI, OBSŁUGI LUB UCHYLENIE SIĘ OD ZALECEŃ DOTYCZĄCYCH DOZWOLONYCH CZĘŚCI I AKCESORIÓW DLA TEGO URZĄDZENIA MOŻE SKUTKOWAĆ POWAŻNYMI URAZAMI LUB USZKODZENIEM MIENIA. KAŻDY MODEL ZABUDOWY JEST MODELEM DEDYKOWANYM, TO ZNACZY, ŻE JEST PRZEZNA- CZONY DO INTUICYJNEGO I SZYBKIEGO ZABUDOWANIA TYLKO TEGO MODELU KOMINKA, KTÓRY JEST SPRZEDAWANY W ZESTAWIE Z ZABUDOWĄ. -
Page 5: Informacje Dotyczące Bezpieczeństwa
UWAGA: Wszystkie powierzchni urządzenia i dedykowanej zabudowy SIMPLE BOX, zwłaszcza w wersji ze stalowymi panelami, traktować należy jako powierzchni robocze! Oznacza to, że podczas pracy urządzenia, wszystkie widoczne elementy urządzenia i zabudowy mogą... -
Page 6: Montaż Urządzenia
INSTALACJA – WPROWADZENIE UWAGI ODNOŚNIE PRZEMIESZCZANIA URZĄDZENIA: To urządzenie zostało zaprojektowane z myślą o łatwej instalacji i montażu z możliwością umiej- scowienia go praktycznie w dowolnym miejsce, tj. wszędzie tam, gdzie można wyprowadzić komin zgodny z wymogami instalacyjnymi instrukcji kominka oraz z wymogami prawa budowlanego. OSTRZEŻENIE: NIE PRÓBUJ PRZEMIESZCZAĆ... - Page 7 Krok 2. Wzorując się na czynnościach wykonanych w kroku pierwszym należy przykręcić przednie nogi konstrukcji nośnej zgodnie ze schematem poniżej. Krok 3. Zamontuj panel tylny zabudowy, zgodnie ze schematem poniżej, używając zaczepów na pa- nelu i wsuwając go we wcięcia znajdujące w szkielecie konstrukcji nośnej. Krok 3.2 (Opcja z dolotem) W przypadku podłączenia dolotu powietrza, w następnej kolejności należy ustawić...
- Page 8 SIMPLE BOX jest wyłącznie dodatkiem. Jeśli brak jest lokalnych wytycznych dotyczących instalacji urzą- dzenia wraz z jego instalacją kominową, należy kierować się w tym założeniami instrukcji urządzenia i jego podłączenia, dołączonymi do zakupionego kominka.
- Page 9 www.nierobdymu.com, fb/nierobdymu For the INSTALLER: Leave the manual with the device. CONSUMER: Keep this manual for future reference.
- Page 10 Thank you for trusting us and choosing our SIMPLE BOX. This device was designed with your sa- fety and comfort in mind. We are confident that you will be satisfied with your choice due to the commitment we have put into the design and production of this device.
-
Page 11: Background Information
INSTALLATION NOTE: FAILURE TO FOLLOW THE INSTRUCTIONS IN THIS MANUAL WITH RESPECT TO INSTAL- LATION, OPERATION, OR FAILURE TO FOLLOW THE INSTRUCTIONS FOR PERMITTED PARTS AND ACCESSORIES FOR THIS DEVICE MAY RESULT IN SERIOUS INJURY OR DAMAGE TO PRO- PERTY. EACH BUILT-IN MODEL IS A DEDICATED MODEL, THAT IS TO SAY, IT IS DESIGNED FOR INTU- ITIVE AND QUICK INSTALLATION ONLY OF THE FIREPLACE MODEL THAT IS SOLD WITH THE BUILT-IN MODEL. -
Page 12: Safety Information
NOTE: All surfaces of the device and dedicated installation of the SIMPLE BOX, especially in the version with steel panels, should be treated as working surfaces! This means that during operation... -
Page 13: Installation Rules
INSTALLATION - INTRODUCTION NOTES ON THE MOVEMENT OF THE DEVICE: This device has been designed for easy installation and assembly with the possibility to place it practically in any place, i.e. anywhere where the chimney can be brought out in accordance with the installation requirements of the fireplace manual and the building law. - Page 14 Step 2: Following the steps of step 1, screw the front legs of the superstructure in accordance with the diagram below. Step 3: Install the back panel, as shown in the diagram below, using the hooks on the panel and inser- ting it into the notches in the substructure frame.
-
Page 15: Maintenance Warning
The connection of the fireplace to the chimney installation should respect the local construction law and the guidelines contained in the manual of the device itself, for which the SIMPLE BOX is only an accessory. If there are no local guidelines for the installation of the appliance and its chimney installa- tion, follow the instructions for the appliance and its connection included with the purchased fireplace. - Page 16 www.nierobdymu.com, fb/nierobdymu Für den INSTALLATEUR: Lassen Sie das Handbuch bei dem Gerät. VERBRAUCHER: Bewahren Sie dieses Handbuch zum späteren Nachschlagen auf.
- Page 17 Verfügung, bevor Sie es in Betrieb nehmen, installieren oder demontieren. Danke, dass Sie uns vertrauen und unsere SIMPLE BOX gewählt haben. Dieses Gerät wurde im Hinblick auf Ihre Sicherheit und Ihren Komfort entwickelt. Wir sind zuversichtlich, dass Sie mit Ihrer Wahl aufgrund des Engagements, das wir in das Design und die Produktion dieses Geräts...
- Page 18 EINRICHTUNG HINWEIS: DIE NICHTBEACHTUNG DER ANWEISUNGEN IN DIESEM HANDBUCH IN BEZUG AUF INSTALLATION, BETRIEB ODER DIE NICHTBEACHTUNG DER ANWEISUNGEN FÜR ZULÄSSIGE TEILE UND ZUBEHÖR FÜR DIESES GERÄT KANN ZU SCHWEREN VERLETZUNGEN ODER SACH- SCHÄDEN FÜHREN. JEDES EINGEBAUTE MODELL IST EIN DEDIZIERTES MODELL, D.H. ES IST NUR FÜR DIE INTUITI- VE UND SCHNELLE INSTALLATION DES KAMINMODELLS VORGESEHEN, DAS ZUSAMMEN MIT DEM EINGEBAUTEN MODELL VERKAUFT WIRD.
- Page 19 Kontakt mit dem Gerät vermeiden, um Verbrennungen und Entzün- dungen der Kleidung zu vermeiden. HINWEIS: Alle Oberflächen des Geräts und die spezielle Installation der SIMPLE BOX, insbesondere in der Ausführung mit Stahlplatten, sollten als Arbeitsflächen behandelt werden! Das bedeutet, dass während des Betriebs des Geräts alle sichtbaren Elemente des Geräts und seines Gehäuses...
- Page 20 INSTALLATION - EINFÜHRUNG NOTIZEN ÜBER DIE BEWEGUNG DES GERÄTS: Dieses Gerät wurde für eine einfache Installation und Montage konzipiert, mit der Möglichkeit, es praktisch an jedem Ort zu platzieren, d.h. überall dort, wo der Schornstein gemäß den Installation- sanforderungen des Kaminhandbuchs und des Baurechts herausgebracht werden kann. WARNUNG: VERSUCHEN SIE NICHT, DAS GERÄT WÄHREND DES BETRIEBS ZU BEWEGEN! INSTALLATIONSREGELN Die Installation sollte in Übereinstimmung mit den Anforderungen des nationalen oder regionalen...
- Page 21 Schritt 1: Schrauben Sie zunächst die hinteren Beine der Aufbaustruktur wie in der Abbildung unten dargestellt, indem Sie sie an den angegebenen Punkten zu M6-Bolzen und Muttern drehen. Schrauben Sie auch die mitgelieferten verstellbaren Füße für die spätere Nivellierung der gesamten Struktur ein.
- Page 22 Der Anschluss des Kamins an die Schornsteinanlage sollte die örtlichen Bauvorschriften und die in der Anleitung des Gerätes selbst enthaltenen Richtlinien beachten, für die die SIMPLE BOX nur ein Zubehörteil ist. Wenn es keine lokalen Richtlinien für die Installation des Geräts und des Schornsteins gibt, befolgen Sie die Bestimmungen des Gerätehandbuchs und des Anschlusses, die dem gekauften...
- Page 23 ACHTUNG!!!! Die Wartung des Geräts darf nur von einem qualifizierten Servicetechniker durchgeführt werden. Es sollte auch daran erinnert werden, dass für jedes Heizgerät Schornsteinfeger nach den Richtlinien der örtlichen Bauordnung, mindestens aber einmal im Jahr, erforderlich sind. • Das Gerät sollte regelmäßig, mindestens einmal pro Jahr, überprüft werden. •...
- Page 24 WYMIARY ZABUDOWY / INSTALLATION DIMENSIONS / EINBAUMAßE SIMPLE BOX BSP...
- Page 25 SIMPLE BOX BSL...
- Page 26 Krok 1. / Step 1 / Schritt 1 Śruba M6 x12 Screw M6x12 Śruba M6x12 Schraube M6x12 Stopka STOPKA Footer Fußzeile Nakrętka M6 Nakrętka M6 M6 nut Nuss M6...
- Page 27 Krok 2. / Step 2 / Schritt 2...
- Page 28 Krok 3. / Step 3 / Schritt 3...
- Page 29 W przypadko podłączenia dolotu powietrza, kominek należy ustawić na konstrukcji np. na cegłach, Krok 3.2. / Step 3.2 / Schritt 3.2 zamontować dolne panele i usunąć podstawki.
- Page 30 Krok 4. / Step 4 / Schritt 4 śruba M5x10 - poziomowanie osłony screw M5x10 - levelling of the protection structure Śruba M5x10 - poziomowanie osłony Schraube M5x10 - Nivellierung der Schutzvorrichtung śruba M5x10 - mocowanie zaczepu Śruba M5x10 - mocowanie zaczepu screw M5x10 - fixing the hook Schraube M5x10 - Befestigung des Hakens...
- Page 31 Krok 5. / Step 5 / Schritt 5 1x śruba M5x10 - mocowanie zaczepu 1x śruba M5x10 - mocowanie zaczepu 1x screw M5x10 - fixing the hook 1x Schraube M5x10 - Befestigung des Starters...
- Page 32 Krok 6. / Step 6 / Schritt 6 Krok 7. / Step 7 / Schritt 7...
- Page 33 Krok 8. / Step 8 / Schritt 8 Śruba M5x10 Screw m5x10 Śruba M5x10 Schraube m5x10...
- Page 34 Krok 9. / Step 9 / Schritt 9 śruba M5x10 screw m5x10 Śruba M5x10 Schraube m5x10...
- Page 35 Krok 10. / Step 10 / Schritt 10 zaczep hook Clip śruba M5x10 screw M5x10 Schraube m5x10...
- Page 36 Krok 11. / Step 11 / Schritt 11 zaczep hook Clip ZACZEP...
- Page 37 Krok 12. / Step 12 / Schritt 12 Panel mniejszy z wieszakami w wersji BSL / Smaller panel with hangers in BSL design / Kleineres Paneel mit Aufhängern in BSL-Ausführung śruba M4x6 Śruba M4x6 screw M4x6 Schraube M4x6 Wieszak do kominka z przeszleniem Wieszak do kominka po lewej stronie z przeszkleniem...
- Page 38 Panel mniejszy z wieszakami w wersji BSP / Smaller panel with hangers according to GNP / Kle- ineres Paneel mit Aufhängern in BSP-Ausführung śruba M4x6 Śruba M4x6 screw M4x6 Schraube m4x6 Wieszak do kominka z przeszleniem Wieszak do kominka po prawej stronie z przeszkleniem Fireplace hanger with glazing on the po prawej stronie...
- Page 39 Krok 13. / Step 13 / Schritt 13...
- Page 40 Krok 14. / Step 14 / Schritt 14 Panel lewy w wersji BSL Panel lewy w wersji BSP Left panel in the BSL version Left panel in the BSP version Linke Tafel in der BSL-Version Linke Tafel in der BSP-Version zaczep zaczep ZACZEP...
- Page 41 Krok 15. / Step 15 / Schritt 15 1x zaczep 1 x ZACZEP 1x hook 1x Clip 2x zaczep 2x hook 2 x ZACZEP 2x Clip...
- Page 42 F ( 1 : 3 ) Zawiesić tylny i boczny ekran Zawiesic tylny i boczny ekran w odpowiednich wycięciach. w odpowiednich wycięciach. Hang the rear and side screens in the appropriate cut-outs. Hängen Sie die Rück- und Seitenscheiben ein in den entspre- chenden Ausschnitten.
- Page 43 Widok z założonymi ekranami Poluzować 4 śruby M5 View with screens attached Lösen Sie 4 Schrauben Ansicht mit angeschlossenen Bildschirmen M5 Loosen 4 M5 screws Widok z założonymi ekranami. Poluzować 4 śruby M5 Wsunąć ekran i dokręcić 4 śruby M5 Wsunąć...
- Page 44 Krok 16. / Step 16 / Schritt 16 śruba M5x10 Śruba M5x10 screw M5x10 Schraube M5x10 śruba M6x12 Śruba M6x12 screw M6x12 Schraube M6x12 nakrętka M6 M6-Mutter Nakrętka M6 M6-Mutter...
- Page 45 Krok 17. / Step 17 / Schritt 17...
- Page 46 Krok 18. / Step 18 / Schritt 18 śruba M5x10 screw M5x10 Śruba M5x10 Schraube M5x10...
- Page 47 Krok 19. / Step 19 / Schritt 19 śruba M5x10 Śruba M5x10 screw M5x10 Schraube M5x10...
- Page 48 Gotowa zabudowa wraz z urządzeniem / Ready to install with the unit / Bereit zur Installation mit dem Gerät...
- Page 50 (PL) SPRZEDAJĄCY Nazwa: Pieczęć i podpis sprzedawcy; Adres: Tel/fax: Data sprzedaży: NABYWCA WKŁADU Wkład kominkowy powinien być zainstalowany zgodnie Data i czytelny podpis nabywcy; z obowiązującymi w kraju przepisami i regułami, z postano- wieniami instrukcji obsługi przez instalatora posiadającego stosowne uprawnienia. Oświadczam, iż...
- Page 51 (PL) REJESTR PRZEGLĄDÓW PRZEWODU DYMOWEGO Przegląd przy instalacji wkładu Data, podpis i pieczęć kominiarza Data, podpis i pieczęć kominiarza Data, podpis i pieczęć kominiarza Data, podpis i pieczęć kominiarza Data, podpis i pieczęć kominiarza Data, podpis i pieczęć kominiarza Data, podpis i pieczęć kominiarza Data, podpis i pieczęć...
-
Page 52: Support Services
SELLER Seller’s seal and signature; Name: Address: Tel/fax: Date of sale: INSERT BUYER The fireplace insert should be installed in accordance with Date and legible signature of the Buyer; the rules and regulations valid in the country, the manual provisions by the installer having required qualifications. I hereby declare that having read the operating manual and the guarantee conditions in case of failure to observe the provisions included there the producer bears no liability for... - Page 53 REGISTER OF SMOKE DUCT INSPECTIONS Inspection during the insert installation Date, signature and seal of the chimney sweeper Date, signature and seal of the chimney sweeper Date, signature and seal of the chimney sweeper Date, signature and seal of the chimney sweeper Date, signature and seal of the chimney sweeper Date, signature and seal of the chimney sweeper Date, signature and seal of the chimney sweeper...
- Page 54 VERKÄUFER Der Name: Stempel und Unterschrift des Verkäufers; Die Adresse: Tel/fax: Datum des Verkaufs: STOCKER EINFÜGEN Der Kaminofen muss gemäß den folgenden Vorschriften Datum und leserliche Unterschrift des Käufers; installiert werden mit den geltenden nationalen Vorschriften und Regeln, mit den Bestimmungen der Betriebsanleitung durch einen au- torisierten Installateur.
- Page 55 RAUCHKANAL-INSPEKTIONSREGISTER Datum, Unterschrift und Siegel Übersicht bei der Installation der Patrone des Schornsteinfegers Datum, Unterschrift und Siegel Datum, Unterschrift und Siegel des Schornsteinfegers des Schornsteinfegers Datum, Unterschrift und Siegel Datum, Unterschrift und Siegel des Schornsteinfegers des Schornsteinfegers Datum, Unterschrift und Siegel Datum, Unterschrift und Siegel des Schornsteinfegers des Schornsteinfegers...
- Page 56 Kratki.pl Marek Bal ul. Gombrowicza 4, Wsola, 26-660 Jedlińsk, Poland tel. 00 48 48 389 99 00, 00 48 48 384 44 88, fax 00 48 48 384 44 88 wew. 106 www.kratki.com www.facebook.com/kratkipl www.youtube.com/kratkipl www.instagram.com/kratkipl AP/14/07/2020...
Need help?
Do you have a question about the SIMPLE BOX and is the answer not in the manual?
Questions and answers