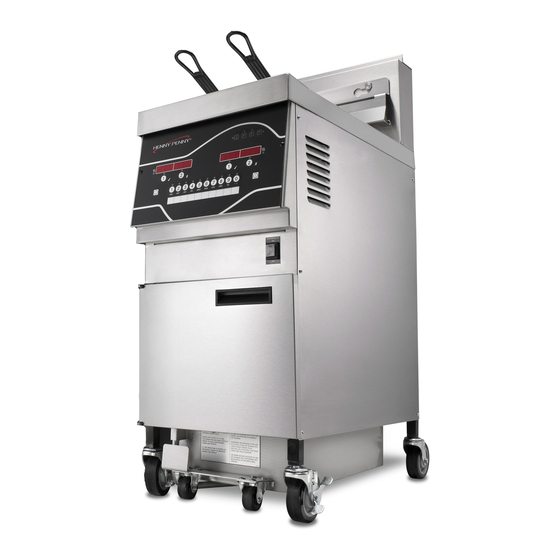
Henny Penny Evolution Elite EEE-141 Technical Manual
Reduced oil capacity open fryer
Hide thumbs
Also See for Evolution Elite EEE-141:
- Operator's manual (86 pages) ,
- Quick manual (2 pages) ,
- Quick manual (2 pages)
Advertisement
Quick Links
TECHNICAL
MANUAL
E E v v o o l l u u t t i i o o n n E E l l i i t t e e ™ ™
( ( E E l l e e c c t t r r i i c c ) )
R R e e d d u u c c e e d d O O i i l l C C a a p p a a c c i i t t y y
O O p p e e n n F F r r y y e e r r
EEE-141
EEE-142
EEE-143
EEE-144
FM06-041B
Advertisement

Related Manuals for Henny Penny Evolution Elite EEE-141


Summary of Contents for Henny Penny Evolution Elite EEE-141
- Page 1 TECHNICAL MANUAL E E v v o o l l u u t t i i o o n n E E l l i i t t e e ™ ™ ( ( E E l l e e c c t t r r i i c c ) ) R R e e d d u u c c e e d d O O i i l l C C a a p p a a c c i i t t y y O O p p e e n n F F r r y y e e r r EEE-141...
- Page 3 Table of Contents Safety......................... iii Chapter 1 Troubleshooting ....................1 1.1 Introduction ......................1 1.2 Troubleshooting .....................1 1.3 Error Codes ......................3 Chapter 2 Info & Filter Button Stats ..................5 2.1 Info & Filter Button Stats ..................5 2.1.1 Filter Button Stats ....................5 2.1.2 Info Button Stats ....................5 Chapter 3 Information Mode ....................7 Chapter 4 Product Program Mode ..................15 4.1 Modifying Product Settings ...................15...
- Page 4 6.13 Filter Pump & Motor for Units Manufactured Prior to September 2018 ....67 6.13.1 Removing Debris from Pump ................67 6.13.2 Resetting Thermal Overload Switch...............69 6.13.3 Motor Removal ....................69 6.13.4 Replacement Of Pump Motor ................71 6.14 HubMounted Filter Pump and Motor Assembly .............72 6.14.1 Removing Debris from Pump ................72 6.14.2 Replacing the Hubmounted Filter Pump ............73 6.14.3 Replacing the Motor Assembly ..............76...
- Page 5 S S a a f f e e t t y y Henny Penny fryers have many safety features incorporated. However, the only way to ensure safe operation is to fully understand the proper installation, operation, and maintenance procedures. The instructions in this manual have been prepared to aid you in learning the proper procedures.
- Page 6 SHOCK HAZARD SYMBOLS HOT SURFACE SYMBOLS These are the original version controlled Henny Penny instructions for Evolution Elite Reduced Oil Capacity Open Fryer Model EEE 141, 142, 143, and 144. This manual is available on the Henny Penny Public website (www.hennypenny.com). Read these instructions completely prior to installation and operation of this appliance to ensure compliance to all required installation, operation and safety standards.
- Page 7 Proper maintenance also increases the usable life of the appliance and oil, which reduces lifetime operating costs. Additionally, old oil increases the possibility of surge boiling and fire due to the reduced flash point of the oil. The oil temperature must never exceed 450⁰...
- Page 9 C C h h a a p p t t e e r r 1 1 T T r r o o u u b b l l e e s s h h o o o o t t i i n n g g 1 1 .
- Page 10 Problem Cause Correction JIB oil line is Check JIB line. clogged or collapsed. Filter pan needs Clean filter pan and change paper or pad. cleaned. Oil foaming or Water in oil. Drain and clean oil. boiling over top of Improper or bad Use recommended oil.
- Page 11 Problem Cause Correction of the pump mo- tor is tripped. D D i i s s p p l l a a y y e e d d P P r r o o m m p p t t S S e e c c t t i i o o n n “IS POT FILLED”...
- Page 12 Display Cause Panel Board Correction “E-18A” Left level sensor Turn switch to OFF position, then back to ON; if display open. still indicates a failed sensor, have the connections checked on the control board. Have sensor check and re- “E-18B” Right level sen- placed if necessary.
- Page 13 C C h h a a p p t t e e r r 2 2 I I n n f f o o & & F F i i l l t t e e r r B B u u t t t t o o n n S S t t a a t t s s 2 2 .
- Page 15 1 1 6 6 . . USB Support NOTE: Not all Information Mode functions are discussed in this section. To ensure proper operation of fryer, please consult Henny Penny Corp. before changing any of these settings. For more information on these functions, contact Technical Support at 1-800-417- 8405, or 1-937-456-8405.
- Page 16 T T a a b b l l e e 3 3 - - 1 1 I I n n f f o o r r m m a a t t i i o o n n M M o o d d e e D D e e t t a a i i l l s s Menu Step Description 1.
- Page 17 Menu Step Description 1 1 . . Press the right arrow button and “4. OIL STATS” shows in displays. 2 2 . . Press the down arrow button to start viewing the cook data. See Table 3-4 Oil Stats Details , page 12 3 3 .
- Page 18 Menu Step Description 2 2 . . Press the down arrow button and an underscore (_) indicates the input is not presently detected. A checkmark (✓) indicates the signal is detecting a normal input. A blinking “X” indicates the signal is presently detected, but is detected as a half-wave (partially failed) input.
- Page 19 Function Display Example Ready? (Was Fryer Ready Before Start?) READY? When Cook Cycle Was Stopped: Early QUIT AT0: 10 REM After Complete Cook Cycle *DONE* +6 SEC Difference (%) Between Actual And Pro- ACT/PROG grammed Cook Time T T a a b b l l e e 3 3 - - 3 3 D D a a i i l l y y S S t t a a t t s s D D e e t t a a i i l l s s Function Display Example Day for which this data was recorded...
- Page 20 Function Display Example Cook Cycles for Product #9 COOK -9- TUE Cook Cycles for Product #0 COOK -0- TUE T T a a b b l l e e 3 3 - - 4 4 O O i i l l S S t t a a t t s s D D e e t t a a i i l l s s Function Display Example Start date of new oil...
- Page 21 Function Display Example Cook Cycles for Product #5 COOK -5- 0 Cook Cycles for Product #6 COOK -6- 6 Cook Cycles for Product #7 COOK -7- 0 Cook Cycles for Product #8 COOK -8- 0 Cook Cycles for Product #9 COOK -9- 1 Cook Cycles for Product #0 COOK -0- 0...
- Page 23 C C h h a a p p t t e e r r 4 4 P P r r o o d d u u c c t t P P r r o o g g r r a a m m M M o o d d e e This mode allows you to program the following: •...
- Page 24 assigned to it, that LED will be lit. To assign other product buttons to that product, press and hold the product button for 3 seconds and that LED stays lit. To remove a product from a button, press and hold the product button with a lit LED and the LED goes out.
- Page 25 the average cooking temperature for each product. The timer speeds up at temperatures above this setting and slows down at temperatures below this setting. Press the product button or the up and down arrow buttons to change this value. F F u u l l l l H H e e a a t t 1 1 5 5 ) ) Press the right arrow button until “FULL HT”...
- Page 27 C C h h a a p p t t e e r r 5 5 L L e e v v e e l l 2 2 P P r r o o g g r r a a m m m m i i n n g g Used to access the following: •...
- Page 28 S S P P - - 8 8 Filter Tracking Mode - 1.MIXED or 2.GLOBAL S S P P - - 8 8 A A Suggest Filter At... - 75% to 100% (MIXED) S S P P - - 8 8 B B Filter Lockout Enabled? - YES or NO (MIXED) S S P P - - 8 8 A A Left Vat Filter Cycles - 0 to 99 (GLOBAL)
- Page 29 S S P P - - 3 3 0 0 Skip ‘SKIM’ Prompt? - YES or NO S S P P - - 3 3 1 1 2-Stage Wash Enabled? - YES or NO T T a a b b l l e e 5 5 - - 2 2 S S p p e e c c i i a a l l P P r r o o g g r r a a m m m m i i n n g g P P r r o o c c e e d d u u r r e e s s SP-1 Temperature 1 1 .
- Page 30 2 2 . . With “YES” in the display, press the right arrow button and “SP- 7A” “USE ‘0’ FOR IDLE” flashes on the left display. Press the up or down arrow buttons to select “YES” or “NO”. If “YES” is selected, an Idle Mode can be programmed in product button 0.
- Page 31 2 2 . . Press the right arrow button and “SP-8B” “LOCKOUT ENABLED?” shows in the left display. Press the up and down arrow buttons to choose “YES or “NO”. 3 3 . . If set to “YES”, when controls suggest filtering, “FILTER LOCKOUT”/“YOU *MUST* FILTER NOW”, shows in display;...
- Page 32 Use the up and down arrow buttons to choose “YES” or “NO”. 2 2 . . Press the right arrow button and “SP-8B” “FILTER LOCKOUT ENABLED?” shows in the left display. Press the up and down buttons to choose “YES” or “NO”. 3 3 .
- Page 33 SP-15 Cooking 1 1 . . Press and release the right arrow button until “SP-15 SHOW Indicator COOKING INDICATR” flashes in the left display. Press the up or down arrow buttons to choose “YES” and during a cook cycle “*” shows which timer is counting down.
- Page 34 SP-22 Bulk Oil 1 1 . . Press and release the right arrow button until “SP-22 BULK OIL Supply SUPPLY?” flashes in the left display. Press the up and down arrow buttons to choose “YES SUPL” or “NO SUPL”. 2 2 . . Set to “YES” if the oil is pumped into the vat from an outside oil reservoir.
- Page 35 3 3 . . If satisfied with code, press the program button, “*CODE CHANGED*” shows in display. 4 4 . . If not satisfied with code, press the info button and “*CANCEL*” shows in display the reverts back to “SP-26” “CHANGE USAGE CODE? 1=YES”.
- Page 36 C C o o n n t t r r o o l l M M o o d d e e s s The Data Logging, Heat Control, Tech, Stat and Filter Control Modes are advanced diagnostic and program modes, mainly for Henny Penny use only. For more information on these modes, contact the Service Department at 1-800-417- 8405 or 1-...
- Page 37 NOTE: Not all Tech Mode functions are discussed in this section. To ensure proper operation of fryer, please consult Henny Penny Corp. before changing any of these settings. For more information on these functions, contact the Service Department at 1-800-417- 8405, or 1-937-456-8405.
- Page 38 Program Code Description T T - - 1 1 4 4 Right Level 2 Probe Calibration & Offset T T - - 1 1 5 5 CPU Control Temp. Calibration/Offset/Highest T T - - 1 1 6 6 View A - D Channel T T - - 1 1 7 7 Digital Inputs T T - - 1 1 8 8...
- Page 39 Program Code Description T-8 LED’s Test 1 1 . . Press timer button 1 to view each LED across the control panel. T-17 Digital Inputs - 1 1 . . Press the down arrow button and an underscore (“_”) indicates the input is not presently detected.
- Page 40 Program Code Description T-19 Outputs S = SAFETY CONTACTOR - Press product button 6 to turn off and on the safety (primary) contactor. H = HEAT CONTACTOR - Press product button 7 to turn off and on the heat contactor. (Product button 1 turns off and on the safety (pri- mary) contactor for the left vat of a split vat fryer, and product button 2 turns off and on the heat contactor.) T-20 Pumps &...
- Page 41 Program Code Description 1 1 4 4 . . Press the down arrow button and “CPU POSN” and “1 OF 3(ex)” shows in the displays. These displays shows which controls are plugged into which port on the AIF board. For example, the left control should be plugged into port 1, and on a 3 control fryer, shows “1 OF 3”...
- Page 42 5 5 . . 6 6 S S t t a a t t s s M M o o d d e e This mode allows a technician to view advanced information on the operation of the fryer and controls. Press and hold the program button for 5 seconds until “LEVEL 2”, followed by, 1 1 ) ) “SP PROG”...
- Page 43 Program Code Description S S T T - - 1 1 8 8 Product RAM Fade Count S S T T - - 1 1 9 9 Stat RAM Fade Count S S T T - - 2 2 0 0 RAM Data Error Count S S T T - - 2 2 1 1 Data Total Loss Count...
- Page 45 C C h h a a p p t t e e r r 6 6 M M a a i i n n t t e e n n a a n n c c e e 6 6 . . 1 1 I I n n t t r r o o d d u u c c t t i i o o n n This section provides checkout and replacement procedures, for various parts of the fryer.
- Page 46 Procedure Frequency Inspect filter pan O-rings. See 3.19 Check/ Quarterly. Replace Drain Pan O-Rings of Operator’s Manual. Inspect EEE-141 reservoir O-rings. See 3.10 Quarterly. Model EEE-141 Oil Reservoir of Operator’s Manual. 6 6 . . 4 4 C C o o n n t t r r o o l l P P a a n n e e l l & & M M e e n n u u C C a a r r d d R R e e p p l l a a c c e e m m e e n n t t Should the control panel become inoperative, or the menu card needs changed, follow these instructions: Remove electrical power supplied to the vat.
- Page 47 Figure 6-2 Lowered Control Panel If changing the menu card, loosen the tape securing the menu card at the 4 4 ) ) bottom side of the control panel and pull menu card from panel. Carefully slide changed menu card back into slot in panel and secure with tape. See Figure 6-3 Removing Menu Card , page Figure 6-3 Removing Menu Card...
- Page 48 Figure 6-4 Unplugging Control Board Connectors Install a new control panel in reverse order. 6 6 ) ) 6 6 . . 5 5 H H i i g g h h T T e e m m p p e e r r a a t t u u r r e e L L i i m m i i t t C C o o n n t t r r o o l l This is a safety, manual reset control, which senses the temperature of the oil.
- Page 49 6 6 . . 5 5 . . 1 1 C C h h e e c c k k o o u u t t T T o o a a v v o o i i d d e e l l e e c c t t r r i i c c a a l l s s h h o o c c k k o o r r p p r r o o p p e e r r t t y y d d a a m m a a g g e e , , m m o o v v e e t t h h e e p p o o w w e e r r s s w w i i t t c c h h t t o o o o f f f f a a n n d d d d i i s s c c o o n n n n e e c c t t m m a a i i n n c c i i r r c c u u i i t t b b r r e e a a k k e e r r , , o o r r u u n n p p l l u u g g c c o o r r d d a a t t w w a a l l l l r r e e c c e e p p t t a a c c l l e e .
- Page 50 Figure 6-7 Removing High Limit Bracket Acorn Nuts Using a Phillip’s-head screwdriver, remove the 2 screws securing the high limit 3 3 ) ) to the bracket. See Figure 6-8 Removing High Limit From Bracket , page Figure 6-8 Removing High Limit From Bracket Use the lift tool and lift the hinged element from the vat.
- Page 51 Figure 6-9 Lifted Heating Element A A v v o o i i d d p p u u t t t t i i n n g g t t h h e e l l i i f f t t t t o o o o l l i i n n t t h h e e c c e e n n t t e e r r o o f f t t h h e e e e l l e e m m e e n n t t s s , , a a t t t t h h e e s s a a m m e e a a r r e e a a a a s s t t h h e e h h i i g g h h l l i i m m i i t t b b u u l l b b , , o o r r d d a a m m a a g g e e t t o o t t h h e e h h i i g g h h l l i i m m i i t t c c o o u u l l d d r r e e s s u u l l t t .
- Page 52 Figure 6-11 Drain Valve Open While holding the top-side capillary bracket, use a Phillip’s-head screwdriver 7 7 ) ) and remove the screws securing the capillary bulb to the lower element bracket. Remove both front and rear capillary brackets. See Figure 6-12 Removing Capillary Bracket Screws , page Figure 6-12 Removing Capillary Bracket Screws...
- Page 53 Figure 6-13 Removing Upper Element Bracket Screws Remove high limit bulb from element and carefully straighten the capillary tube 9 9 ) ) and pull the high limit control from the rear of the unit. See Figure 6-14 Removing High Limit Bulb , page Figure 6-14 Removing High Limit Bulb NOTE: •...
- Page 54 Figure 6-15 Damaged Capillary Tube Insert new high limit capillary through hole in rear of fryer and slide high limit into 1 1 0 0 ) ) bracket and then secure with the 2 screws. Slide bracket and high limit assembly into place, making sure a 1/8” (2-3mm) 1 1 1 1 ) ) gap remains between the red high limit button and the reset place, and then secure with the 2 acorn nuts removed in step 3.
- Page 55 Figure 6-17 Pulling Out Capillary Bulb Using the capillary brackets removed in step 3 (see below), attach the capillary 1 1 3 3 ) ) to the lower brackets, aligning the capillary so it does NOT touch the element. Figure 6-18 Capillary Installation Side View , page Figure 6-18 Capillary Installation Side View Secure the capillary to the upper brackets.
- Page 56 Lower element back into vat and close drain. Fill vat by pressing and holding the 1 1 6 6 ) ) filter button until *FILTER**MENU* shows in the display. Then once “1. EXPRESS FILTER” shows in the display, press the right arrow button 4 times until “5.FILL FROM PAN”...
- Page 57 6 6 . . 6 6 . . 1 1 C C h h e e c c k k i i n n g g P P r r o o c c e e d d u u r r e e f f o o r r B B r r e e a a k k e e r r Remove the left control panel and pull the wires from the breaker.
- Page 58 Figure 6-22 Removing Main Power Switch Wires From the inside of the control area, squeeze in on the tabs on the back of the 3 3 ) ) switch and push the switch out the front of the control area. See Figure 6-23 Removing Power Switch , page Figure 6-23 Removing Power Switch...
- Page 59 6 6 . . 8 8 T T e e m m p p e e r r a a t t u u r r e e P P r r o o b b e e R R e e p p l l a a c c e e m m e e n n t t The temperature probe relays the actual shortening temperature to the control.
- Page 60 Referring to the decal on the rear of the control panel, locate the 12-pin probe 2 2 ) ) connector in the upper, right-hand corner. (An ohm chart is also shown on the decal.) Pull the connector from the panel and using a multimeter, take an ohm reading 3 3 ) ) on the appropriate Oil Temp pins.
- Page 61 Figure 6-26 Removing Compression Fitting Nut Follow the probe wires and disconnect the 2 probe connectors. (These may be 4 4 ) ) found behind the control panel or behind the side panels, depending upon which vat is being serviced.) See Figure 6-27 Temperature Probe Connectors , page Figure 6-27 Temperature Probe Connectors Locate temperature probe through pot wall.
- Page 62 Figure 6-28 Probe Assembly Install Push temperature probe through until it makes contact with gauge. 7 7 ) ) Tighten temperature probe in place. 8 8 ) ) Connect new temperature probe to the 2 fryer connections. 9 9 ) ) Replace rear cover and reconnect power to vat.
- Page 63 6 6 . . 9 9 O O i i l l C C h h a a n n n n e e l l C C l l e e a a n n - - O O u u t t Should the drain channel, under the vats, become clogged, access to a clean-out plug is available by removing the right or left side panels.
- Page 64 6 6 . . 1 1 0 0 . . 1 1 C C h h e e c c k k o o u u t t Remove control panel and hinge it down. 1 1 ) ) Referring to the decal on the rear of the control panel, locate P9 connector (left 2 2 ) ) vat-split vat) or P10 connector (full or right vat).
- Page 65 Figure 6-32 Removing Element Safety Switch Wires Use Phillip’s-head screwdriver and remove the 2 screws securing the switch. 3 3 ) ) Figure 6-33 Removing Element Switch Screws , page Figure 6-33 Removing Element Switch Screws Reassemble with new switch, making sure the plate pushes-in the switch 4 4 ) ) plunger, activating the switch, and then reconnect power to the fryer.
- Page 66 6 6 . . 1 1 1 1 C C o o n n t t a a c c t t o o r r s s The Evolution Elite® fryer requires two switching, 24V contactors per vat: a primary and a heat contactor.
- Page 67 Figure 6-35 Heat Contactor 6 6 . . 1 1 1 1 . . 1 1 C C h h e e c c k k o o u u t t Remove electrical power supplied to the fryer. 1 1 ) ) T T o o a a v v o o i i d d e e l l e e c c t t r r i i c c a a l l s s h h o o c c k k o o r r p p r r o o p p e e r r t t y y d d a a m m a a g g e e , , m m o o v v e e t t h h e e p p o o w w e e r r s s w w i i t t c c h h t t o o o o f f f f a a n n d d d d i i s s c c o o n n n n e e c c t t m m a a i i n n c c i i r r c c u u i i t t b b r r e e a a k k e e r r , , o o r r u u n n p p l l u u g g c c o o r r d d a a t t w w a a l l l l r r e e c c e e p p t t a a c c l l e e .
- Page 68 Figure 6-36 Contactor Test Points Test Points Results From 30 to 34 open circuit From 31 to 35 open circuit From 32 to 36 open circuit From 33 to 37 (coil) ohm reading 5 to 6 T T o o a a v v o o i i d d e e l l e e c c t t r r i i c c a a l l s s h h o o c c k k , , m m a a k k e e c c o o n n n n e e c c t t i i o o n n s s b b e e f f o o r r e e a a p p p p l l y y i i n n g g p p o o w w e e r r , , t t a a k k e e r r e e a a d d i i n n g g , , a a n n d d r r e e m m o o v v e e p p o o w w e e r r b b e e f f o o r r e e r r e e m m o o v v i i n n g g m m e e t t e e r r l l e e a a d d s s .
- Page 69 Figure 6-37 Heat Contactor Checkout If no voltage is found going into the primary contactor coil, check wiring, high 5 5 ) ) limit, and element switch. If no voltage at heat contactor coil check wiring and connections at PC board. 6 6 ) ) 6 6 .
- Page 70 Using a 3/8” wrench or socket, remove the 2 mounting nuts on the base plate of 2 2 ) ) the contactor being replaced and remove contactor. See Figure 6-39 Removing Primary Contactor Nuts , page Figure 6-39 Removing Primary Contactor Nuts When replacing the heat contactor, slide it from the mounting rail.
- Page 71 6 6 . . 1 1 2 2 S S o o l l e e n n o o i i d d V V a a l l v v e e s s Each vat has a solenoid plumbed-into the oil return lines. They are normally closed, but open when power is supplied, such as, the controls are filling the vats.
- Page 72 6 6 . . 1 1 2 2 . . 1 1 R R e e p p l l a a c c e e m m e e n n t t Remove the rear panel (9 screws). 1 1 ) ) Remove the plastic retaining clip on top of the coil housing.
- Page 73 Figure 6-44 Loosening Right Solenoid Fitting Pull the elbow away from the 1 inch nut, and using a 1-1/16 inch wrench or 5 5 ) ) adjustable wrench, hold the solenoid in place while using another wrench to remove the elbow from the solenoid. Attach elbow to new solenoid, using pipe sealant on the threads.
- Page 74 Figure 6-46 Removing Solenoid Body Remove the conduit from the fryer and pull the coil assembly from the fryer. See 7 7 ) ) Figure 6-47 Removing Conduit Nut , page Figure 6-47 Removing Conduit Nut Disconnect conduit at coil. See Figure 6-48 Removing Conduit , page 8 8 ) )
- Page 75 Figure 6-48 Removing Conduit Thread the wires of the new solenoid through the conduit and reattach the 9 9 ) ) conduit to the fryer. Wire nut the solenoid wires onto the fryer wires, and then, attach the solenoid 1 1 0 0 ) ) assembly onto the fittings of the fryer.
- Page 76 The inside is now exposed leaving a rotor and five Teflon rollers. Clean the rotor 2 2 ) ) and rollers. See Figure 6-50 Filter Pump Exposed , page Figure 6-50 Filter Pump Exposed To reassemble, place rotor on drive shaft, and place roller into rotor. 3 3 ) ) T T h h e e r r e e i i s s a a n n i i n n d d i i c c a a t t o o r r o o n n t t h h e e s s i i d d e e o o f f t t h h e e t t w w o o h h a a l l v v e e s s o o f f t t h h e e p p u u m m p p , , t t h h i i s s m m a a r r k k m m u u s s t t b b e e t t o o g g e e t t h h e e r r .
- Page 77 NOTE: A small amount of grease might be needed to hold the bottom roller into place until cover plate is put on. Make sure O-ring is in proper position on plate. 6 6 . . 1 1 3 3 . . 2 2 R R e e s s e e t t t t i i n n g g T T h h e e r r m m a a l l O O v v e e r r l l o o a a d d S S w w i i t t c c h h Locate the pump and motor in the rear of the fryer and if the motor is hot, allow it 1 1 ) ) to cool for about 5 minutes.
- Page 78 Figure 6-53 Loosening Front Flexible Line Fitting Using a 1” wrench, loosen the rear pump fitting. See Figure 6-54 Loosening 4 4 ) ) Rear Pump Fitting , page Figure 6-54 Loosening Rear Pump Fitting Using Phillip’s-head screwdriver, remove the rear cover from motor, exposing 5 5 ) ) the wires.
- Page 79 Figure 6-55 Removing Rear Motor Cover Loosen the conduit clamp and pull the wires through the conduit clamp. 6 6 ) ) Using a 7/16 in. wrench, remove the 4 bolts securing the motor to the motor 7 7 ) ) bracket and pull the pump and motor assembly from fryer.
- Page 80 6 6 . . 1 1 4 4 H H u u b b M M o o u u n n t t e e d d F F i i l l t t e e r r P P u u m m p p a a n n d d M M o o t t o o r r A A s s s s e e m m b b l l y y Included on units manufactured after September 2018.
- Page 81 NOTE: A small amount of grease might be needed to hold the bottom roller into place until cover plate is put on. Make sure O-ring is in proper position on plate. Align filter pump cover and secure with 4 screws. 6 6 ) ) 6 6 .
- Page 82 Figure 6-60 Motor Access Plate Using a Phillips screw driver, remove access plate (3) from motor. 4 4 ) ) Disconnect the conduit wires (4) from the pump. 5 5 ) )
- Page 83 Figure 6-61 Motor Mounting Plate Using a 7/16 in. wrench, remove the 4 bolts (5) securing the motor to the 6 6 ) ) mounting plate and remove the pump and motor assembly from fryer. NOTE: Some units may only have 3 bolts securing the motor to the mounting plate. Align the new filter pump and motor assembly to the holes on the mounting plate 7 7 ) ) and install with 4 bolts.
- Page 84 6 6 . . 1 1 4 4 . . 3 3 R R e e p p l l a a c c i i n n g g t t h h e e M M o o t t o o r r A A s s s s e e m m b b l l y y Figure 6-62 Replacing the Motor Assembly Remove the 3 screws (1) securing the pump to the motor and pull the pump (2) 1 1 ) )
- Page 85 6 6 . . 1 1 5 5 J J I I B B P P u u m m p p This pump keeps the vats filled and is used in the Oil Guardian™ process. 6 6 . . 1 1 5 5 . . 1 1 R R e e p p l l a a c c e e m m e e n n t t T T o o a a v v o o i i d d e e l l e e c c t t r r i i c c a a l l s s h h o o c c k k o o r r p p r r o o p p e e r r t t y y d d a a m m a a g g e e , , m m o o v v e e t t h h e e p p o o w w e e r r s s w w i i t t c c h h t t o o o o f f f f a a n n d d d d i i s s c c o o n n n n e e c c t t m m a a i i n n c c i i r r c c u u i i t t b b r r e e a a k k e e r r , , o o r r u u n n p p l l u u g g c c o o r r d d a a t t w w a a l l l l r r e e c c e e p p t t a a c c l l e e .
- Page 86 Remove the 4 bolts securing the bottom of pump. See Figure 6-65 Removing 4 4 ) ) Pump Mounting Bolts , page Figure 6-65 Removing Pump Mounting Bolts Disconnect the wires in the rear of the pump and pull assembly from fryer. 5 5 ) ) Pull fittings from faulty pump and attach the fittings to the new pump in the same 6 6 ) )
- Page 87 Figure 6-66 Removing PC Board Connectors Using a 5/16” socket, remove the 6 nuts securing the board and remove it from 3 3 ) ) Figure 6-67 PC Board Nuts , page the fryer. See Figure 6-67 PC Board Nuts Install in reverse order.
- Page 88 6 6 . . 1 1 7 7 T T r r a a n n s s f f o o r r m m e e r r s s Both the Express Filter transformer and the control transformer are the same part number.
- Page 89 Figure 6-69 Transformer Connector Checkout Test Points Results From pin 1 to 2 24 VAC From pin 4 to 5 240 VAC From pin 3 to 5 208 VAC 6 6 . . 1 1 7 7 . . 2 2 R R e e p p l l a a c c e e m m e e n n t t Disconnect power and using a 5/16”...
- Page 90 Figure 6-71 Removing Control Transformer Nuts Replace transformer in reverse order. 2 2 ) ) 6 6 . . 1 1 8 8 I I n n s s t t a a l l l l i i n n g g A A r r b b y y ’ ’ s s S S i i t t e e S S a a g g e e R R a a d d i i o o This component is located behind the left control panel.
- Page 91 Remove two screws from control panel on first left well and tilt down. 1 1 ) ) Center the control panel radio assembly against component shroud in first left 2 2 ) ) well. Mark location for holes. 3 3 ) ) Drill .140 diameter holes in the locations you marked.
- Page 92 Insert radio harness connector into each control. 7 7 ) ) Install new control access covers onto controls using existing hardware. 8 8 ) ) Insert SiteSage radio wires in terminals. 9 9 ) ) Insert control communication wires into control and run harnesses to all controls 1 1 0 0 ) ) except last.
- Page 93 Run harness with resistor to control. 1 1 2 2 ) ) Lift all but first left control panel and secure with two screws per panel. 1 1 3 3 ) ) Move the power switch to ON. 1 1 4 4 ) ) Ensure the LED light illuminates and the radio functions properly.
- Page 94 Label and remove wires from relay. See Figure 6-73 Removing Relay Wires , 2 2 ) ) page Figure 6-73 Removing Relay Wires –– Using a 5/16 inch wrench, remove the nuts securing the relay and remove relay 3 3 ) ) from fryer.
- Page 95 6 6 . . 2 2 0 0 D D r r a a i i n n P P a a n n S S w w i i t t c c h h This switch closes when the drain pan is pushed properly in place under the fryer. If the drain pan is not properly in place, or the drain switch is faulty, display prompts such as, “CHECK PAN”;...
- Page 96 Figure 6-76 Removing Drain Switch Shoulder Bolt Figure 6-77 Inside of Drain Switch Box Using a Phillips-Head screwdriver, remove the screws securing the switch to the 3 3 ) ) bracket and remove switch from bracket. See Figure 6-78 Removing Drain Switch Bracket Screws , page Figure 6-78 Removing Drain Switch Bracket Screws...
- Page 97 Label and remove wires from switch. 4 4 ) ) Replace faulty switch, placing wires on new switch on the normally open(1) and 5 5 ) ) common(2) terminals. See Figure 6-79 Drain Pan Switch , page Figure 6-79 Drain Pan Switch 6 6 .
- Page 98 Figure 6-80 Filter Beacon Rear Figure 6-81 Pulling Front of Filter Beacon Figure 6-82 Filter Locate and cut the light wires and pull the light from unit. See 3 3 ) ) Beacon Wires , page Figure 6-82 Filter Beacon Wires...
- Page 99 Connect new light wires using wirenuts, and install light in reverse order. 4 4 ) ) Restore power to the unit. 5 5 ) ) 6 6 . . 2 2 2 2 O O i i l l L L e e v v e e l l P P r r o o b b e e s s The oil level probes monitor the oil level by temperature differences.
- Page 100 T T a a b b l l e e 6 6 - - 3 3 R R T T D D R R e e s s i i s s t t a a n n c c e e C C h h a a r r t t Resist- Resist- Resist-...
- Page 101 Using a terminal extractor, remove the probe terminals from the connector and 3 3 ) ) remove probe from unit. See Figure 6-84 Level Sensor Probe Checkout , page Figure 6-84 Level Sensor Probe Checkout Place the nut and new ferrule on the new temperature probe and insert the 4 4 ) ) temperature probe into the compression fitting.
- Page 102 E E x x c c e e s s s s f f o o r r c c e e w w i i l l l l d d a a m m a a g g e e t t e e m m p p e e r r a a t t u u r r e e p p r r o o b b e e . . H H a a n n d d - - t t i i g g h h t t e e n n n n u u t t a a n n d d t t h h e e n n 1 1 / / 2 2 t t u u r r n n w w i i t t h h a a w w r r e e n n c c h h .
- Page 103 6 6 . . 2 2 3 3 . . 2 2 R R e e p p l l a a c c e e m m e e n n t t Remove right or left side panel, depending upon what side the faulty switch is 1 1 ) ) Figure 6-86 Pulling Drain Pull connector from behind control panel area.
- Page 105 7 7 . . 2 2 G G e e n n u u i i n n e e P P a a r r t t s s Use only genuine Henny Penny parts in your fryer. Using a part of lesser quality or substitute design may result in damage to the unit or personal injury.
- Page 106 7 7 . . 7 7 R R e e c c o o m m m m e e n n d d e e d d S S p p a a r r e e P P a a r r t t s s F F o o r r D D i i s s t t r r i i b b u u t t o o r r s s Recommended replacement parts are indicated with A or B in the parts lists: A = parts to be stocked on service vans or trucks.
- Page 107 Stock Item. Description Qty. Part No. Level — 86087 — TRANSFORMER (CE) - 240V / 24V 1/VAT 24IN WIRE - BEFORE 11/25/2009 EF02-104 FUSE HOLDER - 20A-250V FA52-010 - FUSE - 1 AMP (208/240V FRYERS) BE- FORE SN: BK0911009 FA52-005 - FUSE - .5 AMP (208/240V FRYERS) SN: BK0911009 &...
- Page 108 Figure 7-2 Right Side Panel Removed Stock Item Description Qty. Part No. Level 81027 ASSY - LEVER SWITCH & BRACKET 1/VAT 50764 - MICROSWITCH - RIGID LEVER 1/VAT 81017 - HARNESS LEVER SWITCH 1/VAT 81495 - BRACKET - LEVER SWITCH 1/VAT MOUNTING FP01-099...
- Page 109 Stock Item Description Qty. Part No. Level 85966 WELD ASSY - JIB SHELF 67589 PUMP & MOTOR ASSY 67583 - MOTOR - 1/2 HORSE 10 * 17437 - PUMP - FILTER - EEE 11 * 17476 - SEAL KIT 74583 PUMP - OIL TOP OFF - 230V 80728 EMI FILTER - CE...
- Page 110 Figure 7-3 Rear View Stock Item Description Qty. Part No. Level 78753 CONTACTOR - 24V COIL (HEAT 1/VAT CONTACTOR) 29509 CONTACTOR - 24V COIL (PRIMARY 1/VAT CONTACTOR) 18227 SWITCH - ELEMENT LIFT 1/VAT 140253 KIT - HIGH LIMIT - 425 F 1/VAT 75381 ASSY - POWER CORD - 208-240V - 60...
- Page 111 Stock Item Description Qty. Part No. Level 74469 VALVE - CHECK - 1/2 IN. (VAT FILL) 1/VAT 154048 VALVE - SOLENOID 220-240V - 1/2 IN. 1/VAT (72IN LEAD) 140229 KIT - SOLENOID REPAIR 80148 ASSY - DRAIN SWITCH W/ BOOT 78702 ASSY - TERMINAL BLOCK - DOM 1/VAT...
- Page 112 Figure 7-4 Front View Stock Item. Description Qty. Part No. Level 85520 HANGER - BASKET - EEE-141 77842 HANGER - BASKET - EEE-142 77709 HANGER - BASKET – EEE-143 77934 HANGER - BASKET - EEE -144 91164 HANGER - BASKET - EEE-142 AUTO- LIFT 52224 SWITCH - POWER...
- Page 113 Stock Item. Description Qty. Part No. Level 81190 ASSY - RH DOOR (SEE Figure 7-5 EEE- 1 OR 2 14X Door Break Down , page 106) 74461 PANEL - RH SIDE 140472 ASSY - KIT-EEX- MAN/DRN CONTROL 140498 ASSY-PANEL EEX MAN/DRN AUTOLIFT CONTROL 140402 KIT - EEX CONTROL W/ THUMB DRIVE...
- Page 114 Figure 7-5 EEE-14X Door Break Down T T a a b b l l e e 7 7 - - 1 1 D D o o o o r r H H i i n n g g e e C C h h a a r r t t Bottom Bottom Top Hinge...
- Page 115 Figure 7-6 Top View Stock Item Description Qty. Part No. Level 77838 WELD ASSY - LOW OIL DIVERTER 1/VAT NS03-044 NUT - ACORN - #10-24 - SS 1/VAT 78484-001 ELEMENT - HEATING - 7 KW - 208V 2/FULL; 1/SPLIT 78484-002 ELEMENT - HEATING - 7 KW - 230V 2/FULL;...
- Page 116 Stock Item Description Qty. Part No. Level 78484-005 ELEMENT - HEATING - 7 KW - 220V 2/FULL; 1/SPLIT 78484-006 ELEMENT - HEATING - 7 KW - 240V 2/FULL; 1/SPLIT 86731-001 ELEMENT -HEATING - 8.5 KW - 208V 2/FULL; 1/SPLIT 86731-002 ELEMENT - HEATING - 8.5 KW - 220V 2/FULL;...
- Page 117 Figure 7-7 Element Assembly - Full Vat Stock Item Description Qty. Part No. Level SC01-076 SCREW #8-32 X 1/4 PH THD S 2/VAT 75819 PLATE - FRONT CAPILLARY 1/VAT 75818 PLATE - REAR CAPILLARY 1/VAT SC01-074 SCREW #10-32 X 1/2 PH THD S 4/VAT 74209 HOUSING - ELEMENT PIVOT...
- Page 118 Stock Item Description Qty. Part No. Level 73713 WELD ASSY - HI LIMIT RESET PIN 1/VAT 77147 ERLD ASSY - PIVOT HI LIMIT BRACKET 1/VAT 78780 BRACKET - HI LIMIT MOUNTING 1/VAT 78896 STUD ASSY - GRND & WIRE 1/VAT MOUNTING 85735 STRAP - SPREADER RH - EEE-14X -...
- Page 119 Figure 7-8 Element Assembly - Split Vat Stock Item Qty. Description Part No. Level SC01-076 SCREW #8-32 X 1/4 PH THD S 2/VAT 75819 PLATE - FRONT CAPILLARY 1/VAT 75818 PLATE - REAR CAPILLARY 1/VAT SC01-074 SCREW #10-32 X 1/2 PH THD S 2/VAT 74209 HOUSING - ELEMENT PIVOT...
- Page 120 Stock Item Description Qty. Part No. Level 73713 WELD ASSY - HI LIMIT RESET PIN 1/VAT 77147 WELD ASSY - PIVOT HI LIMIT 1/VAT BRACKET 78780 BRACKET - HI LIMIT MOUNTING 1/VAT 78499 STRAP - SPREADER 4/VAT 85735 STRAP - SPREADER RH - EEE-14X - 4/VAT SN: BK0912003 &...
- Page 121 Figure 7-9 Control Assembly Stock Item Description Qty. Part No. Level 81943RB ASSY - EEE-14X CONTROL 84417RB ASSY - EEE-14X AUTO-LIFT CONTROL 81354 - DECAL - EVOLUTION ELITE® CONTROL 1/CTRL 83206 - DECAL - EE AUTO-LIFT CONTROL 1/CTRL NS02-005 - NUT - HEX KEPS #6-32 C 23/CTRL 26974 - ASSY - SPEAKER...
- Page 122 Stock Item Description Qty. Part No. Level 84910 ASSY - MMC/SD EVENT LOGGER 82326 TOOL-MENU CARD Recommended Parts: A = Truck Stock; B = Dist. Stock * Not Shown / CTRL = Control : EEE-141 = 1; EEE-142 = 2; EEE-143 = 3; EEE-144 = 4 Figure 7-10 SiteSage Radio Kits Stock Item...
- Page 123 Stock Item Description Qty. Part No. Level — 78057 — ASSY-RESISTOR CONNECTOR *PS — EF02–003* — WIRE TIE 5 X 1/8 P 140553 — KIT - EEE144 SITESAGE RADIO M/A — 165689 — ASSY - SITESAGE CNTRL RAD-EEE1XX X — 164026 —...
- Page 124 Figure 7-11 Filter Pan Assembly Stock Item Description Qty. Part No. Level 77531 ASSY - DRAIN PAN 87609 ASSY - DRAIN PAN - EEE-141 ONLY — 82673 — ASSY - DRAIN PAN COVER Recommended Parts: A = Truck Stock; B = Dist. Stock * Not Shown...
- Page 125 Stock Item Description Qty. Part No. Level — 82674 — ASSY - DRAIN PAN COVER - EEE-141 ONLY — 76259 — WELD ASSY - CRUMB CATCHER — 76179 — WELD ASSY - FILTER WEIGHT — 76375 — FILTER - SECTION —...
- Page 126 Figure 7-12 JIB System - EEE-142/143/144 Stock Item Description Qty. Part No. Level 03612 ACCESSORY - JUG - AUTO TOP OFF (EMPTY) 78992 ASSY - JIB TUBE & QUICK DISCONNECT 80490 ASSY - INT’L JIB TUBE & QUICK DISCONNECT 81513 ASSY - HOSE 85966 WELD ASSY - JIB SHELF...
- Page 127 Figure 7-13 Open Pan & Door Assembly - EEE-141 Stock Item Description Qty. Part No. Level 74189 O-RING - PICKUP TUBE 85969 OIL BOX WELD ASSY - FULL VAT 89376 OIL BOX WELD ASSY - SPLIT VAT 86065 OIL BOX COVER ASSY 85163 DOOR ASSY - EEX-141 86566...
- Page 128 Figure 7-14 Oil Management Components Stock Item Description Qty. Part No. Level 74582 VALVE - SOLENOID 220-240V - 1/2 IN (VAT FILL SOLENOIDS) 74469 VALVE - CHECK - 1/2 IN (VAT FILL) 74583 PUMP - OIL TOP OFF - 230V 85777 PUMP &...
- Page 129 Stock Item Description Qty. Part No. Level — 67583 — MOTOR - 1/2 HORSE — 17437 — PUMP - FILTER — 17476 — SEAL KIT 140516 PUMP CONVERSION HARDWARE 83142 SHIELD — CE MOTOR Recommended Parts: A = Truck Stock; B = Dist. Stock * Not Shown Figure 7-15 Drain Valve Linkage...
- Page 130 Figure 7-16 Pivot Stop Drain Handle Stock Item Description Qty. Part No. Level 140175 KIT - DRAIN VALVE CASTLE NUT (FULL VAT BE- 1/VAT FORE SN: BK1201020) 140176 KIT - DRAIN VALVE CASTLE NUT (SPLIT VAT 1/VAT BEFORE SN: BK1202011) NS03-103 CASTLE NUT - 1/2-20 18-8 STEEL (FULL VAT SN: 1/VAT...
- Page 131 Stock Item Description Qty. Part No. Level PN01-001 PIN - COTTER 1/VAT 86669 SHIELD-DRAIN SPOUT EEE-141 SINGLE WELL Recommended Parts: A = Truck Stock; B = Dist. Stock * Not Shown Figure 7-17 Auto Lift Parts...
- Page 132 Stock Item Description Qty. Part No. Level 83982 ASSY - BREAKAWAY HINGE 2/FULL; 1/SPLIT 84279 - WELD ASSY - HINGED BASKET HANGER 2/FULL; 1/SPLIT 15212 - PLUG - TUBING SQUARE 2/FULL; 1/SPLIT 83925 - PIN - 1/4 X 2.25 HINGE 2/FULL;...
- Page 133 Figure 7-18 Filter Return Line Assembly Stock Item Description Qty. Part No. Level 77523-002 TUBE - SUCTION 18 IN L DORMONT FP01-206 CONNECTOR - 3/8 NPT FEM 45 FLARE FP01-029 REDUCER 1/2 NPT M - 3/8 NPT F SS 77259 BRACKET - PLUG AND PLAY 77248 ADAPTOR - TUBE END...
- Page 134 Figure 7-19 Filter Pump & Motor...
- Page 135 Stock Item Description Qty. Part No. Level 67583 MOTOR - 1/2 HP - 50/60 HZ 17476 SEAL KIT 17437 PUMP ASSEMBLY SC01-132 - SCREW - PUMP COVER 17451 - COVER - PUMP 17447 - ROTOR - PUMP 17446 ROLLER - PUMP 17453 O-RING 17454...
- Page 136 Figure 7-20 Filter Pump Motor Assembly (Units Manufactured After February 2018) Stock Item Part No. Description Qty. Level 164184–001 MOTOR, 1/2 HP — 60 Hz 164184–002 MOTOR, 1/2 HP — 50 Hz — CE FP01–020 PLUG, 1/4-18 HEX SOCKET 164323 PUMP ASSEMBLY, 5 GPM HUBMOUNTED FILTER —...
- Page 137 Figure 7-21 Bulk Dispose - EEE-142/143/144 Stock Item Description Qty. Part No. Level 140053 KIT - EEE BULK DISPOSE RETROFIT 67662 - ASSY - DIRECT CONNECT HOSE 21612 — DISCONNECT - FEMALE 21800 — VALVE - 3/4 CHECK FP01-088 - ELBOW - STREET 1/2 X 90 BI 74582 - VALVE - 220-240V - SOLENOID - 1/2 NPT FP02-052...
- Page 138 Figure 7-22 Rear Bulk Dispose - 141 Stock Item Description Qty. Part No. Level 140053 KIT - EEE-141 ONLY BULK DISPOSE 67662 - ASSY - DIRECT CONNECT HOSE 21800 — VALVE - 3/4 CHECK 21612 — DISCONNECT - FEMALE FP01-028 - NIPPLE - CLOSE 1/2 NPT SS 1 LG Recommended Parts: A = Truck Stock;...
- Page 139 Stock Item Description Qty. Part No. Level 74582 - VALVE - 220-240V - SOLENOID - 1/2 NPT 88942 - ASSY - JIB PUMP TO CHECK VALVE TUBE FP01-011 - 1/2 NPT PIPE TEE 304 SS 18226 - NIPPLE - 1/2 X 3-1/2 SS PIPE 10 * 21611 - DISCONNECT - MALE...
- Page 140 T T a a b b l l e e 7 7 - - 2 2 F F r r o o n n t t B B u u l l k k D D i i s s p p o o s s e e - - E E E E E E - - 1 1 4 4 1 1 & & 1 1 4 4 2 2 ( ( A A u u s s t t r r a a l l i i a a ) ) Stock Description Qty.
- Page 141 Stock Description Qty. Part No. Level FP01-029 REDUCER 1/2 NPT M - 3/8 NPT F SS FP02-001 NIPPLE 3/8 CLOSE SC01-031 SCREW 1/4-20 X 3/4 PH THD E E E E E E - - 1 1 4 4 2 2 17333 RINSE HOSE DISCONNECT FEMALE 74582...
- Page 142 Figure 7-23 Front Bulk Dispose - EEE-141 (France) Stock Item Description Qty. Part No. Level 17333 DISCONNECT - FEMALE 84790 LABEL 84987 SWITCH - MOMENTARY - SPLASH 140153 ASSY - HOSE DISPOSE 17334 - DISCONNECT - MALE Recommended Parts: A = Truck Stock; B = Dist. Stock...
- Page 143 C C h h a a p p t t e e r r 8 8 W W i i r r i i n n g g D D i i a a g g r r a a m m s s The wiring diagrams are shown in this section.
- Page 148 8 8 . . 2 2 3 3 8 8 0 0 - - 4 4 1 1 4 4 V V o o l l t t...
- Page 157 blank page...
- Page 158 H H e e n n n n y y P P e e n n n n y y C C o o r r p p o o r r a a t t i i o o n n P P .
Need help?
Do you have a question about the Evolution Elite EEE-141 and is the answer not in the manual?
Questions and answers