Table of Contents
Advertisement
Quick Links
Advertisement
Table of Contents
Troubleshooting

Related Manuals for Bosch ACS 652


Summary of Contents for Bosch ACS 652
- Page 1 ACS 652 en Repair instruction A/C Service Unit...
-
Page 2: Table Of Contents
2 | ACS 652 | en – Contents Troubleshooting Service messages Symbols used Fault messages In the documentation 1.1.1 Warning notices - Emptying the ACS 652 Structure and meaning 10.1 Automatic emptying 1.1.2 Symbols in this documentation 10.2 Extraction of internal refrigerant circuit with sec-... -
Page 3: Symbols Used
Symbols used | ACS 652 | 3 Symbols used Component test 14.1 LCD In the documentation 14.2 Outputs 14.3 Control PCB input signal 1.1.1 Warning notices - 14.4 Printer Structure and meaning 14.5 Counter Warning notices warn of dangers to the user or people 14.6 Service printout... -
Page 4: Important Information
4 | ACS 652 | Important information Important information Test equipment and auxil- iary materials Installation and/or repairs must only be performed by trained and instructed Bosch customer service rep- resentatives or companies authorized by Bosch If the General tools for electricians and A/C mechanics units are opened or modified by unauthorized persons, Digital multimeter (e.g. -
Page 5: Safety Regulations
De-energization is only to be performed by a quali- Before connecting the ACS 652 to a vehicle air con- fied electrician, a qualified electrician for specific ditioning system or an external refrigerant cylinder, tasks (hybrid), or a power systems engineer. -
Page 6: Notes On Operation
ACS 652 unattended when in operation. For safety reasons it is advisable to use a residual Position the ACS 652 on all four wheels on a flat, current operated circuit breaker (rccb) with the fol- vibration-proof surface such that proper operation of lowing specifications: the scales is guaranteed. -
Page 7: Product Description
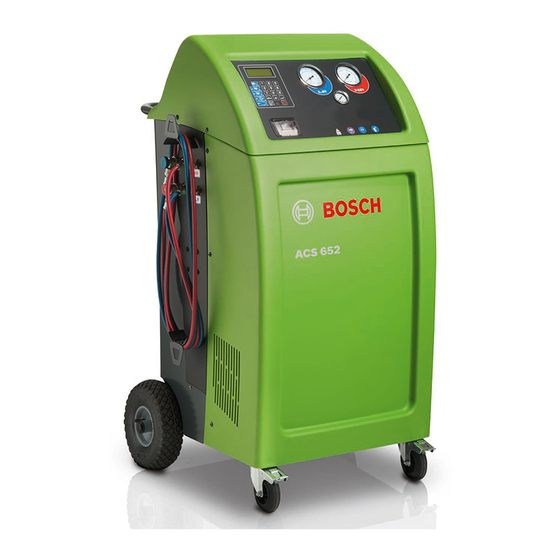
Product description | ACS 652 | 7 Product description 5.1.2 Rear view Description of unit 5.1.1 Front view Fig. 1: Front view Fig. 2: Rear view 1 Printer 1 Service quick-release coupling (low pressure) 2 Display and control panel 2 Service quick-release coupling (high pressure) -
Page 8: Display And Control Panel
Terminate and return. For updating firmware/software or database Various functions are assigned to the <MENU> function key in the ACS 652 software. The functions of the keys are defined in the menu line of the ACS 652 software. 5.1.5 Input keys The input keys can be used to enter letters, numbers and special characters in the input boxes. -
Page 9: Program Structure
Program structure | ACS 652 | 9 Program structure Manual mode Input Menu Calibration and tare SELECT PORTS Input Menu TANK CALIBRATION <RECOVERY> R Automatic emptying IN OIL CALIBRATION + < > 1111 R Extraction 2. Enter OUT OIL CALIBRATION R Oil drain 3. -
Page 10: Hydraulics Diagram
10 | ACS 652 | Hydraulics diagram Hydraulics diagram EVHP1 EVHP2 EV10 EVLP1 EVLP2 HOSE FLUSH MANIFOLD SERVICE PORT Name Description Name Description Name Description Pressure sensor Fresh oil tank Oil drain solenoid valve Vacuum pump Oil injection solenoid valve... -
Page 11: Service Phases
1. The ACS 652 is connected to the vehicle with the At the end of this phase, the solenoid valves EVLP1, service hoses T1 and T2. - Page 12 12 | ACS 652 | Service phases EVHP1 EVHP2 EV10 EVLP1 EVLP2 HOSE FLUSH MANIFOLD SERVICE PORT Name Description Name Description Name Description Fresh oil tank Oil drain solenoid valve Pressure sensor Vacuum pump Oil injection solenoid valve Pressure switch...
-
Page 13: Draining Oil Into The Used Oil Bottle
The used oil bottle scales (13) weigh the drained used At the end of recovery, the solenoid valve EV7 opens oil and ACS 652 saves the value for fresh oil filling in and the oil previously separated out in the evaporator/ automatic mode. -
Page 14: Vacuum Phase And Recycling (Simultaneous)
6. ant. In that way, refrigerant is sucked from storage bottle 1. The ACS 652 is connected to the vehicle with the 7 and is conveyed through the filter F1, the expan- service hoses T1 and T2. - Page 15 Service phases | ACS 652 | 15 EVHP1 EVHP2 EV10 EVLP1 EVLP2 HOSE FLUSH MANIFOLD SERVICE PORT Name Description Name Description Name Description Fresh oil tank Oil drain solenoid valve Pressure sensor Vacuum pump Oil injection solenoid valve Pressure switch...
-
Page 16: Leak Test
16 | ACS 652 | Service phases Leak test During this phase the EVHP1, EVHP2, EVLP1, EVLP2 and EV10 solenoid valves are open. After the speci- The leak test starts after the vacuum phase. fied vacuum time has elapsed, EV1 is closed to per- form the leak test. -
Page 17: Refrigerant Preparation
2. Select <R134a PREPARATION> and confirm with E. Internal preparation of the refrigerant is the same " ACS 652 starts internal preparation of the refriger- process that the ACS 652 performs in the recovery ant. phase to clean the refrigerant recovered from the vehicle air conditioning system. -
Page 18: Fresh Oil Filling
18 | ACS 652 | Service phases Fresh oil filling If "Fresh oil filling" has been selected in the service process, the quantity of fresh oil entered is fed into By default, individual service phases are linked to the vehicle air conditioning system along with the other service phases as they are needed to fully per- refrigerant. -
Page 19: Uv Contrast Medium Filling
Service phases | ACS 652 | 19 UV contrast medium filling If "UV contrast medium filling" has been selected in the service process, a defined quantity (time con- By default, individual service phases are linked to trolled) entered is fed into the vehicle air condition- other service phases as they are needed to fully per- ing system along with the refrigerant. -
Page 20: Filling Refrigerant
20 | ACS 652 | Service phases Filling refrigerant Open EVHP1, EVHP2, EV 3 and EV 6. Refrigerant flows from the internal refrigerant cylin- The refrigerant in the internal refrigerant cylinder is der through valves V 4 and V 2, through the solenoid used for filling the vehicle air conditioning system. -
Page 21: Separating And Returning Compressor Oil
Service phases | ACS 652 | 21 Separating and returning compressor This oil is separated from the refrigerant in the com- pressor oil separator (5) and is then fed back to the compressor (6). During the recovery phase and preparation of the refrigerant, small quantities of compressor oil get into the internal circuit. -
Page 22: Non-Condensing Gases
22 | ACS 652 | Service phases 8.10 Non-condensing gases The pressure of the internal refrigerant cylinder in- creases during the recovery phase and when prepar- The drain valve (V6) for non-condensing gases opens ing the refrigerant. if the pressure in the refrigerant cylinder is higher... -
Page 23: Troubleshooting
Actions HIGH PRESSURE There is excess pressure at the outlet of the compressor. Turn off the ACS 652 and wait approx. 30 minutes. PROGRAM ERROR Error in the software. FULL TANK The internal refrigerant cylinder has been filled to maximum filling level. Carry out several refill procedures to reduce the internal refrigerant quantity. -
Page 24: 10. Emptying The Acs 652
24 | ACS 652 | Emptying the ACS 652 10. Emptying the ACS 652 10.2 Extraction of internal refrigerant cir- cuit with second A/C service unit When repairing internal components, we recommend extracting the internal hoses on the ACS 652 to... -
Page 25: Troubleshooting And Analysis
2 and 2.3 bar. Before carrying out any service intervention, re- 5. Check compressor (6). duce the ACS 652 pressure so that no refrigerant is released. ACS 652 ends the recovery phase but the pressure at the pressure gages does not change. -
Page 26: Fault Messages That Can Occur During Recovery
26 | ACS 652 | TROUBLESHOOTING AND ANALYSIS 11.2 Faults during the vacuum phase 11.1.3 Fault messages that can occur during recovery 11.2.1 The vacuum pump starts "CYLINDER FULL" The vacuum pump starts but no vacuum is generated Check the weight of the internal refrigerant cylinder... -
Page 27: Fault Message That Can Occur During The Vacuum Phase
TROUBLESHOOTING AND ANALYSIS | ACS 652 | 27 11.5 Faults during filling with refrigerant 11.2.3 Fault message that can occur during the vacu- um phase 11.5.1 Vehicle air conditioning system cannot "A/C SYSTEM FULL" be filled 1. Check hose connections on the internal refrigerant ¶... -
Page 28: Component Test And Maintenance
28 | ACS 652 | Component test and maintenance 12. Component test and main- 12.3 Pressure switch P2 tenance The pressure switch is normally closed between contacts 1 and 2, and open between contacts 1 and 12.1 Vacuum pump 4. The pressure switch opens at 14.5 bar. -
Page 29: Combo Filter
Component test and maintenance | ACS 652 | 29 12.5 Combo filter 3. Switch off ACS 652. 12.5.1 Replacement of combo filter 4. Disconnect ACS 652 from power supply. 5. Carefully open the ACS 652 housing. DANGER – Risk of electric shock from 6. -
Page 30: Vacuum Pump
30 | ACS 652 | Component test and maintenance 12.6 Vacuum pump The container for catching oil should have a capacity 12.6.1 Changing vacuum pump oil of approx. 1 l. DANGER – Risk of electric shock from 1. Place a vessel under the drain. -
Page 31: 13. Calibration
Calibration | ACS 652 | 31 13. Calibration 13.2 Fresh oil bottle scales 13.1 Internal refrigerant cylinder scales According to the display, the calibration weight must be entered in ml. However, we recommend enter- Detach the rear panel and remove the refrigerant ing the weight in grams. -
Page 32: Tara Values
32 | ACS 652 | Calibration 13.3 Used oil bottle scales 13.4 Tara values The following Tara values for the Internal refrigerant According to the display, the calibration weight must cylinder and oil bottles are set from the factory. be entered in ml. However, we recommend enter- ing the weight in grams. -
Page 33: Pressure Sensor
3. After 5 minutes, stop the vacuum function and check 5. Remove the service hoses on the ACS 652 so that on the pressure gages that there are no leaks. the pressure sensor is subjected to the atmospheric 4. - Page 34 34 | ACS 652 | Component test 14. Component test 14.3 Control PCB input signal 14.1 Follow the additional ACS 652 menu prompting. Follow the additional ACS 652 menu prompting. 1. Call up the start screen. 2. Press <3> and <Flush> simultaneously and release.
- Page 35 EV7 to be serviced. This function displays the total number of operations Follow the additional ACS 652 menu prompting. performed with the ACS 652 since initial commis- sioning. 1. Call up the start screen. 2. Press <3> and <Flush> simultaneously and release.
- Page 36 1. Call up the start screen. 2. Press <3> and <Flush> simultaneously and release. The message ENTER CODE 0000 The set values guarantee that the ACS 652 will is displayed. 5599 and confirm with E . function perfectly. These parameters may only be 3.
- Page 37 3. Press and hold the <MENU> key. INSERT THE KEY is displayed. 4. Turn on the ACS 652 and release the <MENU> key. 5. Remove plastic cover (input PS2 stick) between 5. The ACS 652 turns itself off after programming. menu key and stop key.
- Page 38 38 | ACS 652 | Circuit diagram 17. Circuit diagram 17.1 Control PCB 230 V CPU-1 CPU-1 T N L RL11 EVFLU CN20 VR11 EV11 FAN 1 FAN 1 RL12 CN22 VR12 EVLP2 CN18 COMP RL13 COMP CN21 VR13 EVLP1...
- Page 39 Circuit diagram | ACS 652 | 39 17.2 Computer printed circuit board Fig. 7: Computer printed circuit board 1 Internal refrigerant scales connection 2 Power supply printer connection 3 Fresh oil scales connection 4 Used oil scales connection 5 Pressure sensor connection...
- Page 40 Robert Bosch GmbH Franz-Oechsle-Straße 4 73207 Plochingen DEUTSCHLAND www.bosch.com bosch.prueftechnik@bosch.com 1 689 975 257 | 2019-05-15...
Need help?
Do you have a question about the ACS 652 and is the answer not in the manual?
Questions and answers