
Related Manuals for QuietCool RM WHF-4.0


Summary of Contents for QuietCool RM WHF-4.0
- Page 1 OWNER’S GUIDE ROOF MOUNT WHOLE HOUSE FAN RM WHF-4.0 DO NOT THROW AWAY! SERIAL NUMBER FOR FAN IS LOCATED ON THE BACK COVER OF THE OWNER’S GUIDE. LEAVE WITH HOMEOWNER...
-
Page 2: Table Of Contents
2. INSTALLATION ......... . . 5 2.1 Installing RM WHF-4.0 ....... . . 5 2.2 Installing RM WHF-4.0-DB . -
Page 3: System Overview
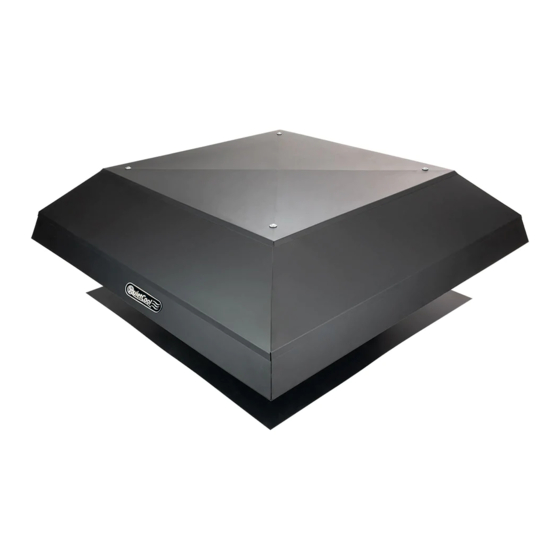
House Fan! The QuietCool Roof Mount Fans offer great versatility for any system you are looking to put in. QuietCool Roof Mount Fans can be used in many applications such as a whole house fan with a duct, or as a whole house fan that pulls air through air intake grilles in multiple rooms. -
Page 4: Getting Started
4. FOLLOW INSTRUCTIONS - All installation and operating instructions should be followed. 5. WATER - The QuietCool system should not be used near water. If you live in a very humid climate, be sure to cover your damper box with insulation to reduce condensation. -
Page 5: Installation
Watch the video by scanning the QR code or visit 2.1 INSTALLING THE RM WHF-4.0 www.QuietCoolSystems.com/support 1. Determine in which area you would like to install your QuietCool Roof Mount Fan (see diagrams below) RM WHF Installation Diagrams RM WHF-4.0-DB Installed RM WHF-4.0-DG1 Installed 24”... - Page 6 (See Figure 2.1E) 10. If installing on a tile roof, cut tile appropriately and re-install the tile to fit snuggly around the fan housing. (See Figure 2.1F) 1-888-QUIETCOOL...
-
Page 7: Installing Rm Whf-4.0-Db
Figure 2.2A Use the following instructions to finish the installation of your accessory kit. These instructions are for installing the RM WHF-4.0 with damper box, duct,and grille 1. Using the duct clasp, connect the duct to your fan unit. 2. Determine the location for your damper box. Ensure that the Figure 2.2B... -
Page 8: Installing Rm Whf-4.0-Dg1
2.3 INSTALLING THE RM WHF-4.0-DG1 Use the following instructions to finish the installation of your accessory kit. These instructions are for installing the RM WHF-4.0 with 22” x 22”damper grille. IMPORTANT: The RM WHF-4.0-DG1 will only fit 24” on center ceiling joists. -
Page 9: Installing Rm Whf-4.0-Dg2
2.5 INSTALLING THE RM WHF-4.0-PL Use the following instructions to finish the installation of your accessory kit. These instructions are for installing the RM WHF-4.0 with Plenum Box and 22” x 22” damper grille. IMPORTANT: This installation requires roof rafters that are 24” on center. - Page 10 8. Follow the wiring instructions on page 11 to wire your RF Control Hub to the power source. Figure 2.5D Figure 2.5E 9. Remove the damper grille and screws from its packaging. Place the grille in the cutout. Install the grille with the white screws provided. (See Figure 2.5E) 1-888-QUIETCOOL...
-
Page 11: Wiring
3. WIRING NOTE: Wiring Diagrams are for examples ONLY. Wiring should be done by an experienced electrician. NOTE: Your fan came with the RF Hub pre-wired to a power cord for testing purposes before installation. The power cord can be used when installed inside of an attic. DO NOT USE THE POWER CORD OUTDOORS. -
Page 12: Fan Hub Led Indicators
If the Dip Switch is not configured correctly, all the indicators on the Hub will stay solid • when the Hub is powered on. Please switch off power and re-configure the Dip Switch as shown in Figure 3.1A on pg. 11. 1-888-QUIETCOOL... -
Page 13: Pairing The Wall Switch
PAIRING THE WALL SWITCH 1. Using a flat-head screwdriver, remove the front cover off the wall switch. 2. Install the included AAA batteries into the switch. All the LED indicators will light up indicating that the switch has power. Replace the front cover. 3. -
Page 14: Installing The Wall Switch
If no button press is detected for 10 seconds, the Wall Switch will • enter sleep mode. Pressing either button will wake the switch and display the current status. In Sleep Mode, all LED indicators will be off. • 1-888-QUIETCOOL... -
Page 15: Frequently Asked Questions
LED STATUS INDICATORS OF WALL SWITCH If all LED indicators on the Wall Switch come on after three seconds of pressing one of the buttons, • this means the Wall Switch is failing to connect to the Hub. You will need to move the switch closer to the Hub to ensure proper communication. -
Page 16: When To Run
QuietCool can also be used in the winter to heat your home during the day and exhuast the pollutants inside your home. -
Page 17: Where To Start Cooling
The breeze will flow through your home and make its way to each QuietCool you have in operation. As it gets later in the evening, and even cooler outside, you can begin to open windows in other rooms of your home, to prepare for bedtime. - Page 18 QUIETCOOL REFERRAL PROGRAM Our referral program is unlimited; This means you can refer as many people as you like. Best of all, both you and your friend will earn $25 for each whole house fan that your friend installs. QuietCoolSystems.com/referrals...
-
Page 19: Warranty
WHOLE HOUSE FANS LIMITED WARRANTY QC Manufacturing Inc. extends this warranty to the original purchaser of the following QuietCool Whole House Fan - RM WHF-4.0 - installed and used in a residence under normal conditions within the United States: A. Ten year coverage applies to the QuietCool motor fan assembly. At our option we will repair or replace any part of the assembly should it fail to operate during the first ten years from the date of original purchase. - Page 20 Rev. 4/16/20 FAN SERIAL NUMBER INFORMATION RETAIN FOR YOUR RECORDS. SERIAL NUMBER IS REQUIRED FOR WARRANTY PURPOSES. 1-888-QUIETCOOL | WWW.QUIETCOOLSYSTEMS.COM...
Need help?
Do you have a question about the RM WHF-4.0 and is the answer not in the manual?
Questions and answers