CETAC ASX-520 Replacement
Daughter board replacement
Hide thumbs
Also See for ASX-520:
- Quick installation manual (9 pages) ,
- Manual to installing (9 pages) ,
- Upgrading and servicing manual (24 pages)
Advertisement
Quick Links
Advertisement

Subscribe to Our Youtube Channel
Related Manuals for CETAC ASX-520


Summary of Contents for CETAC ASX-520
- Page 1 Daughter Board replacement for Cetac ASX-520/ASX-520HS Autosamplers.
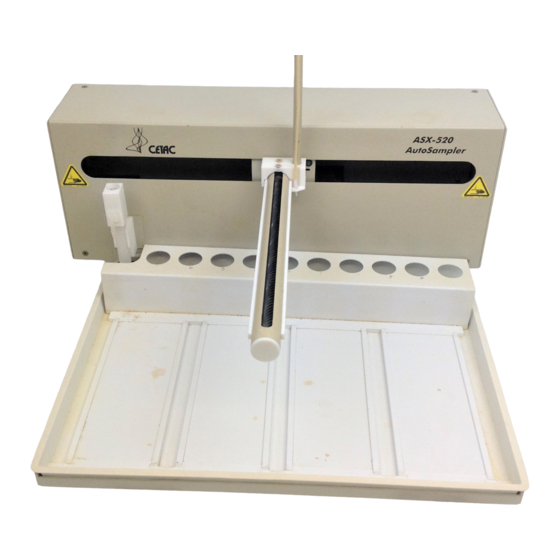
- Page 2 MAKE SURE THE UNIT IS UNPLUGGED AND IN THE “OFF” POSITION BEFORE BEGINNING THIS PROCEDURE. Figure 1-1. Front view of ASX-520. 1. First, remove the two Kynar thumbscrews from the Y-axis home block. See Figure 1-2. Figure 1-2. View of Y- axis home block with Kynar thumbscrews.
- Page 3 Daughter Board Replacement in ASX-520/520HS Figure 1-3. Z-drive removed from arm assembly. 2. Next, remove the whole Z-drive assembly from the arm by pulling the whole Z-drive assembly forward and off the Auto Sampler arm. See Figure 1-3. 3. After the Z-drive assembly is removed, then remove the rinse station. See Figure 1-4. Turn the rinse station ¼...
- Page 4 Daughter Board Replacement in ASX-520/520HS Figure 1-5. View of rinse stations removed from the front cover. 5. The Auto Sampler tray is next to be removed. Lift up the tray and pull forward. See Figure 1-6. Figure 1-6. Removing the tray.
- Page 5 7. The front cover can be removed by lifting it slightly and pulling forward. See Figure 1-8. Figure 1-8. View of ASX-520 Auto Sampler with the front cover being removed. Figure 1-9. View of inner shield inside the ASX-520 (old shield).
- Page 6 9. The inner shield can be removed by lifting it up while pulling forward. See Figure 1-10. Figure 1-10. Removal of inner shield. Figure 1-11. View of ASX-520 with inner shield removed. 10. If you have a newer shield/splash guard combination proceed as follows. Locate and remove the 5 screws...
- Page 7 Daughter Board Replacement in ASX-520/520HS Figure 1-12. View of new shield and splashguard inside the ASX-520. 11. Remove the two shield pieces. Notice that the splashguard goes under the chassis on the top and over the chassis on the bottom. See Figure 1-13. When you replace the splashguard, ensure it is oriented in this manner.
- Page 8 Daughter Board Replacement in ASX-520/520HS 13. Unplug all connections from the main board, including pump (if equipped), blue ribbon cable, z-sensor and z-motor, x-motor, and power entry cable. Figure 1-15. Main Board mounting screws. 14. Remove the Jack screws holding the auxillary (daughter board) connector from the rear of the sampler if equipped.
- Page 9 Daughter Board Replacement in ASX-520/520HS Figure 1-17. Main and Daughter board replaced in system. 18. Remove the auxilliary (daughter) board from the old main board and replace with the new daughter board. Take care to double check pin orientation between the two boards. See Figure 1-17.(Note – Your daughter board will use P7 as pictured above and may utilize P4 as well.
Need help?
Do you have a question about the ASX-520 and is the answer not in the manual?
Questions and answers