Table of Contents

Related Manuals for Nivus NivuFlow Stick


Summary of Contents for Nivus NivuFlow Stick
- Page 1 F L O W p o r t a b l e Instruction Manual Mobile Flow Measurement System NivuFlow Stick for Flow Measurement in Flowing Waters Firmware version: 3.3.X Document revision 00 / 27.01.2020 Original manual: German / rev. 01 as of 15.01.2020...
- Page 2 Phone +33 (0)3 88 9992 84 info@nivus.fr www.nivus.fr NIVUS Ltd., United Kingdom Wedgewood Rugby Road Weston under Wetherley Royal Leamington Spa CV33 9BW, Warwickshire Phone +44 (0)8445 3328 83 nivusUK@nivus.com www.nivus.com Page 2 NivuFlow Stick - rev. 00 / 27.01.2020...
-
Page 3: Copyrights And Property Rights
Copyrights and property rights Copyrights and property rights This document and its contents are proprietary to NIVUS GmbH and are not to be repro- duced or copied without the express written permission of NIVUS GmbH. Violations oblige to compensation. Important Note This manual may exclusively - even in parts - be copied or translated in any other way with the express written consent of NIVUS GmbH. -
Page 4: Document Modifications
Instruction Manual NivuFlow Stick Document modifications Editor in Rev. Modifications Date charge First version based on the German document 27.01.2020 Page 4 NivuFlow Stick - rev. 00 / 27.01.2020... -
Page 5: Table Of Contents
18 Configuration / Device Types ..............18 Functional description 19 Operating Ranges ................... 19 20 Functional Principles ................19 20.1 Flow velocity measurement Cross correlation ........19 20.2 Level measurement Pressure ............. 21 NivuFlow Stick - rev. 00 / 27.01.2020 Page 5... - Page 6 22.3 Steps to execute Flow Measurements ..........23 Operation start-up 23 Notes to users ..................25 24 First steps ....................25 25 Indication System of Status LED on NivuFlow Stick ....... 25 26 Setting Up Connection ................26 26.1 General....................26 26.2 Android Operating System ..............26 26.3 iOS Operating System ................
- Page 7 35.5 “Velocity” Menu Main Screen .............. 61 35.6 “Position 1/x” Menu Main Screen ............61 Diagnostics 36 Diagnostics Menu Principles ..............64 37 Diagnostics h-Sensors Menu ..............64 38 Diagnostics v-Sensors Menu ..............65 NivuFlow Stick - rev. 00 / 27.01.2020 Page 7...
- Page 8 43 Installation of spare parts and parts subject to wear and tear ....70 44 Accessories ..................... 70 Index Credits and Licenses 45 List of references of the licenses an codes used ........73 Approvals and Certificates Page 8 NivuFlow Stick - rev. 00 / 27.01.2020...
-
Page 9: General
READ CAREFULLY BEFORE USE. KEEP IN A SAFE PLACE FOR LATER REFERENCE. The manual belongs to the mobile flow measurement system NivuFlow Stick and is for the in- tended use of the device. This manual is oriented exclusively to qualified expert personnel. -
Page 10: Signs And Definitions Used
Rechargeable batteries shall be charged externally by using a standard battery charger. NivuFlow Stick Operating Elements NivuFlow Stick is equipped only with an On/Off switch and a Reed contact (status LED) with no other control elements. Instrument operation and the setting of parameters are carried out completely by using smartphone, tablet, notebook and PC. -
Page 11: Safety Instructions
Contains information that should be highlighted. Indicates a potentially damaging situation which can result in damage to the product or to an object in its environment. Note Contains information and facts. NivuFlow Stick - rev. 00 / 27.01.2020 Page 11... -
Page 12: Warning Notices On The Product (Option)
Limitation of warranty In the event of non-compliance with the safety instructions and instructions in this docu- ment, the companies of the NIVUS group of companies reserve the right to limit the warran- Page 12 NivuFlow Stick - rev. 00 / 27.01.2020... -
Page 13: Liability Disclaimer
The NivuFlow Stick is designed and manufactured in accordance with the current state of the art and with the recognised safety rules and regulations applicable at the time this document is issued. -
Page 14: User's Responsibilities
Education and instruction according to the standards of safety engineering regard- ing the maintenance and use of adequate safety equipment. III. First aid training Page 14 NivuFlow Stick - rev. 00 / 27.01.2020... -
Page 15: Delivery, Storage And Transport
Protect NivuFlow Stick against heavy impacts, shocks, punches or vibration using appropri- ate safety measures such as belts or similar. 14 Return In case of a required reshipment return the unit at customer cost to NIVUS GmbH in Ep- pingen using the original packaging. Insufficiently franked shipments will not be accepted! NivuFlow Stick - rev. -
Page 16: Product Specification
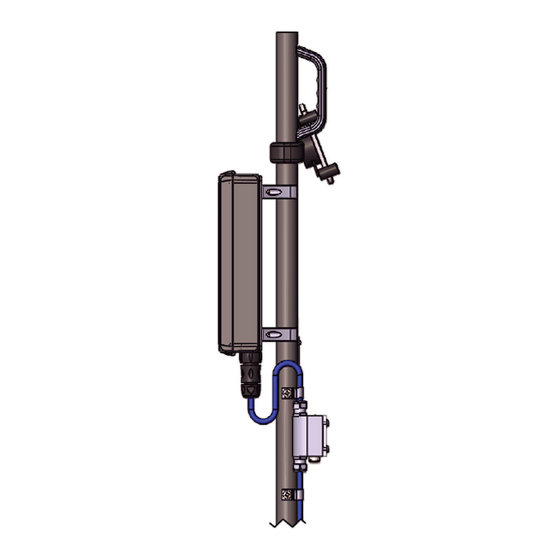
Battery compartment (for four batteries each) Status LED 10 On/Off switch 11 Locking pin to remove the sensor from the tube 12 Spirit level for alignment Fig. 15-1 Device setup NivuFlow Stick Page 16 NivuFlow Stick - rev. 00 / 27.01.2020... -
Page 17: Connectable Sensors
Nameplate NivuFlow Stick Check nameplates Check the delivered instrument for accordance with your order by identifying the name- plate. The declaration of conformity is located at the end of the manual. NivuFlow Stick - rev. 00 / 27.01.2020 Page 17... -
Page 18: Specifications
The cross correlation version of the mobile flow measurement system is manufactured with a CSM flow velocity wedge sensor with pressure measurement. NFS002 NivuFlow Stick; mobile measurement system for discharge measurement in flow- ing waters Accessories see Sect. “44 Accessories”. -
Page 19: Functional Description
Functional description 19 Operating Ranges NivuFlow Stick is a mobile flow measurement system. The instrument is designed mainly for measurement in slight to heavily polluted aqueous liquids of various compositions. It is used within the scope of discharge measurements in rivers, flumes and channels featur- ing various shapes and dimensions. - Page 20 It mathematically strings the single flow velocities together which results in the flow profile of the acoustic path. This measured velocity profile is directly indicated on the NivuFlow Stick display (Fig. 20-4 pict. 1). Clicking the graph will switch over to lateral profile view (Fig. 20-4 pict. 2).
-
Page 21: Level Measurement Pressure
Fluctuations in atmospheric pressure are compensated by a small air tube, which is integrat- ed into the sensor cable. The pressure sensor is adjusted by entering a manually determined reference value at the initial start-up. Fig. 20-5 Determined filling level NivuFlow Stick - rev. 00 / 27.01.2020 Page 21... -
Page 22: Using The Nivuflow Stick Measurement System
21 General Information on Device Use 21.1 Energy-saving mode (Powerdown) After a pre-set period of (5…720 minutes) of inactivity the NivuFlow Stick transmitter saves the existing data and goes into energy-saving mode (Powerdown). Use the On/Off switch to restart and to resume the measurement. -
Page 23: Prerequisites To Execute Flow Measurements
Use the level ruler on the reverse side of the guide bar to cross-check the depth measurement. Observe possible measuring depth of NivuFlow Stick The depth measurement of the sensor used will work only as long as the pressure com- pensation element is above the water level. - Page 24 As soon as all measurement spots have been measured the transmitter automatically recommends saving the readings. Do so to retain the data gained. 6. After finishing (saving) the measurement turn the transmitter off with the on/off switch to save battery power. Page 24 NivuFlow Stick - rev. 00 / 27.01.2020...
-
Page 25: Operation Start-Up
Fig. 25-1 LED on the NFS front Once the NivuFlow Stick is in full working conditions without limitation the LED is lit green: 1x long, pause, 5x short. The same intervals apply as soon as there is one error message pending at least. The LED then, however, is lit red. -
Page 26: Setting Up Connection
3. Select WLAN (Fig. 26-2 no. 1). Fig. 26-2 WLAN symbol 4. From the list of available WLANs select the NivuFlow Stick (Fig. 26-3 no. 1) with the according SSID (default state = serial no.). Page 26 NivuFlow Stick - rev. 00 / 27.01.2020... - Page 27 Enter password (example here fd671a105c5d) and connect 6. Start the Internet browser. 7. Type “192.168.1.1” into the IP address field and open. The NivuFlow Stick display (Fig. 26-5) is indicated as soon as the connection has been established successfully. Fig. 26-5 NivuFlow Stick display in browser 8.
- Page 28 The link (Fig. 26-8 no. 1) is indicated on the start screen and can be used for instant access without the need to specify the IP address. This link can be used for each further NivuFlow Stick transmitter after it has been selected from the WLAN list.
-
Page 29: Ios Operating System
26.3 iOS Operating System Preparing the NivuFlow Stick: 1. Open the NivuFlow Stick enclosure cover and use the on/off switch to power up. Steps on the display and operation module (smartphone, tablet, notebook, PC etc.): 1. Start the display and operation module. - Page 30 Instruction Manual NivuFlow Stick 4. From the list of available WLANs select the NivuFlow Stick (Fig. 26-11 no. 1) with the according SSID (default state = serial no.). Fig. 26-11 WLAN List 5. Enter the password for server access (default state = PUK) (Fig. 26-12 no. 2) and join (Fig.
- Page 31 The link (Fig. 26-17 no. 1) is indicated on the start screen and can be used for instant access without the need to specify the IP address. This link can be used for each further NivuFlow Stick transmitter after it has been selected from the WLAN list.
-
Page 32: Windows Operating System
1. Start the display and operation module. 2. Go to the list of available (WLAN) networks (Fig. 26-18 no. 2). 3. From the list select the NivuFlow Stick (Fig. 26-18 no. 1) with the according SSID (de- fault stat = serial no.). - Page 33 The bookmark is shown in the bookmarks list (Fig. 26-23 no. 1) and can be used for instant access without the need to specify the IP address. This link can be used for each further NivuFlow Stick transmitter after it has been selected from the WLAN list.
-
Page 34: Menu Operation/Overview
NivuFlow Stick 27 Menu Operation/Overview 27.1 Display Overview The NIVUS display at any time provides an overview on where you currently are within the menu structure and which entries you are about to modify. Menu / Back (depending on display view) -
Page 35: Saving Parameters
After modifying parameters and navigating back using the menu field save the modified pa- rameters to make the changes effective. Once saved the status message “Successful” (Fig. 27-2) is shown. Fig. 27-2 Saving parameters For saving procedures see Sect. “28.1 Save Parameters”. NivuFlow Stick - rev. 00 / 27.01.2020 Page 35... -
Page 36: Menus
Error messages under >Error Messages< Service levels Parameter/System Reset Information on batteries and the current capacity WLAN Parameters for the configuration of NivuFlow Stick communication interfaces Battery (12V) To choose the batteries / rechargeable batteries used Table 3 Menu overview Page 36 NivuFlow Stick - rev. -
Page 37: Parameter Setting
Simultaneous access will not be indicated or logged. Necessarily observe to agree parameter changes in order to avoid several users accessing the parameters at the same time. Always the latest saving process applies. NivuFlow Stick - rev. 00 / 27.01.2020 Page 37... -
Page 38: Change Instrument Ssid
4. Enter new name and confirm. 28.4 Lost Password Each NivuFlow Stick is shipped with an individual PUK (“Personal Unblocking Key” or Super- PIN) which permits to create a new password and to reactivate the instrument. The PUK is identical to the default WLAN password and can be found on a label attached to the side of the transmitter. -
Page 39: Parameter Functions
29 Parameter Functions 29.1 Main Menu The NivuFlow Stick parameters can be set using a total of six menus which are described in greater detail starting with Sect. “30 Application Parameters Menu”. The main menu indicates six icons containing the functions described in the following Sections. -
Page 40: Menu - Readings
Listing (and temporary modifications) of data and dimensions measurement place and • measurement spots • Calculation method setting • Options to save, set and erase the internal data memory 29.2.3 Menu - System Fig. 29-4 Menu System Page 40 NivuFlow Stick - rev. 00 / 27.01.2020... -
Page 41: Menu - Wlan
Erase error memory • Parameter/system reset 29.2.4 Menu - WLAN Fig. 29-5 Menu WLAN This menu shows the SSID as well as the password and permits modification of both basic parameters. NivuFlow Stick - rev. 00 / 27.01.2020 Page 41... -
Page 42: Menu - Battery (12V)
“basic measurement place” or similar) and loaded again and again. This default data set exists only once in the transmitter but can be overwritten and saved newly, however. Page 42 NivuFlow Stick - rev. 00 / 27.01.2020... -
Page 43: Name Of Measurement Place
Besides the pre-set selection it is also possible to set “User defined”. In such a case, howev- er, it is necessary to enter the according material roughness manually since this value is con- sidered with the transmitter’s calculations. Default setting: Natural NivuFlow Stick - rev. 00 / 27.01.2020 Page 43... -
Page 44: Width
Default setting: 0.0 m Fastening post Measuring tape Offset (here positive) Single measurement spots (measurement verticals) Width of water body Fig. 30-4 Offset on the measurement place Page 44 NivuFlow Stick - rev. 00 / 27.01.2020... -
Page 45: Calculation
This value is based on empirical values of the user. The default setting is “80 %” and can be left in most cases. Fig. 30-6 Bank NivuFlow Stick - rev. 00 / 27.01.2020 Page 45... -
Page 46: Measurement Points
Taking the specified period, all readings are saved and a floating average is created for each individual average value. This average is used for further calculation of the flow rate. Input the value in steps of one second. Default setting: 5 s Page 46 NivuFlow Stick - rev. 00 / 27.01.2020... -
Page 47: Stability
All menu points which can be set in >Measurement Place< are adjustable. Furthermore, various measured or computed measurement place readings are indicated. After powering up the NivuFlow Stick there are three different procedures available to set the parameters of a measurement place: •... -
Page 48: Name Of Measurement Place
Bank right and k(Bank right)” and “30.1.8 Measurement Points”. 31.1.6 Flow, Level, Velocity, Area, Wetted Perimeter and Hydraulic Radius Indication of measured or computed (average) values on this measurement place. This is a read-only parameter. Page 48 NivuFlow Stick - rev. 00 / 27.01.2020... -
Page 49: Save
(pdf, csv and xml). Select by using the indicated directory and document symbols. Fig. 31-4 Download as xml / csv / pdf NivuFlow Stick - rev. 00 / 27.01.2020 Page 49... -
Page 50: Erase
Specifies start and end time of the data period to transfer. Select by using some sort of cal- endar (Fig. 32-2). As per default the transmitter suggests the transmission period between the last data trans- mission and the current point in time. Fig. 32-2 Specify start/end time Page 50 NivuFlow Stick - rev. 00 / 27.01.2020... -
Page 51: File Format
This option is appropriate for the verification of critical, important applications and is re- quired mainly for servicing personnel. >Expert< • This option should be used only by trained service personnel or NIVUS’ developers. Such data sets may become very large very quickly. If required contact NIVUS GmbH. 32.1.4... -
Page 52: Menu Region Settings
This menu can be used to adjust various country-specific and unit-specific settings for the in- dication of measurement values. >Decimal Separators< • Comma or Point The decimal separators specified here are used only for representation on the operation module display. Page 52 NivuFlow Stick - rev. 00 / 27.01.2020... -
Page 53: Units Memory
Specifying the decimal separators is relevant for correct data import. Particularly in case of using foreign software applications (such as foreign Excel) to evaluate readings observe to specify the correct decimal separators. NivuFlow Stick - rev. 00 / 27.01.2020 Page 53... -
Page 54: Menu Time/Date
“Plus-” or “Minus-Hours” symbols defining the time zones compared to UTC. NIVUS highly recommend to leave the transmitter system time unchanged and to define your time zone as well as summer and winter times by using the >Time Zone (UTC)< func- tion. - Page 55 To reactivate the transmitter turn off and then turn on again by using the on/off switch. The transmitter will restart using the measurement place / measurement spot where it has last been used actively. NivuFlow Stick - rev. 00 / 27.01.2020 Page 55...
-
Page 56: Menu Error Messages
This submenu contains the following functions: • Service levels (password-protected); the service levels are reserved exclusively for NIVUS service personnel Reboot (system) • Parameter reset (back to default settings) • Fig. 33-7 Service Page 56 NivuFlow Stick - rev. 00 / 27.01.2020... -
Page 57: Service Level
The >WLAN< menu provides information on SSID and the WLAN password. Either SSID as well as the password can be modified here. To change the WLAN password see Sect. “28.2 Change WLAN Password”. NivuFlow Stick - rev. 00 / 27.01.2020 Page 57... -
Page 58: Battery (12V) Parameter Menu
• User defined The capacity [Ah] must be specified to correctly indicate the (rechargeable) battery per- formance in the >System< / >Information< menu. Fig. 35-1 Menu – Battery (12V) Page 58 NivuFlow Stick - rev. 00 / 27.01.2020... -
Page 59: Main Display
Hold the left mouse key for a moment • Keep touching the field on the touchscreen for a moment • NivuFlow Stick - rev. 00 / 27.01.2020 Page 59... -
Page 60: Flow" Menu Main Screen
>Application< / >Diagnostics< / >h-Sensors< parame- ter setting menu. Fig. 35-4 Pop-up Menu “Level” The diagnostics menu is described in greater detail in Sect. “37 Diagnostics h- Sensors”. Page 60 NivuFlow Stick - rev. 00 / 27.01.2020... -
Page 61: Velocity" Menu Main Screen
The according measurement point as well as the adjacent ones are synchronised regarding the width in the graph on the display. >Add measurement point< Adds another measurement point/vertical to the existing one(s). NivuFlow Stick - rev. 00 / 27.01.2020 Page 61... - Page 62 If “Yes” the saved and original parameters of the measurement place are loaded. All modifications entered via quick access are deleted. • “No” continues using the current measurement place settings entered via quick access. Page 62 NivuFlow Stick - rev. 00 / 27.01.2020...
- Page 63 Main Display Fig. 35-8 Position offset / width / restart measurement NivuFlow Stick - rev. 00 / 27.01.2020 Page 63...
-
Page 64: Diagnostics
The >Diagnostics< / >h-Sensors< menu shows the current filling level. The calibration level can be modified/specified manually and must be confirmed with Ok after entry. The calibra- tion level is equal to the offset. Page 64 NivuFlow Stick - rev. 00 / 27.01.2020... -
Page 65: Diagnostics V-Sensors Menu
>Noise typical< • Information on sensor cable installation (interference); relevant for NIVUS commissioning and service personnel. >Noise max.< • Information on sensor cable installation (interference); relevant for NIVUS commissioning and service personnel. NivuFlow Stick - rev. 00 / 27.01.2020 Page 65... -
Page 66: Diagnostics Signal Analysis Menu
The signal is thus broken down into its frequency components and can be better examined for disturbances. >Download<: of current data (as .csv file) to be analysed by NIVUS. >Gates<... - Page 67 Similarity and temporal shift of the received signals (delta t). >Index<: Gates 1...16 >VZoom< of chart: X1, X2, X5, X10, X20 and X50 >Download<: of current data (as .csv file) to be analysed by NIVUS. >Tx signal< • Visual representation / signal shape >Index<: Subsections 1...8...
- Page 68 >Sensor test< • Functional test (settling-time test; can also be performed in air) of the connected sen- sor. The data obtained is mainly used by the NIVUS customer service. >VZoom< of chart: X1, X2, X5, X10, X20 and X50 ...
-
Page 69: Maintenance And Cleaning
Wear protective clothing. 40 Maintenance 40.1 Maintenance Interval The flow measurement system type NivuFlow Stick is conceived to be virtually free of calibra- tion, maintenance and wear. NIVUS, however, recommend having the entire measurement system inspected by NIVUS customer service once per year. -
Page 70: Dismantling/Disposal
Observe the local disposal regulations and laws. NIVUS GmbH is registered with the EAR, therefore public collection and return points in Germany can be used for disposal. -
Page 71: Index
..........58 Reboot ............57 Reception inspection ......15 Reference number ......43, 48 Liability disclaimer ........13 Repeatedly measure same Licenses ..........73 measurement places ......37 Logout............. 34 Replacement parts .........70 Return .............15 NivuFlow Stick - rev. 00 / 27.01.2020 Page 71... - Page 72 Trigger quality ........... 46 TX signal signal analysis........67 Use in accordance with the requirements .......... 13 User’s responsibilities ......14 Wall material ........... 43 Warranty ..........12 WLAN ............. 57 Page 72 NivuFlow Stick - rev. 00 / 27.01.2020...
-
Page 73: Credits And Licenses
Credits and Licenses Credits and Licenses 45 List of references of the licenses an codes used The measurement system type NivuFlow Stick uses code of the following Open Source Pro- jects: Freetype (http://www.freetype.org) • Libharu (http://libharu.org) • Libjpeg (http://www.ijg.org) •... -
Page 74: Approvals And Certificates
Instruction Manual NivuFlow Stick Approvals and Certificates Page 74 NivuFlow Stick - rev. 00 / 27.01.2020...
Need help?
Do you have a question about the NivuFlow Stick and is the answer not in the manual?
Questions and answers