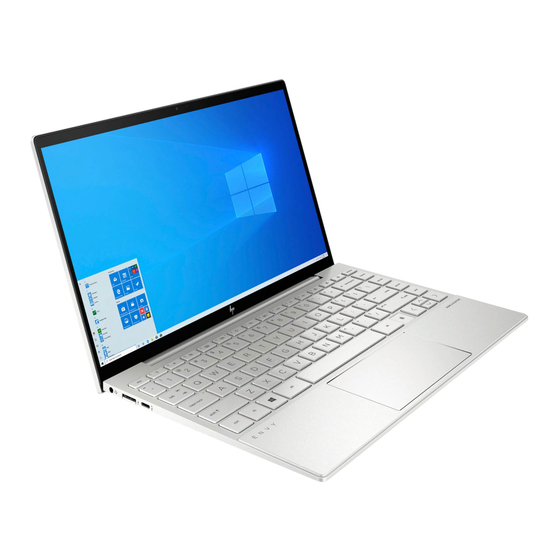
HP Envy 13 Series Maintenance And Service Manual

HP Envy 13 Series Maintenance And Service Manual

Pc
Hide thumbs Also See for Envy 13 Series:
Table of Contents

Advertisement

Maintenance and Service Guide
HP Envy 13 Laptop PC
IMPORTANT! This document is intended for HP authorized service
providers only.

Advertisement

Table of Contents
loading

Summary of Contents for HP Envy 13 Series

  • Page 1 Maintenance and Service Guide HP Envy 13 Laptop PC IMPORTANT! This document is intended for HP authorized service providers only.
  • Page 2 Bluetooth is a trademark owned by its bound by the terms of the HP End User License Not all features are available in all editions or proprietor and used by HP Inc. under license.
  • Page 3 Safety warning notice WARNING! To reduce the possibility of heat-related injuries or of overheating the computer, do not place the computer directly on your lap or obstruct the computer air vents. Use the computer only on a hard, flat surface. Do not allow another hard surface, such as an adjoining optional printer, or a soft surface, such as pillows or rugs or clothing, to block airflow.
  • Page 4 Safety warning notice...
  • Page 5: Table Of Contents

    Table of contents 1 Product description ............................1 2 Getting to know your computer ........................4 Locating hardware ..............................4 Locating software ..............................4 Right side ................................5 Left side ................................. 6 Display ..................................7 Low blue light mode (select products only) ..................7 Keyboard area ................................
  • Page 6 Backing up information and creating recovery media ..................64 Using Windows tools ......................... 64 Using the HP Cloud Recovery Download Tool to create recovery media (select products only) ..64 Restoring and recovery ............................65 Restoring, resetting, and refreshing using Windows tools .............. 65 Recovering using HP Recovery media ....................
  • Page 7 Downloading HP PC Hardware Diagnostics UEFI to a USB flash drive ..........69 Downloading the latest HP PC Hardware Diagnostics UEFI version ......69 Downloading HP PC Hardware Diagnostics UEFI by product name or number (select products only) ..................... 70 Using Remote HP PC Hardware Diagnostics UEFI settings (select products only) ..........
  • Page 8 viii...
  • Page 9: Product Description

    Product components and their descriptions Category Description Product Name HP ENVY 13 Laptop PC HP model numbers:13-ba0xxx, 13t-ba000 Processors Intel® i5-1021 0U (1.6 GHz, turbo up to 4.2G GHz, BGA, 2666 MHz FSB, 6 MB L3 cache, quad core, UHD 620, 15W) Intel i5-1035 G1 (1.0 GHz, turbo up to 3.6G GHz, BGA, 3200 MHz FSB, 6 MB L3 cache, quad core, UHD 12W)
  • Page 10 3-cell, 51 Whr, polymer/prismatic-mix battery Supports battery fast charge AC adapter 65 W HP Smart AC adapter (non-PFC, slim black barrel, 4.5 mm, straight) AC Adapter 65 Watt Smart nPFC EM Barrel 4.5 mm Power cord Chapter 1 Product description...
  • Page 11 Table 1-1 Product components and their descriptions (continued) Category Description 1 m, conventional power cord (C5) with plug adapter Security Trusted Platform Module (TPM) 2.0, firmware based Privacy camera cover Privacy screen Universal 2nd Factor Authentication Audio/mic mute Operating system Preinstalled Windows®...
  • Page 12: Getting To Know Your Computer

    Getting to know your computer Your computer features top-rated components. This chapter provides details about your components, where they are located, and how they work. NOTE: Actual computer color, features, feature locations, icon labels, and accessories might vary from the images depicted.
  • Page 13: Right Side

    ▲ Press in on the card, and then remove it from the memory card reader. USB port with HP Sleep and Charge Connects a USB device, provides high-speed data transfer, and charges small devices, even when the computer is off.
  • Page 14: Left Side

    For additional safety information, see the Regulatory, Safety, and Environmental Notices. To access this guide: Type HP Documentation in the taskbar search box, ▲ and then select HP Documentation. NOTE: When a device is connected to the jack, the computer speakers are disabled.
  • Page 15: Display

    The Safety & Comfort Guide also provides important electrical and mechanical safety information. The Safety & Comfort Guide is available on the web at http://www.hp.com/ergo. Table 2-3 Display components and their descriptions...
  • Page 16 For wireless regulatory notices, see the section of the Regulatory, Safety, and Environmental Notices that applies to your country or region. To access this guide: Type HP Documentation in the taskbar search box, and then select HP Documentation. ▲ Chapter 2 Getting to know your computer...
  • Page 17: Keyboard Area

    Keyboard area NOTE: Keyboards can vary by language. Touchpad Touchpad settings To adjust touchpad settings and gestures, or to turn off the touchpad: Type touchpad settings in the taskbar search box, and then press enter. Choose a setting. To turn on the touchpad: Type touchpad settings in the taskbar search box, and then press enter.
  • Page 18: Lights

    Lights Table 2-5 Lights and their descriptions Component Description Caps lock light On: Caps lock is on, which switches the key input to all capital letters. Mute light On: Computer sound is off. ● Off: Computer sound is on. ● Microphone mute light On: Microphone is off.
  • Page 19: Button And Fingerprint Reader

    Button and fingerprint reader Table 2-6 Button and fingerprint reader and their descriptions Component Description Power button ● When the computer is off, press the button to turn on the computer. ● When the computer is on, press the button briefly to initiate Sleep.
  • Page 20 Table 2-6 Button and fingerprint reader and their descriptions (continued) Component Description IMPORTANT: To prevent fingerprint logon issues, be sure when you register your fingerprint that all sides of your finger are registered by the fingerprint reader. Chapter 2 Getting to know your computer...
  • Page 21: Special Keys

    Special keys Table 2-7 Special keys and their descriptions Component Description Displays system information when pressed in combination with key. Executes specific functions when pressed in combination with another key. Windows key Opens the Start menu. NOTE: Pressing the Windows key again will close the Start menu.
  • Page 22: Bottom

    Table 2-7 Special keys and their descriptions (continued) Component Description When the computer is in Hibernation, press the button ● briefly to exit Hibernation. IMPORTANT: Pressing and holding down the power button results in the loss of unsaved information. If the computer has stopped responding and shutdown procedures are ineffective, press and hold the power button down for at least 10 seconds to turn off the computer.
  • Page 23: Labels

    Your service label will resemble one of the following examples. Refer to the illustration that most closely matches the service label on your computer. Table 2-9 Service label components Component HP product name Model number Product ID Serial number Warranty period...
  • Page 24 Table 2-10 Service label components (continued) Component Serial number Warranty period Regulatory label(s)—Provide(s) regulatory information about the computer. ● Wireless certification label(s)—Provide(s) information about optional wireless devices and the approval ● markings for the countries or regions in which the devices have been approved for use. Chapter 2 Getting to know your computer...
  • Page 25: Illustrated Parts Catalog

    Computer major components NOTE: HP continually improves and changes product parts. For complete and current information about supported parts for your computer, go to http://partsurfer.hp.com, select your country or region, and then follow the on-screen instructions. NOTE: Details about your computer, including model, serial number, product key, and length of warranty, are on the service tag at the bottom of your computer.
  • Page 26 Table 3-1 Computer major components and their descriptions Item Component Spare part number Display assembly FHD natural silver finish nontouch screen L96778-001 FHD pale gold finish nontouch screen L96779-001 FHD nightfall black finish nontouch screen L96780-001 FHD natural silver finish touch screen L96781-001 FHD pale gold finish touch screen L96782-001...
  • Page 27 Table 3-1 Computer major components and their descriptions (continued) Item Component Spare part number FHD natural silver finish nontouch screen L96784-001 FHD pale gold finish nontouch screen L96785-001 FHD nightfall black finish nontouch screen L96786-001 FHD natural silver finish touch screen L96787-001 FHD pale gold finish touch screen L96788-001...
  • Page 28 Table 3-1 Computer major components and their descriptions (continued) Item Component Spare part number For use in Korea in natural silver finish with backlight L96799-AD1 For International use in natural silver finish with backlight L96799-B31 For use in Slovenia in natural silver finish with backlight L96799-BA1 For use in Israel in natural silver finish with backlight L96799-BB1...
  • Page 29 Table 3-1 Computer major components and their descriptions (continued) Item Component Spare part number For use in Denmark, Sweden, Finland, and Norway in natural silver finish with backlight L96800-DH1 and privacy For use in Czechoslovakia and Slovenia in natural silver finish with backlight and privacy L96800-FL1 For use in the United States in natural silver finish with backlight L96801-001...
  • Page 30 Table 3-1 Computer major components and their descriptions (continued) Item Component Spare part number For use in Spain in natural silver finish with backlight and privacy L96802-071 For use in Portugal in natural silver finish with backlight and privacy L96802-131 For use in Turkey in natural silver finish with backlight and privacy L96802-141 For use in Greece in natural silver finish with backlight and privacy...
  • Page 31 Table 3-1 Computer major components and their descriptions (continued) Item Component Spare part number For use in Russia in pale gold finish with backlight L96803-251 For use in Bulgaria in pale gold finish with backlight L96803-261 For use in Romania in pale gold finish with backlight L96803-271 For use in Thailand in pale gold finish with backlight L96803-281...
  • Page 32 Table 3-1 Computer major components and their descriptions (continued) Item Component Spare part number For use in Taiwan in pale gold finish with backlight L96804-AB1 For use in Korea in pale gold finish with backlight L96804-AD1 For International use in pale gold finish with backlight L96804-B31 For use in Slovenia in pale gold finish with backlight L96804-BA1...
  • Page 33 Table 3-1 Computer major components and their descriptions (continued) Item Component Spare part number For use in Israel with wood veneer, backlight and privacy L96806-BB1 For use in the Ukraine with wood veneer, backlight and privacy L96806-BD1 For use in Switzerland with wood veneer, backlight and privacy L96806-BG1 For use in French Canada with wood veneer, backlight and privacy L96806-DB1...
  • Page 34 Table 3-1 Computer major components and their descriptions (continued) Item Component Spare part number For use in Denmark, Finland, Norway and Sweden with wood veneer, backlight, and L96808-DH1 privacy For use in the Czech Republic and Slovakia with wood veneer, backlight, and privacy L96808-FL1 Touchpad NOTE:...
  • Page 35: Display Assembly Subcomponents

    Table 3-1 Computer major components and their descriptions (continued) Item Component Spare part number (14) Bottom cover Bottom cover in natural silver finish L94027-001 Bottom cover in nightfall black finish L94028-001 Bottom cover in pale gold finish L94026–001 Display assembly subcomponents Table 3-2 Display components and their descriptions Item...
  • Page 36: Mass Storage Devices

    Table 3-2 Display components and their descriptions (continued) Item Component Spare part number FHD pale gold finish touch screen L96788-001 FHD nightfall black finish touch screen L96789-001 FHD natural silver finish nontouch screen with privacy L96790-001 FHD pale gold finish nontouch screen with privacy L96791-001 FHD nightfall black finish nontouch screen with privacy L96792-001...
  • Page 37: Cables

    Table 3-3 Mass storage devices and their descriptions Item Component Spare part number Solid-state drives 1 T GB PCIe-NVMe 3 × 4 TLC SS L85348-005 1 T GB PCIe-NVMe Value L85370-005 512 GB, PCIe, Gen 3 × 4 TLC SS L85360-005 512 GB, PCIe, Gen 3 ×...
  • Page 38: Miscellaneous Parts

    For use in Taiwan L22329-001 For use in India L22624-001 For use in Argentina L30811-001 For use in India L30813-001 Hub, USB-C–to–Multiport 919666-001 Hub, USB-C to USB-A Hub 916838-001 Hub, HP Elite USB-C Multi Port Hub L39572-001 Chapter 3 Illustrated parts catalog...
  • Page 39 Component Spare part number Adapter, USB to Gigabit RJ45 829941-001 Adapter, USB-C to VGA 831751-001 Adapter, USB-C–to–USB-A 916838-001 Adapter, HP USB-C to RJ45 855560-001 Adapter, USB-C to HDMI 2.0 935325-001 Adapter, USB-C to USB-A cable adapter 833960-001 Screw kit L94062-001...
  • Page 40: Removal And Replacement Procedures Preliminary Requirements

    Removal and replacement procedures preliminary requirements Tools required You need the following tools to complete the removal and replacement procedures: Tweezers ● Nonconductive, nonmarking pry tool ● Magnetic Phillips P1 screwdriver ● Service considerations The following sections include some of the considerations that you must keep in mind during disassembly and assembly procedures.
  • Page 41: Drive Handling

    Drive handling IMPORTANT: Drives are fragile components that must be handled with care. To prevent damage to the computer, damage to a drive, or loss of information, observe these precautions: Before removing or inserting a hard drive, shut down the computer. If you are unsure whether the computer is off or in Hibernation, turn the computer on, and then shut it down through the operating system.
  • Page 42: Generating Static Electricity

    IMPORTANT: To prevent damage to the device when you are removing or installing internal components, observe these precautions: Keep components in their electrostatic-safe containers until you are ready to install them. Before touching an electronic component, discharge static electricity by using the guidelines described in this section.
  • Page 43: Personal Grounding Methods And Equipment

    Use field service tools, such as cutters, screwdrivers, and vacuums, that are conductive. ● Recommended materials and equipment HP recommends the following materials and equipment to prevent static electricity: ● Antistatic tape ● Antistatic smocks, aprons, or sleeve protectors ●...
  • Page 44: Packaging And Transporting Guidelines

    Static-dissipative table or floor mats with hard tie to ground ● ● Field service kits ● Static awareness labels Wrist straps and footwear straps providing 1 MΩ ±10% resistance ● Material handling packages ● Conductive plastic bags ● Conductive plastic tubes ●...
  • Page 45: Removal And Replacement Procedures For Authorized Service Provider Parts

    Accessing these parts can damage the computer or void the warranty. NOTE: HP continually improves and changes product parts. For complete and current information about supported parts for your computer, go to http://partsurfer.hp.com, select your country or region, and then follow the on-screen instructions. Component replacement procedures There are as many as 52 screws that must be removed, replaced, or loosened when servicing the parts described in this chapter.
  • Page 46: Bottom Cover And Rubber Feet

    Bottom cover and rubber feet Table 5-1 Bottom cover and rubber feet descriptions and part numbers Description Spare part number Bottom cover in pale gold finish L94026-001 Bottom cover in natural silver finish L94027-001 Bottom cover in nightfall black finish L94028-001 Rubber foot kit for natural silver finish L94024-001...
  • Page 47: Battery

    Battery Table 5-2 Battery description and part number Description Spare part number Battery (3 cell, 51 Whr) L77034-005 Before removing the battery, follow these steps: Prepare the computer for disassembly (Preparation for disassembly on page 37). Remove the bottom cover (see Bottom cover and rubber feet on page 38).
  • Page 48: Touchpad

    Touchpad NOTE: The touchpad spare part kit does not include the touchpad cable. The touchpad cable is available using spare part number L87955-001. Touchpads that are included with keyboard/top covers with wood veneer cannot be replaced. Table 5-3 Touchpad description and part number Description Spare part number Touchpad in pale gold finish...
  • Page 49 Reverse this procedure to install the touchpad. Component replacement procedures...
  • Page 50: Speakers

    Speakers Table 5-4 Speaker description and part number Description Spare part number Speakers (includes left and right speakers and cables) L94045-001 Before removing the speakers, follow these steps: Prepare the computer for disassembly (Preparation for disassembly on page 37). Remove the bottom cover (see Bottom cover and rubber feet on page 38).
  • Page 51: Solid-State Drive And Optane Memory Module

    Solid-state drive and Optane Memory Module Table 5-5 Solid-state drive descriptions and part numbers Description Spare part number 512 GB, PCIe, Gen 3 × 4 L85360-005 512 GB, PCIe, value L85364-005 256 GB, PCIe, Gen 3 × 4 L85350-005 256 GB, PCIe L85354-005 128 GB, SATA-3, TLC L85346-005...
  • Page 52 Remove the screw securing the solid-state drive bracket to the computer (2) and then remove the solid- state drive bracket (3). Remove the Phillips M2.0 × 3.0 screw (1), lift the solid-state drive module bracket and pull the solid- state drive module from the socket (2). Reverse this procedure to install the solid-state drive.
  • Page 53: Wlan Module

    WLAN module Table 5-6 WLAN module description and part number Description Spare part number Intel Wireless-AC 2230 802.11ac 2 × 2 Wi-Fi + Bluetooth 5 L57250-005 IMPORTANT: To prevent an unresponsive system, replace the wireless module only with a wireless module authorized for use in the computer by the governmental agency that regulates wireless devices in your country or region.
  • Page 54 Remove the WLAN module (4) by pulling the module away from the slot at an angle. Reverse this procedure to install the WLAN module. Chapter 5 Removal and replacement procedures for authorized service provider parts...
  • Page 55: Fan

    Table 5-7 Fan description and part number Description Spare part number L94043-001 Before removing the fan, follow these steps: Prepare the computer for disassembly (Preparation for disassembly on page 37). Remove the bottom cover (see Bottom cover and rubber feet on page 38).
  • Page 56: Heat Sink

    Heat sink Table 5-8 Heat sink and thermal pad descriptions and part numbers Description Spare part number Heat sink — UMA L94042-001 Heat sink — discrete L94041-001 Before removing the heat sink, follow these steps: Prepare the computer for disassembly (Preparation for disassembly on page 37).
  • Page 57 Remove the heat sink. Reverse this procedure to install the heat sink. Component replacement procedures...
  • Page 58: System Board

    System board Table 5-9 System board descriptions and part numbers Description Spare part number System board including integrated Intel Core i7-1051 U processor and 16 GB of discrete graphics L94594-601 memory System board including integrated Intel Core i7-1051 U processor and 8 GB of discrete graphics memory L94593-601 System board including integrated Intel Core i7-1065 G7 processor and 8 GB of UMA graphics memory L94591-601...
  • Page 59 Remove the three Phillips M2.0 × 3.0 screws (1), and then remove the USB Type C bracket securing the system board (2). Remove the four M2.0 × 3.0 screws securing the system board (3). Lift the system board (1), and then remove the board (2). ▲...
  • Page 60: Ir Sensor Board

    Reverse this procedure to install the system board. IR sensor board Description Spare part number IR sensor board L94039-001 IR sensor board cable L94040-001 Before removing the IR sensor board, follow these steps: Prepare the computer for disassembly (Preparation for disassembly on page 37).
  • Page 61 Remove the IR board from the computer (2). Reverse this procedure to install the IR sensor board. Component replacement procedures...
  • Page 62: Display Assembly

    Display assembly Table 5-10 Display assembly descriptions and part numbers Description Spare part number Full High Definition (FHD) natural silver finish, touch screen L96778-001 FHD pale gold finish touch screen L96779-001 FHD, nightfall black finish touch screen L96780-001 FHD natural silver finish touch screen L96781-001 FHD, pale gold finish touch screen L96782-001...
  • Page 63 Disconnect the display panel cable on the right side (3) and remove the cable (4). Remove the two Phillips M2.0 × 3.0 screws (1) from each hinge. Open the display to open the hinges (2). Component replacement procedures...
  • Page 64 Separate the display from the computer by pulling the display up and away from the chassis (3). Reverse this procedure to install the display assembly. Position two suction cup tools at the illustrated location on the display panel (1) and then rotate each locking lever down to lock the cup (2).
  • Page 65 Download and install the touch panel firmware when you replace the touch screen board or touch panel. Download the correct calibration firmware file based on your panel specification. For more information, see HP Help and Support. Peel the bottom nonstick backing off the double-sided tape (1).
  • Page 66 Peel the top nonstick backing off the double-sided tape so it can be secured to the rear (3). Place the panel on top of the display panel cover (1), and then press the panel down to secure it to the display enclosure (2). Chapter 5 Removal and replacement procedures for authorized service provider parts...
  • Page 67 If it is necessary to remove or replace the camera, peel back the tape (1) and disconnect the camera cable from the connector (2). Locate the display cable locations (3). Use a plastic tool to pull the camera from the display panel cover (4), and then remove the camera (5). To release the camera cable from the camera connector, lift the release arm on the camera connector securing the camera cable to the connector (1), and then release the camera cable (2).
  • Page 68 If it is necessary to remove or replace the touch screen board, remove the touch screen board cable from the touch screen board on the display assembly (1), and then remove both touch screen cables from the touch screen board (2). Release the adhesive tape from the touch screen board (3), and then remove the touch screen board after releasing it from the clips securing it.
  • Page 69 If it is necessary to remove or replace the antenna, detach the auxiliary antenna (1) from the adhesive securing it to the display panel enclosure. Remove the main antenna (2), and disengage the cable from the clips that secure the antenna cable to the display enclosure (3). The separate antenna is available as spare part number L94057-001.
  • Page 70: Power Connector

    Power connector Table 5-11 Power connector description and part number Description Spare part number Power connector L94044-001 Before removing the power connector cable, follow these steps: Prepare the computer for disassembly (Preparation for disassembly on page 37). Remove the bottom cover (see Bottom cover and rubber feet on page 38).
  • Page 71: Keyboard/Top Cover

    Keyboard/top cover The top cover with keyboard remains after removing all other spare parts from the computer. In this section, the first table provides the main spare part number for the top cover/keyboards. The table provides the country codes. Table 5-12 Keyboard/top cover description and part number Description Spare part number...
  • Page 72: Backing Up, Restoring, And Recovering

    You must be connected to the Internet to access the Get Help app. Using the HP Cloud Recovery Download Tool to create recovery media (select products only) You can use the HP Cloud Recovery Download Tool to create HP Recovery media on a bootable USB flash drive. For details: ▲...
  • Page 73: Restoring And Recovery

    You can use HP Recovery media to recover the original operating system and software programs that were installed at the factory. On select products, it can be created on a bootable USB flash drive using the HP Cloud Recovery Download Tool. For details, see...
  • Page 74: Using Hp Sure Recover (Select Products Only)

    Using HP Sure Recover (select products only) Select computer models are configured with HP Sure Recover, a PC OS recovery solution built into the hardware and firmware. HP Sure Recover can fully restore the HP OS image without installed recovery software.
  • Page 75: Using Hp Pc Hardware Diagnostics

    The tool runs within the Windows operating system to diagnose hardware failures. If HP PC Hardware Diagnostics Windows is not installed on your computer, first you must download and install it. To download HP PC Hardware Diagnostics Windows, see...
  • Page 76: Downloading The Latest Hp Pc Hardware Diagnostics Windows Version

    To download HP PC Hardware Diagnostics Windows, follow these steps: Go to http://www.hp.com/go/techcenter/pcdiags. The HP PC Diagnostics home page is displayed. Select Download HP Diagnostics Windows, and then select a location on your computer or a USB flash drive. The tool downloads to the selected location.
  • Page 77: Starting Hp Pc Hardware Diagnostics Uefi

    If your PC does not start in Windows, you can use HP PC Hardware Diagnostics UEFI to diagnose hardware issues. When HP PC Hardware Diagnostics UEFI detects a failure that requires hardware replacement, a 24-digit Failure ID code is generated. For assistance in solving the problem: Select Contact HP, accept the HP privacy disclaimer, and then use a mobile device to scan the Failure ID ▲...
  • Page 78: Downloading Hp Pc Hardware Diagnostics Uefi By Product Name Or Number (Select Products Only)

    For some products, you might have to download the software to a USB flash drive by using the product name or number. To download HP PC Hardware Diagnostics UEFI by product name or number (select products only) to a USB flash drive: Go to http://www.hp.com/support.
  • Page 79 Set the location for downloading the diagnostic tools. This feature provides access to the tools from the ● HP website or from a server that has been preconfigured for use. Your computer does not require the traditional local storage (such as a hard drive or USB flash drive) to run remote diagnostics.
  • Page 80: Specifications

    Specifications Computer specifications Table 8-1 Computer specifications Metric U.S. Dimensions Width 30.65 cm 12.07 in Depth 19.50 cm 7.70 in Height (front to back) 1.70 cm 0.67 in Weight 1.30 kg (depending on 2.87 lb configuration) Input power Operating voltage and current 19.5 V dc @ 3.33 A –...
  • Page 81: Xx Cm (Xx-In) Display Specifications

    xx cm (xx-in) display specifications Table 8-2 Display specifications Metric U.S. Dimensions Height 20.77 cm 8.175 in Width 37.78 cm 14.875 in Diagonal 39.62 cm 15.600 in Number of colors Up to 16.8 million Contrast ratio 500:1 (typical) Brightness 200 nits Pixel resolution Pitch 0.252mm ×...
  • Page 82 Table 8-3 Hard drive specifications (continued) 500 GB* 750 GB* Disk rotational speed 5400 rpm 5400 rpm Operating temperature 0°C to 60°C (0°F to 140°F) 0°C to 60°C (0°F to 140°F) *Size refers to hard drive storage capacity. Actual accessible capacity is less. Actual drive specifications may differ slightly. NOTE: Certain restrictions and exclusions apply.
  • Page 83: Power Cord Set Requirements

    Power cord set requirements The wide-range input feature of the computer permits it to operate from any line voltage from 100 to 120 V ac, or from 220 to 240 V ac. The 3-conductor power cord set included with the computer meets the requirements for use in the country or region where the equipment is purchased.
  • Page 84: Requirements For Specific Countries And Regions

    Requirements for specific countries and regions Table 9-1 Power cord requirements for specific countries and regions Country/region Accredited agency Applicable note number Argentina IRAM Australia Austria Belgium CEBEC Brazil ABNT Canada Chile Denmark DEMKO Finland FIMKO France Germany India Israel Italy Japan The Netherlands...
  • Page 85 Table 9-1 Power cord requirements for specific countries and regions (continued) Country/region Accredited agency Applicable note number The flexible cord must be Type SVT/SJT or equivalent, No. 18 AWG, 3-conductor. The wall plug must be a two-pole grounding type with a NEMA 5-15P (15 A, 125 V ac) or NEMA 6-15P (15 A, 250 V ac) configuration. CSA or C-UL mark. UL file number must be on each element.
  • Page 86: 10 Recycling

    Follow the local laws and regulations in your area for battery disposal. HP encourages customers to recycle used electronic hardware, HP original print cartridges, and rechargeable batteries. For more information about recycling programs, see the HP Web site at http://www.hp.com/recycle.
  • Page 87: Index

    (microphone) combo jack, spare part numbers 26 identifying 6 hinge kit display spare part number 28 specifications 73 HP PC Hardware Diagnostics UEFI back cover, with antenna display assembly downloading 69 spare part number 28 removal 54 starting 69 backup, creating 64...
  • Page 88 73 product description 2 recovery 64 hard drive 73 discs 65 static electricity 34 USB port with HP Sleep and HP Recovery partition 65 system board Charge 5 media 65 removal 50 USB Type-C Thunderbolt port with USB flash drive 65...
  • Page 89 9 transporting guidelines 36 traveling with the computer 16 USB port with HP Sleep and Charge, identifying 5 USB port, identifying 6 USB Type-C port with HP Sleep and Charge, identifying 6...

This manual is also suitable for:

Envy 13-ba0 seriesEnvy 13t-ba000

Table of Contents