Advertisement
Quick Links
Model
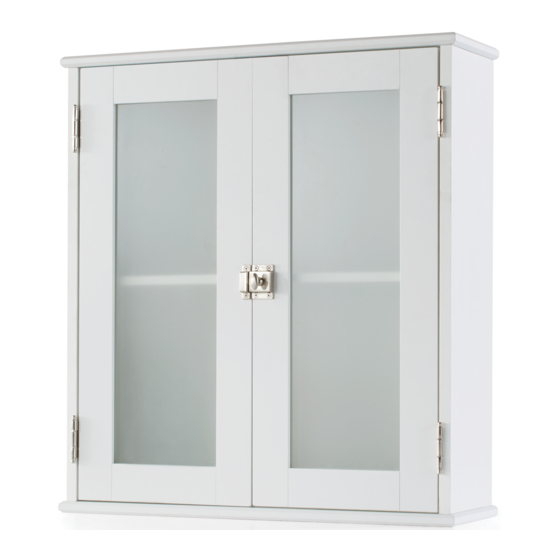
9834WWWM (White
Date:
Fecha:
Date:
Lot number:
Número de lote:
:
Numéro de lot
Product Inquiries - Installation Help
Just call (800) 892-3986 for parts and service. For faster service, have the model number ready when calling.
Consultas sobre productos - Instalación Ayuda
Simplemente llame al (800) 892-3986 para piezas y servicio. Si desea una servicio más rápido, al llamar tenga a mano el número de modelo.
Questions sur le produit - Aide à l'installation
Il suffit d'appeler le 1.800.892.3986 pour les commandes de pièces et le dépannage. Pour un service plus rapide, munissez-vous du
numéro de modèle avant d'appeler.
THIS INSTRUCTION BOOKLET CONTAINS IMPORTANT SAFETY INFORMATION. PLEASE READ AND KEEP FOR FUTURE REFERENCE.
ESTE FOLLETO DE INSTRUCCIONES CONTIENE INFORMACIÓN DE SEGURIDAD IMPORTANTE. LÉALO Y CONSÉRVELO COMO REFERENCIA
PARA EL FUTURO.
CE LIVRET D'INSTRUCTIONS CONTIENT DES RENSEIGNEMENTS IMPORTANTS SUR LA SÉCURITÉ. VEUILLEZ LE LIRE ET LE CONSERVER POUR TOUTE
RÉFÉRENCE ULTÉRIEURE.
Pg 1 of 15
/ Modelo / Modèle
/ Blanco / Blanc
MCS
)
1/17/2018
(800) 892-3986
IS09834
Advertisement

Subscribe to Our Youtube Channel
Related Manuals for Better Homes and Gardens 9834WWWM


Summary of Contents for Better Homes and Gardens 9834WWWM
- Page 1 Model / Modelo / Modèle 9834WWWM (White / Blanco / Blanc Date: Fecha: Date: Lot number: Número de lote: Numéro de lot Product Inquiries - Installation Help Just call (800) 892-3986 for parts and service. For faster service, have the model number ready when calling.
-
Page 2: Before You Begin
Before You Begin: Thank you for purchasing this product. Please identify all parts and hardware pieces before you begin. When laying out parts, place them on a soft surface to prevent scratching. If any pieces are missing, call our Toll Free Number 1-800-892-3986 between 8:00AM-5:00PM EST Monday through Friday. - Page 3 List of Parts / Lista de Partes / Liste des pièces Top Panel Paneles superior e inferior Panneau supérieur et inférieur Bottom Panel Panel lateral Panneau inférieur Left Side Panel Panel lateral izquierdo Panneau latéral gauche Right Side Panel Panel lateral derecho Panneau latéral droit Hanging Rail Riel colgante...
- Page 4 List of Hardware / Lista de piezas de tornillería / Liste des pièces de montage Large Screw Tornillo grands Vis longue Cambolt Perno para levas Boulon à cames Leva Came Dowel Clavija Goujon Hinge Screw x 16 Tornillo para bisagras Vis pour charnière Hinge Bisagra...
- Page 5 List of Hardware continued / Lista de piezas de tornillería continuada / Liste des pièces de montage, suite Shelf Clip Sujetadore para Repisa Attache pour étagères Nail Clavo x 18 Clou Screw Cover Sticker Adhesivo para cubierta de tornillo Pastille autocollante cache-vis Cam Sticker Adhesivo para leva Pastille autocollante cache-came...
- Page 6 Insert cams (3) into the hanging 1. Inserte las levas (3) dentro del riel Insérez des cames (3) dans le rail de colgante (E), como se ilustra. TENGA EN suspension (E), comme illustré. NOTEZ le rail (E), as shown. NOTE the direction CUENTA la orientación de las levas (3).
- Page 7 1. Attach the cambolts (2) to the 1. Fije los pernos de levas (2) a los paneles 1. Fixez les boulons à came (2) aux laterales superiores (C y D), como se ilustra panneaux latéraux supérieurs (C et D), side panels (C and D), as shown. comme illustré.
- Page 8 Attach the dowels (4) into the Fije las clavijas (4) dentro del panel Insérez des goujons (4) dans le panneau inferior (B), como se ilustra. inférieur (B), comme illustré. bottom panel (B), as shown. Unfinished Edge Borde Sin Acabado Bord non fini 1.
- Page 9 1. Attach the hanging rail (E) to the 1. Fije el riel colgante (E) a los paneles 1. Fixez le rail de suspension (E) aux laterales (C y D), como se ilustra. panneaux latéraux (C et D), comme illustré. side panels (C and D), as shown. 2.
- Page 10 Attach the bottom panel (B) to the Fije el panel inferior (B) a los paneles Fixez le panneau inférieur (B) aux laterales (C y D), como se ilustra. panneaux latéraux (C et D), comme illustré. side panels (C and D), as shown. (800) 892-3986 IS09834 Pg 10 of 15...
- Page 11 Lay unit face down on floor. Coloque la unidad hacia abajo sobre Placez le meuble à l’envers sur le sol. el piso. En plaçant les jointures du panneau With the seam side of back Con el lado de la unión del panel arrière (I) vers le haut, fixez-le au dos du panel (I) facing up attach to the posterior (I) hacia arriba, fíjelo a la parte...
- Page 12 1. Attach two hinges (6) to left 1. Coloque dos bisagras (6) a la puerta 1. Fixez deux charnières (6) à la porte izquierda (G), como se ilustra. ¡NO APRIETE gauche (G), comme illustré. NE SERREZ door (G), as shown. DO NOT LOS TORNILL0S DE LAS BISAGRAS (5) DE PAS TROP LES VIS DES CHARNIÈRES (5)! OVERTIGHTEN HINGE SCREWS (5)!
- Page 13 Attach the latch knob assembly (8) Fije el ensamble de la perilla de cierre (8) Fixez le bouton de loquet (8) et le loquet (9) y el cierre (9) a las puertas (G y H), como aux portes (G et H), comme illustré. and the latch (9) to the doors se ilustra.
- Page 14 1. Attach doors (G and H) to the 1. Fije las puertas (G y H) a los paneles 1. Fixez les portes (G et H) aux panneaux laterales (C y D), como se ilustra. latéraux (C et D), comme illustré. side panels (C and D), as shown.
- Page 15 11. Mount the unit to the wall. Montaje de la unidad a la Montez l’unité au mur. pared. WARNING: BEFORE CUTTING OR AVERTISSEMENT : AVANT DE COUPER OU PERCER TOUTE SURFACE MURALE, VÉRIFIEZ DRILLING INTO ANY WALL SURFACE, ADVERTENCIA: ANTES DE CORTAR O L’EMPLACEMENT DES CANALISATIONS VERIFY THE LOCATION OF ELECTRICAL, TALADRAR EN CUALQUIER SUPERFICIE DE...
Need help?
Do you have a question about the 9834WWWM and is the answer not in the manual?
Questions and answers