
Subscribe to Our Youtube Channel
Related Manuals for Hioki DT4221


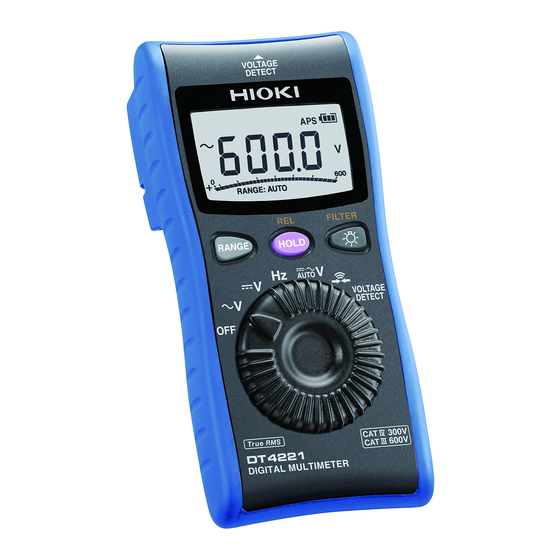
Summary of Contents for Hioki DT4221
- Page 1 DT4221 DT4222 Instruction Manual DT4223 DT4224 DIGITAL MULTIMETER Aug. 2016 Revised edition 2 DT4221A981-02 16-08H 1.800.561.8187 information@itm.com www. .com...
-
Page 2: Table Of Contents
Hanging the instrument with the strap ....27 Performing Measurements Inspection Before Use ......29 Measuring Voltage........33 Measuring AC voltage .........33 Measuring DC voltage ........34 Measurement using the AC/DC automatic judgment (DT4221, DT4223) ......34 Measuring Frequencies ......35 DT4221A981-02 1.800.561.8187 information@itm.com www. .com... - Page 3 (DT4222, DT4223, DT4224) ..... 38 Measuring Capacitance (DT4222, DT4224) ........39 Checking the Electric Charge (DT4221, DT4223) ........40 Using Instrument Conveniently 41 Selecting the Measurement Range ..41 Measuring with the auto range ......41 Measuring with the manual range .......42 Retaining the Measured Value ....
- Page 4 Contents Maintenance and Service Repair, Inspection, and Cleaning ... 65 Troubleshooting ........66 Error Display ..........68 Appendix Appx.1 Appx. 1 RMS and Average ....... Appx.1 1.800.561.8187 information@itm.com www. .com...
-
Page 5: Introduction
Introduction Introduction Thank you for purchasing the Hioki DT4221, DT4222, DT4223, DT4224 Digital Multimeter. To obtain maximum performance from the product, please read this manual fi rst, and keep it handy for future reference. Verifying Package Contents When you receive the instrument, inspect it carefully to ensure that no damage occurred during shipping. -
Page 6: Options (Sold Separately)
Options (sold separately) Options (sold separately) The following options are available for the instrument. Contact your authorized Hioki distributor or reseller when ordering. Connecting cables (p. 24) L4933 Contact Pin Set 33 V AC/70 V DC DT4911 L4934 Test Lead... -
Page 7: Safety Notes
Safety Notes Safety Notes This instrument is designed to conform to IEC 61010 Safety Standards, and has been thoroughly tested for safety prior to shipment. However, using the instrument in a way not described in this manual may negate the provided safety features. Before using the instrument, be certain to carefully read the following safety notes. - Page 8 Safety Notes Notation In this manual, the risk seriousness and the hazard levels are classifi ed as follows. Indicates an imminently hazardous situation DANGER that will result in death or serious injury to the operator. Indicates a potentially hazardous situation WARNING that may result in death or serious injury to the operator.
- Page 9 Safety Notes Symbols affi xed to the instrument Indicates cautions and hazards. When the symbol is printed on the instrument, refer to a corresponding topic in the Instruction Manual. Indicates that dangerous voltage may be present at this terminal. Indicates a double-insulated device. Indicates a grounding terminal.
- Page 10 Safety Notes Accuracy We defi ne measurement tolerances in terms of rdg. (reading) and dgt. (digit) values, with the following meanings: (Reading or displayed value) rdg. The value currently being measured and indicated on the measuring instrument. (Resolution) The smallest displayable unit on a digital measuring dgt.
- Page 11 Safety Notes Measurement categories To ensure safe operation of measuring instruments, IEC 61010 establishes safety standards for various electrical environments, categorized as CAT II to CAT IV, and called measurement categories. DANGER • Using a measuring instrument in an environment designated with a higher-numbered category than that for which the instrument is rated could result in a severe accident, and must be...
-
Page 12: Usage Notes
If you fi nd any damage, contact your authorized Hioki distributor or reseller. Installation Installing the instrument in inappropriate locations may cause a malfunction of instrument or may give rise to an accident. Avoid the following locations. - Page 13 Usage Notes Handling the cables WARNING To prevent electric shock, when measuring the voltage of a power line use a test lead that satisfi es the following criteria: • Conforms to safety standards IEC61010 or EN61010 • Of measurement category III or IV •...
- Page 14 Precautions during shipment Observe the following during shipment. Hioki cannot be responsible for damage that occurs during shipment. CAUTION • During shipment of the instrument, handle it carefully so that it is not damaged due to a vibration or shock.
-
Page 15: Overview
• This safe design keeps circuit breakers from tripping and sparks from being produced at the tips of test leads. • Although the DT4221 and DT4222 will not break if they are used to measure voltage in continuity, resistance, capacitance, or diode range, those models do not provide functionality to limit the amount of current fl... - Page 16 Overview and Features Problem fi nding a suitable installation location? The strap with magnet allows the instrument to be hung conveniently. For various purposes Large, easily- viewable display The measurement test leads and end Backlighting to allow pins can be selected. users to read the measurement values in dark environments...
-
Page 17: Parts Names And Functions
Parts Names and Functions 1.2 Parts Names and Functions Front Some indications are different among the models. Display (p. 18) Operation keys (p. 14) Rotary switch (p. 16) DT4224 DT4221 DT4222 DT4223 1.800.561.8187 information@itm.com www. .com... - Page 18 Parts Names and Functions Operation keys DT4221, DT4222 Pressed down Power- Normal for at least 1 on option second (p. 52) Sets the manual Cancels the manual All LCDs range/switches range. light up and the range. the software version is RANGE:AUTO / RANGE:MANUAL displayed.
- Page 19 Parts Names and Functions DT4223, DT4224 Pressed down Power- Normal for at least 1 on option second (p. 52) Sets the auto and Sets/cancels the All LCDs light up. manual range/ display of the The software switches the relative value version and range.
- Page 20 Parts Names and Functions Rotary switches and measurement descriptions DT4221 DT4222, DT4224 DT4223 Function √ √ √ AC voltage measurement √ √ √ DC voltage measurement √ √ √ Frequency measurement √ − √ DC/AC voltage measurement (Automatic judgment) √...
- Page 21 Parts Names and Functions Rear DT4224 Test lead holder The test lead can be held. 2 2 2 Strap hole The optional Z5004, Z5020 Magnetic Strap can be attached. (p. 27) Battery cover When replacing the battery (p. 22), remove the cover. (See p.
-
Page 22: Display
Diode (p. 37) Retention of the Auto range, manual range measured value (p. 41) (p. 43) Relative value *1: DT4221 display (p. 48) *2: DT4223, DT4224 The fi lter function is activated. (p. 46) 1.800.561.8187 information@itm.com www. -
Page 23: Voltage Input Protected (Dt4223, Dt4224)
Voltage Input Protected (DT4223, DT4224) 1.4 Voltage Input Protected (DT4223, DT4224) Erroneous voltage warning for continuity, resistance, capacitance, or diode range The red backlight fl ashes to warn the user. Immediately move the test leads away from the measurement object. Grounding terminal Voltage input... -
Page 24: Alarm Display And Battery Indicator
Alarm Display and Battery Indicator 1.5 Alarm Display and Battery Indicator When the measured value exceeds the maximum input range in each range Voltage measurement The measured value and [OVER] blinks. Corrective action: When the input exceeds the maximum rating, immediately move the test leads away from the measurement object. -
Page 25: Preparation For Measurements
Preparation for Measurements 2.1 Measurement Workfl ow Before using the instrument, be sure to read “Usage Notes” (p. 8). Installation and connection Insert the battery. (p. 22) As necessary, have other optional items available and ready. Perform the startup check. (p. 29) Measurement To ensure safe operation, To ensure safe operation,... -
Page 26: Inserting/Replacing The Battery
Inserting/Replacing the Battery 2.2 Inserting/Replacing the Battery Before using the instrument, insert one LR03 alkaline battery. Before measurements, check that the battery level is suffi cient. When the battery charge is low, replace the battery. Nickel-metal hydride batteries Nickel-metal hydride batteries can be used. However, the discharge characteristic of these batteries is different from that of alkaline batteries. - Page 27 Inserting/Replacing the Battery • The indicator appears when the battery charge diminishes. Replace the battery as soon as possible. The power may be turned off when the backlight lights up or a buzzer sounds. • After use, be sure to turn off the instrument. •...
-
Page 28: Using Test Leads
(M3×7.5 mm) for securing the battery cover in place that are originally installed. If you have lost a screw or fi nd that a screw is damaged, please contact your Hioki distributor for replacement. 2.3 Using Test Leads The DT4911 Test Leads supplied with the instrument are used for measurements. - Page 29 Using Test Leads DT4911 Test Lead (p. 8 ) Sleeves Barriers Plugs Cables Metal pins Metal pin Connect to the object to be measured. Approx. 3 mm (sleeve attached) Approx. 15 mm (sleeve removed) Sleeve Attach to the metal pins to prevent short circuit accidents. Barrier Represents the safe handling distance from the metal pins.
- Page 30 Using Test Leads Connecting to the instrument CAUTION • When removing the test leads from the measurement terminals, hold the end of the plugs. • Do not pull the cables with excessive force, as they may be broken. Black When connecting the test leads to the instrument, push them as far as possible into the measurement terminals while holding the end of the plugs.
-
Page 31: Installation In Measurement Location
Installation in Measurement Location 2.4 Installation in Measurement Location Hanging the instrument with the strap Attach the optional Z5004, Z5020 Magnetic Strap to the instrument and attach the magnet to the wall surface (with metal plate affi xed). DANGER Those with medical electronics such as pacemakers should not use the Z5004, Z5020 Magnetic Strap. - Page 32 Installation in Measurement Location Example: Z5004 Strap holes Front Rear Magnet Attach it to the wall surface (with metal plate affi xed). 1.800.561.8187 information@itm.com www. .com...
-
Page 33: Performing Measurements
Before using the instrument the fi rst time, verify that it operates normally to ensure that no damage occurred during storage or shipping. If you fi nd any damage, contact your authorized Hioki distributor or reseller. Appearance check of the instrument and test leads... - Page 34 If the same phenomena persist even after the test leads are replaced, a malfunction may have occurred. Halt inspection and then For the DT4221 send the instrument for repair. (The position of the rotary switch varies depending on the model.) 1.800.561.8187...
- Page 35 Inspection Before Use Measure samples (such as battery, commercial power supply, and resistor) of which values have already been known, and check that the appropriate values appear. Check method Action Example: Normal: Perform the AC voltage An already-known value appears. measurement to measure the (In this example, the commercial commercial power supply, and...
- Page 36 Inspection Before Use Check that the electric charge detection function operates normally. (DT4221, DT4223) Check method Action Position the detector on a known Normal: power supply, such as a power outlet. A buzzer sounds. Abnormal: A buzzer does not sound and the display does not change.
-
Page 37: Measuring Voltage
Measuring Voltage 3.2 Measuring Voltage AC or DC voltage measurement and measurement using the AC/DC automatic judgment (DT4221, DT4223) can be performed. Before measurements WARNING If the instrument is used in locations where the rating indicated on the instrument or probes is exceeded, the instrument may be damaged resulting in personal injury. -
Page 38: Measuring Dc Voltage
Measuring DC voltage Measure the DC voltage. Measurement using the AC/DC automatic judgment (DT4221, DT4223) The AC or DC are automatically judged and the voltage is measured. (The instrument does not measure both AC and DC at the same time.) -
Page 39: Measuring Frequencies
Measuring Frequencies 3.3 Measuring Frequencies The frequency can be checked. The frequency display is auto ranging. The AC voltage range can be changed by pressing the RANGE key. • If signals out of the range of frequency measurement are measured, “−−−−−”... -
Page 40: Checking Continuity
Checking Continuity 3.4 Checking Continuity The input short circuit is detected and informed via a buzzer. WARNING Before measuring, be sure to turn off the power to the measurement circuit. Otherwise, electric shock may occur or the instrument may be damaged. For the DT4223 (The position of the rotary switch varies depending on the... -
Page 41: Measuring Diode (Dt4222, Dt4224)
Measuring Diode (DT4222, DT4224) 3.5 Measuring Diode (DT4222, DT4224) The forward voltage of the diode is measured. If the forward voltage is within the range from 0.15 V to 1.5 V, it is indicated via a buzzer (intermittent buzzer sound). WARNING Before measuring, be sure to turn off the power to the measurement circuit. -
Page 42: Measuring Resistance (Dt4222, Dt4223, Dt4224)
Measuring Resistance (DT4222, DT4223, DT4224) 3.6 Measuring Resistance (DT4222, DT4223, DT4224) Resistance is measured. To measure the low resistance accurately, it is necessary to cancel the resistance of the test leads. Perform zero adjustment for the displayed value using the relative value display (relative function) in advance. -
Page 43: Measuring Capacitance (Dt4222, Dt4224)
Measuring Capacitance (DT4222, DT4224) 3.7 Measuring Capacitance (DT4222, DT4224) The capacity of the capacitor is measured. WARNING Before measuring, be sure to turn off the power to the measurement circuit. Otherwise, electric shock may occur or the instrument may be damaged. Do not measure the capacitor which has been charged. -
Page 44: Checking The Electric Charge (Dt4221, Dt4223)
Checking the Electric Charge (DT4221, DT4223) 3.8 Checking the Electric Charge (DT4221, DT4223) Whether a power line is energized can be checked easily. If the power line is energized, it is indicated via a buzzer and display. Use this function for coated power lines. The detection may not be made depending on the measurement conditions. -
Page 45: Using Instrument Conveniently
Using Instrument Conveniently 4.1 Selecting the Measurement Range Auto or manual range can be selected. In the case of measurement where the desired range can be selected, [RANGE:] lights up at the bottom of the display. • Auto range Sets the optimum range automatically in accordance with the actual measurement. -
Page 46: Measuring With The Manual Range
Selecting the Measurement Range Measuring with the manual range DT4221, DT4222 Press [RANGE: MANUAL] lights up. Each time is pressed, the range is switched. When the key is pressed at the highest range, the lowest range is specifi ed once again. -
Page 47: Retaining The Measured Value
Retaining the Measured Value 4.2 Retaining the Measured Value The measured value is retained. (The bar graph is updated.) Retaining the measured value manually (HOLD) To retain the measured value, press ([HOLD] lights up and the measured value is retained.) To cancel the hold state, press it again. -
Page 48: Automatically Retaining The Measured Value When The Value Stablizes (Auto Hold) (Dt4223, Dt4224)
Retaining the Measured Value Automatically retaining the measured value when the value stablizes (AUTO HOLD) (DT4223, DT4224) Press for at least 1 sec. Press for at least 1 sec. ([HOLD] blinks, the instrument is Blinks waiting for the measured value to (Waiting for measured value to stabilize.) - Page 49 Retaining the Measured Value Conceptual diagram (AC voltage) 100.0 V 99.0 V Retained measured value Auto hold Not retained automatically. (Example) 100.0 V (The threshold is not exceeded.) Auto hold (Example) 99.0 V Threshold Fluctuation range (Example) 12.0 V Measured value Start Start...
-
Page 50: Reducing The Noise (Filter)
Reducing the Noise (FILTER) 4.3 Reducing the Noise (FILTER) WARNING To avoid electric shock or other personal injury, select the appropriate passband setting when measuring the AC voltage. If an inappropriate frequency is selected, the measured value displayed will not be correct. The infl... - Page 51 Reducing the Noise (FILTER) Example of frequency property when a fi lter is used (AC voltage 600.0 V range, 100 V input) Measured value [V] Filter OFF Passband 500 [Hz] Passband 100 [Hz] 1000 10000 Frequency at 100 V input (Hz) Example: Power frequency on an aircraft or marine vessel is 400 Hz When voltage is 100 V...
-
Page 52: Checking The Relative Value/Performing Zero Adjustment
• The DT4223 and DT4224 can display relative values for frequency input. Checking the relative value (REL) Example 1: DC voltage measurement For the DT4221, DT4222 When the standard value is measured, press for at least 1 second. For the DT4223, DT4224... -
Page 53: Performing Zero Adjustment
Checking the Relative Value/Performing Zero Adjustment Performing zero adjustment When performing zero adjustment, the condition of the test leads varies depending on the measurement function. Perform zero adjustment, referring to the table below. Ω Measurement function Condition of the test leads Short circuit Open Example 1:... - Page 54 Checking the Relative Value/Performing Zero Adjustment Example 2: Capacitor measurement (DT4222, DT4224) Select the measurement function. Connect the test leads to the measurement terminals. Allow the test leads to open. DT4222: Press for at least 1 second. DT4224: Press at least 1 second. (After zero adjustment: 0.000 μF) Measure the capacitor.
-
Page 55: Turning On The Backlight
Turning On the Backlight 4.5 Turning On the Backlight The backlight can be turned on/off by pressing The backlight automatically turns off if the instrument is not operated for 40 seconds. The automatic backlight deactivation function can be disabled. (p. 52) 4.6 Using the Auto Power Save (APS) The auto power save function saves on battery consumption. -
Page 56: Power-On Option Table
• When the power is turned off, the settings are disabled. (DT4221, DT4222) • The setting is retained even if the instrument is turned off. To enable the setting again, repeat the same action. (DT4223, DT4224) 1.800.561.8187 information@itm.com... - Page 57 Power-on Option Table Setting Method change (First position from OFF) Checking Example: Ver 1.00 software version (Second position from OFF) Check that there are no missing indicators. If any indicator is missing, stop using the instrument and send Displaying it for repair. indicators (Third position from OFF) The 9-digit serial number is displayed 3 digits at a time.
- Page 58 Indoors, pollution degree 2, altitude up to 2000 m environment (6562 ft.) Operating • Temperature −10°C to 50°C (14°F to 122°F) (DT4221, DT4222) temperature and −10°C to 65°C (14°F to 149°F) (DT4223, DT4224) humidity • Humidity −10°C to 40°C (14°F to 104°F): 80% RH or less (no condensation) 40°C to 45°C (104°F to 113°F): 60% RH or less...
-
Page 59: Specifi Cations
General Specifi cations −30°C to 60°C (−22°F to 140°F) (DT4221, DT4222) Storage −30°C to 70°C (−22°F to 158°F) (DT4223, DT4224) temperature and humidity 80% RH or less (no condensation) Dust-proof and IP42 (EN60529) water-proof Drop-proof 1 m on concrete (with the holster attached) - Page 60 Electrical Characteristics 5.2 Electrical Characteristics • DCV: −60 dB or more (50 Hz/60 Hz) Noise suppression NMRR • DCV: −100 dB or more Noise suppression Ω CMRR (DC/50 Hz/60 Hz, 1 k unbalance) • ACV: −60 dB or more Ω (DC/50 Hz/60 Hz, 1 k unbalance) Response time...
-
Page 61: Electrical Characteristics
Backlight off: Approx. 40 hours* Approx. 35 hours* *1: Until the values stabilize within the accuracy specifi cation range. *2: Measured within the measurement range (excluding range movement). *3: DT4221, DT4222 *4: DT4223, DT4224 1.800.561.8187 information@itm.com www. .com... - Page 62 100 pF or less • Overload protection: 660 V DC/660 V AC or 3 × 10 V • Hz (energized for 1 minute) (DT4221, DT4222) • Overload protection: 750 V DC/750 V AC or 3 × 10 V • Hz (energized for 1 minute) (DT4223, DT4224) •...
-
Page 63: Accuracy Table
Accuracy Table • Crest factor: The crest factor is 3 up to 4000 counts and reduces linearly to 2 at 6000 counts. • Connection method: AC coupling • Auto range movement threshold: 6,000 counts or more for upper range, 540 counts or less for lower range *1: The accuracy is specifi... - Page 64 ±1.5% • Overload protection: 660 V DC/660 V AC or 3 × 10 V • Hz (energized for 1 minute) (DT4221, DT4222) • Overload protection: 750 V DC/750 V AC or 3 × 10 V • Hz (energized for 1 minute) (DT4223, DT4224) •...
- Page 65 200 μA ±20% 600.0 ±1.0% rdg. ±5 dgt. • Open circuit voltage: 1.8 V DC or less (DT4221, DT4222) 2.0 V DC or less (DT4223, DT4224) • Overload protection: 600 V DC/600 V AC or 3 × 10 V • Hz (energized for 1 minute) Current under overload: Steady state 15 mA or less, transient state 0.8 A or less...
- Page 66 60.00 M ±1.5% rdg. ±5 dgt. 10 nA ±20% • Open circuit voltage: 1.8 V DC or less (DT4221, DT4222) 2.0 V DC or less (DT4223, DT4224) • Overload protection: 600 V DC/600 V AC or 3 × 10 V • Hz (energized for 1 minute) Current under overload: Steady state 15 mA or less, transient state 0.8 A or less...
- Page 67 V • Hz (energized for 1 minute) Current under overload: Steady state 15 mA or less, transient state 0.8 A or less (DT4221, DT4222) • Overload protection: 750 V DC/750 V AC or 3 × 10 V • Hz (energized for 1 minute) Current under overload: 1.5 mA or less (DT4223, DT4224)
-
Page 68: Maintenance And Service
Maintenance and Service 6.1 Repair, Inspection, and Cleaning DANGER Customers are not allowed to modify, disassemble, or repair the instrument. Doing so may cause fi re, electric shock, or injury. Calibrations IMPORTANT Periodic calibration is necessary in order to ensure that the instrument provides correct measurement results of the specifi... - Page 69 • When a malfunction of the instrument is suspected, check the information in “Before sending the instrument for repair” and then, if necessary, contact your authorized Hioki distributor or reseller. • When sending the instrument for repair, remove the battery and pack it carefully to prevent damage during transportation.
-
Page 70: Troubleshooting
Troubleshooting Symptom Check and/or corrective action Nothing appears in Check that the battey is not exhausted. the display. Replace with a new battery. (p. 22) Or the display Check that the auto power save function has disappears after a not been activated. short time. -
Page 71: Error Display
When the error appears in ROM error Err 2 the display, it is necessary Adjustment data to repair the instrument. EEPROM error Contact your authorized Err 4 Memory data Hioki distributor or reseller. ADC error Err 5 Hardware malfunction 1.800.561.8187 information@itm.com www. .com... -
Page 72: Appendix
Appendix Appx. 1 RMS and Average Difference between the RMS and Average When converting AC to RMS, 2 methods are available, “True RMS method (True RMS indication)” and “Average method (Average rectifying RMS indication)”. In the case of the sine wave where no skew is included, the same values are indicated in both methods. - Page 73 16-01 EN 1.800.561.8187 information@itm.com www. .com...
- Page 74 DT4221 DT4222 Instruction Manual DT4223 DT4224 DIGITAL MULTIMETER Aug. 2016 Revised edition 2 DT4221A981-02 16-08H 1.800.561.8187 information@itm.com www. .com...
Need help?
Do you have a question about the DT4221 and is the answer not in the manual?
Questions and answers