Sign In
Upload
Download
Table of Contents
Contents
Add to my manuals
Delete from my manuals
Share
URL of this page:
HTML Link:
Bookmark this page
Add
Manual will be automatically added to "My Manuals"
Print this page
×
Bookmark added
×
Added to my manuals
Manuals
Brands
Hioki Manuals
Multimeter
dt4212
Instruction manual
Hioki dt4212 Instruction Manual
Hide thumbs
1
2
3
4
5
6
7
8
9
10
11
12
13
14
15
16
17
18
19
20
21
22
23
24
25
26
27
28
29
30
31
32
33
34
35
36
37
38
39
40
41
42
43
44
45
46
47
48
49
50
51
52
53
54
55
56
57
58
59
60
61
62
63
64
65
66
67
68
69
70
71
72
73
74
75
76
77
78
79
80
81
82
83
84
85
86
87
88
89
90
91
92
93
94
95
96
97
98
99
100
101
102
103
104
105
106
107
108
109
110
111
112
113
114
115
116
117
118
119
120
121
122
123
124
125
126
127
128
129
130
131
132
133
134
135
136
137
138
139
140
141
142
143
144
145
146
147
148
149
150
151
152
153
154
page
of
154
Go
/
154
Contents
Table of Contents
Troubleshooting
Bookmarks
Table of Contents
English
Digital Multimeter
Table of Contents
Introduction
Verifying Package Contents
Options (Sold Separately)
Safety Notes
Usage Notes
1 Overview
Overview and Features
Parts Names and Functions
Display
2 Preparation for Measurements
Measurement Workfl Ow
Inserting/Replacing Batteries
Using Test Leads
3 Performing Measurements
Inspection before Use
Operation Check
Measuring AC Voltage
Measuring Voltage
Measuring DC Voltage
Measuring Resistance
Measuring Diode
Checking Continuity
Measuring Electrostatic Capacities
Measuring Frequencies
Measuring Duty Ratio
Measuring Current
Measuring DC/AC
Measuring Temperatures (DT4212)
4 Using Instrument Conveniently
Selecting the Measurement Range
Measuring with the Auto Range
Measuring with the Manual Range
Retaining the Measured Value
Retaining the Measured Value (HOLD)
Checking the Relative Value/Performing Zero Adjustment
Checking the Relative Value (REL)
Performing Zero Adjustment
Turning on the Backlight
Using the Auto Power Save (APS)
5 Specifi Cations
General Specifi Cations
Electrical Characteristics
Accuracy Table
6 Maintenance and Service
Repair, Inspection, and Cleaning
Troubleshooting
Replacing Fuses
Appendix Appx
Appx. 1 RMS and Average
汉语
安全注意事项
使用注意事项
概述
概述和特性
各部分的名称和功能 显示
测量准备
测量流程
安装 / 更换电池
使用测试线
执行测量
测量电压
测量交流电压
测量直流电压
导通检查
测量静电容量
测量频率
测量占空比
测量电流
测量直流 / 交流电流
测量温度( Dt4212
便利的使用方法
选择测量量程
用自动量程测量
用手动量程测量
保持测量值
保持测量值( Hold
确认相对值 / 执行调零
确认相对值( Rel
执行调零
打开背光灯
使用自动节电( Aps
规格
一般规格
电气特性
精度表
维护和检修
维修、检查和清洁
故障诊断
更换熔断器
附录 1 有效值与平均值
Advertisement
Quick Links
1
Digital Multimeter
2
English
3
Overview and Features
Download this manual
Instruction Manual
使用说明书
DT4211
DT4212
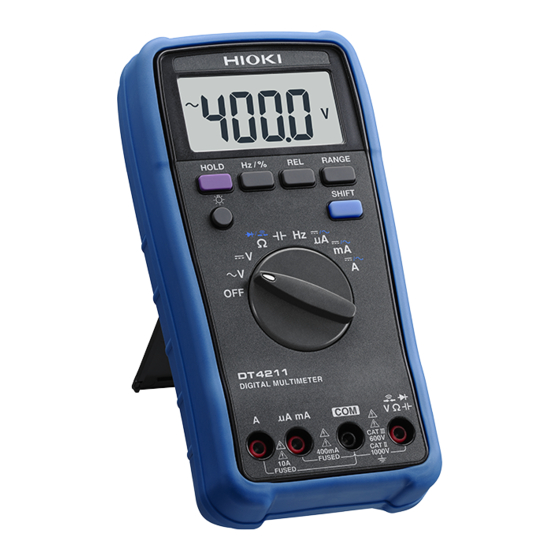
DIGITAL MULTIMETER
数字万用表
November 2013 Revised edition 1
2013年11月 修订一版
DT4211A981-01 13-11H
Table of
Contents
Previous
Page
Next
Page
1
2
3
4
5
Advertisement
Chapters
English
3
汉语
79
Table of Contents
Need help?
Do you have a question about the dt4212 and is the answer not in the manual?
Ask a question
Questions and answers
Related Manuals for Hioki dt4212
Multimeter Hioki DT4221 Instruction Manual
(72 pages)
Multimeter Hioki DT4221 Instruction Manual
(74 pages)
Multimeter Hioki DT4222 Instruction Manual
(82 pages)
Multimeter Hioki DT4252 Instruction Manual
(116 pages)
Multimeter Hioki DT4252 Instruction Manual
(105 pages)
Multimeter Hioki DT4200 Series Manual
(20 pages)
Multimeter Hioki DT4251 Instruction Manual
(106 pages)
Multimeter Hioki DT4281 Instruction Manual
(113 pages)
Multimeter Hioki DT4281 Instruction Manual
(114 pages)
Multimeter Hioki DT4280 Series Remote Operation Manual
(14 pages)
Multimeter Hioki DT4250 series Operation Manual
(11 pages)
Multimeter Hioki dt4211 Instruction Manual
(154 pages)
Multimeter Hioki DT4261 Instruction Manual
(154 pages)
Multimeter Hioki DT4261 Remote Operation Manual
(11 pages)
Multimeter Hioki 3255-50 HiTESTER Instruction Manual
Digital hitester (52 pages)
Multimeter Hioki 3256-50 Instruction Manual
Digital hitester (54 pages)
This manual is also suitable for:
Dt4211
Table of Contents
Print
Rename the bookmark
Delete bookmark?
Delete from my manuals?
Login
Sign In
OR
Sign in with Facebook
Sign in with Google
Upload manual
Upload from disk
Upload from URL


Need help?
Do you have a question about the dt4212 and is the answer not in the manual?
Questions and answers