
Related Manuals for Markes International Kori-xr


Summary of Contents for Markes International Kori-xr
- Page 1 QUI-1138 Version 1.1 – March 2017 Installation manual Kori-xr Markes International Ltd T: +44 (0)1443 230935 F: +44 (0)1443 231531 E: enquiries@markes.com www.markes.com...
-
Page 2: Table Of Contents
Installing the heated Transfer Line between Kori-xr and UNITY-xr or UNITY 2 – CIA-Advantage, no ULTRA-xr configuration (SERASX-5004) ....14 4.4.2 Installing the heated Transfer Line between Kori-xr and UNITY-xr – CIA- Advantage and ULTRA-xr configuration (SERASX-5031) ........17 Markes International Ltd T: +44 (0)1443 230935 F: +44 (0)1443 231531 E: enquiries@markes.com... - Page 3 Installing the heated Transfer Line between Kori-xr and UNITY Air Server-xr (SERASX-5031) ..................20 4.4.4 Installing the heated Transfer Line between Kori-xr and UNITY 2 Air Server (SERASX-5004) ..................... 24 Installing the split tube in Kori-xr .................... 26 Installing the cold trap in Kori-xr .................... 26 Installing the Kori-xr sample line (SERWAD-7001) ..............
-
Page 4: Preface
Warranty Kori-xr is designed for laboratory use only. It is not intended for use in domestic establishments or establishments directly connected to a low-voltage power supply network that supplies buildings used for domestic purposes. Where equipment is used in a field placement environment, care must be taken to ensure that the instrument is not exposed to detrimental conditions, i.e. -
Page 5: Important Safety Warnings
Throughout this manual symbols will appear where carrying out an operation may involve hazards. Symbols and warnings also appear on the instrument, and these should be adhered to at all times. Markes International can accept no liability for failure to do so. BURN HAZARD A hot surface may result in a burn injury. -
Page 6: High Temperatures
See Section 3 for the location of these zones. 1.4.4 Cleaning and decontamination Please consult Markes International or your local agent for information on decontamination or the use of cleaning agents NOTE: Incorrect cleaning/decontamination could result in damage to the instrument. -
Page 7: Environment Operating Conditions
50/60 Hz Input inrush current (A): <40 A (cold start) Technical support contact details In the first instance please contact your distributor. If they are unable to resolve your query, please contact Markes International (details below). Website: www.markes.com E-Mail: support@markes.com... -
Page 8: Kori-Xr Pre-Installation Check List
50 and 60 psi both to actuate the main valve and to purge the cold trap box. It is recommended that a secondary pressure regulator be used to control the supply of dry gas to Kori-xr in addition to that controlling the general laboratory line pressure. Any conventional pressure regulator should suffice for this and suitable pneumatic control may already be available on your GC. -
Page 9: Instrument Familiarisation
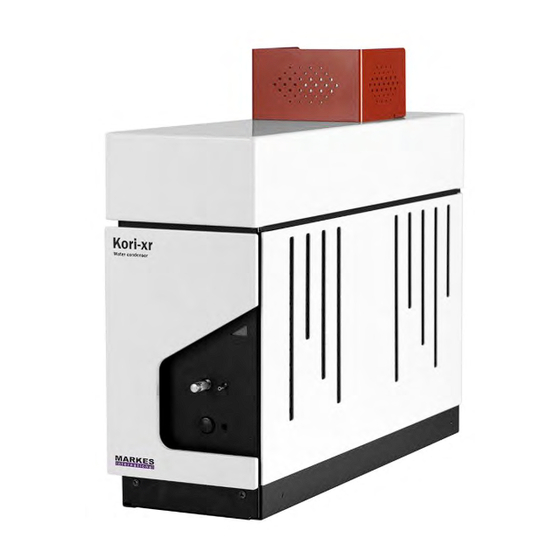
Page 9 3. Instrument Familiarisation The Kori-xr selectively removes water from the sample gas stream with virtually no loss of polar or non- polar species. It is ideal for GC-MS analysis of complex air samples. The Kori-xr works in two steps: ... -
Page 10: Installing Kori-Xr
The above configuration also applies if an ULTRA-xr is present alongside a UNITY 2. The ULTRA-xr must be removed from the UNITY 2 tube oven prior to installation of the Kori-xr and vice versa. Separate software configurations should be used for each of the two situations. -
Page 11: Unity-Xr -Ultra-Xr/Cia-Advantage/Kori-Xr
QUI-1138 Page 11 4.2.2 UNITY-xr -ULTRA-XR/CIA-Advantage/Kori-xr In this configuration the Kori-xr is positioned BETWEEN the CIA Advantage and the UNITY-xr. 4.2.3 UNITY Air Server-xr/Kori-xr In this configuration the Kori-xr is positioned to the RIGHT of the UNITY AirServer-xr. Markes International Ltd T: +44 (0)1443 230935 F: +44 (0)1443 231531 E: enquiries@markes.com... -
Page 12: Unity 2 Air Server/Kori-Xr
QUI-1138 Page 12 4.2.4 UNITY 2 Air Server/Kori-xr In this configuration the Kori-xr is positioned to the LEFT of the UNITY 2 AirServer. Markes International Ltd T: +44 (0)1443 230935 F: +44 (0)1443 231531 E: enquiries@markes.com www.markes.com... -
Page 13: Connections To Kori-Xr
Purge gas connection Connect the purge gas line on the rear of Kori-xr to the plug-in Y-fitting on the inlet on the rear of the UNITY-xr (UNITY 2) via 4mm o.d. nylon tubing (Z-0055). The other port on the Y-fitting should be connected to the back of the U-GAS01 regulator. -
Page 14: Cable Connections
Cable connections Connect the power cable (SERZ-0024). Connect the Kori-xr to the PC with the serial cable (SERZ-0189). If there are no available serial ports on the PC, use the USB-Serial cable adapter (U-USBSR) provided. Installing the heated transfer lines Kori-xr is supplied with two heated transfer lines. - Page 15 SERASX-5004 to the sample outlet on top of Kori- Connect the four way Molex connector of SERASX- 5004 to the terminal labelled ‘CIA I/F’ on top of Kori-xr Markes International Ltd T: +44 (0)1443 230935 F: +44 (0)1443 231531 E: enquiries@markes.com www.markes.com...
- Page 16 Page 16 Connect the longer piece of 1/16” tubing of SERASX-5004 to the length of 1/16” Stainless Steel tubing supplied in the Kori-xr shipping kit (Z-0175) using a 1/16” union Remove top rear cover of CIA Advantage. Connect the other end of the 1/16” Stainless Steel tubing to the outlet tubing of the CIA-Advantage valve oven using a second1/16”...
-
Page 17: Installing The Heated Transfer Line Between Kori-Xr And Unity-Xr - Cia-Advantage And Ultra-Xr Configuration (Serasx-5031)
The oven cover must be lowered completely to ensure a good seal. 4.4.2 Installing the heated Transfer Line between Kori-xr and UNITY-xr – CIA-Advantage and ULTRA-xr configuration (SERASX-5031) Remove the Kori-xr covers as described in Section 4.4.1... - Page 18 CIA-Advantage valve oven using a second1/16” union as described in section 4.4.1 To enable the Kori-xr heated transfer line to be installed in UNITY-xr, it is first necessary to remove the split tube cradle by removing the two screws...
- Page 19 Insert the split tube and Kori-xr transfer line (SERASX-5031) into the split side of the UNITY-xr heated valve as shown and fully lower the split tube cover to ensure a leak tight seal.
-
Page 20: Installing The Heated Transfer Line Between Kori-Xr And Unity Air Server-Xr (Serasx-5031)
The length of 1/16” stainless steel tubing at this end of the transfer line should be connected to the bulkhead union on UNITY-xr as shown 4.4.3 Installing the heated Transfer Line between Kori-xr and UNITY Air Server-xr (SERASX-5031) Remove the Kori-xr covers as described in Section 4.4.1 Connect the shorter length of 1/16”... - Page 21 Kori-xr To enable the Kori-xr heated transfer line to be installed in UNITY-xr, it is first necessary to remove the split tube support by remove the two screws...
- Page 22 Insert the split tube and Kori-xr transfer line (SERASX-5031) into the split side of the UNITY-xr heated valve as shown and fully lower the split tube cover to ensure a leak tight seal.
- Page 23 The length of 1/16” stainless steel tubing at this end of the transfer line is unused and should remain unconnected and be routed away from other components on Kori-xr Markes International Ltd T: +44 (0)1443 230935 F: +44 (0)1443 231531 E: enquiries@markes.com...
-
Page 24: Installing The Heated Transfer Line Between Kori-Xr And Unity 2 Air Server (Serasx-5004)
QUI-1138 Page 24 4.4.4 Installing the heated Transfer Line between Kori-xr and UNITY 2 Air Server (SERASX-5004) Remove the Kori-xr covers as described in Section 4.4.1 Connect the shorter length of 1/16” tubing of SERASX-5004 to the sample outlet on top of Kori- Connect the four way Molex connector of SERASX- 5004 to the terminal labelled ‘CIA I/F’on top of... - Page 25 Gently but firmly lower the tube oven cover on UNITY-xr taking care not to damage the insulation on the interface line. The oven cover must be lowered completely to ensure a good seal. Markes International Ltd T: +44 (0)1443 230935 F: +44 (0)1443 231531 E: enquiries@markes.com www.markes.com...
-
Page 26: Installing The Split Tube In Kori-Xr
The oven cover must be lowered completely to ensure a good seal. Installing the cold trap in Kori-xr Kori-xr uses a specific 4mm tube trap (U-T1KORI). This part is not used in any other Markes TD products Holding onto the trap as close as possible to the trap box, gently push the trap into the trap box. -
Page 27: Installing The Kori-Xr Sample Line (Serwad-7001)
QUI-1138 Page 27 Installing the Kori-xr sample line (SERWAD-7001) 4.7.1 Installing the Sample Line between Kori-xr and CIA-Advantage Ensure that Kori-xr is switched off and cool. SERWAD-7001 Connect the length of 1/16” tubing to the sample outlet of the CIA-Advantage valve oven and... -
Page 28: Installing The Sample Line Between Kori-Xr And The Unity Air Server-Xr (Unity 2 Air Server)
Adjustment thumbscrew screw Replace the front cover 4.7.2 Installing the Sample Line between Kori-xr and the UNITY Air Server-xr (UNITY 2 Air Server) Ensure that Kori-xr is switched off and cool. SERWAD-7001 Markes International Ltd T: +44 (0)1443 230935 F: +44 (0)1443 231531 E: enquiries@markes.com... - Page 29 Air Server Locate the connector block of SERWAD-7001 on the brass runner located on top of Kori-xr and gently push the block towards the installed trap Markes International Ltd T: +44 (0)1443 230935 F: +44 (0)1443 231531 E: enquiries@markes.com...
- Page 30 Secure the connector block using the black Adjustment thumbscrew screw Replace the front cover Markes International Ltd T: +44 (0)1443 230935 F: +44 (0)1443 231531 E: enquiries@markes.com www.markes.com...
-
Page 31: Configuring Kori-Xr In Markes Instrument Control (Mic) Software
QUI-1138 Page 31 5. Configuring Kori-xr in Markes Instrument Control (MIC) software Configuring the software With the all instruments switched off, start the software either by double clicking the MIC icon placed on the desktop or from Start > Programs. The following Connecting window will appear, Click Configure to open the configuration page. - Page 32 PC. Make sure that the Kori-xr communications cable is initially disconnected from the PC, When it is then plugged in the Kori-xr com port will appear, make note of its com port and then ensure the correct ones are selected in the instrument configuration page as shown.
-
Page 33: Detecting The Kori-Xr
Page 33 Detecting the Kori-xr Ensure that the gas supplies to the system - especially the dry air or nitrogen purge gas used for Kori-xr valve actuation and purging the cold trap box - are on. Having checked the above, alongside all other instruments, switch Kori-xr on using the switch located on the back panel of Kori-xr. -
Page 34: Installation Qualification
Click on the Kori-xr heated valve icon Select Top In, Bottom Out (Standby) to move the position of the pins in the Kori-xr Heated Valve Click the ‘Pressurise’ button to pressurise the flow path with carrier gas. Then click the ‘Leak Test’... -
Page 35: Purge Configuration
Page 35 Monitor the split gauge pressure, if this remains stable then the Kori-xr is leak tight in the sampling direction. If a leak is detected, further investigation of the entire system flow path (not just Kori-xr) is required. - Page 36 The Kori-xr flow path should be configured as shown below Click on Solenoid Valve 1 in the Kori-xr to open the valve and allow carrier gas flow through the purge vent on the front of the Kori-xr Markes International Ltd T: +44 (0)1443 230935 F: +44 (0)1443 231531 E: enquiries@markes.com...
-
Page 37: Conditioning The Kori-Xr Trap
QUI-1138 Page 37 Using a helium leak detector, check for leaks on the o-rings at each end of the Kori-xr split tube to ensure the split tube has been installed correctly Using an external flowmeter, set the Kori-xr purge flow to 50ml/min by adjusting the purge vent...
Need help?
Do you have a question about the Kori-xr and is the answer not in the manual?
Questions and answers