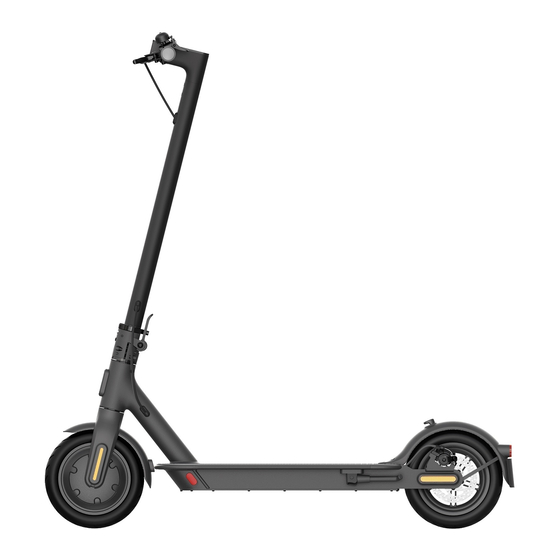
Xiaomi M365 Edition Owner's Manual
Hide thumbs
Also See for M365 Edition:
- User manual ,
- Repair manual (16 pages) ,
- Instruction manual (13 pages)
Advertisement
Advertisement
Table of Contents

Related Manuals for Xiaomi M365 Edition


Summary of Contents for Xiaomi M365 Edition
- Page 1 Xiaomi M365 Edition Owner’s Manual...
- Page 2 INTRODUCTION Thank you for purchasing our bSeen product. bSeen is an indicator light kit developed for electric scooters, electric bicycles and any other vehicle that lacks of indicators, and light warning systems. Sold as a “do it yourself” kit, bSeen is a powerful and reliable system, based on the latest technologies.
-
Page 3: Box Contents
BOX CONTENTS Inside your bSeen kit box you will find: 1 x ECU (Electronic Control Unit) 1 x Handlebar Control Unit 4 x LED units with cable tail ECU (Electronic Control Unit) Handlebar Control Unit Amber LED Units White LED Units... -
Page 4: System Specifications
SYSTEM SPECIFICATIONS • Input voltage: 18V - 78V DC • Main board operating voltage: 9V DC • Outputs voltage: 12V DC regulated • Power consumption in standby mode: 14mA • Heat resistant PVC box • Dimensions: 50mm (L) x 40mm (W) x 33mm (H) •... -
Page 5: Basic Installation Diagram
BASIC INSTALLATION DIAGRAM Handlebar Control Unit Front Left LED Unit Front Right LED Unit Rear Left LED Unit Rear Right LED Unit... - Page 6 BSEEN ELEMENTS’ LOCATION Handlebar Control Unit mounted on the left side of the handlebar. ECU mounted inside Rear LED Front LED the deck indicators indicators mounted on mounted on the wheel the wheel cover cover...
-
Page 7: Installation
INSTALLATION bSeen Xiaomi edition was designed to be installed inside your Xiaomi’s deck, and it uses Xiaomi’s battery power to operate. PROCEED WITH CAUTION AND READ CAREFULLY The installation of the bSeen kit requires basic electric skills, such as connector block connections and stripping electrical wires. - Page 8 Once the handlebar grip is removed, install the bSeen Handlebar Control Unit in place, and tighten the hexagonal screw located at the back of the unit. Step 3 Step 4 Tighten the hexagonal screw located on the back, to securely hold the Handlebar Control Unit. Cut the handlebar grip to size and re-fit it.
- Page 9 The Handlebar Control Unit is supplied with a 2 metres cable length and a Higo connector. The cable runs inside your Xiaomi’s stem, along with the brake line - usually a red cable. Insert cable inside the stem with the...
- Page 10 INSTALLATION - REAR LED UNITS CABLES’ PLACEMENT Start by securing your Xiaomi on the top of a solid surface or support. Usually a table top, a work bench or a keyboard stand are the most common supports used to work on electric scooters.
- Page 11 Remove the rear wheel plastic covers, remove the rear wheel and open the battery compartment. On both rear wheel plastic covers, drill a small hole and snap one of the plastic guide pins inside, as shown below. Drill a hole large enough for the LED unit cable Snap one of the plastic guide pins inside the wheel cover...
- Page 12 Choose one of the rear LED units and start running its cable through the hole on the scooter’s frame. Make sure the hole is the one which corresponds to the guide you snapped on the previous step. Run the cable length through the frame’s hole Use the small cavity on the frame to run the cable through, and then pull the cable through the bottom of the fork.
- Page 13 Unplug the tail light connector and remove the rubber grommet. This will allow both LED cables to go inside the battery’s compartment. Run both cables on the gap between the battery pack and the scooter’s frame, and leave them loose where the ECU unit will be mounted (see page 6).
- Page 14 INSTALLATION - FRONT LED UNITS CABLE PLACEMENT The front LED units are mounted on the plastic covers - as shown on the picture below. The left LED unit cable runs through the head tube along with the brake line and the handlebar switch cable - left loose previously. The right LED unit cable also runs through the head tube along with the motor cable (grey) on the right side of the electric scooter.
- Page 15 INSTALLATION - CONNECTIONS OVERLOOK Once all cables are in place, these need to be connected to the ECU. The Handlebar Control Unit cable has a fixed Higo connector at the end, and the connection is made directly onto the ECU. The LED units’...
- Page 16 The ECU for the Xiaomi was designed to fit in the gap between the Xiaomi’s controller and the head tube, inside the deck. The ECU has connection points on three sides of its enclosure: ECU’s Top View Battery input Handlebar Control input Indicators’...
- Page 17 We recommend to simulate your ECU’s final placement prior to the connections. This will help you to understand how to manage your cable cuts and cables’ final placement. The ECU slides in an angle until it sits inside the scooter’s frame: ECU’s location Tidy up all cables surrounding the ECU’s location, such as the grey cables and the red brake line cable, and insert the ECU as shown bellow:...
- Page 18 INSTALLATION - CONNECTIONS - LED UNITS The LED units connections are made on the left connector block (view from top of ECU). The Right LED units - front and rear - are connected in parallel mode. The same applies for the Left LED units - front and rear. You will need to strip the wires in order to connect them to the ECU’s connector block.
- Page 19 With the cables joined as shown above, insert them in the connector block and tight the top screws to secure each connection: Top screws Left indicators Right indicators ATTENTION Double check the cables’ polarities, and make sure there are no wires touching each other between the connector blocks.
- Page 20 INSTALLATION - CONNECTIONS - HANDLEBAR CONTROL UNIT The connection to the Handlebar Control Unit is made via a 6 pin connector. Inspect the interior of the connectors before plug them in. The pins inside the male connector are fragile and can bend if both connectors are offset. There’s also an arrow icon on each connector’s enclosure.
- Page 21 INSTALLATION - CONNECTIONS - BATTERY The ECU is supplied with a “Y” adaptor for your Xiaomi’s battery. The “Y” adaptor attached to the ECU’s power cable has two XT 30 connectors - male and female. Unplug the battery connector from the Xiaomi’s controller, and plug it to the XT30 male connector on the ECU’s power cable.
- Page 22 Handlebar Control Unit • Left LED units • Right LED units • XT30 Battery connectors With this bSeen Xiaomi kit, the functions you will find on your Handlebar Control Unit are: • Left Turn • Right Turn • Hazard Lights Headlight and horn switches are activated, and can be used at any time if you upgrade your system.
-
Page 23: Troubleshooting
TROUBLESHOOTING Q. No signal of power. A. Double check your battery connections, and if the scooter’s battery is charged. Q. Handlebar Control Unit not working properly, or lack of any function. A. Unplug the connector from the ECU and inspect if there’s any broken (or bent) pin. - Page 24 Mi V1.0 2019...
Need help?
Do you have a question about the M365 Edition and is the answer not in the manual?
Questions and answers