
Related Manuals for King Industrial KC-2244DS


Summary of Contents for King Industrial KC-2244DS
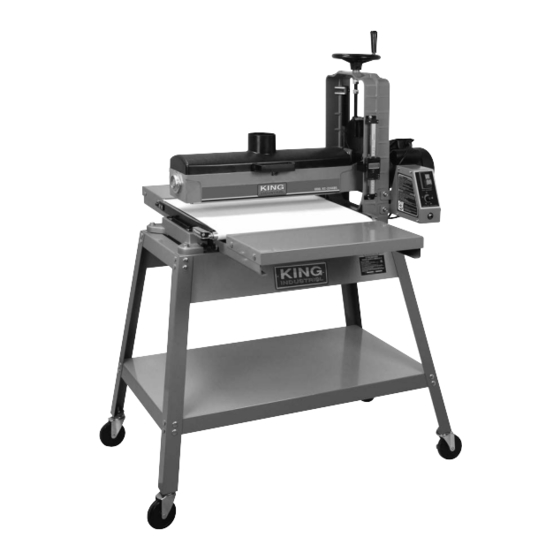
- Page 1 22” OPEN DRUM SANDER INSTRUCTION MANUAL MODEL: KC-2244DS COPYRIGHT © 2019 ALL RIGHTS RESERVED BY KING CANADA TOOLS INC.
-
Page 2: Warranty Information
WARRANTY INFORMATION 2-YEAR KINg CANADA TOOLS LIMITED WARRANTY OFFERS A 2-YEAR LIMITED WARRANTY FOR THIS 22” OPEN DRUM SANDER FOR NON-COMMERCIAL USE. PROOF OF PURCHASE Please keep your dated proof of purchase for warranty and servicing purposes. REPLACEMENT PARTS Replacement parts for this product are available at our authorized King Canada service centers across Canada. Please use the 10 digit part numbers listed in this manual for all part orders where applicable. -
Page 3: Specific Safety Instructions
gENERAL & SPECIFIC SAFETY INSTRUCTIONS VOLTAgE WARNINg: Before connecting the tool to a power source (receptacle, outlet, etc.) be sure the voltage supplied is the same as that specified on the nameplate of the tool. A power source with voltage greater than that for the specified tool can result in SERIOUS INJURY to the user - as well as damage to the tool. - Page 4 ELECTRICAL REqUIREMENTS & SWITCH OPERATION WARNINg! ALL ELECTRICAL CONNECTIONS MUST BE DONE BY A QUALIFIED ELECTRICIAN. FAILURE TO COMPLY MAY RESULT IN SERIOUS INJURY! ALL ADJUSTMENTS OR REPAIRS MUST BE DONE WITH THE MACHINE DISCONNECTED FROM THE POWER SOURCE. FAILURE TO COMPLY MAY RESULT IN SERIOUS INJURY! POWER SUPPLY (110V) PROPERLY gROUNDED 110V OUTLET...
- Page 5 16. Feed belt motor 5. Head raising/lowering handwheel 11. Folding infeed table 6. Digital depth gauge 12. Stand SANDER SPECIFICATIONS MODEL KC-2244DS Drum motor 1.75 HP, 15 Amp. Belt feed motor 1/8 HP Maximum width of sanding 2” x 22”...
- Page 6 ASSEMbLY UNPACKINg Remove all loose parts from the carton. Carefully lift the sander from the carton and place it on a level work surface. Remove all other items from the carton and follow all of the following assembly, adjustments, operation and maintenance instructions in this manual.
- Page 7 ASSEMbLY MOUNTINg SWITCH ASSEMbLY continued... 2) The feed motor comes with a quick connect cord with plug (A) Fig.8. Connect the plug (A) into the on-board receptacle (B) on the side of the switch housing as shown. WARNINg: ONLY USE THIS ON-BOARD RECEPTACLE FOR THE MOTOR CORD.
-
Page 8: Assembly And Adjustments
ASSEMbLY & ADJUSTMENTS ASSEMbLY DUST COLLECTION When using this Open Drum Sander, dust collection is required for a safe work environment and to extend abrasive life. This Open Drum Sander comes with a 4” dust chute (A) Fig.12. 1) Slide a 4” diameter dust collection hose (B) Fig.12 over the 4” dust chute (A). Secure the dust collection hose to the dust chute with a hose clamp (C). - Page 9 ADJUSTMENTS ADJUSTINg FEED bELT (CONVEYOR) Warning: To avoid possible serious personal injury, user must unplug power cord from power source before attempting to do any of the following adjustments. Due to feed belt stretching, it may be required to adjust the feed belt tracking/ tension.
-
Page 10: Dust Collection
OPERATION OPERATION SETTINg DRUM HEIgHT/DEPTH OF CUT Determining the depth of cut is the most important operating procedure decision. It may take some experimentation to determine the proper depth of cut. Variables to keep in mind are abrasive grit, type of wood, type of project, and conveyor feed belt speed. -
Page 11: Maintenance
MAINTENANCE MAINTENANCE REPLACINg DRUM SANDINg bELT Preparing and installing a new sanding belt on the drum is critical. The end of the sanding belt gets installed to the left side of the drum first. Then the new sanding belt is wrapped tightly around the drum, and fixed to the right side of the drum. Once it is necessary to replace the sanding belt, obtain a replacement belt through your nearest King Canada distributor. - Page 12 MAINTENANCE MAINTENANCE REPLACINg FEED bELT 1) Raise the drum to its highest position using the height adjustment handle. 2) Loosen the feed belt tracking/tension adjustment screws (A) Fig.25 and (A) Fig.26 to relieve feed belt tension. 3) Loosen the two cap screws (B) Fig.26 on the inboard (right) side that secures the feed belt assembly to the base.
-
Page 13: Troubleshooting
TROUbLESHOOTINg Problem Probable cause Solution • Voltage drop. • Check power source. • Motor doesn’t start. • Motor short circuit or bad connection. • Check all motor connections. • Check plug or switch for bad • Plug or switch short circuit. insolation or contact.
Need help?
Do you have a question about the KC-2244DS and is the answer not in the manual?
Questions and answers