Table of Contents
Advertisement
Advertisement
Table of Contents

Related Manuals for FitNord SPRINT 300


Summary of Contents for FitNord SPRINT 300
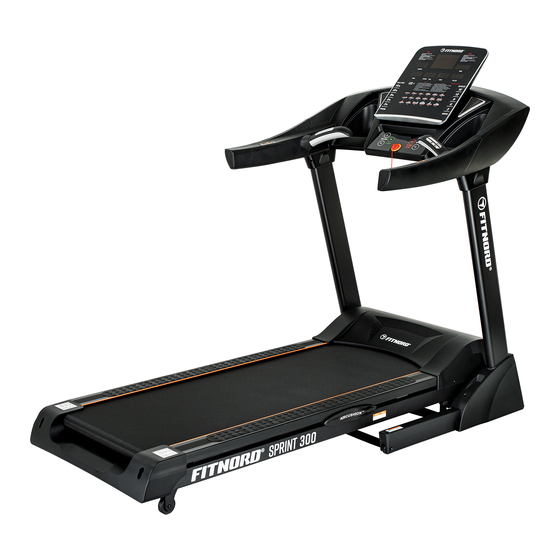
- Page 1 FITNORD SPRINT 300 TREADMILL OWNER’S MANUAL...
- Page 2 WARNING Read all instructions carefully before using this product. Retain this owner’s manual for future reference: - Attach the safety key string to your clothes when using this treadmill. - Keep your hands to your sides, your eyes staring forward, and never look down at your feet when using the treadmill.
- Page 3 adjusting the speed control, there may be a pause before the walking belt begins to move. Always stand on the foot rails on the sides of the frame until the belt is moving. 5. Wear appropriate clothing when exercising on the treadmill. Do not wear long, loose clothing that may get caught in the treadmill.
-
Page 4: Table Of Contents
ASSEMBLY STEPS ..................4 GROUNDING METHODS ................. 9 TECHNICAL PARAMETER ................9 OPERATION INSTRUCTIONS ................10 1.1. Start ................................11 1.2. Programs ..............................11 1.3. Safety Key function ...........................11 1.4. Key functions .............................11 1.5. Heart rate function ............................ 12 1.6. Preset programs ............................12 1.7. -
Page 5: Assembly Steps
ASSEMBLY STEPS STEP 1: Open the package, take out all parts and place the main frame on a flat surface. (NOTE: Do not cut the packing straps yet.) STEP 2: 1. Cut the packaging straps and do not move the treadmill. 2. - Page 6 STEP 3: 1. Connect the Upper extension wire (97) and the Lower extension wire (96) 2. Attach the Computer frame (4) onto the Upright tubes (3L/R) with Hex socket screws (57) and Lock washers (83) 3. Fasten all the bolts tightly.
- Page 7 STEP 4 : 1. Screw the Protective covers (29L/R) tightly to the Bottom frame (1) with Cross tapping screws (77) and Cross circle head screws (71). 2. Insert the B side of the Outer upright tube cover (26) and Inner upright tube cover (27) to the A side of the Computer frame (4) as shown below.
- Page 8 Folding the machine: Grab from under the Running board (A) and lift the machine up as shown in the picture until you hear a sound from the Cylinder (10). (NOTE: Make sure the treadmill is unplugged and belt has fully stopped before folding the machine!)
- Page 9 Unfolding the machine: With one hand, grab from under the Running borad (A), push the Cylinder (10) from the middle (B) with your right foot. and lower the running board to the level of the Handlebars (C). The Running board will lower down automatically.
-
Page 10: Grounding Methods
GROUNDING METHODS This product must be grounded. If it should malfunction or break down, grounding provides a path of least resistance for electric current to reduce the risk of electric shock. This product is equipped with a cord that has an equipment-grounding conductor and a grounding plug. -
Page 11: Operation Instructions
NET WEIGHT 97 KG SPEED RANGE 1.0-20 KM/H MAX WEIGHT 150 KG INCLINE 0-15% OPERATION INSTRUCTIONS Speed: Displays speed data. (Default speed 1.0 km/h, max speed 25km/h) Time: Displays time. Dis.: Displays distance. INC.: Displays incline. -
Page 12: Start
Prog/cal: Displays program and calories. PUL.: Displays heart rate. Middle dot matrix: Displays the exercise segments. 400m per segment. 1.1. Start Begin a 3s countdown and start the treadmill. 1.2. Programs 18 Preset programs, 3 USER setting programs, 4 exercise modes, Body Fat Test program. -
Page 13: Heart Rate Function
7. SPEED shortcuts: 3km/h, 6km/h, 9km/h, 12km/h & 15km/h can be set when exercising. 8. INCLINE shortcuts: 3%, 6%, 9%, 12% & 15%can be set when exercising. 9. VOLUME: adjust the music volume. 10. UP/NEXT: select next track. 11. Switching between km/h and mph: take off the safety key and simultaneously hold PROGRAM and MODE for 3s. -
Page 14: Body Fat Test
INCLINE SPEED INCLINE SPEED INCLINE SPEED INCLINE SPEED INCLINE SPEED INCLINE SPEED INCLINE SPEED INCLINE SPEED INCLINE 1.7. Body fat test 1. On standby, press MODE to navigate to the Body Fat Test-program (FAT). 2. Press MODE to select parameters F1 (gender), F2 (age), F3 (height), F4 (weight). -
Page 15: Parameters For 3 Modes
1.8. Parameters for 3 modes 1. Time Countdown mode: a. Set time: 30:00min. b. Range: 5:00-99:00min. c. Add step: 1:00min. 2. Countdown cal.: a. Set calories: 50 Kcal. b. Set range: 20-990 Kcal. c. Add step: 10 Kcal. 3. Countdown distance: a. -
Page 16: Others
On standby, press PROGRAM to navigate to the required customized program (U01-U03). Set operation time and press START. 1.10. Others • When countdown parameters are completed, the screen will display END. The alarm sounds for 0.5s every 2s until the treadmill is fully stopped. The treadmill is set back to manual mode. -
Page 17: Error Messages
ERROR MESSAGES Error Possible reasons Test method Communicational failure Check whether the connector of If yes, change the connector. between the meter and the the meter and the controller is controller, and the drive cut. cannot receive signal from Check whether the joint has Re-plug the joint. -
Page 18: Exercise Instructions
Failure of the controller 24C02 is broken down or you forgot to install 24C02, change the EEPROM motor control board. Controller is in tilted Machine is not placed on level Place machine level position surface when it is powered on surface, then start the machine Check if the torsion of the Adjust the torsion regulator to... -
Page 19: Maintenance Instructions
This stage should last for a minimum of 12 minutes, though most people start at about 15-20 minutes. 3. The Cooldown Phase This stage is to let your cardio-vascular system and muscles wind down and relax. This is a repeat of the warm up exercise e.g. - Page 20 3. If the belt veers off the track to the right, screw the right adjusting bolt clockwise slowly to move the belt to the center. (Attention: there is a gap between the belt and the right/left edgings. The gap should be no more than 5mm.) 4.
- Page 21 the motor cover at least once a year. WALKING BELT AND DECK LUBRICATION This treadmill is equipped with a pre-lubricated, low maintenance deck system. The belt/ deck friction may play a major role in the function and lifespan of your treadmill, thus requiring periodic lubrication.
-
Page 22: Exploded Drawing
EXPLODED DRAWING... -
Page 23: Parts List
PARTS LIST Part Part Description Description Hex socket screw M8*50 Bottom frame Hex socket screw M8*45 Main frame 3L/R Upright tube Hex socket screw M8*40 Hex screw M8*15 Computer frame Hex screw M8*55 Incline frame Hex screw M8*35 Strengthening tube Hex socket cap screw M8*18 Wheel bracket Hex socket cap screw M6*45... - Page 24 Hand grip Nylon nut M10 33L/R 1 pr. Computer back cover Nylon nut M8 Computer upper cover Nylon nut M6 C-shaped clasp Φ8 Edgings Running board Running belt Computer connecting wire Blow molding cushion Upper extension wire Lower extension wire Transport wheel Computer down wire End cap...
Need help?
Do you have a question about the SPRINT 300 and is the answer not in the manual?
Questions and answers