Advertisement

Quick Start Guide
C-250 Access Point
C-260 Access Point
Arista Networks
www.arista.com
DOC-03846-03

Advertisement

Table of Contents
loading
Need help?

Need help?

Do you have a question about the C-250 and is the answer not in the manual?

Questions and answers

Subscribe to Our Youtube Channel

Summary of Contents for Arista C-250

  • Page 1 Quick Start Guide C-250 Access Point C-260 Access Point Arista Networks www.arista.com DOC-03846-03...
  • Page 2 © Copyright 2020 Arista Networks, Inc. The information contained herein is subject to change without notice. Arista Networks and the Arista logo are trademarks of Arista Networks, Inc in the United States and other countries. Other product or service names may be trademarks or service marks of others.
  • Page 3: Table Of Contents

    Install the Access Point....................10 Ceiling Mount the Access Point........................10 Wall Mount the Access Point........................11 Power the Access Point On.........................14 Using the C-250 with Power Adapter......................14 Connect the Access Point to the Network....................14 Connect the Access Point using PoE......................15 Access Point Troubleshooting..................16 Appendix A: AP-Server Mutual Authentication ............17...
  • Page 4: About This Guide

    About This Guide This installation guide explains how to deploy the C-250 or C-260 access point (AP). Important: Please read the EULA before installing the access point (AP). You can download and read the EULA from https://www.arista.com/en/support/product-documentation. Installing the AP constitutes your acceptance of the terms and conditions of the EULA mentioned above.
  • Page 5: Package Content

    Table 1: Labels: Package Components Label Description C-250 or C-260 Access Point 15/16" (24 mm) Mounting Bracket Important: The MAC address of the AP is printed on a label at the bottom of the product and the packaging box. Note down the MAC address before mounting the AP on the ceiling or at a location that is difficult to access.
  • Page 6 If the package is not complete, please contact the Arista Networks Technical Support Team at support-wifi@arista.com or return the package to the vendor or dealer where you purchased the product.
  • Page 7: Access Point Overview
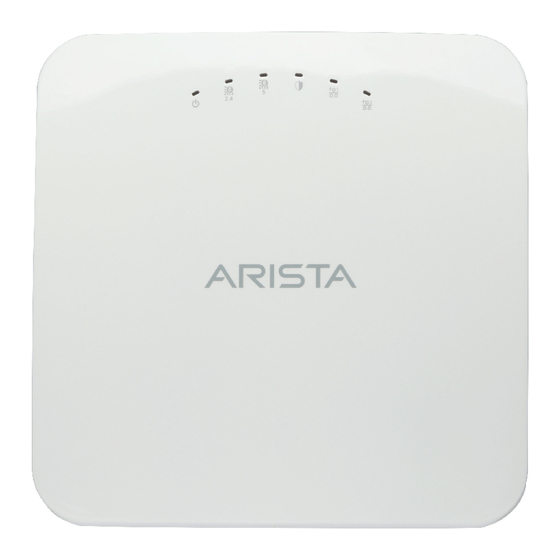
    • Side Panel on page 8. Front Panel The front panel of the C-250 or C-260 has 6 LEDs that indicate the status of various device functions. Figure 2: Front Panel LEDs Table 2: Labels: Front Panel LEDs Label Description Power 2.4 GHz Radio...
  • Page 8: Rear Panel

    LAN. Figure 3: Rear Panel Table 4: Labels: Rear Panel Label Description LAN1 LAN2 Power The first of the following tables shows port details for C-250, and the second one shows port details for C-260.
  • Page 9: Side Panel

    Table 5: C-250 Port Details Port Description Connector Type Speed/Protocol Power 12V DC 5.5 mm overall diameter / 2.1 mm center pinhole LAN 1 2.5 Gigabit Ethernet with 802.3bt RJ-45 100/1000 Mbps / 2.5 Gbps compliant PoE Ethernet LAN 2 2.5 Gigabit Ethernet with 802.3bt...
  • Page 10 Table 7: Labels: Side Panel Label Description Reset Console Port Description Connector Type Speed/Protocol Console RJ-45 • RS 232 Serial (115200 bits per Establish ‘config shell’ terminal second) session via serial connection • Data bits:8; Stop bits: 1 • Parity: None •...
  • Page 11: Install The Access Point

    3851 for bidirectional User Datagram Protocol (UDP) and Transport Control Protocol (TCP) traffic on that firewall. This port number is assigned to Arista Networks. Zero-configuration cannot work if multiple APs are set up to connect to multiple servers. In this case, the APs must be configured manually.
  • Page 12: Wall Mount The Access Point

    2. Mounting C-250 on the bracket: Place the first mounting post on the rear-side of the AP on to the lower notch of the bracket. Rotate the AP such that the center mounting post fits in to the center notch on the bracket.
  • Page 13 1. Drill four mounting holes in the wall, as shown below. Table 8: Labels: Dimensions to drill holes Label Description 46 mm 83.4 mm Diameter: 6.5 mm, Depth: 30 mm 2. Insert four anchors. 3. Affix the mounting bracket on the wall. Quick Start Guide: Access Point...
  • Page 14 4. Attach the AP to the mounting bracket. Pull the release key outward. Attach the AP stubs to the bracket holder, ensuring a firm fit. 5. Once attached, push in the release key to lock the hooks and make sure all the hooks are locked in place.
  • Page 15: Power The Access Point On

    5. Log on to the server using ssh and run the get sensor list command. You will see a list of all Arista devices that are recognized by the server. Single Sign-On users can go to the Monitor tab in CloudVision WiFi and check whether the device is visible under the Monitor tab.
  • Page 16: Connect The Access Point Using Poe

    AP. For details on configuring an AP manually, see the Access Point Configuration guide on our website at https://www.arista.com/en/support/product-documentation Connect the Access Point using PoE If you are using a PoE injector, make sure the data connection is plugged into a suitable switch port with proper network connectivity.
  • Page 17: Access Point Troubleshooting

    'Authentication failed ' event is raised on the server. Refer to the event for recommended action. The AP has encountered a problem. • If you are using Arista Cloud Services, then open the TCP port 443 (SSL). If you have an on-premises installation, then open UDP port 3851 and port 80.
  • Page 18: Appendix A: Ap-Server Mutual Authentication

    Appendix A: AP-Server Mutual Authentication The AP-server communication begins with a mutual authentication step in which the AP and server authenticate each other using a shared secret. The AP-server communication takes place only if this authentication succeeds. After the authentication succeeds, a session key is generated. From this point on, all communication between the AP and server is encrypted using the session key.

This manual is also suitable for:

C-260

Table of Contents