Table of Contents
Advertisement
Advertisement
Table of Contents

Related Manuals for Riello UPS Sentryum S3T


Summary of Contents for Riello UPS Sentryum S3T
-
Page 3: Table Of Contents
SUMMARY GLOSSARY OF ACRONYMS PREPARATIONS NSTALLATION ENVIRONMENT LECTROMAGNETIC COMPATIBILITY RELIMINARY INFORMATION FOR INSTALLATION NTERNAL BATTERIES ATTERY MAINTENANCE SENTRYUM THREE PHASE - S3T XTERNAL PROTECTIVE DEVICES BREAKER ESIDUAL URRENT EVICE ACKFEED PROTECTION HERMAL MAGNETIC CIRCUIT BREAKERS HORT CIRCUIT PROTECTION HORT CIRCUIT WITHSTANDING NTERNAL PROTECTIVE DEVICES OWER CONNECTION INFORMATION (S3T) - Page 4 ACTIVE OSITIONING INFORMATION OWER CONNECTION INSTALLATION DETAILS OWER CONNECTION DETAILS S3T - T HREE PHASE VERSION NPUT VERSION OPTIONAL S3M - S INGLE PHASE VERSION NPUT VERSION XTEND OSITIONING INFORMATION OWER CONNECTION INSTALLATION DETAILS OWER CONNECTION DETAILS S3T - T HREE PHASE VERSION S3M - S INGLE PHASE VERSION...
-
Page 5: Glossary Of Acronyms
GLOSSARY OF ACRONYMS Acronym ITEM Description Compact Version UPS model type Active Version UPS model type Xtend Version UPS model type Three Phase Sentryum Three phase output voltage UPS Single Phase Sentryum Single phase output voltage UPS Extended Runtime Version with high battery charging current capability Version with separated lines for Mains and Bypass Dual Input input connections... -
Page 6: Preparations
PREPARATIONS READ THE "SAFETY MANUAL" BEFORE STARTING THE UPS INSTALLATION NSTALLATION ENVIRONMENT When choosing the site in which to install the UPS and the Battery Cabinet, the following points should be taken into consideration: Avoid dusty environments Check that the floor is level and capable of withstanding the weight of the UPS and the Battery Cabinet ... -
Page 7: Electromagnetic Compatibility
ELECTRICAL INFORMATION TABLE Table 2 10 kVA 15 kVA 20 kVA Power [kVA / kW] 10/10 15/15 20/20 Three-phase (S3T / S3M) 400 ± 20% (3PH + N) V Input [V] Single-phase (S3M) 230 ± 20% (PH + N) Frequency Input [Hz] 50 - 60 380-400-415 (3PH + N) V Output [V]... -
Page 8: Internal Batteries
NTERNAL BATTERIES CAUTION: If the UPS has INTERNAL BATTERIES, follow all the PRECAUTIONS AND SAFETY RULES listed below. The UPS has HAZARDOUS electrical voltages inside it, even when the input and/or battery switches are off. The inside of the UPS is protected by safety panels which should not be removed by untrained personnel. All installation and maintenance or operations involving access inside the UPS require the use of tools and may ONLY be performed by trained personnel. -
Page 9: Sentryum Three Phase - S3T
SENTRYUM THREE PHASE - S3T XTERNAL PROTECTIVE DEVICES BREAKER ESIDUAL URRENT EVICE If an input isolation transformer is not present, the neutral from the mains power supply is connected to the UPS output neutral. As a result, there will be no change to the neutral arrangements of the installation: THE UPS INPUT NEUTRAL IS CONNECTED TO THE UPS OUTPUT NEUTRAL THE DISTRIBUTION SYSTEM THAT POWERS THE UPS IS NOT MODIFIED BY THE UPS The neutral condition is only modified if an isolation transformer is present or when the UPS works with the neutral... -
Page 10: Thermal - Magnetic Circuit Breakers
HERMAL MAGNETIC CIRCUIT BREAKERS As previously explained, the UPS has protection devices for output faults as well as for internal faults. In order to configure the power source, a thermal-magnetic switch must be installed upstream of the UPS. Please follow the indications in the table below: Automatic external protective devices Table 3 UPS model... -
Page 11: Ower Connection Information
OWER CONNECTION INFORMATION INPUT AC Line Connection 3PH + N + PE Table 6 Terminal L1, L2, L3, N Suggested wire L1, L2, L3, N, PE Maximum Max Tightening Cross sectional area Cross sectional area size current Bolt [kVA] cross section torque L1, L2, L3 N, PE... -
Page 12: Electrical Connections (S3T)
(S3T) LECTRICAL CONNECTIONS WARNING: a 4-wire three-phase distribution system is required. The UPS must be connected to a power supply source providing 3-phase + neutral + PE (protective earth) of a TT, TN or IT type. The phase rotation must be correct. In the IT system a 4-pole thermal-magnetic circuit breaker is mandatory. -
Page 13: Sentryum Single Phase - S3M
SENTRYUM SINGLE PHASE - S3M XTERNAL PROTECTIVE DEVICES BREAKER ESIDUAL URRENT EVICE If an input isolation transformer is not present, the neutral from the mains power supply is connected to the UPS output neutral. As a result, there will be no change to the neutral arrangements of the installation: THE UPS INPUT NEUTRAL IS CONNECTED TO THE UPS OUTPUT NEUTRAL THE DISTRIBUTION SYSTEM THAT POWERS THE UPS IS NOT MODIFIED BY THE UPS The neutral condition is only modified if an isolation transformer is present or when the UPS works with the neutral... -
Page 14: Short Circuit Protection
Output protections (recommended values for selectivity) Table 13 Normal fuses (GI) In (Nominal current)/4 Normal switches (C curve) In (Nominal current)/4 Ultra-fast fuses (GF) In (Nominal current)/2 HORT CIRCUIT PROTECTION If a failure at the output occurs, the UPS protects itself by limiting the value and duration of the output current (short-circuit current). These values also depend on the operating status of the UPS at the time of the failure;... -
Page 15: Power Connection Information
OWER CONNECTION INFORMATION INPUT AC Line Connection 3PH + N + PE Table 17 Max current [A] Terminal L1, L2, L3, N Suggested wire L1, L2, L3, N, PE Cross Cross size Max cross PH + N 3PH + N Tightening Bolt sectional area... -
Page 16: Electrical Connections (S3M)
(S3M) LECTRICAL CONNECTIONS WARNING: a 4-wire three-phase distribution system is required. The UPS must be connected to a power supply source providing 3-phase + neutral + PE (protective earth) of a TT, TN or IT type. The phase rotation must be correct. In the IT system a 4-pole thermal-magnetic circuit breaker is mandatory. -
Page 17: Ups Models
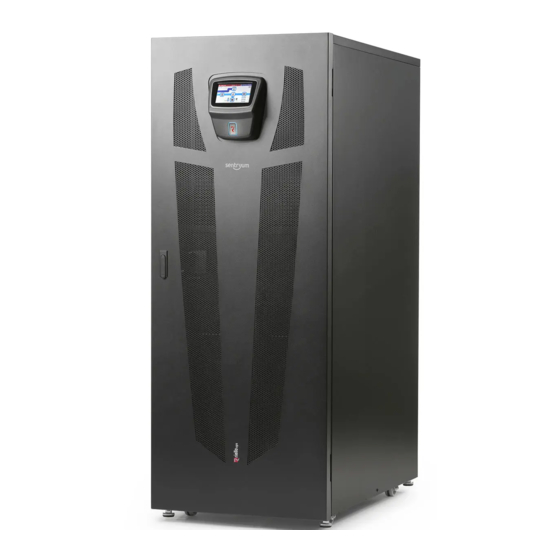
UPS MODELS COMPACT - CPT ACTIVE - ACT XTEND - XTD NOTE: some images contained in this document are for information purposes only and may not faithfully demonstrate the parts of the product they represent. UPS CABINET POSITIONING When positioning, take into account that: - the wheels are to be used for final positioning only. -
Page 18: Compact
- COMPACT series - COMPACT OSITIONING INFORMATION - 16 -... -
Page 19: Power Connection Installation
- COMPACT series - OWER CONNECTION INSTALLATION PULL TO REMOVE THE FRONT PANEL. FASTEN THE STABILISING BRACKET USING THE SCREWS PROVIDED - 17 -... - Page 20 - COMPACT series - REMOVE THE REAR TERMINAL COVER CUT A SUITABLE HOLE IN THE CABLE GLANDS PROVIDED TO MAINTAIN THE REQUIRED DEGREE OF PROTECTION A. PE CONNECTION B. TERMINAL BLOCKS (FOR MORE INFORMATION REFER TO “POWER CONNECTION DETAILS”) - 18 -...
- Page 21 - COMPACT series - CABLE POSITION DETAIL It should be recommended to bring each group of cables (Input, Output, Battery) through one hole separately to avoid Eddy Current. REFIT THE REAR TERMINAL COVER USING THE PREVIOUSLY REMOVED SCREWS. - 19 -...
-
Page 22: Ups Details
- COMPACT series - DETAILS FRONT REAR Touch screen display and UPS status LED Communication ports (R.E.P.O., IN/OUT SIGNAL) Battery start button (COLD START) Communication ports (USB, SERIAL) Mains input switch (SWIN) Parallel card (optional) Output switch (SWOUT) Slot for optional accessory communication cards Manual bypass switch (SWMB) Slot for optional accessory communication and contacts cards Internal battery fuse holder isolator (SWBATT) -
Page 23: Power Connection Details
- COMPACT series - OWER CONNECTION DETAILS The first wire to be connected is the protective earth wire, which is to be inserted in the terminal marked PE. During operation the UPS must be connected to the earthing system. Connect the input and output cables to the terminal blocks as indicated in the figure below: TERMINAL BLOCK COLOURS BLACK GREY... - Page 24 - ACTIVE series - ACTIVE OSITIONING INFORMATION - 22 -...
- Page 25 - ACTIVE series - OWER CONNECTION INSTALLATION REMOVE THE FRONT TERMINAL COVER - 23 -...
- Page 26 - ACTIVE series - FASTEN STABILISING BRACKET USING THE SCREWS PROVIDED CUT A SUITABLE HOLE IN THE CABLE GLANDS PROVIDED MAINTAIN THE REQUIRED DEGREE OF PROTECTION A. PE CONNECTION B. TERMINAL BLOCKS (FOR MORE INFORMATION REFER TO “POWER CONNECTION DETAILS”) C.
- Page 27 - ACTIVE series - A. CABLE POSITION DETAIL B. EXAMPLE OF THE WIRE BEING SECURED USING CABLE TIES It should be recommended to bring each group of cables (Input, Output, Battery) through one hole separately to avoid Eddy Current. REFIT THE FRONT TERMINAL COVER USING THE PREVIOUSLY REMOVED SCREWS.
- Page 28 - ACTIVE series - DETAILS FRONT REAR Touch screen display and UPS status LED Communication ports (R.E.P.O., IN/OUT SIGNAL) Battery start button (COLD START) Communication ports (USB, SERIAL) Mains input switch (SWIN) Parallel card (optional) Output switch (SWOUT) Slot for optional accessory communication cards Manual bypass switch (SWMB) Slot for optional accessory communication and contacts cards Internal battery fuse holder isolator (SWBATT)
- Page 29 - ACTIVE series - OWER CONNECTION DETAILS S3T - T HREE PHASE VERSION The first wire to be connected is the protective earth wire, which is to be inserted in the terminal marked PE. During operation the UPS must be connected to the earthing system. Connect the input and output cables to the terminal blocks as indicated in the figure below: TERMINAL BLOCK COLOURS BLACK...
- Page 30 - ACTIVE series - S3M - S INGLE PHASE VERSION The first wire to be connected is the protective earth wire, which is to be inserted in the terminal marked PE. During operation the UPS must be connected to the earthing system. Connect the input and output cables to the terminal blocks as indicated in the figure below: TERMINAL BLOCK COLOURS BLACK...
- Page 31 - XTEND series - XTEND OSITIONING INFORMATION - 29 -...
- Page 32 - XTEND series - OWER CONNECTION INSTALLATION REMOVE THE FRONT TERMINAL COVER - 30 -...
- Page 33 - XTEND series - FASTEN THE STABILISING BRACKET USING THE SCREWS PROVIDED CUT A SUITABLE HOLE IN THE CABLE GLANDS PROVIDED TO MAINTAIN REQUIRED DEGREE OF PROTECTION A. PE CONNECTION B. TERMINAL BLOCKS (FOR MORE INFORMATION REFER TO “POWER CONNECTION DETAILS”) C.
- Page 34 - XTEND series - A. CABLE POSITION DETAIL B. EXAMPLE OF THE WIRE BEING SECURED USING CABLE TIES It should be recommended to bring each group of cables (Input, Output, Battery) through one hole separately to avoid Eddy Current. REFIT THE FRONT TERMINAL COVER USING THE PREVIOUSLY REMOVED SCREWS.
- Page 35 - XTEND series - DETAILS FRONT REAR Touch screen display and UPS status LED Communication ports (USB, SERIAL) Battery start button (COLD START) Parallel card (optional) Mains input switch (SWIN) Slot for optional accessory communication cards Output switch (SWOUT) Slot for optional accessory communication and contacts cards Manual bypass switch (SWMB) Bypass input switch (SWBYP) (optional) Internal battery fuse holder isolator (SWBATT)
- Page 36 - XTEND series - OWER CONNECTION DETAILS The first wire to be connected is the protective earth wire, which is to be inserted in the terminal marked PE. During operation the UPS must be connected to the earthing system. Connect the input and output cables to the terminal blocks as indicated in the figure below: TERMINAL BLOCK COLOURS BLACK GREY...
- Page 37 - XTEND series - S3M D ONNECTION OF NPUT Follow the table below for the correct jumper configuration of the terminal blocks, depending on the power connection required. S3M default configuration S3M Single phase input, with a common bypass (three phase input, with the bypass commoned with PH1) S3M three phase input with a separated bypass line S3M Single phase input, with a separated bypass line Table 23...
- Page 38 COMMUNICATION INTERFACE R.E.P.O. R.E.P.O. This isolated input is used to turn the UPS off remotely in case of an emergency. The UPS is supplied from the factory with the “Remote Emergency Power Off” (R.E.P.O.) terminals short-circuited (refer to "UPS DETAILS” ref.7). If it is to be installed, remove the short-circuit and connect to the normally closed contact of the stop device using a double insulated cable.
- Page 39 USB/S RS232 ERIAL SERIAL RS232 Use these ports to connect the UPS to a server or PC for remote monitoring, service configuration or firmware update. These two ports cannot be used simultaneously. The USB port is to be used as an alternative to the RS232 serial port. USB port function is only guaranteed with a cable length of no more than 1.5m.
- Page 40 APPENDIX UMPERS INSTALLATION REMOVAL Depending on the type of terminal blocks, to install or remove any jumpers refer to the following images. TYPE 1 Installation Removal TYPE 2 Installation Removal - 38 -...
- Page 41 EMOVING DOOR ACTIVE MODEL XTEND MODEL - 39 -...
- Page 42 - 40 -...
Need help?
Do you have a question about the Sentryum S3T and is the answer not in the manual?
Questions and answers