
Related Manuals for Motorola ML25255


Summary of Contents for Motorola ML25255
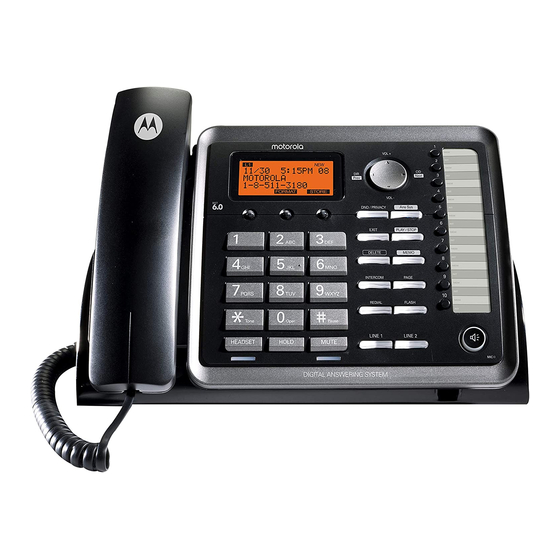
- Page 1 Motorola ML25255 2-Line Corded / Cordless Phone with Digital Answering System Full User Guide...
-
Page 2: Equipment Approval Information
• US Number is located on the cabinet bottom of the Motorola ML25255 base station. • REN number is located on the cabinet bottom of the Motorola ML25255 base station. - Page 3 However, there is no guarantee that interference will not occur in a particular installation. If this equipment does cause harmful interference to radio or television reception, which can be determined by turning the equipment off and on, the user is encouraged to try to correct the interference by one or more of the following measures: •...
-
Page 4: Table Of Contents
Equipment Approval Information ................2 Introduction ........................7 Important Safety Instructions ................... 7 Parts Checklist .........................9 Handset Layout ......................10 Base Layout ........................11 Connections and Setup ....................12 Important Installation Information .....................12 Important Installation Guidelines ......................12 Installing the Phone..........................12 7.3.1 Installing the Handset Battery ....................12 7.3.2 Changing / Charging the Handset Battery ..............13 Installing the Base and Connecting your System .................13... - Page 5 8.7.8 Message Length .........................24 8.7.9 Call Screening ..........................24 8.7.10 Message Alert ..........................24 8.7.11 Remote Password ........................24 Restore Settings ............................24 Basic Operation ......................25 Making Calls with the Corded Handset (from the base) ............25 Making Calls with the Cordless Handset ..................25 Making Calls with the Speakerphone ....................25 Making Calls with a Wired Headset ....................25 Pre-Dialing ..............................26...
- Page 6 13.7.1 From base to handset extension ..................34 13.7.2 From handset extension to base ..................34 13.8 Deleting a Directory Record ....................... 34 13.9 Deleting All Directory Records ......................35 13.10 Deleting a One-Touch Memory Record (only applicable to base)........35 13.11 Dialing a Directory Record ........................35 13.11.1 Dial a directory record while in Talk mode..............35...
-
Page 7: Introduction
Introduction Your Motorola multi-line / 2-line phone is a full-featured phone ideally suited for home or office use. It is designed to receive calls on up to two incoming telephone lines and serve up to 10 extensions. It is possible to expand your system with the additional purchase of the Motorola ML25055 Cordless Handset. - Page 8 (c) The product does not operate normally by following the operating instructions. (d) The product’s cabinet has been damaged. (e) The product exhibits a distinct change in performance. 20. Avoid using a telephone (other than a cordless type) during an electrical storm. There may be a remote risk of electric shock from lightning.
-
Page 9: Parts Checklist
Parts Checklist Make sure your package includes the following items: AC power adaptor AC power adaptor (for base) (for charging cradle) Corded handset Corded base & desk stand (assembled together) Coiled handset cord Handset battery pack Belt clip Wall mount telephone cord Cordless handset Cordless handset... -
Page 10: Handset Layout
Handset Layout LED Event Indicator 3 Softkeys Headset Jack DND / Privacy Speakerphone Exit Volume + Talk Phonebook Directory Volume - Caller ID Record Intercom / Hold Menu / Flash Mute / Delete Redial... -
Page 11: Base Layout
Base Layout A Volume + N Redial Record B Directory O Speakerphone C 3 Softkeys Caller ID Record D Exit Q One-Touch Memory (1-10) Buttons Delete R Volume - # Pause Answering System Button / Indicator G * Tone DND / Privacy Button / Indicator H Mute U Play / Stop Headset... -
Page 12: Connections And Setup
Connections and Setup Important Installation Information • Never install telephone wiring during a lightning storm. • Never install telephone jacks in wet locations unless the jack is specifically designed for wet locations. • Never touch uninsulated telephone wires or terminals unless the telephone line is disconnected from the network. -
Page 13: Changing / Charging The Handset Battery
6. Place cordless handset in the charging cradle. The charge indicator illuminates, verifying the battery is charging. Allow the phone to charge for 14 hours prior to first use. If you don’t properly charge the phone, battery performance is compromised. Caution: To reduce the risk of fire or personal injury, use only the approved Nickel- metal Hydride (Ni-MH) battery pack (2.4V, 550mAh rechargeable batteries) supplied. - Page 14 IMPORTANT If you are not going to use the telephone for more than 30 days, remove the batteries because they can leak and damage the unit. 3. Plug the power supply cord into the power jack on the back of the base and the other end into an electrical outlet.
- Page 15 5. If you want to mount the telephone on the wall, you can plug the 2 lines as below drawing: Line 2 Line 1 -OR- Line 2 Line 1 -OR- Line 1 + 2...
-
Page 16: Backup Battery Operation
6. Connect the handset cord: Connect one end of the coiled handset cord to the jack on the side of the base and the other end into the jack in the corded handset, and place the handset in the cradle. Backup Battery Operation If the power supply cord is not plugged into the base unit, and the battery is available, the unit enters Battery Operation Mode. -
Page 17: Phone Settings
If no key is pressed for 30 seconds, the handset or base will automatically exit programming and return to standby screen. Phone Settings In idle mode, press MENU softkey (on base) or Menu/Flash (on cordless handset) to go to the main menu. -
Page 18: Tone/Pulse Dial
From the PHONE SETTINGS menu: Using VOL + and VOL - of the navigation button to scroll to AUTO ANS INTERCOM. Press SELECT softkey. 2. Using VOL + and VOL - of the navigation button to scroll to or OFF. 3. -
Page 19: Remove Handset (Base Menu Option)
From the PHONE SETTINGS menu: Using VOL + and VOL - of the navigation button to scroll to REGISTRATION. Press SELECT softkey. 2. Using VOL + and VOL - of the navigation button to scroll to REMOVE HANDSET. Press SELECT softkey. -
Page 20: Language
3. Press SELECT softkey and you may program the following items: On your base: LANGUAGE CONTRAST BACKLIGHT On your handset: LANGUAGE CONTRAST 8.4.1 Language DISPLAY SETTINGS From the menu: Using VOL + and VOL - of the navigation button to scroll to LANGUAGE. Press SELECT softkey. -
Page 21: Key Tones
3. Using VOL + and VOL - of the navigation button to adjust the ring volume. SELECT 4. Press softkey to save your selection. 8.5.3 Key Tones From the SOUND SETTINGS menu: Using VOL + and VOL - of the navigation button to scroll to TONES. -
Page 22: On/Off Status
On your handset: MEMO RECORDING OGA PLAYBACK OGA RECORD 8.7.1 On/Off Status This is used to set the Answering System On or Off for each telephone line individually. ANSWERING SYS. From the menu: Using VOL + and VOL - of the navigation button to scroll to ON/OFF STATUS. -
Page 23: Set Outgoing Message (Oga)
8.7.5 Set Outgoing Message (OGA) From the ANSWERING SYS. menu: Using VOL + and VOL - of the navigation button to scroll to OGA. Press SELECT softkey. 2. Using VOL + and VOL - of the navigation button to scroll to LINE 1 LINE 2 and press... -
Page 24: Message Length
2. Using VOL + and VOL - of the navigation button to scroll to LINE 1 LINE 2 and press SELECT softkey. 3. Using VOL + and VOL - of the navigation button to scroll to your selection. You can choose from 2 RINGS up to... -
Page 25: Basic Operation
main menu. 2. Using VOL + and VOL - of the navigation button to scroll to RESTORE SETTINGS. Press SELECT softkey. LOAD TO DEFAULT?. 3. The screen will display 4. Press softkey to reset the unit to default setting. The phone will reboot with the default settings. -
Page 26: Pre-Dialing
If the headset is not connected (or if not completely inserted into headset jack), pressing t will enter the receiver talk mode. Although this device will accept a variety of standard 2.5mm telephone headsets, Motorola does not guarantee compatibility with third party devices. Performance may vary depending on the quality of the headset. -
Page 27: Mute
From the cordless handset: To switch to the speakerphone mode, press s. 2. If the headset is plugged in, press t to switch to headset. Or, if the headset is not plugged in, press t to switch to the handset receiver mode. Mute To have a private, off-line conversation, use the Mute feature. -
Page 28: Viewing A Redial Record
2. Press REDIAL. The redial number list (last 3 previously dialed numbers) is shown. 3. Using VOL + and VOL - of the navigation button to scroll to the number you want to redial. 4. Press DIAL softkey to dial the phone number. From the cordless handset: Press t, or s and the phone will select the first available line. -
Page 29: Receiving A Transferred Call From Another Extension
9.16 Receiving a Transferred Call from Another Extension If the unit receives a transfer call paging, INTERCOM CALL FROM BASE/HANDSET X shows in the display. Pick up the corded handset, or press t (on cordless handset), or s (on base and cordless handset) to answer the call. -
Page 30: 3-Way Conference Call With Two Lines
From the cordless handset: While on a call, press Int./Hold and wait for the timer to clear from the screen. 2. Press Int./Hold again. 3. Using VOL + and VOL - of the navigation button to scroll to the desired handset or base and press SELECT softkey. -
Page 31: Caller Id (Cid)
Page The page feature helps you locate a misplaced handset. Press PAGE on the base. The cordless handset beeps and the visual indicator on the cordless PAGING FROM BASE. handset flashes. The cordless handset will display 2. To cancel the paging call from the base, either press PAGE or EXIT button, or STOP softkey. -
Page 32: Deleting A Cid Record
NOTE If an incoming call number matches this record the VIP Tone Melody will ring. 12.3 Deleting a CID Record While viewing a CID record, press DELETE (one base) or Mute/Del. (on cordless handset). 2. The screen will display CALLS LIST DELETE?. -
Page 33: Directory And One-Touch Memory Log
Directory and One-Touch Memory Log You may store data in the Directory (up to 99 records) or the One-Touch Memory (10 buttons located to the right of the number pad on the base). The Directory and each One-Touch Memory Log stores up to 16 characters and 32 digits. The records in the Directory are stored by alphabetic ascending order. -
Page 34: Viewing A One-Touch Memory Record (Only Applicable To Base)
13.4 Viewing a One-Touch Memory Record (only applicable to base) In idle mode, press DIR. 2. Press One-Touch Memory (1-10) button of the record you wish to view. 13.5 Editing a Directory Record In idle mode, press DIR. 2. Using VOL + and VOL - of the navigation button to scroll to the record you wish to edit. MENU 3. -
Page 35: Deleting All Directory Records
13.9 Deleting All Directory Records In idle mode, press DIR. 2. Press and hold DELETE (on base) or Mute/Del. (on cordless handset). DELETE ALL? DELETE LIST DELETE ALL? 3. The screen will display (on base) or (on cordless handset). 4. Press softkey to confirm. -
Page 36: Recording Incoming Messages
14.2 Recording Incoming Messages The unit will answer incoming calls or routed calls after X rings (according to your Ring Delay setting) and play the outgoing message greeting. After hearing the greeting followed by a long beep, the caller can leave a message. If there is a new message recorded in the unit, the Ans Sys indicator on the base will flash, and the envelope icon will flash on the display. -
Page 37: Accessing Your Messages Remotely
14.7 Accessing your Messages Remotely Dial the telephone number to which the Answering System is connected. 2. Enter the remote password during the outgoing announcement or after you hear the tone. 3. If the passcode is entered correctly, the Answering System will play the following voice prompts: Press (2) to play messages, press (2) again to stop Press (0) while playing a message to erase... -
Page 38: Display Messages
Display Messages The following messages show the status of the phone, provide Caller ID information, or help you set up and use your phone. DELETE ALL? Prompt asking if you want to erase all records. DELETE? Prompt asking if you want to erase the current record. ENTER NAME: Prompt telling you to enter a name. -
Page 39: Troubleshooting
Intercom does not function correctly • Make sure all extension phones are properly registered with the Motorola ML25255 base. • Make sure all extension phones are within range of the Motorola ML25255 base and there are no major sources of interference nearby. - Page 40 shows on the handset display OUT OF RANGE • Move the handset closer to the base. • Make sure the base power cord is connected to a working electrical outlet. Causes of poor reception • Aluminum siding. • Foil backing on insulation. •...
-
Page 41: General Information
PROVIDED UNDER THIS EXPRESS LIMITED WARRANTY IS THE EXCLUSIVE REMEDY OF THE CONSUMER, AND IS PROVIDED IN LIEU OF ALL OTHER WARRANTIES, EXPRESS OF IMPLIED. IN NO EVENT SHALL MOTOROLA OR MZGW BE LIABLE, WHETHER IN CONTRACT OR TORT (INCLUDING NEGLIGENCE) FOR DAMAGES IN EXCESS OF THE PURCHASE PRICE OF THE... - Page 42 (c) use of the Products or Accessories for commercial purposes or subjecting the Product or Accessory to abnormal usage or conditions; or (d) other acts which are not the fault of Motorola or MZGW are excluded from coverage. Use of Non-Motorola branded Products and Accessories. Defects or damage that result from the use of Non-Motorola branded or certified Products or Accessories or other peripheral equipment are excluded from coverage.
- Page 43 Manufactured, distributed or sold by Meizhou Guo Wei Electronics Co. LTD., official licensee for this product. MOTOROLA and the Stylized M Logo are trademarks or registered trademarks of Motorola Trademark Holdings, LLC. and are used under license. All other trademarks are the property of their respective owners.
Need help?
Do you have a question about the ML25255 and is the answer not in the manual?
Questions and answers
My Motorola M25255 phone shows the mail button and blinks blue like I have a message, but the messages are empty (this is the cordless phone only). It says L1 MSG Waiting on the bottom. I'm not sure how to find/delete that so it no longer looks like I have a message