Table of Contents
Advertisement
Available languages
Available languages
Advertisement
Table of Contents

Subscribe to Our Youtube Channel
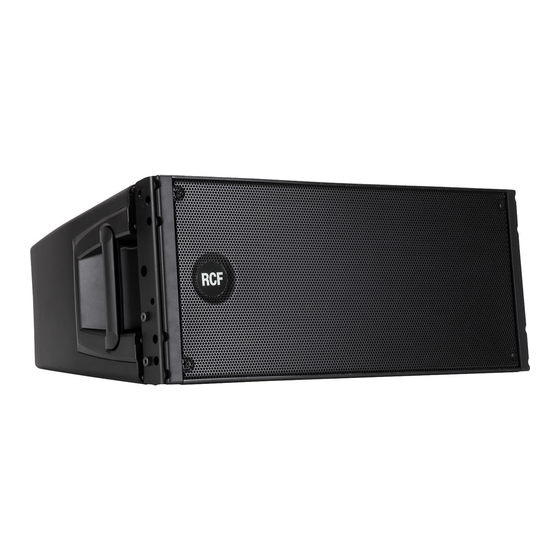
Related Manuals for RCF HDL20-A


Summary of Contents for RCF HDL20-A
- Page 1 OWNER MANUAL MANUALE D’USO HDL20-A ACTIVE LINE HDL10-A ARRAY MODULES...
- Page 2 LANGUAGE ENGLISH ITALIANO...
- Page 3 (wall, ceiling, structure, etc.), and the components used for attachment (screw anchors, screws, brackets not supplied by RCF etc.), which must guarantee the security of the system / installation over time, also considering, for example, the mechanical vibrations normally generated by transducers.
- Page 4 RCF S.p.A. will not assume any responsibility for the incorrect installation and / or use of this product.
- Page 5 The vocals are natural, the sound is clear at longer distances, the spl power is stable at very high levels. The RCF Precision transducers equipping D LINE have been representing for decades the ultimate performance, the highest power handling and the mos advanced technology in the professional and touring industry.
- Page 6 POWER REQUIREMENTS AND SET-UP The HDL line arrays Systems are designed to operate in hostile and demanding situations. WARNING Nevertheless it is important to take extremely care of the AC power supply and set up a proper power distribution. The HDL line arrays Systems are designed to be GROUNDED. Always use a grounded connection.
- Page 7 - OFF (not active correction) - ON (for high curving arrays of few pieces HDL20-A or HDL10-A). INDOOR. The switch gives the extra possibility to set low frequencies correction depending on a indoor/outdoor use, in order to compensate room reverberation on lows.
- Page 8 AC POWERCON LINK RECEPTACLE. Use this receptacle to link one or more units. Always make sure that the maximum current requirement does not exceed the maximum admitted POWERCON current. In case of doubt call the closest RCF SERVICE CENTRE. POWER MAIN SWITCH. The power switch turns the AC power ON and OFF. Make sure that the VOLUME is set to - when you turn on the speaker.
- Page 9 HF on NEAR when a single speaker is used. Indoor switch use depends on the speaker placement. Place the speaker on the pole or on a tripod using its own hardware LIGHT BAR HDL20-A (P.N. 13360229) or LIGHT BAR HDL10-A (P.N. 13360276) as shown in the following picture.
- Page 10 “RCF SHAPE DESIGNER” The suspension system is designed to have a proper Safety Factors (configuration dependent). Using the “RCF Shape Designer” software it is very easy to understand safety SOFTWARE AND SAFETY factors and limits for each specific configuration. To better comprehend in which safety...
- Page 11 In this case the front links are in compression and the rear links are supporting the total weight of the system plus the front compression. Always check very carefully with the “RCF Shape Designer” software all this kind of situations (even with a small number of cabinets).
- Page 12 Check that all the pins are secured and locked. RIGGING PROCEDURE Rigging the system follow the procedure: RIGGING CHAIN HOIST. CERTIFIED SHACKLE. FLY BAR. 1) Connect the fly-bar F to the chain hoist H (o motors) using the certified shackle. Secure the shackle.
- Page 13 4) Reverse and connect the 1 rear bracket to the fly-bar using 2 quick lock pins. The first HDL has to be fixed always starting at 0° with respect of the frame. No other angles are allowded. 5) Connect the second cabinet to the first always starting from the 2 front brackets. 6) Reverse and connect the rear bracket of the second cabinet using the hole for the proper angle.
- Page 14 RCF Shape Designer software designed to help calculate optimum splay angles, aiming angles, and fly-bar pick points (crucial in aiming the array) for a given venue,...
- Page 15 At the very first installation user should refer to the installation package, available from the RCF website, containing the Matlab Runtime (ver. 9) or the installation package that will download the Runtime from the web. Once the libraries are correctly installed, for all the following version of the software the user can directly download the application without the Runtime.
- Page 17 After the choice of folders for RCF Easy Shape Designer software (Figure 2) and Matlab Libraries Runtime the installer takes a couple of minutes for the installation procedure.
- Page 18 The RCF Easy Shape Designer software is divided into two macro sections: the left part of the interface is dedicated to project variables and data (size of audiences to cover, height, number of modules, etc.), the right part shows the processing results.
- Page 19 OPTIMIZING THE ARRAY Once the design (number of elements and vertical splay angles) has been designed using Shape Designer software, you can effectively optimise the array depending on the environment and the application by driving it using different DSP presets stored onboard. Typically arrays are divided in two or three zones depending the design and size of the array.
- Page 20 HDL10-A & HDL20-A GROUND STACKED HDL modules can still be stacked on top of RCF subwoofers using the HDL fly bar. HDL 20-A compatible Subwoofers: - SUB 8004-AS - SUB 8006-AS - HDL 18-AS HDL 10-A compatible Subwoofers: - SUB 8004-AS...
- Page 21 3) Connect front bracket of the first HDL cabinet using 2 quick lock pins. 4) The baffle of the bottom box in a stacked array does not necessarily have to be parallel to the stage or the array frame. It can be tilted up or downward if desired. In this way arced arrays can be readily created from a ground stack position.
- Page 23 Verificare inoltre l’idoneità della superficie di supporto a cui si intende ancorare il prodotto (parete, soffitto, struttura, ecc.) e dei componenti utilizzati per il fissaggio (tasselli, viti, staffe non fornite da RCF, ecc.), che devono garantire la sicurezza del sistema/installazione nel tempo, considerando inoltre, ad esempio, le vibrazioni meccaniche normalmente prodotte dai trasduttori.
- Page 24 RCF S.p.A. declina ogni responsabilità per le conseguenze di un’installazione e/o utilizzo errati del prodotto.
- Page 25 Dallo stampaggio alla finitura, la serie D-LINE offre il massimo livello di affidabilità e di resistenza per l’uso intenso su strada. I modelli HDL20-A e HDL10-A sono moduli di casse acustiche a 2 vie per sistemi ad array, ultracompatti e autoalimentati. I moduli di amplificatori Classe D da 700 W si abbinano perfettamente con le schede di ingresso del segnale digitale ad alta qualità, grazie a una...
- Page 26 REQUISITI DI ALIMENTAZIONE E SETTAGGIO I sistemi line array HDL sono progettati per poter funzionare anche in condizioni sfavorevoli ATTENZIONE e gravose. È comunque importante prestare la massima attenzione all’alimentazione in CA e a impostare un sistema di distribuzione adeguato. I sistemi line array HDL sono progettati per essere COLLEGATI A TERRA.
- Page 27 - OFF (senza correzione attiva) - ON (per gruppi a curvatura elevata di pochi elementi HDL20-A o HDL10-A). INTERNI. L’interruttore offre l’ulteriore possibilità di impostare correzioni di bassa frequenza in base all’uso interno/esterno, allo scopo di compensare il riverbero...
- Page 28 PRESA POWERCON CA. La serie D-LINE RCF utilizza una rete di alimentazione in CA con POWERCON a 3 poli. Utilizzare sempre gli appositi connettori forniti nella confezione. PRESA DI COLLEGAMENTO POWERCON CA. Utilizzare questa presa per collegare uno o più elementi. Accertarsi sempre che i requisiti di corrente massimi non superino la massima corrente ammessa della presa POWERCON.
- Page 29 Ogni volta che si installa il diffusore su un pole mount o su un treppiedi, è necessario utilizzare solo ed esclusivamente i suoi accessori LIGHT BAR HDL20-A (P.N. 13360229) o LIGHT BAR HDL10-A (P.N. 13360276), come illustrato nella figura seguente.
- Page 30 Il proprietario o installatore è responsabile di garantire che il sistema sia fissato regolarmente, in base alle leggi e ai regolamenti statali e locali. Il software “RCF Shape Designer” fornisce informazioni dettagliate sul fattore di sicurezza per ogni configurazione...
- Page 31 La posizione B consente un passaggio intermedio utilizzando gli stessi fori di fissaggio. Spostare la staffa di sollevamento nella posizione suggerita da RCF Shape Designer. Fissare la staffa di sollevamento con i due perni sulla corda della staffa per bloccare il...
- Page 32 Controllare che tutti i perni siano fissati e bloccati. PROCEDURA DI SOSPENSIONE Seguire la procedura seguente per fissare il sistema: PARANCO CON CATENA DI FISSAGGIO. MOSCHETTONE CERTIFICATO. BARRA DI SOSPENSIONE. 1) Collegare la barra di sospensione F al paranco con catena di fissaggio H (o ai motori) utilizzando il moschettone certificato.
- Page 33 4) Invertire e collegare la staffa posteriore 1 alla barra di sospensione utilizzando 2 perni di bloccaggio rapido. Il primo HDL deve essere fissato sempre partendo a 0° rispetto al telaio. Non sono permesse altre angolazioni. 5) Collegare il secondo diffusore al primo sempre partendo dalle 2 staffe anteriori. 6) invertire e collegare la staffa posteriore del secondo diffusore utilizzando il foro per l’angolazione corretta.
- Page 34 Il software RCF Shape Designer programmato per il calcolo degli angoli di apertura ottimali, degli angoli di puntamento e dei punti di appoggio sul graticcio della barra di sospensione (fondamentali per il posizionamento del gruppo) per un dato ambiente, sarà...
- Page 35 è stato sviluppato con Matlab 2016b e richiede librerie di programmazione Matlab. Alla prima installazione l’utente deve fare riferimento al pacchetto di installazione, disponibile sul sito Web RCF, contenente Matlab Runtime (ver. 9) o il pacchetto di installazione che scaricherà l’eseguibile dal Web. Una volta installate correttamente le librerie, per tutte le seguenti versioni del software l’utente può...
- Page 37 Dopo aver scelto le cartelle per il software RCF Easy Shape Designer (Figura 2) e Matlab Libraries Runtime, l’installer impiegherà un paio di minuti per la procedura di installazione.
- Page 38 Il software RCF Easy Shape Designer è diviso in due macro sezioni: la parte sinistra dell’interfaccia è dedicata alle variabili e ai dati del progetto (dimensioni dell’area da coprire, altezza, numero di moduli, ecc.), la parte destra mostra i risultati dell’elaborazione .
- Page 39 OTTIMIZZARE L’ARRAY Una volta finita la progettazione (numero di elementi e angoli di apertura verticale) tramite il software Shape Designer, è possibile ottimizzare realmente l’array in base all’ambiente e all’uso, tramite le molteplici impostazioni DSP memorizzate. Gli array sono solitamente suddivisi in due o tre zone, in base al progetto e alle dimensioni dell’array stesso.
- Page 40 HDL10-A & HDL20-A POSIZIONATI A TERRA I diffusori HDL possono essere impilati sopra ai subwoofer RCF con i relativi accessori. Subwoofer compatibili con HDL 20-A: - SUB 8004-AS - SUB 8006-AS - HDL 18-AS Subwoofer compatibili con HDL 10-A: - SUB 8004-AS...
- Page 41 3) Collegare la staffa anteriore del primo diffusore HDL utilizzando 2 perni a bloccaggio rapido. 4) La parte frontale del diffusore inferiore in un array a stacking non deve essere necessariamente parallelo al palco o al telaio. Se necessario può essere inclinato verso l’alto o verso il basso.
- Page 43 ± SPECIFICATIONS µ ÷ HDL 20-A HDL 10-A ACOUSTICAL Frequency response 55 Hz - 20 kHz 65 Hz - 20 kHz Max SPL 135 dB 133 dB Horizontal Coverage angle 100° 100° Vertical Coverage angle 15° max 15° max Compression Driver 2”...
- Page 44 RCF S.p.A. Via Raffaello Sanzio, 13 42124 Reggio Emilia - Italy Tel +39 0522 274 411 Fax +39 0522 232 428 e-mail: info@rcf.it...
Need help?
Do you have a question about the HDL20-A and is the answer not in the manual?
Questions and answers