Subscribe to Our Youtube Channel
Summary of Contents for Nuna KLIK plus
- Page 1 INSTRUCTIONS FOR INSTALLATION KLIK plus SEAT AND BASE MODEL CF05702 BASE ONLY IF05702 IMPORTANT: KEEP THIS INSTRUCTION BOOKLET IN THE PLACE PROVIDED ON THE CHILD RESTRAINT...
-
Page 2: Table Of Contents
Contents IMPORTANT: Before installation and use of this child restraint check that it is suitable for the size of your child. Quick Reference .............. 2 See page 7 of the USE Instructions WARNINGS ..............3 for more information. Additional Warnings ..........4 & 5 Features ................ -
Page 3: Quick Reference
Quick Reference WARNING IMPORTANT: After reading this Quick Reference read the • Use the restraint exactly as shown in the instructions. following instructions carefully. • Fit the restraint firmly to the car seat. Tether Strap Carry Handle must always be used when the must always be locked •... -
Page 4: Additional Warnings
ADDITIONAL WARNINGS ADDITIONAL WARNINGS Only install child restraint TO BE USED WITH A LAP-SASH/LAP ONLY SEATBELT in a forward facing vehicle OR ISOFIX LOW ANCHORAGES IN THE BACK OF MOST seat. Never install in a seat CARS WITH FORWARD FACING SEATS. that faces the rear or the This restraint is 700 mm long, 440 mm wide and 500 mm side of the vehicle. -
Page 5: Features
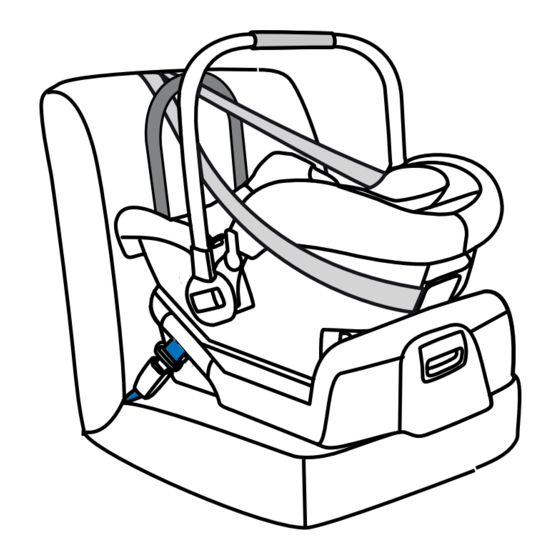
Features Installation - General Where to install the child 1 Tether Strap 7 Instruction Manual restraint? Storage 2 Child Restraint Release Only install the child re- Lever 8 Recline Foot straint in a forward facing 3 Tether Strap Anchorage 9 ISOFIX connector vehicle seat. -
Page 6: Installation - Vehicle Belts
Installation — Vehicle Belts 1 Position base on a forward facing vehicle seat. Use the Belt Path labels as a guide for Adjust base so bubble correct belt placement. REARWARD-FACING is between the black BELT PATH patches. 2 Use recline adjustment, if needed, to achieve correct angle for installation. - Page 7 Installation — Vehicle Belts 5. Hold vehicle belts tight and engage the belt 1. Place the base on the lockoff. vehicle seat and pass BELTS MUST BE the vehicle belt through TIGHT. the openings in the base LOOSE BELTS ARE labeled ‘BELT PATH’...
-
Page 8: Installation - Isofix Compatible Connectors
Installation — ISOFIX Compatible Connectors Some vehicles sourced from Some vehicles are fitted LATCH the USA may be marked with ISOFIX low anchorage LATCH. points. These are are found at the ISOFIX and LATCH low bottom of the back seat anchorage points are the backrest. - Page 9 Installation — ISOFIX Compatible Before fitting see general installation instructions on Connector Guides pages 7 & 8 1 Some models come with 1 Press the release buttons guides for the ISOFIX A and swing the ISOFIX compatible connectors compatible connectors. forward to their operat- ing position.
-
Page 10: Storage - Isofix Compatible Connectors
Storage — ISOFIX Checklist — ISOFIX Installation Compatible Connectors Store the ISOFIX compatible 1 Check the bubble level connectors by pressing the indicator to see if recline release button under the level is still correct. base and swinging them Release back until they are snugly Button Adjust if necessary. -
Page 11: Fitting Restraint To Base
Fitting Restraint to Base WARNINGS – Tether Strap To Install THIS RESTRAINT MUST BE ATTACHED TO A CHILD RESTRAINT UPPER ANCHORAGE POINT IN THE CAR. First make sure there is "CLICK" REFER TO CAR OWNERS HANDBOOK FOR LOCATION nothing in or on the base OF ANCHORAGE POINTS. -
Page 12: How To Use The Tether Strap
How to use the Tether Strap How to use the Tether Strap Always use the tether strap. When the restraint is in a Connect the tether strap to the built-in anchorage fitting vehicle always fit the tether in the vehicle, or if there is not one available, install the into the guide at the back. -
Page 13: Installation - Tether Anchorage
How to use the Tether Strap Installation — Tether Anchorage Most cars have several Do not adjust so tight that The threaded hole for it lifts the child restraint off threaded holes to fit the the anchorage bolt the vehicle seat. tether anchorage to. - Page 14 Installation — Tether Anchorage Installation — Tether Anchorage If the car is fitted with a If the car is not fitted with Attachment Attachment Bolt Bolt child restraint anchorage a child restraint anchorage Anchor point: point: Fitting Lock For sedans only - drill a 9 Locate the anchorage point Washer behind the rear seating...
-
Page 15: Use With Strollers
Use with Strollers Cleaning and Maintenance This NUNA child restraint can attach to Nuna strollers using ™ Seat Cover adapters. Instructions are included with the adapters, which Wash with cold water and mild detergent. are sold separately. Do not iron.


Need help?
Do you have a question about the KLIK plus and is the answer not in the manual?
Questions and answers