Table of Contents
Advertisement
Available languages
Available languages
Advertisement
Chapters
Table of Contents

Related Manuals for Nuna pipa lite lx


Summary of Contents for Nuna pipa lite lx
- Page 2 Designed around your life...
- Page 5 2 31 5 34 3 32 6 35 2 30 4 33 1 36...
- Page 6 2 37 5 40 5 46 3 38 6 41 2 44 6 47 4 39 3 45...
- Page 7 1 49 4 52 4 58 2 50 5 53 2 56 5 59 3 51 3 57 6 54...
-
Page 8: Table Of Contents
IMPORTANT! Warnings Infant Car Seat Parts List KEEP THESE Base Parts List INSTRUCTIONS FOR Product Overview FUTURE REFERENCE: Product Use READ CAREFULLY Installation Cleaning and Maintenance Dutch (NL) French (FR) German (DE) Italian (IT) Spanish (ES) PIPA lite lx Instructions... -
Page 9: Product Information
Please have the proof of purchase, model number Weight: Child weighing under 13kg and manufactured in date available when you (approximately 1.5 years old or under) contact us. For warranty information please visit: www.nuna.eu/warranty PIPA lite lx Instructions PIPA lite lx Instructions... -
Page 10: For Use With Base
C and D. replacement. Frequently check the ISOFIX guides for dirt and clean them if necessary. Reliability can be effected by ingress of dirt, dust, food particles etc. PIPA lite lx Instructions PIPA lite lx Instructions... - Page 11 The parts of this child restraint should not manufacturers. be lubricated in any way. PIPA lite lx Instructions PIPA lite lx Instructions...
- Page 12 NEVER use ropes or any other substitutes to secure child restraint in vehicle or to secure child into child restraint. Only use vehicle belt to secure child restraint in vehicle. PIPA lite lx Instructions PIPA lite lx Instructions...
-
Page 13: Infant Car Seat Parts List
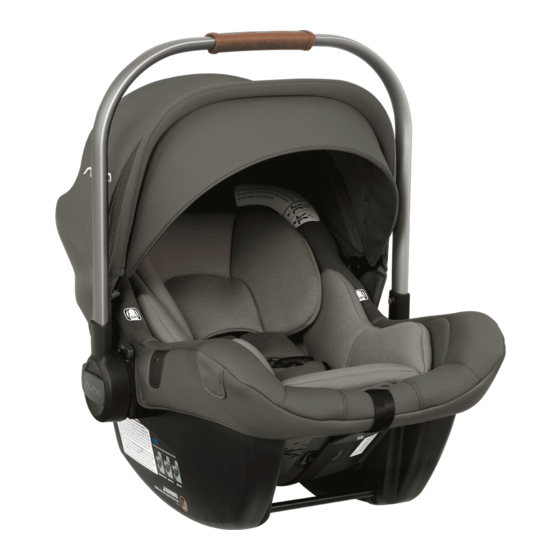
Infant Car Seat Parts List Make sure all parts are available before assembly. If any part is missing, please contact Nuna (see page 2 for information). No tools are required for assembly. Seat Pad 10 Handle Body Support (x2) Canopy... -
Page 14: Base Parts List
Base Parts List Make sure all parts are available before assembly. If any part is missing, please contact Nuna (see page 2 for information). No tools are required for assembly. Vehicle Belt Load Leg Lock Off Carrier Release ISOFIX Connector... -
Page 15: Product Overview
(16) Attach the dream drape to the magnets on each ™ corner to the front of the carrier. DO NOT install this infant child restraint on vehicle seats unstable during installation. PIPA lite lx Instructions PIPA lite lx Instructions... - Page 16 - Keep the tab at the end of the crotch pad strap flat against the strap and then route the crotch pad strap through the front of the buckle. (21) - Pull the crotch pad off the buckle. (22) PIPA lite lx Instructions PIPA lite lx Instructions...
-
Page 17: Product Use
Harness is snug – A snug harness cannot be back and bottom of the seat with no gap pinched, and should not allow any slack. behind the child. DO NOT allow child to slouch. (33) PIPA lite lx Instructions PIPA lite lx Instructions... -
Page 18: Installation
The load leg must be installed correctly with connectors should be completely green. (43) green indicator. (45)-2 Check the installation Base should not move side to side or forward more than 1” at belt path. PIPA lite lx Instructions PIPA lite lx Instructions... - Page 19 (56) belts must lay flat. (52) DO NOT allow Child Restraint to contact the vehicle door or seat in front of it. PIPA lite lx Instructions PIPA lite lx Instructions...
-
Page 20: Cleaning And Maintenance
(57)-1 For reasons of safety, only use original Nuna parts. - To remove the base, lift up on the the lock off. (58) Refer to the care label attached to the soft goods - Unbuckle the vehicle belt and un-route the for washing and drying instructions. - Page 21 Inhoud Productinformatie Productregistratie Garantie BELANGRIJK! Contact DEZE INSTRUCTIES Vereisten kindergebruik Voor gebruik met voet BEWAREN VOOR Waarschuwingen LATER GEBRUIK. Onderdelenlijst kinderzitje AANDACHTIG LEZEN Onderdelenlijst voet Productoverzicht Gebruiken Installatie Reiniging en onderhoud Instructies PIPA lite lx Instructies PIPA lite lx...
-
Page 22: Productinformatie
Ga voor garantie-informatie naar: www.nuna.eu/warranty Contact Neem contact op met onze klantenservice- afdelingen voor vervangende onderdelen, service of aanvullende vragen over de garantie. info@nuna.eu www.nuna.eu Instructies PIPA lite lx Instructies PIPA lite lx... -
Page 23: Voor Gebruik Met Voet
GEEN ENKEL kinderzitje biedt volledige bescherming tegen letsel bij een ongeluk. Maar het juiste gebruik van het kinderzitje vermindert het risico van ernstig letsel of de dood. Instructies PIPA lite lx Instructies PIPA lite lx... - Page 24 Vervang het direct, omdat er onzichtbare Gebruik dit kinderzitje NIET zonder de zachte structurele schade kan zijn ontstaan door de onderdelen. botsing. Instructies PIPA lite lx Instructies PIPA lite lx...
- Page 25 Gebruik alleen de autogordels om het kinderzitje in de auto vast te zetten. Instructies PIPA lite lx Instructies PIPA lite lx...
-
Page 26: Onderdelenlijst Kinderzitje
Onderdelenlijst kinderzitje Zorg dat alle onderdelen voor het opslaan droog zijn. Wanneer er een onderdeel ontbreekt, kunt u contact opnemen met Nuna (zie pagina 26 voor informatie). Voor de montage is geen gereedschap nodig. 1 Zitkussen 11 Kap 2 Lichaamssteun (x2) -
Page 27: Onderdelenlijst Voet
Onderdelenlijst voet Zorg dat alle onderdelen voor het opslaan droog zijn. Wanneer er een onderdeel ontbreekt, kunt u contact opnemen met Nuna (zie pagina 26 voor informatie). Voor de montage is geen gereedschap nodig. 1 Vergrendeling 6 Steunvoet voertuigriem 7 Ontgrendelknop... -
Page 28: Productoverzicht
- Trek de dream drape™ uit het vak. (8) autostoel achter te plaatsen. (16) Bevestig de Dream Drape™ aan dE MAGNETEN op NIET het kinderzitje installeren op autostoelen elke hoek voorop de wagen. die tijdens de installatie bewegen. Instructies PIPA lite lx Instructies PIPA lite lx... - Page 29 (27) voorste gedeelte van de gesp. (21) Instructies PIPA lite lx Instructies PIPA lite lx...
-
Page 30: Gebruiken
- Het kind dient tegen zowel de achterkant als de onderkant van het zitje te zitten, er mag geen ruimte achter het kind zitten. Het kind mag NIET hangen. (33) Instructies PIPA lite lx Instructies PIPA lite lx... -
Page 31: Installatie
- Lijn de ISOFIX-aansluitingen uit met de ISOFIX- aangesloten en vergrendeld in de ISOFIX- ankerpunten en klik beide ISOFIX-aansluitingen ankerpunten. (45)-1 in de ISOFIX-ankerpunten. (42) De steunvoet moet goed zijn geplaatst en de indicator moet groen zijn. (45)-2 Instructies PIPA lite lx Instructies PIPA lite lx... - Page 32 De steunvoet moet goed zijn geplaatst en de - Druk op de ISOFIX-ontgrendelknop om de indicator moet groen zijn. (55)-3 ISOFIX op te vouwen. (50) Het kinderzitje kan niet worden gebruikt als Instructies PIPA lite lx Instructies PIPA lite lx...
-
Page 33: Reiniging En Onderhoud
Gebruik de kinderwagen niet meer als onderdelen zijn Deze babydraagmodule kan met behulp van gescheurd, gebroken of ontbreken. adapters ook op andere merken wandelwagens worden bevestigd. Ga naar nuna.eu voor meer informatie. ©2018 Nuna International B.V. Nuna en alle gekoppelde logo’s zijn handelsmerken... - Page 34 UNE UTILISATION Avertissements FUTURE : Liste des pièces du siège auto pour bébé Liste des pièces de la base LIRE ATTENTIVEMENT Vue d’ensemble du produit Utilisation du produit Installation Nettoyage et maintenance Instructions PIPA lite lx Instructions PIPA lite lx...
-
Page 35: Informations Sur Le Produit
à votre disposition lorsque vous nous contactez. Pour des informations sur la garantie, veuillez vous rendre sur le site suivant : www.nuna.eu/warranty Instructions PIPA lite lx Instructions PIPA lite lx... -
Page 36: Utilisation Avec La Base
La classe de taille ISOFIX pour laquelle ce dispositif AUCUN siège de bébé ne peut garantir une est prévu est C et D. protection complète contre les blessures en cas d’accident. Cependant, une bonne utilisation de Instructions PIPA lite lx Instructions PIPA lite lx... - Page 37 Ceci créerait des risques de blessures ou de mort. NE CONTINUEZ PAS à utiliser ce siège de bébé après un accident, même mineur. Remplacez-le Instructions PIPA lite lx Instructions PIPA lite lx...
- Page 38 N’UTILISEZ JAMAIS de cordes ou d’autres substituts pour attacher le siège bébé dans le véhicule ou pour attacher l’enfant dans le siège bébé. Utilisez uniquement la ceinture du véhicule pour attacher le siège bébé dans le véhicule. Instructions PIPA lite lx Instructions PIPA lite lx...
-
Page 39: Liste Des Pièces Du Siège Auto Pour Bébé
Liste des pièces du siège auto pour bébé Assurez-vous que toutes les pièces sont présentes avant le montage. Si une pièce est manquante, veuillez contacter Nuna (voir la page 52 pour plus d’informations). Le montage ne nécessite aucun outil. 1 Assise de siège 10 Poignée... -
Page 40: Liste Des Pièces De La Base
Liste des pièces de la base Assurez-vous que toutes les pièces sont présentes avant le montage. Si une pièce est manquante, veuillez contacter Nuna (voir la page 52 pour plus d’informations). Le montage ne nécessite aucun outil. 1 Pince d’arrêt de la 6 Piètement de charge... -
Page 41: Vue D'ensemble Du Produit
Fixez le dream drape™ aux aimants sur chaque sur le siège arrière du véhicule. (16) coin à l’avant du siège bébé. N’installez PAS ce siège bébé sur des sièges de véhicule instables lors de l’installation. Instructions PIPA lite lx Instructions PIPA lite lx... - Page 42 - Pour retirer le coussin pour faible poids à la puis faites passer la sangle du coussinet naissance, ouvrez la fermeture velcro à l’arrière d’entrejambe par l’avant de la boucle. (21) du support corporel et retirez le coussin. (27) Instructions PIPA lite lx Instructions PIPA lite lx...
-
Page 43: Utilisation Du Produit
- L’enfant doit être assis contre le dossier et l’assise du siège sans espace derrière l’enfant. NE LAISSEZ PAS l’enfant s’affaler. (33) Guidez délicatement les bras de l’enfant dans les boucles du harnais. Instructions PIPA lite lx Instructions PIPA lite lx... -
Page 44: Installation
ISOFIX. d’ancrage ISOFIX, puis insérez les deux (45)-1 connecteurs ISOFIX dans les points d’ancrage Le piètement de charge doit être installé ISOFIX. (42) correctement avec l’indicateur vert. (45)-2 Instructions PIPA lite lx Instructions PIPA lite lx... - Page 45 - Appuyez sur le bouton de déverrouillage ISOFIX pour plier l’ISOFIX. (50) Le piètement de charge doit être installé correctement avec l’indicateur vert. (55)-3 Le dispositif de retenue pour enfants ne peut Instructions PIPA lite lx Instructions PIPA lite lx...
-
Page 46: Nettoyage Et Maintenance
Installation sur une poussette après une longue période d’utilisation, même normale. Ce siège bébé peut être fixé aux poussettes Nuna à l’aide d’adaptateurs. Des instructions sont incluses Vérifiez régulièrement si tout fonctionne avec les adaptateurs, qui sont vendus séparément. - Page 47 Anforderungen an die Nutzung mit Kind ANWEISUNGEN Für Verwendung mit der Basis ZUM KÜNFTIGEN Warnhinweise NACHSCHLAGEN Teileliste des Kinderrückhaltesystems Teileliste der Basis AUF! Produktübersicht SORGFÄLTIG LESEN Produkt verwenden Installation Reinigung und Wartung Anleitung zu PIPA lite lx Anleitung zu PIPA lite lx...
-
Page 48: Produktdaten
Bitte halten Sie bei Kontaktaufnahme mit uns Kaufbeleg, Modellnummer und Fertigungsdatum bereit. Garantieinformationen finden Sie unter: www.nuna.eu/warranty Kontakt Wenden Sie sich für Ersatzteile, Service und weitere Garantiefragen an unseren Kundendienst. info@nuna.eu www.nuna.eu Anleitung zu PIPA lite lx Anleitung zu PIPA lite lx... -
Page 49: Für Verwendung Mit Der Basis
Schmutz und reinigen Sie sie bei Bedarf. Die Kinderrückhaltesystems bzw. an den Zuverlässigkeit des Systems kann durch Eindringen Fahrzeughersteller. von Schmutz, Staub, Lebensmittelresten usw. beeinträchtigt werden. ISOFIX-Größenklasse, für die dieses Produkt vorgesehen ist: C und D. Anleitung zu PIPA lite lx Anleitung zu PIPA lite lx... - Page 50 Oberschenkeln gesichert werden. Kinderrückhaltesystem NIEMALS mit Kind auf eine erhöhte Position stellen. Führen Sie keine Modifikationen an diesem Kinderrückhaltesystem durch; verwenden Sie es NICHT in Verbindung mit Teilen von anderen Herstellern. Anleitung zu PIPA lite lx Anleitung zu PIPA lite lx...
- Page 51 Schäden auf, die Ihr Kind gefährden können. Verwenden Sie niemals Seile oder andere Ersatzmittel, um das Kinderrückhaltesystem im Auto oder das Kind im Kinderrückhaltesystem zu sichern. Sichern Sie das Kinderrückhaltesystem nur mit dem Fahrzeuggurt im Fahrzeug. Anleitung zu PIPA lite lx Anleitung zu PIPA lite lx...
-
Page 52: Teileliste Des Kinderrückhaltesystems
Teileliste des Kinderrückhaltesystems Überprüfen Sie vor der Montage, ob alle Teile vorhanden sind. Wenden Sie sich an Nuna, falls etwas fehlen sollte (Informationen finden Sie auf Seite 78). Für die Montage werden keine Werkzeuge benötigt. 1 Sitzauflage 11 Verdeck 2 Körperstütze (x2) -
Page 53: Teileliste Der Basis
Teileliste der Basis Überprüfen Sie vor der Montage, ob alle Teile vorhanden sind. Wenden Sie sich an Nuna, falls etwas fehlen sollte (Informationen finden Sie auf Seite 78). Für die Montage werden keine Werkzeuge benötigt. 1 Verriegelung des 6 Stützbein... -
Page 54: Produktübersicht
Bringen Sie das dream drape™ an den Installieren Sie dieses Kinderrückhaltesystem Magneten an jeder Ecke an der Vorderseite der NICHT auf Fahrzeugsitzen, die sich während Schale an. der Installation bewegen. Anleitung zu PIPA lite lx Anleitung zu PIPA lite lx... - Page 55 Neugeborene, indem Sie den Klettverschluss Schrittpolstergurts flach an den Gurt und an der Rückseite der Körperstütze öffnen und führen Sie dann den Schrittpolstergurt durch das Polster herausziehen. (27) die Vorderseite des Verschlusses. (21) Anleitung zu PIPA lite lx Anleitung zu PIPA lite lx...
-
Page 56: Produkt Verwenden
- Das Kind sollte direkten Kontakt mit Rück- und erleiden. Unterseite des Sitzes haben. Achten Sie darauf, dass das keine Lücken bestehen. (33) Führen Sie die Arme des Kindes vorsichtig durch die Gurtschlaufen. Anleitung zu PIPA lite lx Anleitung zu PIPA lite lx... -
Page 57: Installation
ISOFIX-Führungen aus und rasten Sie dort eingerastet sein. (45)-1 beide ISOFIX-Befestigungen in den ISOFIX- Das Standbein muss richtig installiert sein, was Verankerungspunkten ein. (42) durch eine grüne Anzeige überprüft werden kann. (45)-2 Anleitung zu PIPA lite lx Anleitung zu PIPA lite lx... - Page 58 Knopf. durch eine grüne Anzeige überprüft werden - Drücken Sie zum Klappen des ISOFIX den kann. (55)-3 ISOFIX-Freigabeknopf. (50) Das Kinderrückhaltesystem kann nicht verwendet werden, wenn der Verschluss Anleitung zu PIPA lite lx Anleitung zu PIPA lite lx...
-
Page 59: Reinigung Und Wartung
Reichweite des Kindes auf. Installation an einem Kinderwagen Es ist selbst bei gewöhnlichem Gebrauch normal, dass Textilien nach langer Benutzung Diese Babyschale kann mit Adaptern an Nuna- durch Sonnenlicht verblassen und Kinderwagen befestigt werden. Anweisungen sind Verschleißerscheinungen aufweisen. im Lieferumfang der separat erhältlichen Adaptern enthalten. - Page 60 PER FUTURE Uso con la base CONSULTAZIONI! Avvertenze Elenco parti del seggiolino per auto LEGGERE Elenco parti della base ATTENTAMENTE Panoramica del prodotto Uso del prodotto Installazione Pulizia e manutenzione Istruzioni per PIPA lite lx Istruzioni per PIPA lite lx...
-
Page 61: Informazioni Sul Prodotto
Per informazioni sulla garanzia, visitare il sito: www.nuna.eu/warranty Recapito Per la sostituzione di parti, manutenzione o domande sulla garanzia, contattare il dipartimento di assistenza al cliente. info@nuna.eu www.nuna.eu Istruzioni per PIPA lite lx Istruzioni per PIPA lite lx... -
Page 62: Uso Con La Base
ISOFIX e pulirle se necessario. La classe di dimensioni ISOFIX prevista è C e D. L’affidabilità può essere ridotta dalla penetrazione di sporcizia, polvere, residui di cibo, ecc. Istruzioni per PIPA lite lx Istruzioni per PIPA lite lx... - Page 63 I componenti del sistema di ritenuta per bambini non devono essere mai lubrificati. Istruzioni per PIPA lite lx Istruzioni per PIPA lite lx...
- Page 64 Utilizzare solo le cinture del veicolo per fissare il sistema di ritenuta per bambini nel veicolo. Istruzioni per PIPA lite lx Istruzioni per PIPA lite lx...
-
Page 65: Elenco Parti Del Seggiolino Per Auto
Elenco parti del seggiolino per auto Assicurarsi che tutti i pezzi siano disponibili prima dell’assemblaggio. Se manca qualche pezzo, contattare Nuna (per informazioni, vedere pagina 104). Per l’assemblaggio non è necessario nessun attrezzo. 1 Imbottitura 10 Maniglia 2 Supporto corpo (x2) -
Page 66: Elenco Parti Della Base
Elenco parti della base Assicurarsi che tutti i pezzi siano disponibili prima dell’assemblaggio. Se manca qualche pezzo, contattare Nuna (per informazioni, vedere pagina 104). Per l’assemblaggio non è necessario nessun attrezzo. 1 Blocco cintura del 7 Pulsante di rilascio veicolo... -
Page 67: Panoramica Del Prodotto
Fissare il dream drape™ ai magneti su ciascun NON installare questo sistema di ritenuta per angolo della parte anteriore del passeggino. bambini su sedili dei veicoli che si sono rivelati instabili durante l’installazione. Istruzioni per PIPA lite lx Istruzioni per PIPA lite lx... - Page 68 (27) parte anteriore della fibbia. (21) Istruzioni per PIPA lite lx Istruzioni per PIPA lite lx...
- Page 69 - Il bambino deve essere seduto contro la parte posteriore e la parte inferiore del seggiolino senza alcuno spazio dietro. NON consentire al bambino di inclinarsi. (33) Istruzioni per PIPA lite lx Istruzioni per PIPA lite lx...
- Page 70 Il supporto deve essere installato - Allineare gli attacchi ISOFIX con le guide correttamente con l’indicatore verde. (45)-2 ISOFIX, quindi fare clic su entrambi gli attacchi ISOFIX nei punti di ancoraggio ISOFIX. (42) Istruzioni per PIPA lite lx Istruzioni per PIPA lite lx...
- Page 71 Il sistema di ritenuta non può essere utilizzato piegare gli attacchi ISOFIX. (50) se la fibbia della cintura di sicurezza del veicolo (il terminale femmina) è troppo lungo per ancorare saldamente il sistema di ritenuta. (55)-4 Istruzioni per PIPA lite lx Istruzioni per PIPA lite lx...
- Page 72 Se alcune parti sono danneggiate, Per ulteriori informazioni, visitare il sito nuna.eu. rotte o mancanti, cessare di utilizzare questo prodotto. ©2018 Nuna International B.V. Nuna e tutti i logo associati sono marchi di fabbrica. Istruzioni per PIPA lite lx Istruzioni per PIPA lite lx...
- Page 73 CONSULTAS! Lista de piezas del asiento para vehículo para niños 140 LÉALAS Lista de piezas de la base DETENIDAMENTE Información general del producto Uso del producto Instalación Limpieza y mantenimiento Instrucciones para PIPA lite lx Instrucciones para PIPA lite lx...
-
Page 74: Información Del Producto
Tenga preparada la prueba de compra, el número de modelo y la fecha de fabricación cuando se ponga en contacto con nosotros. Para obtener información acerca de la garantía, visite: www.nuna.eu/warranty Instrucciones para PIPA lite lx Instrucciones para PIPA lite lx... -
Page 75: Para Su Uso Con La Base
La clase de tamaño ISOFIX para la que está diseñado este dispositivo es C y D. Instrucciones para PIPA lite lx Instrucciones para PIPA lite lx... - Page 76 Para evitar el riesgo de sufrir caídas, asegure siempre al niño con el arnés de seguridad cuando el niño se encuentre en el dispositivo de sujeción para niños, incluso cuando el dispositivo de Instrucciones para PIPA lite lx Instrucciones para PIPA lite lx...
- Page 77 NO coloque ningún objeto en la pata de carga delante de la base. Instrucciones para PIPA lite lx Instrucciones para PIPA lite lx...
-
Page 78: Lista De Piezas Del Asiento Para Vehículo Para Niños
Asegúrese de que están disponibles todas las piezas antes de montar el producto. Si alguna pieza falta, póngase en contacto con Nuna (consulte la página 130 para obtener información). No se necesita ninguna herramienta para el montaje. -
Page 79: Lista De Piezas De La Base
Lista de piezas de la base Asegúrese de que están disponibles todas las piezas antes de montar el producto. Si alguna pieza falta, póngase en contacto con Nuna (consulte la página 130 para obtener información). No se necesita ninguna herramienta para el montaje. -
Page 80: Información General Del Producto
(16) en cada esquina de la parte frontal de la sillita. NO instale este dispositivo de sujeción para niños en asientos de vehículo que se muestren inestables durante la instalación. Instrucciones para PIPA lite lx Instrucciones para PIPA lite lx... - Page 81 - Mantenga la lengüeta situada en el extremo de el cuerpo se debe usar para niños de 0 a 6 la correa del acolchado de la entrepierna plana meses. (26) Instrucciones para PIPA lite lx Instrucciones para PIPA lite lx...
-
Page 82: Uso Del Producto
- Coloque al niño en el dispositivo de sujeción para niños en la posición de sentado. (32) Instrucciones para PIPA lite lx Instrucciones para PIPA lite lx... -
Page 83: Instalación
ISOFIX hasta que escuche un clic. (42) anclaje ISOFIX. (45)-1 La pata de carga debe estar correctamente instalada con el indicador en verde. (45)-2 Instrucciones para PIPA lite lx Instrucciones para PIPA lite lx... - Page 84 La pata de carga debe estar correctamente - Pulse el botón de desbloqueo ISOFIX para plegar instalada con el indicador en verde. (55)-3 el sistema ISOFIX. (50) Instrucciones para PIPA lite lx Instrucciones para PIPA lite lx...
-
Page 85: Limpieza Y Mantenimiento
Instalación en un cochecito largo periodo de uso, incluso si se utiliza de una Este capazo puede acoplarse a los cochecitos Nuna forma normal. mediante adaptadores. Las instrucciones se incluyen Compruebe periódicamente que todo funciona...
Need help?
Do you have a question about the pipa lite lx and is the answer not in the manual?
Questions and answers