Paxton PaxLock Pro Installation And Commissioning Manual
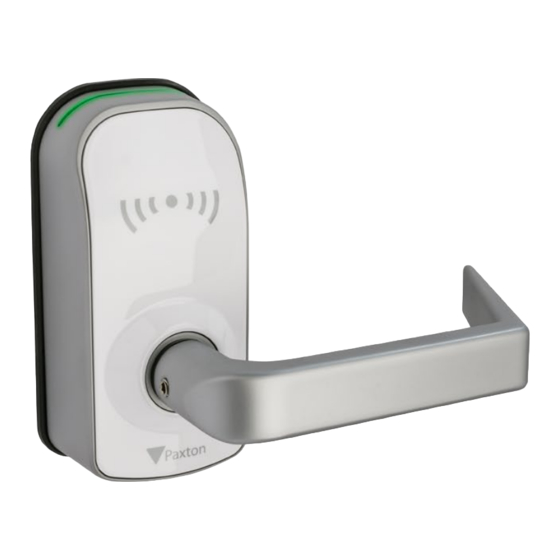
Latch
Hide thumbs
Also See for PaxLock Pro:
- Manual (14 pages) ,
- Installation and commissioning manual (10 pages) ,
- Installation and commissioning manual (11 pages)
Advertisement
Quick Links
PaxLock Pro - Latch Installation and
Commissioning Guide
Overview
When installing a PaxLock Pro - Latch, it is important
to ensure the environment the PaxLock Pro - Latch
is to be installed in is fit for purpose.
This application note covers the preparation that
should be carried out before, during and after
installation to ensure the longevity of the product
as well as correct installation.
Checks to make prior to installation
Before installing the PaxLock Pro - Latch onto the door, it is important to check that the door, frame and
any relevant door furniture are in good working order. This is important to ensure both the longevity and
the smooth operation of the product once installed.
Door usage
The PaxLock Pro - Latch is recommended for use on doors being operated up to 75 times per day. For
usage above this number, we would recommend a Paxton hardwired solution.
Through door holes
The PaxLock Pro - Latch has been designed to work with the supplied tubular latch. The through door
holes must be 63/64" in diameter and the central follower must have at least 15/16" clearance around it.
2 / "
PaxLock
AN1192-US
/ "
1
Advertisement

Subscribe to Our Youtube Channel
Related Manuals for Paxton PaxLock Pro


Summary of Contents for Paxton PaxLock Pro
- Page 1 Checks to make prior to installation Before installing the PaxLock Pro - Latch onto the door, it is important to check that the door, frame and any relevant door furniture are in good working order. This is important to ensure both the longevity and the smooth operation of the product once installed.
-
Page 2: Door Frame
It is best practice to ensure there is a gap of 1/8" from the door edge to the frame. The door strike plate should also be 5/8" to avoid clashing with the PaxLock Pro - Latch when the door is closed. - Page 3 Metal doors The PaxLock Pro - Latch is suitable for installation onto metal doors providing both the width and tubular latch are within the specifications outlined on the PaxLock Pro - Latch datasheet. To ensure correct operation, the following must be checked: •...
-
Page 4: During Installation
AN1192-US Ordering the right equipment Once you are happy the site is suitable for the PaxLock Pro - Latch, you will need to ensure you have the right information to order the correct products. There are 4 sales codes to choose from for the PaxLock Pro - Latch. You'll need to know whether you prefer the Galaxy or Eclipse handle and if you would like the black or white fascia. -
Page 5: Troubleshooting
Once the PaxLock Pro - Latch has been installed, there are several checks that can be made to ensure the product has been installed correctly and is functioning correctly. When the PaxLock Pro - Latch is first powered up it will remain in an unlocked state. This will give you the chance to check the following:... - Page 6 Paxlock Pro - Latch If this occurs, it may be a result of the The edge of the PaxLock Pro - Latch or handle backset on the lock case being too low. We is clipping the door frame when opening and recommend a 2 3/4"...
- Page 7 PaxLock AN1192-US These events indicate the respective PaxLock Event in Net2: “Battery-side handle stuck” Pro - Latch handle has been held down for or “Reader-side handle stuck. ” more than 30 seconds. Most likely, someone is holding the handle down for too long or something has been left on the handle.
Need help?
Do you have a question about the PaxLock Pro and is the answer not in the manual?
Questions and answers