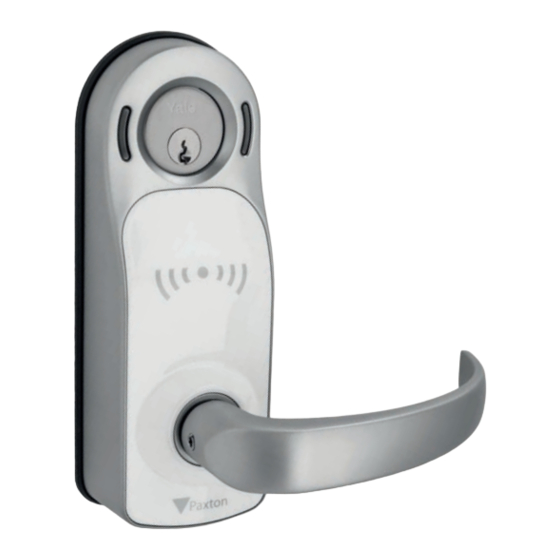
Paxton Paxlock Pro Installation And Commissioning Manual
Hide thumbs
Also See for Paxlock Pro:
- Manual (14 pages) ,
- Installation and commissioning manual (10 pages) ,
- Installation and commissioning manual (11 pages)
Advertisement
PaxLock Pro - Mortise - Installation and
Commissioning Guide
Overview
When installing a PaxLock Pro - Mortise, it is
important to ensure the environment the PaxLock
Pro - Mortise is to be installed in is fit for purpose.
This application note covers the preparation that
should be carried out before, during and after
installation to ensure the longevity of the product
as well as correct installation.
This application note also covers a few common
problems which may impact the performance and
quality of the PaxLock Pro - Mortise.
Checks to make prior to installation
When preparing a new door, follow this drilling template:
For the 901-053-US PaxLock Pro – Latchbolt Mortise lock, follow the instructions and drill holes:
•
Outside: A, B, E,
•
Inside: A, E
For the 901-054-US PaxLock Pro – Deadbolt Mortise lock, follow the instructions and drill holes:
•
Outside: A, B, E
•
Inside: A, C, E, F
Note: The F markings are to hold the rose of the thumbturn in place. These are not very deep and can
be done when the thumbturn is being installed.
Before installing the PaxLock Pro - Mortise onto the door, it is important to check that the door, frame and
any relevant door furniture are in good working order. This is important to ensure both the longevity and
the smooth operation of the product once installed.
Door usage
The PaxLock Pro – Mortise is recommended for use on doors being operated up to 75 times per day. For
usage above this number we would recommend a Paxton hard wired solution.
Through door holes
The PaxLock Pro - Mortise has been designed to work with the Yale 8800 series lockset as shown in Figure 1.
The through door holes must be 5/16" diameter and the central follower must have at least 15/16" clearance
around it.
www.Paxton.Info/6464
PaxLock
APN-1181-US
1
Advertisement
Table of Contents

Subscribe to Our Youtube Channel
Summary of Contents for Paxton Paxlock Pro
- Page 1 Through door holes The PaxLock Pro - Mortise has been designed to work with the Yale 8800 series lockset as shown in Figure 1. The through door holes must be 5/16" diameter and the central follower must have at least 15/16" clearance...
- Page 2 Figure 2 Fire doors The PaxLock Pro - Mortise is certified to UL10C 3 hour fire test. All door furniture used in the installation must have equivalent fire certification in order to comply. This includes the use of interdens as recommended...
-
Page 3: Door Frame
It is best practice to ensure there is a gap of 1/8" from the door edge to the frame. This is to ensure that if a deadbolt is present on the lock case, it can function correctly. The door strike plate should also be 5/8" to avoid clashing with the PaxLock Pro - Mortise when the door is closed. - Page 4 Metal doors The PaxLock Pro - Mortise is suitable for installation onto metal doors providing both the width and lockset are within the specifications outlined on the PaxLock Pro - Mortise datasheet. To ensure correct operation, the following must be checked: •...
-
Page 5: During Installation
APN-1181-US Ordering the right equipment Once you are happy the site is suitable for the PaxLock Pro - Mortise, you will need to ensure you have the right information to order the correct products. There are 4 sales codes to chose from for PaxLock Pro - Mortise. You’ll need to know if you prefer the Galaxy or Eclipse handle as well as if you would like the black or white fascia. - Page 6 Once the PaxLock Pro - Mortise has been installed, there are several checks that can be made to ensure the product has been installed correctly and is functioning correctly. When the PaxLock Pro - Mortise is first powered up it will remain in an unlocked state. This will give you the chance to check the following;...
-
Page 7: Replacing The Batteries
Lock Case It is recommended that the PaxLock Pro – Mortise is installed with a new lock case to ensure the smooth operation of the PaxLock Pro – Mortise. The PaxLock Pro - Mortise is compatible with the Yale® Latchbolt Mortise Lock or the Yale® Deadbolt Mortise Lock, both of which are available from Paxton. - Page 8 PaxLock Pro - Mortise The edge of the PaxLock Pro - Mortise or handle If this occurs, it may be a result of the backset is clipping the door frame when opening and on the lock case being too low.
- Page 9 Pro - Mortise is held down when a token is operation” presented to the reader. To correctly use the PaxLock Pro - Mortise present your token, wait for green LED & beep, then depress the handle Event in Net2: “Secure-side handle stuck”...


Need help?
Do you have a question about the Paxlock Pro and is the answer not in the manual?
Questions and answers