Advertisement
Quick Links
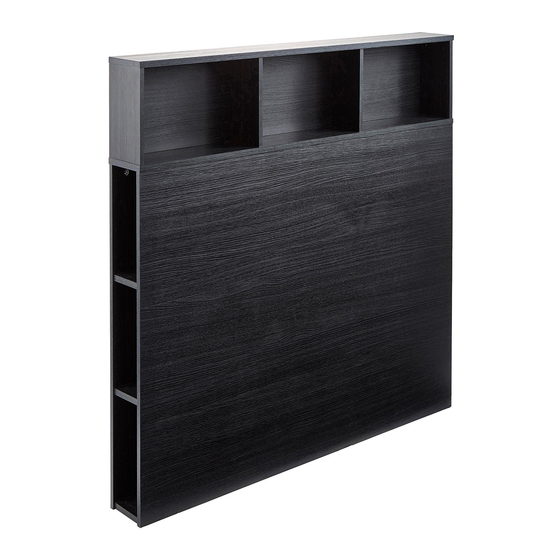
Storage Double Headboard
Assembly Instructions
007 xx 8741
- Please keep for future reference
Dimensions
Width - 135.0cm
Depth - 16.0cm
Height - 110.0cm
Important -
Please read these instructions fully before starting assembly
If you need help or have damaged or missing parts, call the Customer Helpline: 01709 534123
Please turn to back page for important information when contacting Customer Helpline.
Rev A - 08/11/2018
Advertisement

Subscribe to Our Youtube Channel
Related Manuals for J D Williams Henderson SG855 Series


Summary of Contents for J D Williams Henderson SG855 Series
- Page 1 Storage Double Headboard Assembly Instructions 007 xx 8741 - Please keep for future reference Dimensions Width - 135.0cm Depth - 16.0cm Height - 110.0cm Important - Please read these instructions fully before starting assembly If you need help or have damaged or missing parts, call the Customer Helpline: 01709 534123 Please turn to back page for important information when contacting Customer Helpline.
- Page 2 Safety and Care Advice Important - Please read these instructions fully before starting assembly Do not stand or put weight on Check you have all the We do not the product, this could cause components and tools listed on recommend the damage.
- Page 3 Components - Panels Please check you have all the panels listed below Important - Thick lines indicate finished edges 2411 (135.0x16.0cm) 2404 2410 Left Back Panel Right Back Panel (84.0x25.0cm) (84.0x25.0cm) 2414 Front Rail (135.0x84.0cm) 2408 Shelf x 6 (12.6x22.8cm) 2413 Back Rail (131.6x22.8cm)
- Page 4 If you have damaged or missing components, call the Components-Fittings Customer Helpline: 01709 534123 Please turn to back page for important information when contacting Customer Helpline. Please check you have all the fittings listed below Note: The quantities below are the correct amount to complete the assembly, In some case more fittings may be supplied than are required.
-
Page 5: Exploded View
Exploded View 2411 2406 2407 2410 2412 2407 2413 2408 2405 2408 2415 2405 2408 2404 2408 2408 2414 2408... - Page 6 Assembly Instructions Fittings you will need for this step: Step 1 Fitting cams to back rail. 2413 Note: Ensure cam arrow points towards the edge with hole. Step 2 Fittings you will need for this step: Fitting dowels and cams to front rail. Note: Insert metal dowels as far as...
- Page 7 Assembly Instructions Step 3 Fittings you will need for this step: Fitting cams to back panels. 2410 2404 Fittings you will need for this step: Step 4 Step 5 Fitting cams to 6 shelf panels. 2408 2408 2408 2408 2408 2408...
- Page 8 Assembly Instructions Fittings you will need for this step: Step 5 Fitting cams to back rails. 2405 2405 Step 6 Fittings you will need for this step: Fitting cams to end panels and dividers. 2407 2407 2406 2415...
- Page 9 Assembly Instructions Step 7 Fittings you will need for this step: Fitting dowels and cams to top panel. 2411 Finished edge Fittings you will need for this step: Step 8 Fitting dowels and cams to underside of shelf panel. 2412 Finished edge NOW TURN SHELF PANEL OVER Fittings you will need for this step:...
- Page 10 Assembly Instructions Step 10 Attach end panels & 2411 dividers the top panel. 2406 Connect the dowels in 2411 the top panel with the cams in the end 2407 panels and divider panels & 2407 2406 2415 Finished edge 2407 Finished edge 2415 Finished edge...
- Page 11 Assembly Instructions Step 12 Attach shelf panel to the back rail. Connect the dowels in 2413 2412 the shelf panel with the cams in the back rail 2413 2412 Turn cam 180 degrees to lock Finished edge Fittings you will need for this step: Step 13 Secure the shelf panel to the end and...
- Page 12 Assembly Instructions Step 14 Attach front rail to the shelf panel. Connect the dowels in 2412 the shelf panel with 2412 the cams in the front rail 2414 Turn cam 180 degrees to lock 2402 2414 Step 15 Attach shelf panels to the front rail.
- Page 13 Assembly Instructions Step 16 Attach back rails to the front rail. Connect the dowels in 2405 2414 the front rail with the cams in the back rails 2405 2405 Turn cam 180 degrees to lock 2414 cam holes to inside Step 17 Attach back rails to the front rail.
- Page 14 Assembly Instructions Fittings you will need for this step: Step 18 Secure the back panels to the shelves end and back rail panels. Using screws secure the back panels 2404 2410 & to the 2408 shelves & back rails 2405 2408 Please ensure screws locate into the grooves...
- Page 15 Assembly Instructions Step 19 WARNING Fixing to wall We recommend that this IN ORDER TO PREVENT OVERTURNING unit is fixed to a suitable THIS PRODUCT MUST BE USED WITH wall to prevent possible THE WALL ATTACHMENT DEVICE PROVIDED overbalancing. We have included a fixing bracket Serious or fatal crushing injuries can occur from furniture tipping over.
- Page 16 Assembly Instructions Congratulations! Your unit is complete. Important Information If you need help or have damaged or missing parts, call the Customer Helpline: 01709 534123 8am - 4.30pm (Monday to Thursday) 8am - 2.30pm (Fridays) (by contacting the customer service line your statutory rights are not affected) Please have the following information to hand: >>...
Need help?
Do you have a question about the Henderson SG855 Series and is the answer not in the manual?
Questions and answers