Table of Contents
Advertisement
Quick Links
GDO-12 Wiring and Installation Instructions
Wireless WPE-2v1
WPE-2V1 KIT -
SAP# ORDER NO. 86802
ITEM
DESCRIPTION
1
WPB-04.02 TX ASSEMBLY
2
WPB-04.02 RX ASSEMBLY
3
BASE STATION WPE2V1 ASSEMBLY
4
MOUNTING KIT
FLUSH MOUNTING KIT -
5
PEB4-W1 BRACKET
6
TAPTITE SCREW "P" M3 X 8
7
SELF TAPPING SCREW M6 X 25
8
PLASTIC WALL PLUG 6.7 X 25
9
TAPTITE SCREW "P" BLACK ZINC M3 X 12
WARNING! When using PE Beams, the doorway must be
clear of all obstructions and persons at all times. The location
of the beams and manner in which it is installed might not
give safety protection at all times. Check to make sure
that the height of the beam and type used give maximum
protection possible.
WARNING! PE beams must be installed
if the closing force at the bottom edge
of the door exceeds 400N (40kg force)
Important Safety Instructions
WARNING!
ELECTROCUTION!
CAUTION:
Fall from ladder
Entrapment
Doc # 160097_01
Part # 86806
Released 04/06/19
Safety Beam Kits
QTY
1
1
1
1
2
8
4
4
8
•
When using Safety beams, the doorway must be clear of all obstructions and persons
a all times. The location of the beams and manner in which they are installed might not
give safety protection at all times.
•
The sensors need to be 100mm above the floor level, however, the exact position must
be chosen in such a manner that it suits the application, the environmental conditions
and provides maximum safety protection.
•
When using auto close mode, a Safety beam must be fitted correctly and tested for
operation at regular intervals. Extreme caution is recommended when using auto close
mode. All safety rules must be followed.
•
Disconnect the power cord from mains power and battery backup (if installed) before
making any repairs or removing covers on openers.
•
Ensure ladder is the correct type for job.
•
Ensure ladder is on flat ground.
•
Ensure user has 3 points of contact while on ladder.
•
Ensure the garage door is in good working order by undertaking regular servicing.
•
Safety beams must be installed if the closing force at the bottom edge of the door exceeds
400N (40kg)
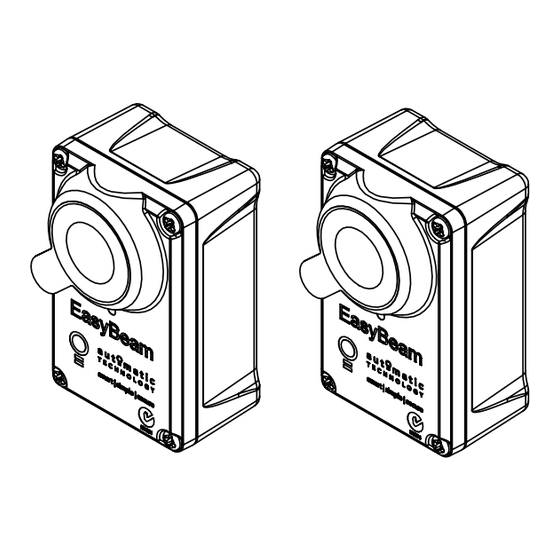
EasyBeam
PE-3v1
TM
EASYBEAM P.E.-3V1 KIT
SAP# ORDER NO. 62626
ITEM
DESCRIPTION
14
EASYBEAM RX-TX SET
4
MOUNTING KIT
3
Right side
bracket
MOUNTING KIT
ITEM
DESCRIPTION
1
PE 2000TS BRACKET
2
ADJUSTMENT BRACKET
3
MOUNTING BRACKET
4
TAPTITE SCREW "B" PH M3 X 5 ZNC
5
PAN HEAD SCREW W/WASHER M5 X 10
QTY
1
1
5
2
4
1
5
QTY
2
2
2
8
4
Advertisement
Table of Contents

Related Manuals for Automatic Technology GDO-12


Summary of Contents for Automatic Technology GDO-12
- Page 1 Safety Beam Kits GDO-12 Wiring and Installation Instructions EasyBeam PE-3v1 Wireless WPE-2v1 EASYBEAM P.E.-3V1 KIT WPE-2V1 KIT - SAP# ORDER NO. 62626 SAP# ORDER NO. 86802 ITEM DESCRIPTION ITEM DESCRIPTION EASYBEAM RX-TX SET WPB-04.02 TX ASSEMBLY MOUNTING KIT WPB-04.02 RX ASSEMBLY...
- Page 2 Wireless Kit WPE-2v1 for GDO-12V1 Mounting the Base Station to the Opener a. Disconnect the power supply to the opener. b. Remove the light diffuser cover via screw at the bottom. c. Mount the base station board next to the control board as shown using the screw supplied.
- Page 3 EasyBeam Kit PE-3v1 NOTE: Mount the receiver on the side of the doorway / gateway TX - 2 RX - 2 closest to the opener / console. Assembling the Mounting Bracket RX - 1 TX - 1 Assemble the mounting bracket as per font page instructions. NOTE: When using two (2) sets of Safety Beams within the 100mm opening you must alternative the configuration.
- Page 4 1 year This warranty is to be read in conjunction with the owner’s copy of the opener installation instruction. © March 2019 Automatic Technology (Australia) Pty Ltd. All rights reserved. No part of this document may be reproduced without prior permission.
Need help?
Do you have a question about the GDO-12 and is the answer not in the manual?
Questions and answers