
Subscribe to Our Youtube Channel
Related Manuals for Razor SIDE MOUNT SYSTEM


Summary of Contents for Razor SIDE MOUNT SYSTEM
- Page 1 M A N U A L R A Z O R S Y S T E M 2 . 5 S I D E M O U N T S Y S T E M W W W . G O S I D E M O U N T . C O M...
- Page 2 M A N U A L R A Z O R H A R N E S S 2 . 5 S I D E M O U N T S Y S T E M W W W . G O S I D E M O U N T . C O M...
-
Page 3: Table Of Contents
General Information 1.1 Important Warnings CE-Certificate Important Cautions Inspection and handling of the BAT Wing Inspection and handling of the Razor Side Mount System Storage Choice of cylinders The Razor Side Mount System Overview The Basic Razor Side Mount System 2.5 The Complete Razor Side Mount System 2.5... -
Page 4: General Information
This manual must be read and understood entirely before using the product. It is advised that you keep this manual in your possession during the entire life of your Razor Side Mount System. FAILURE TO READ, UNDERSTAND, AND FOLLOW THE PRECAUTIONS LISTED IN THIS MANUAL COULD RESULT IN SERIOUS INJURY OR DEATH. -
Page 5: Ce-Certificate
The BCs described in this manual have obtained the CE certification according the follow- ing European norms: EN 250: 2000 for the Razor harness that provides divers with a device for fixing the tanks to the body : it has not to be used deeper than 50 m (164 feet). -
Page 6: Important Cautions
Always perform a pre-dive and post-dive inspection of the Razor Side Mount System. WARNING Do not use your Razor Side Mount System as an assist or “lift bag” for bringing objects to the surface. These objects may be lost during the ascent, creating a sudden increase in buoyancy and loss of buoyancy control. -
Page 7: Inspection And Handling Of The Bat Wing
30 minutes or more, then check the BAT Wing for loss of air. 5. Cross check all valves’ operation and visually inspect your Razor Side Mount System with your dive partner before each dive, prior to entering the water. -
Page 8: Inspection And Handling Of The Razor Side Mount System
Rinse the entire BAT Wing with fresh water by dipping in a tub or spraying with a hose. • Rinse all valves to make sure all sand and other debris is removed. 2. Dry the Razor Side Mount System: if hanging, make sure it is not in direct sunlight. Dry completely if storing, slightly inflated. WARNING Avoid prolonged or repeated exposure to chlorinated water, such as in swimming pools. -
Page 9: Storage
Post-Dive : Razor Side Mount System cleaning and examination and storage Store your Razor Side Mount System, after it has fully dried, by partially inflating and then placing it in a cool, dark, dry, location: ultraviolet rays will shorten the life of the fabric and cause colors to fade. -
Page 10: Choice Of Cylinders
WARNING Diving with more than 2 cylinders requires special training to ensure the safety of the diver. These instructions are not included in this manual. Inquire with your official Razor instructor or from your dealer for the appropriate courses. W W W . G O S I D E M O U N T . C O M... -
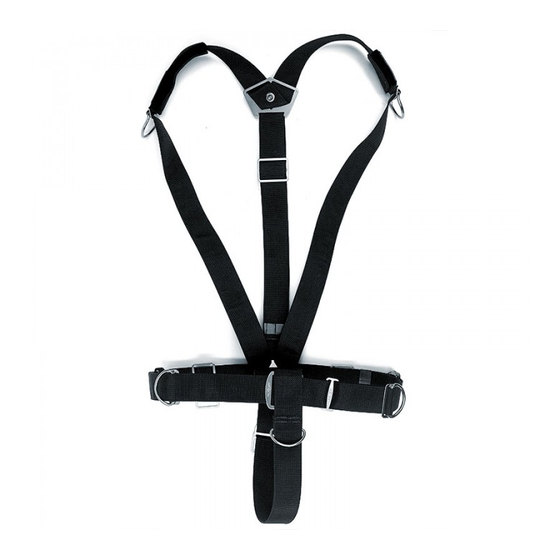
Page 11: The Razor Side Mount System
Each of the components in the system is designed to fit together seamlessly and work as part of an integrated whole. The Razor Harness is at the heart of this sys- tem and is the foundation of all the Bogarthian Side-Mount procedures. - Page 12 It fits like a glove and is very comfort- able to wear. The Razor will fit anyone no matter what their physical size or shape and is quick and easy to set up and adjust so that each individual diver gets a custom fit using standardized hardware.
-
Page 13: The Basic Razor Side Mount System
2 The Razor Side Mount System 2.2 The Basic Razor Side Mount System 2.5 Package content Razor Harness R edundant BAT Wing T Weight System U niversal Spares Kit D P ocket Weight Base Layer E All hardware is heavy duty passivated stainless steel W W W . - Page 14 2 The Razor Side Mount System 2.3 The Complete Razor Side Mount System 2.5 Package content Razor Harness R edundant BAT Wing T Weight System E xpandable SM Pouch 2 Double Ender U niversal Spares Kit F S ide Mount Bungee Kit...
-
Page 15: The Razor Harness
3 The Razor Harness 2.5 3.1 Package content Hardware plates: DSP (Delta Shoulder Plate) 1 x Bungee Tri-glide MBP (Mini Back Plate) 2 x DAPs (Drop Attachement Points) D Wing Tab Slotted BAT Wing Tri-glide B utt B Ring G... -
Page 16: Package Content
3 The Razor Harness 2.5 3.1 Package content Webbing and hardware bag Hardware Bag S houlder and Waist Strap Lumbar/Crotch Strap All hardware is heavy duty passivated stainless steel W W W . G O S I D E M O U N T . C O M... - Page 17 3 The Razor Harness 2.5 3.1 Package content Hardware bag content: L ong Neopren Razor Logo Wrap for 2 x 2" Bent Shoulder D Rings Shoulder Webbing (Oral Inflator) B ag with Screws and Washers G S hort Neopren Razor Logo Wrap...
- Page 18 3 The Razor Harness 2.5 3.1 Package content 1 DSP (Delta Shoulder Plate) 1 12ft Shoulder / Waist Strap resin reinforced web- bing with grommet, button head screw and washer 2 Neoprene Razor Logo Wraps for shoulder webbing 2 2” Bent Shoulder D Rings...
-
Page 19: Hardware Layout
3 The Razor Harness 2.5 3.2 Hardware layout Hardware setup: DSP (Delta Shoulder Plate) 2 x 2" Bent Shoulder D Rings MBP (Mini Back Plate) 2 x DAPs (Drop Attachement Points) D 4 x 1" Low Profile Waist D Rings... - Page 20 3 The Razor Harness 2.5 3.2 Hardware layout Figure 2: Delta Shoulder Plate (DSP) & Mini Backplate (MBP): W W W . G O S I D E M O U N T . C O M...
-
Page 21: Rigging The Razor Harness
4 Rigging the Razor Harness 2.5 4.1 Tools You will need the following tools to rig your Razor BAT Wing: W W W . G O S I D E M O U N T . C O M A hex wrench to fasten the button head screws. -
Page 22: Overview
It is highly recommended that you use the T weight system with the Razor Harness however if you are going to put weight directly on the Razor Harness then it is advisable to work out how much weight you will need and where you want to place it on your harness before assembling it (see Step 9: Weighting and Trim). - Page 23 4 Rigging the Razor Harness 2.5 Step 1: Rigging the Razor Harness Slotted BAT Wing Tri-glide and Butt B Ring P lace the Slotted BAT Wing Tri-glide and the Butt B Ring as shown next to the lumbar/crotch strap. R un the webbing through the...
- Page 24 Mini Back Plate and bicycle tire inner tube N ow slide the Mini Back Plate on the webbing by pointing the Razor logo of the plate to the inside and the 2 holes facing the Butt B Ring. M ove the Mini Back Plate so...
- Page 25 Y ou can run the webbing double through the wide slots of the Bungee Tri-glide. O nce placed you should see the Razor engraved logos on the outside of the harness on the same side as the the scooter D Ring is.
- Page 26 (see Step 9: Weighting and Trim) but it is recommended to use the T Weight System rather than add weight directly to the Razor Harness itself. W W W . G O S I D E M O U N T . C O M...
- Page 27 4 Rigging the Razor Harness 2.5 Step 1: Rigging the Razor Harness Shoulder Webbing and Tubes R un the shoulder strap webbing through the Delta Shoulder Plate and screw it down with a screw and washer. A dd a bicycle inner tube to both sides of the webbing.
- Page 28 4 Rigging the Razor Harness 2.5 Step 1: Rigging the Razor Harness Mini Back Plate and Tube N ow place the 2" Bent Shoulder D Rings to both sides. Check that the D Rings are pointing out from the webbing.
- Page 29 4 Rigging the Razor Harness 2.5 Step 1: Rigging the Razor Harness Mini Back Plate and Tube A ttach the Neopren Razor Logo Wraps around the webbing. Make sure that the long version is on the right side in preparation for the oral inflator tube.
- Page 30 4 Rigging the Razor Harness 2.5 Step 1: Rigging the Razor Harness W W W . G O S I D E M O U N T . C O M Pass each shoulder strap through the inside of slot C on the MBP then back out through slot D.
-
Page 31: Step 2: Adjusting The Height Of The Mbp
4 Rigging the Razor Harness 2.5 Step 2: Adjusting the height of the MBP The Lumbar / Crotch Strap is a continuous piece of Adjustment webbing that begins at the DSP. W W W . G O S I D E M O U N T . C O M... - Page 32 4 Rigging the Razor Harness 2.5 Step 2: Adjusting the height of the MBP W W W . G O S I D E M O U N T . C O M The MBP can be moved either up or down the lumbar/crotch strap webbing until it is positioned in the ideal location based on individual diver preference.
- Page 33 4 Rigging the Razor Harness 2.5 Step 2: Adjusting the height of the MBP W W W . G O S I D E M O U N T . C O M The position of the MBP will determine the position of the lower attachment points for the bottom of the Side-Mount Tanks.
-
Page 34: Step 3: Fitting The Lumbar / Crotch Strap
4 Rigging the Razor Harness 2.5 Step 3: Fitting the Lumbar / Crotch Strap W W W . G O S I D E M O U N T . C O M Adjustment If using a butt mounted primary light canister... - Page 35 4 Rigging the Razor Harness 2.5 Step 3: Fitting the Lumbar / Crotch Strap W W W . G O S I D E M O U N T . C O M The DSP is placed with the button head screw on the inside against the divers back W W W .
-
Page 36: Step 4: Adjusting The Length Of The Shoulder Straps
T Weight System rather than add weight directly to the Razor Harness itself (see Step 9: Weighting and Trim). All the hardware on both sides of the waist straps will have to be removed in order to do this. -
Page 37: Step 5: Fitting The Chest D Rings
4 Rigging the Razor Harness 2.5 Step 5: Fitting the Chest D Rings W W W . G O S I D E M O U N T . C O M Making sure the DSP remains in the correct position the shoulder D Rings should be positioned at the same approximate height as the ends of the clavicle. -
Page 38: Step 6: Fixing Attachment Hardware On The Waist Straps
W W W . G O S I D E M O U N T . C O M The DAPs are an ideal location to clip off the Razor Expandable Pouch as well as other items such as reels or lift bags for example. - Page 39 T Weight System rather than add weight directly to the Razor Harness itself (see Step 9: Weighting and Trim). Hardware on both sides of the waist straps will have to be removed in order to do this.
- Page 40 4 Rigging the Razor Harness 2.5 Step 6: Fixing Attachment Hardware on the Waist Straps W W W . G O S I D E M O U N T . C O M Steel tanks will tend to remain negative throughout the dive even as gas is used from them.
-
Page 41: Step 7: Fitting The Low Profile Buckle
Wide Gauge Tri-glide. The closing system then is not bent to your body but on the other side you can see one Razor logo more engraved ;) W W W . G O S I D E M O U N T . C O M... - Page 42 4 Rigging the Razor Harness 2.5 Step 7: Fitting the Low Profile Buckle W W W . G O S I D E M O U N T . C O M The loop of webbing between the buckle and the wide gauge Tri-glide should be small enough so that neither of the buckle plates can rotate and are held in the correct orientation.
- Page 43 4 Rigging the Razor Harness 2.5 Step 7: Fitting the Low Profile Buckle W W W . G O S I D E M O U N T . C O M The buckle is tightened by passing the right hand waist strap through both of the buckle plates and then back under the large plate.
-
Page 44: Step 8: Sizing And Fitting The Side-Mount Bungee
4 Rigging the Razor Harness 2.5 Step 8: Sizing and Fitting the Side-Mount Bungee W W W . G O S I D E M O U N T . C O M Clip the swiveling snap bolt already attached to the SM Bungee... - Page 45 4 Rigging the Razor Harness 2.5 Step 8: Sizing and Fitting the Side-Mount Bungee W W W . G O S I D E M O U N T . C O M This should be approximately the right length for the SM Bungee and it can be temporarily attached to the snap bolt using a cable tie as shown below.
- Page 46 Expandable Pouch as a backup. W W W . G O S I D E M O U N T . C O M The complete Razor Side Mount System comes with a Spare Side Mount Bungee included in the package.
-
Page 47: Step 9: Weighting And Trim
4 Rigging the Razor Harness 2.5 Step 9: Weighting and Trim Diving either under weighted or over weighted is inefficient and potentially dangerous. Correct weighting is critical to mastery of buoyancy control and trim allowing easier more comfortable diving. Both the correct amount of ballast weight required and its ideal position on the diver need to be established. - Page 48 4 Rigging the Razor Harness 2.5 Step 9: Weighting and Trim W W W . G O S I D E M O U N T . C O M Weights can be added easily to either the Lumbar T Weight Belt or the Waist T Weight Belt or to both if required.
- Page 49 4 Rigging the Razor Harness 2.5 Step 9: Weighting and Trim Refer to the "Razor T Weight System" manual and as well check out the Manual "Razor Pocket Weight System" for instructions on how to attach weights correctly to the Razor Harness.
-
Page 50: Step 10: Final Adjustments
W W W . G O S I D E M O U N T . C O M Many divers choose to get 2 Razor Harnesses, 1 for cold water diving in a Drysuit and 1 for warm water diving in a Wetsuit so that they do not have to worry about adjusting the harness or changing D rings etc. - Page 51 4 Rigging the Razor Harness 2.5 Step 10: Final Adjustments W W W . G O S I D E M O U N T . C O M...
- Page 52 M A N U A L R A Z O R T W E I G H T S Y S T E M S I D E M O U N T S Y S T E M W W W . G O S I D E M O U N T . C O M...
- Page 53 Content Table of contents The Razor T Weight System Package Content Overview Rigging the TWS Lumbar Strap Rigging the TWS Waist Strap Weighting and Trim Go Diving! W W W . G O S I D E M O U N T . C O M...
-
Page 54: The Razor T Weight System
1 The Razor T Weight System 1.1 Package Content Parts: A Lumbar Strap B Waist Strap N eoprene Wrap 4 Button Head Screws 4 Washers All hardware is heavy duty passivated stainless steel W W W . G O S I D E M O U N T . C O M... -
Page 55: Overview
W W W . G O S I D E M O U N T . C O M The Razor T Weight System (TWS) is a modular 2 part weighting system designed to make adding or removing weights from the Razor Harness quick and easy. - Page 56 1 The Razor T Weight System 1.2 Overview W W W . G O S I D E M O U N T . C O M The TWS is designed to use standard lead diving weights that are universally avail- able.
- Page 57 1 The Razor T Weight System 1.2 Overview Weight can be added directly to the Razor Harness itself (see Razor Harness Manual) but this is not recommended. The advantage of using the TWS over putting weights directly on the harness is fourfold:...
-
Page 58: Rigging The Tws Lumbar Strap
2 Rigging the TWS Lumbar Strap a R emove the BAT wing if fitted to the Razor Harness. b B olt the top of the Lumbar Strap webbing to the bottom hole of the DSP using one of the supplied button head screws and a washer. - Page 59 Ideally the Velcro closure of the Neoprene Wrap should be positioned on the inside of the Razor Harness against the divers back. The loose end of the Lumbar strap should be secured inside the Neoprene wrap. The Neoprene wrap should not be placed around the webbing loop below the DSP so as not to inter- fere with the SM Bungee.
-
Page 60: Rigging The Tws Waist Strap
2 outside grommets. e T he DAPs can be moved on the Razor Harness either closer to or further away from the MBP as required to get a good fit with the Waist Strap of the TWS. -
Page 61: Weighting And Trim
4 Weighting and Trim W W W . G O S I D E M O U N T . C O M It is very important to dive properly weighted and trimmed out in a well balanced equipment configuration. This will make your diving both safer and easier. W W W . - Page 62 After a few dives as you become more relaxed and comfortable diving your Razor Side Mount System you may find that you can reduce your ballast weight a little. W W W . G O S I D E M O U N T . C O M When you are correctly weighted you will need very little gas in your Bat Wing.
- Page 63 M A N U A L R A Z O R B A T W I N G 2 . 5 S I D E M O U N T S Y S T E M W W W . G O S I D E M O U N T . C O M...
- Page 64 Rigging the Razor BAT Wing Tools Step 1: Adjusting and Attaching the top of the BAT Wing to the DSP of the Razor Harness Step 2: Attaching and Adjusting the BAT Wing Waist Bungee Step 3: Attaching and Adjusting the BAT Wing Rear Bungee...
-
Page 65: The Razor Bat Wing
POCKET WEIGHT BASE LAYER. P rimary Wing: 19” large diameter inflation hose with fixed low profile elbow and power inflator L arge Razor Logo Wrap for large diameter Inflation Hose 6 ” LPI Hose H eavy Duty Pull Dump Valve B ackup Wing:... -
Page 66: Overview
1 The Razor BAT Wing 1.2 Overview Once your Razor Harness and T Weight System have been set up then you can attach the BAT Wing to the Harness. The BAT Wing should be worn with the Primary Wing on the outside and the Backup Wing on the inside. - Page 67 1 The Razor BAT Wing 1.2 Overview The dump valve and the large diameter inflator hose elbow have compa- tible fittings and can be positioned on either the left or right hand side of the BAT wing according to diver preference.
- Page 68 1 The Razor BAT Wing 1.2 Overview Normally when using a Drysuit the dump valve will be positioned on the left hand side of the wing with the large diameter Inflator hose on the right hand side of the wing. The...
- Page 69 1 The Razor BAT Wing 1.2 Overview When using a wetsuit normally the fittings should be switched so that the large dia- meter inflator hose is on the left hand side and the LPI hose can deliver from the regu- lator on the left hand Side Mount tank.
- Page 70 1 The Razor BAT Wing 1.2 Overview When changing the fittings make sure that they are not cross threaded when screwing them in. The best way to do this is to turn anti clockwise until the threads drop into position and then tighten gently.
- Page 71 1 The Razor BAT Wing 1.2 Overview The orientation of the elbow can be adjusted so that the large diameter inflation hose routes comfortably under the arm and across the chest. To do this start the threads a couple of...
- Page 72 1 The Razor BAT Wing 1.2 Overview When replacing the dump valve it is important that the spring is located in the right position in the center and can move freely so that the valve does not stick in the closed position.
-
Page 73: Rigging The Razor Bat Wing
2 Rigging the Razor BAT Wing 2.1 Tools You will need the following tools to rig your Razor BAT Wing: A hex wrench to fasten the button head screws. (included with the complete system in the Universal Spares Kit.) A lighter to burn and seal the ends of the cut webbing and elastic bungee cord. -
Page 74: Step 1: Adjusting And Attaching The Top Of The Bat Wing
/ infla- tor elbow are at the height of your belly button just above the waist strap of the Razor Harness. Depending on the individual setup the top of the wing can be bolted directly into the DSP or into the Bungee Triglide if required to get a perfect fit. -
Page 75: Step 2: Attaching And Adjusting The Bat Wing Waist Bungee
BAT Wing in a low profile streamlined position even when the wing is inflated and still give easy unrestricted A simple overhand knot access to all of the Razor Harness attachment points. tied into the end of the bungee cord will hold the... - Page 76 2 Rigging the Razor BAT Wing Step 2: Attaching and Adjusting the BAT Wing Waist Bungee The waist bungee should be fairly snug with the wing completely deflated and both bungee cords will need to be adjusted to achieve the correct length and tension to keep the BAT wing in a nice low profile position when it is inflated and to prevent it from floating away from the divers body.
-
Page 77: Step 3: Attaching And Adjusting The Bat Wing Rear Bungee
The BAT Wing Rear Bungee is designed to secure the bottom of the BAT Wing in a low profile streamlined position even when the wing is inflated and still give easy unrestricted access to all of the Razor Harness attachment points. - Page 78 The bottom of the BAT Wing with the Wing Tab attached should line up with the slot of the Wing Tri- glide of the Razor Harness that holds the Butt B ring in position. The Wing Tri-glide can be moved up or down the crotch strap webbing of the Razor Harness to achieve the desired location.
- Page 79 Lark’s Head Hitch on the Wing Tab should be passed through the slot of the Wing Tri-glide attached to the Razor Harness and then run up to the MBP and passed through the two holes either side of slot B.
-
Page 80: Step 4: Adjusting And Attaching The Inflation Hose
2 Rigging the Razor BAT Wing Step 4: Adjusting and Attaching the Inflation Hose With the BAT Wing now attached to the Razor Harness the harness should be put on so that the large diameter inflation hose and power inflator can be correctly positioned. - Page 81 2 Rigging the Razor Harness: Step 4: Adjusting and Attaching the Inflation Hose The oral inflator mouthpiece should now face up towards the diver along with the power inflator button and Schrader valve. The large diameter inflation hose will run over the kidney area under the arm and across the lower chest.
- Page 82 Wrap which has to go around the large diameter inflator hose as well as the web- bing of the Razor Harness is larger than the 2 Logo Wraps that come with the Razor Harness. They should not be confused as they are not interchangeable.
-
Page 83: Step 5: Positioning The Oral Inflator Hose Of The Backup Wing
The oral inflator of the Backup wing should be routed over the right shoulder and can be held securely in place by passing it under the long neoprene logo wrap and the bycicle inner tube on the right hand shoulder of the Razor Harness webbing. - Page 84 Spare mouthpieces are available and it is recommended to carry one in your Razor Expandable Pouch in case you should lose it while diving. In the event it should be lost while diving and you have no replacement it will have no effect at all unless you are actually using the Backup wing.
-
Page 85: Step 6: Adding Weights To The Pocket Weight Layer
BAT wing. The pouches can be bought seperately at our online shops or along with our dealers Detailed information on how to juggle with weights you will find in the "Razor Pocket Weight System" manual... -
Page 86: Step 6: Adding Weights To The Pocket Weight Layer
2 Rigging the Razor BAT Wing Step 6: Adding weights to the Pocket Weight Layer Place the pockets against your back if you want ..to easy adjust the weights of your students even in the water by adding some more weights left and right top find out the right amount to use ... -
Page 87: Step 6: Adding Weights To The Pocket Weight Layer
2 Rigging the Razor BAT Wing Step 6: Adding weights to the Pocket Weight Layer After you know the exact weight place the pockets between the weight layer and the wing itself. You can distribute the weight pockets depending on your needs of horizontal trim... -
Page 88: Step 6: Adding Weights To The Pocket Weight Layer
2 Rigging the Razor BAT Wing Step 6: Adding weights to the Pocket Weight Layer Once you placed the pockets on the wing and for example you have to leave the weights after a day of diving on the boat, then just open the pouches and take the... -
Page 89: Step 7: Correct Use Of The Bat Wing
2 Rigging the Razor BAT Wing Step 7: Correct Use of the BAT Wing Only use one wing at a time either the Primary or the Backup. Make sure the wing you are not using is completely empty while diving so that you only have 1 air space to control. - Page 90 2 Rigging the Razor BAT Wing Step 7: Correct Use of the BAT Wing To use the oral inflation hose place the very end of the bite on mouthpiece between your teeth horizontally and make a seal around it with your lips.
- Page 91 2 Rigging the Razor BAT Wing Step 7: Correct Use of the BAT Wing After diving both the Primary and Backup wings should be drained of any water that is inside and partially inflated to dry. Both Primary and Backup wings can be drained of water in exactly the same way air is vented from them although it is easier if you orally inflate them a little first so that you can force any water out under pressure.
-
Page 92: Last Step: Go Diving
M A N U A L R A Z O R E X P A N D A B L E P O U C H S I D E M O U N T S Y S T E M W W W . - Page 93 Content Table of contents The Razor Expandable Pouch (REP) Package Content Overview Go Diving! W W W . G O S I D E M O U N T . C O M...
- Page 94 1 The Razor Expandable Pouch (REP) 1.1 Package Content D ouble Enders (only with the complete system) B Large Heavy Duty Top Zipper C 2 Internal Lanyards D 2 Internal Pockets E Velcro Expandable Sides F 1 Inch Stainless Steel D Rings M esh Pocket for Slates / Wetnotes W W W .
- Page 95 The way that the REP is attached with a double ender clipped off to each of the small stainless steel D Rings sewn into the REP and then each double ender clipped to the DAPs on the Razor Harness provides a very solid secure attachment which will prevent accidental loss of the pouch.
- Page 96 1 The Razor Expandable Pouch (REP) 1.2 Overview W W W . G O S I D E M O U N T . C O M This position also prevents the REP from swinging from side to side while swim- ming or getting caught between the diver’s body and the SM tanks.
- Page 97 1 The Razor Expandable Pouch (REP) 1.2 Overview W W W . G O S I D E M O U N T . C O M The REP has 2 internal Velcro closure pockets on the inside of the front panel which were designed to carry small items such as a backup cutting tool like the EZZYCUT or your Spare SM Bungee.
-
Page 98: Go Diving
W W W . G O S I D E M O U N T . C O M Please contact Go Side Mount directly if you have any questions or problems with your Razor BAT Wing. Best Wishes HP Hartmann info@gosidemount.com... - Page 99 M A N U A L R A Z O R S Y S T E M 2 . 5 S I D E M O U N T S Y S T E M W W W . G O S I D E M O U N T . C O M...
Need help?
Do you have a question about the SIDE MOUNT SYSTEM and is the answer not in the manual?
Questions and answers