Table of Contents
Advertisement
Quick Links
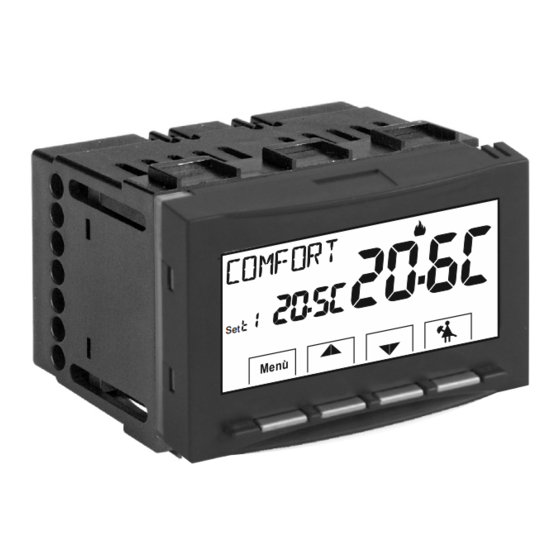
DIGITAL THERMOSTAT
MENU DRIVEN with BACKLIT DISPLAY
Recessed installation
www.perry.it
PE - DETIPE024EN
12/19
S e t
PERRY ELECTRIC Srl
Via Milanese, 11
22070 VENIANO (Como) ITALY
Mod. TE541
Power supply: 230V~
Winter / Summer
2 temperature levels + antifreeze
Input for remote contact
Power supply:
230V~
230V~
ENGLISH
Advertisement
Table of Contents

Related Manuals for Perry Electric TE541


Summary of Contents for Perry Electric TE541
- Page 1 DIGITAL THERMOSTAT MENU DRIVEN with BACKLIT DISPLAY Recessed installation Mod. TE541 Power supply: 230V~ Winter / Summer 2 temperature levels + antifreeze Input for remote contact S e t Power supply: 230V~ 230V~ PERRY ELECTRIC Srl ENGLISH Via Milanese, 11 www.perry.it...
-
Page 2: Table Of Contents
CONTENTS DEVICE PRESENTATION pag. 3 pag. 16 11 - CONFIGURATION MENU (installer) pag. 16 WARNINGS pag. 3 11.1 - Access to configuration menu pag. 4 11.2 - Change set language pag. 16 1 - TECHNICAL DATA pag. 5 pag. 17 11.3 - Type of temperature adjustment mode 2 - FACTORY SETTINGS 11.3.1 - Selection of the temperature adjustment mode... - Page 3 PRESENTATION Dear Customer, thank you for choosing our product. The thermostat, suitable for all heating and/or cooling system, is fitted with a large and clear backlit display to keep all its functions under control in real time. The fundamental feature is its easy to use menu navigation, which makes it extremely user-friendly despite its comprehensive range of functions.
-
Page 4: Technical Data
1 - TECHNICAL DATA Power supply: 230V~ 50-60 Hz timed 6 secs. / always on / always off Display and key back-lighting: Type of action, disconnection and device: 1 / B / U / Electronic Type of output: voltage free relay with COM / NO / NC changeover contact, max 5(3)A/250 V ~ Keeping memory setting during power failure: Software:... -
Page 5: Factory Settings
2 -FACTORY SETTINGS The data entered in the thermostat called «FACTORY SETTINGS» refer to operation defined as «Standard». The following chapters describe all customisable functions, in order to satisfy any ambient comfort need. FACTORY SETTINGS TABLE (default) RESTORE «Installer RESET» PARAMETER DEFAULT Restore «reset»... - Page 6 3 - KEY FUNCTION LEGEND DISPLAY AND KEY BACK-LIGHTING Touching any key activates back-lighting, displaying the words selection and navigation press the desired key within 6 secs. to vary the settings (touching any key reactivates a 6 sec time- out). Note: setting the backlight always on (par.
-
Page 7: Display Features
4 - DISPLAY FEATURES Display Set temperature Currently active set temperature depending on the desired setting: t1 Comfort or t2 Economy (saving) or t antifreeze Current program pause (example: for household cleaning) Note: further displays Enabling thermostat from remote control are described in the specific operation Info and thermostat operating mode, menu items... -
Page 8: Installation
5 - INSTALLATION 5.1 - DIMENSIONS 5.3 - INSTALLATION EXAMPLES Disconnect the 230V~ mains power supply Examples of installation in heating systems with a thermostat that controls: A) Wall mounted boiler B) Burner or Circulation pump or Motorized solenoid valve C) Zone solenoid valve N.B.: the examples contained in this documentation are in principle. -
Page 9: Electrical Connections Pag
5 - INSTALLATION 5.4 - ELECTRICAL CONNECTIONS example: Examples of electrical connections Telephone programmer ATTENTION! Disconnect the 230V~ mains voltage Contact for remote Connection to a boiler 230V~ power supply terminals thermostat control and to a telephone programmer ! Connect line voltage power supply to the terminals: n°... -
Page 10: Start The Thermostat
6 - START THE PROGRAMMABLE THERMOSTAT The first time mains voltage is engaged, the thermostat performs a lamp-test by switching on all display segments, displaying the installed software version for a few seconds. When this phase is over, the thermostat asks to select the language of use. Select the desired language by scrolling through the available languages using the keys. -
Page 11: Use Of The Thermostat
7 - USE OF THE THERMOSTAT 7.1 - MODIFICATION of temperature from COMFORT to ECONOMY (energy saving) and vice-versa Press the MENU key briefly WINTER = heating (factory setting) With COMFORT temperature MODIFICATION OF 7.2 - T Set TEMPERATURES SET Directly press the ... - Page 12 7 - USE OF THE THERMOSTAT OFF (disabling the thermostat) 7.4 - This setting has the purpose of locking thermostat functions when heating or cooling must remain off. 1- In «CLEANING» mode (par. 7.3), press the button briefly to set the thermostat to OFF and consequently «Switch off the system».
- Page 13 9 - ACCESS TO MENUS Menu From the normal thermostat operation press the key for 3 secs. to access the first available menu. Or, if a secret user and/or installer access code has been previously entered, follow the steps below to access the user or installer menus. with the user and installer password main screen 1°...
- Page 14 10 - USER MENU 10.1 - SET WINTER OR SUMMER MODE default: From normal thermostat operation, access the menus by pressing and holding the «Menu» key. Under item SEASON SEt confirm with OK. Select with the keys the WINTER (heating) or SUMMER (cooling) mode and confirm with OK.
- Page 15 10 - USER MENU 10.3 - USER PASSWORD Menu 10.3.1 - Entering the user password No code is set in the factory configuration. From normal thermostat operation access the menus by pressing and holding the «Menu» key. 1- Select item USER PASSWORD SEt with the keys ...
- Page 16 11 - CONFIGURATION MENU (installer) 11.1 - ACCESS TO CONFIGURATION MENU ATTENTION: access to the configuration menu is recommended for the installer or experienced users since the modification of some settings might affect correct system operation. From normal thermostat operation access the menus by pressing and holding the «Menu»...
- Page 17 11 - CONFIGURATION MENU (installer) 11.3 - TYPE TEMPERATURE ADJUSTMENT METHODS thermal inertia over temperature The thermostat is factory set to work in THERMAL DIFFERENTIAL mode °C/°F of the heating element ON/OFF with a preset thermal differential value (Hysteresis) of 0,3 °C. Note: adjustable from 0,2 °C to 1,2 °C (from 0,3 °F to 2,1 °F).
- Page 18 11 - CONFIGURATION MENU (installer) 11.3.2 - Setting hysteresis for thermal differential ON-OFF From normal thermostat operation access the menus by pressing and holding the «Menu» key. •Through the path CONFIGUR SEt -> RULE SEt -> select On:OFF, then press •With the keys enter the desired hysteresis value ...
- Page 19 11 - CONFIGURATION MENU (installer) 11 - MENU PER LA CONFIGURAZIONE (installatore) 11.5 - CORRECTION OF ROOM TEMPERATURE READING If for any reason the thermostat must be installed in a position where the measured room temperature might be affected (e.g. perimeter wall which is on average colder in winter and warmer in summer than the rest of the dwelling) the device has 2 separate parameters to adjust the room temperature measured in the Winter and Summer modes.
- Page 20 11 - CONFIGURATION MENU (installer) From normal thermostat operation access the menus by pressing and holding the «Menu» key. •Through the path CONFIGUR SEt ->, select item LOCKS SEt. Press OK to confirm. In a sequential manner it is possible to set maximum temperature locks (t1 comfort) and/or minimum (t2 economy) for the winter mode and/or maximum temperature (t1 comfort) and/or minimum (t2 economy) for the Summer mode If no locks have been entered yet, the display shows empty flashing fields (- - - -).
-
Page 21: Activation / Disabling With A Telephone Programmer
11 - CONFIGURATION MENU (installer) 11.7 - CONNECTION TO EXTERNAL CONTACT FOR REMOTE THERMOSTAT SWITCHING ON/OFF Before enabling any item of the «INPUT» menu listed below ensure you have connected an external contact to terminals 1 and 2 (AUX). A remote device may be connected to the thermostat (e.g. telephone programmer, hourly switch, switch) able to remotely enable/disable the thermostat. - Page 22 11 - CONFIGURATION MENU (installer) E.g. Telephone programmer 11.7.1a - Example of remote thermostat switching on/off, connected to a telephone programmer with «nA» contact (NO NO contac normally open). - Programmer contact closure (status change): causes temperature t1 comfort override and displaying associated symbols/setpoints and the steady icon “...
-
Page 23: Na Duty - For Normally Open Contact
11 - CONFIGURATION MENU (installer) 11.7.2 - «nA» Duty - for normally open contact ATTENTION: to the 8 and 9 AUX terminals, only connect switches and contacts with insulation suitable to work at 230Vac mains voltage. ATTENTION: to the 1 and 2 AUX terminals, only connect switches and contacts with insulation suitable to work at 230Vac mains voltage. By selecting this function it is possible to connect a NO remote contact which upon closing sets the thermostat in the OFF mode with antifreeze temperature t , unless it has been previously disabled. -
Page 24: Descaling Cycle
11 - CONFIGURATION MENU (installer) 11.8 - DESCALING CYCLE If the function is activated, the thermostat activates every day of the year (24h after the last intervention of the relay), for 2 minutes. It activates the controlled device (pump, valve etc.) to prevent scaling or jamming caused by prolonged inactivity. -
Page 25: Entering And Managing Password
11 - CONFIGURATION MENU (installer) 11.11 - ENTERING AND MANAGING PASSWORDS Some functions of this thermostat may be protected by a user Password (Ut) and/or installer (Inst), so that they may be only modified by authorised persons. No password is active in factory settings. 11.11.1 - ENTERING THE NEW PASSWORD •From normal thermostat operation press the Menu key for 3 secs., t hrough the example:... -
Page 26: Restore (Reset)
11 - CONFIGURATION MENU (installer) 11.12 - RESTORE (RESET) IMPORTANT! The RESTORE (Reset) operation is recommended for the installer or expert user. In fact, this operation deletes many previous settings and programs carried out also according to the type of system. •The operation may be carried out by pressing the Menu key for 3 secs., following the path CONFIGUR Set ->: using keys select item RESTORE SEt confirm with OK. -
Page 27: Possible Problems And Solutions
12 - POSSIBLE PROBLEMS AND SOLUTIONS PROBLEM CAUSE SOLUTION Checl that the switch or protection differ- No power supply ential isn't on OFF The thermostat display is OFF After you turn off the power supply of Electrical cables not properly 230V ~ check the power cables if tightened in the terminals tightened to the appropriate terminals on...
Need help?
Do you have a question about the TE541 and is the answer not in the manual?
Questions and answers