
Subscribe to Our Youtube Channel
Related Manuals for Hans Grohe AXOR Citterio Select 39861001


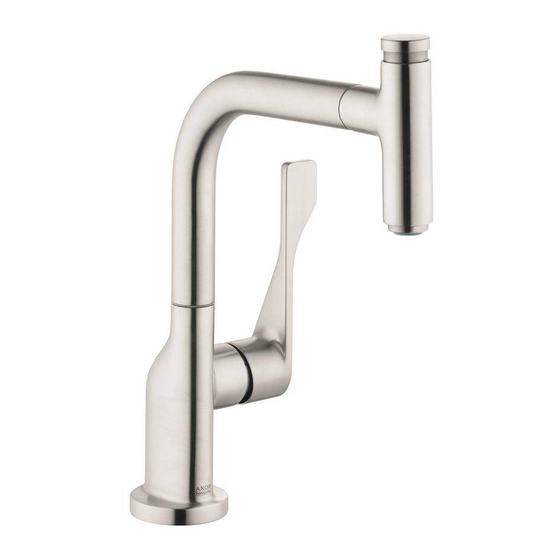
Summary of Contents for Hans Grohe AXOR Citterio Select 39861001
- Page 1 EN Installation / User Instructions / Warranty FR Instructions de montage / Mode d'emploi / Garantie ES Instrucciones de montaje / Manejo / Garantía Citterio Select 39861001 / 39861801...
- Page 2 English Français Technical Information Données techniques Water pressure Pression d’eau Recommended 15 - 75 PSI (0.1 - 0.5 MPa) recommandée 15 - 75 PSI (0.1 - 0.5 MPa) Maximum 145 PSI (1 MPa) maximum 145 PSI (1 MPa) Hot water temp. Température d'eau chaude Recommended 120°-140° F (48° - 60° C)* recommandée 120°-140° F (48° - 60° C)* Maximum 158°F (70° C)* maximum 158°F (70° C)* Max. flow rate 1.75 GPM (6.6 L/min) Capacité nominale 1.75 GPM (6.6 L/min) Hole size in mounting surface 1½" (38 mm) Dimension du trou dans la surface 1½ po (38 mm) Max. depth of mounting surface 2⅜" (60 mm) de montage Profondeur maximale de la surface 2⅜ po (60 mm) de montage * Please know and follow all applicable local plumbing codes when setting the temperature on the water heater.
-
Page 3: Datos Tecnicos
Español Datos tecnicos Tools Required / Outiles Utiles / Herramientas Útiles Presión en servicio recomendada 15 - 75 PSI (0.1 - 0.5 MPa) max. 145 PSI (1 MPa) Temperatura del agua caliente 10 mm recomendada 120°-140° F (48° - 60° C)* 12 mm max. 158°F (70° C)* 17 mm Caudal máximo 1.75 GPM (6.6 L/min) 19 mm Tamaño del orificio en la superficie 1½" (38 mm) de montaje Profundidad máxima de la 2⅜" (60 mm) superficie de montaje * Debe conocer y cumplir todos los códigos locales apli- cables para ajustar la temperatura del calentador de agua. Consideraciones para la instalación This unit meets or exceeds the following: • Para obtener mejores resultados, la instalación... - Page 4 Citterio Select 39861001 / 39861801 9¼" (234 mm) 8⅝" (219 mm) Ø ⅞" (22 mm) Ø 1⅛" (28 mm) 5¼" (133 mm) 4" (103 mm) 3⅞" (99 mm) 5½" (141 mm) 2½" (64 mm) 1⅜" (34 mm) G ⅜ ⅜...
-
Page 5: Installation / Installation / Instalación
Installation / Installation / Instalación English Français Español Place the faucet and sealing ring Placez l'anneau d'étanchéite et le Coloque el oro de sellado y on the mounting surface. robinet sur la surface de montage. el grifo sobre la superficie de montaje. Install the plastic washer, friction Installez la rondelle de plastique, washer, metal washer, and mount- la rondelle en fibre, la rondelle de Instale la arandela plástica, la ing nut. friction, et l'écrou de montage. arandela de fibra, la arandela de fricción y la tuerca de fijación. If the mounting surface Si l'épaisseur du comp- is thicker than 1⅜", or if toir dépasse 1⅜ po, ou Si el espesor de la there is insufficient space, si l'espace disponible est... - Page 6 English Français Español Install the adapters on the stops. Installez les adaptateurs sur les Instale los adaptadores sobre los butées d’arrêt. topes. Install the filters. Failure to install the filters may Installez les filtres. Si ces Instale los filtros. Si no result in unsatisfactory filtres ne sont pas instal- se instalan los filtros, el operation of the faucet.
- Page 7 Adjust the spout rotation / Ajustez la Rotation du Bec / Ajuste la Rotación del Surtidor 150° 24 x 15° 75° 75° 105° 45° 105° 45°...
- Page 8 110° 55° 55° 24 x 15° 85° 25° 85° 25° 110°...
- Page 9 English Français Español Align the hole in the rear of the Alignez le trou à l’arrière du bec Alinee el orificio en la parte spout with the detent pin on the avec la goupille d’arrêt sur le trasera del surtidor con el pasador faucet body. corps du robinet. de tope en el cuerpo del grifo. Press the spout downward firmly. Appuyez fermement sur le bec Presione firmemente el surtidor vers le bas. hacia abajo. Remove the protective cap from the handspray hose. Retirez le capuchon de protection Retire la tapa protectora de la du tuyau de la douchette. manguera del rociador de mano.
- Page 10 12 mm 17 mm English Français Español Connect the handspray hose to the Raccordez le tuyau de la Conecte la manguera del rociador connection hose using the squeez- douchette au tuyau de raccorde- de mano con la manguera de ing connection. ment à l’aide du raccord à bague conexión, usando la conexión a sertie. presión. Install the hose weight. Installez le contrepoids du tuyau. Instale el contrapeso de la manguera. Test the handspray hose. If it does Testez le tuyau de la douchette. Pruebe la manguera del rocia- not retract smoothly, reposition the Si le tuyau se rétracte par à- weight. coups, modifiez la position du dor de mano. Si no se retrae contrepoids. suavemente, vuelva a posicionar el contrapeso.
- Page 11 > 2 min. English Français Español Remove the clip. Retirez l’étrier. Retire la presilla. Remove the handspray. Retirez la douchette. Retire el rociador de mano. Flush the hot and cold supplies for Rincez les conduites d’alimentation Lave los suministros de agua cali- at least two minutes. d’eau chaude et d’eau froide pen- ente y agua fría durante al menos dant au moins deux minutes. dos minutos.
- Page 12 English Français Español Install the handspray. Installez la douchette. Instale el rociador de mano. Install the clip. Installez l’étrier. Instale la presilla.
- Page 13 Set the High Temperature Limit Stop (optional) / Réglage de la butée limite d’eau chaude (en option) / Ajuste el tope de límite de alta temperatura (opcional) 3 mm 50° F 44 PSI 140°F 109°F 100°F 131°F 140°F 96°F 122°F 3 mm 3.7 ft-lb 5 Nm...
- Page 14 Replacement Parts / Pièces détachées / Repuestos 92566000 95962000 92570xx1 (19x1.5) 98112000 92583xx0 (8x2) 92567000 98463000 150°/110° 96029000 98211000 (M6x10) (21x2.5) 98193000 98365000 (32x2) 13913000 95008000 39891xx0 96338000 92634000 98603xx0 (40x3) 96461000 98422000 (7x1.5) 92730000 92568000 96099000 95372000 92500000 92569000 97523000 97523000 95049000...
- Page 15 User Instructions / Instructions de service / Manejo paused ouvert mise en abierto pause en pausa ouvert fermé abierto cerrar • Use the lever to turn the faucet • À l’aide du levier, ouvrez et • Use la palanca para abrir y on and off and to set the fermez le robinet et réglez cerrar el grifo y para configu- desired temperature. la température au niveau rar la temperatura deseada. souhaité. • Temporarily pause the • Pause temporalmente el water flow by pressing the • Arrêtez temporairement flujo de agua presionando el Select button on the top of the le débit d’eau en appuyant botón Select (Seleccionar) en handspray.
- Page 16 cold froid chaud frío caliente Cleaning / Nettoyage / Limpieza...
-
Page 17: Troubleshooting
Troubleshooting Problem Possible Cause Solution Handle stiff – Cartridge dirty or worn – Replace cartridge Mixer dripping – Cartridge dirty or worn – Replace cartridge Low flow with Select valve after – Improper Select valve installed – Replace Select valve (#98463000) valve replacement Water escaping in area of swivel – O-ring dirty or worn – Replace O-ring spout Water escaping at the threaded – connection hoses not completely – Tighten connection hoses by hand base screwed into basic body – O-ring at the connection hose dirty – Replace O-ring or worn. Hot water temperature too low –... -
Page 18: Dépannage
Dépannage Dysfonctionnement Origine Solution Dureté de fonctionnement – Cartouche défectueuse, entartrée – Changer la cartouche Le mitigeur goutte – Cartouche défectueuse – Changer la cartouche Faible débit avec vanne Select – Vanne Select incorrecte montée – Remplacer la vanne Select ouverte après le remplacement de (#98463000) la vanne Fuite à l'embase du bec – Joint torique défectueux – Changer le joint torique Fuite à la fixation sous le mitigeur – Les flexibles de raccordement ne – Resserrer le flexible à la main. sont pas correctement visser dans le corps. – Joint torique sous les flexible de – Changer le joint torique raccordements défectueux Température d'eau chaude trop –... -
Page 19: Localización De Fallas
Localización de fallas Problema Causa Solución Manecilla va dura – Cartucho dañado – Cambiar el cartucho Grifo pierde agua – Cartucho dañado – Cambiar el cartucho Reducido flujo con la válvula Select – Válvula Select errónea – Cambiar la válvula Select abierta después de cambiar la (#98463000) válvula Pérdida de agua en el caño giratorio – Junta dañado – Cambiar juntas Pérdida de agua en el set de fijación – Conexión flexible mal atornillada al – Apretar a mano la conexión flexible cuerpo del caño. – Daños en la junta de la conexión – Cambiar juntas flexible Temperatura del agua caliente –... -
Page 20: Limited Consumer Warranty
Limited Consumer Warranty This warranty is limited to products manufactured by Hansgrohe, Inc. excessive water pressure or corrosion. (“Hansgrohe”) that are purchased by a consumer in the United States C. Labor and other expenses for disconnection, deinstallation, or Canada after March 1, 1996, and installed in either the United or return of the product for warranty service (including but States or in Canada. not limited to proper packaging and shipping costs), or for installation or reinstallation of the product.
Need help?
Do you have a question about the AXOR Citterio Select 39861001 and is the answer not in the manual?
Questions and answers