Table of Contents
Advertisement
Advertisement
Table of Contents

Subscribe to Our Youtube Channel
Related Manuals for HighSecLabs SK21 N Series


Summary of Contents for HighSecLabs SK21 N Series
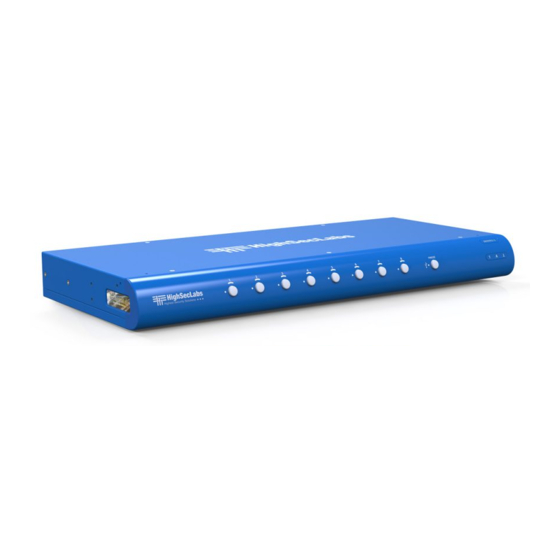
- Page 1 K V M S W I TC H E S | Q U I C K S E T U P G U I D E Models: SK21x-N / DK22x-N – 2-Port DVI-I / HDMI / DP Video KVM Switch SX41x-N / DX42x-N –...
- Page 2 SEC TIONS Table of Contents TablE of ConTEnTS Introduction . . . . . . . . . . . . . . . . . . . . . . . . . . . . . . . . . . . . . . . . . . . . . . . . . . . . . . . . . . 2 HSl KVM Switches.
- Page 3 SEC TIONS Table of Contents InTRoDuCTIon HSL KVM Switches Share keyboard, video, mouse, uSb and audio peripherals to simplify The Keyboard Video Mouse (KVM) switch offered by HSl allows user experience when working with multiple computers. effortlessly sharing a single set of peripherals between multiple computers.
- Page 4 SEC TIONS Table of Contents InSTallaTIon Installing the KVM General • Audio out peripherals: Connect headphones / speakers to the KVM console audio-out ports (colored green). • Verify that all peripherals and computers are turned off prior to • Audio in peripherals: Connect a microphone to the KVM connecting them to the product.
-
Page 5: Installation
SEC TIONS Table of Contents InSTallaTIon Step 2 – Connect computers to the KVM Computer ports: • Computer keyboard & mouse connection: Connect each Single Display computer to the KVM keyboard & mouse computer port using a uSb a to uSb b cable. Connect the uSb a end to the computer and the uSb b end to KVM. - Page 6 SEC TIONS Table of Contents InSTallaTIon Step 3 – Power ON your system: Step 4 – Reset to Factory Defaults • Power ON the monitor: Make sure that the monitor is turned on Reset to factory defaults clears the device settings and restores the prior to powering on the KVM.
-
Page 7: Front Panel Push-Buttons
SEC TIONS Table of Contents oPERaTIon Operating the KVM • Press the freeze uSb button on the front panel to assign the uSb Front Panel Push-Buttons port to a specific computer. freeze uSb prevents switching the • following power up, the default channel is #1. uSb port while the keyboard, video, mouse and audio peripherals •... -
Page 8: Smoothly Switch Between Computers (Virtual Display Technology)
(Keyboard, audio, uSb) switch to the • VDT is disabled by default. Resetting the product to factory defaults, next computer without having to press any buttons. disables VDT. • Multi-monitor computers require driver installation, currently available only for Windows (http://highseclabs.com/support/downloads/?rid=19). HSL KVM Quick Setup Guide... -
Page 9: Interchangeable Kvm-To-Km Functionality
SEC TIONS Table of Contents oPERaTIon Interchangeable KVM-to-KM Functionality • In KVM mode (default) one display, keyboard, mouse, uSb and audio peripheral set is shared between all computers. Display Computers Audio • In KM mode each computer is connected to a separate display while keyboard and mouse are shared. - Page 10 SEC TIONS Table of Contents oPERaTIon Switch between computers in KM mode: To change from KM to KVM mode: • Press the front panel buttons to manually switch control from one • Connect a Display to the KVM Console Port. computer to another.
-
Page 11: Keyboard Shortcut Options
SEC TIONS Table of Contents oPERaTIon Keyboard shortcut options Action Description Keyboard (absolute) - L CTRL | L CTRL | F11 | c Toggle between mouse modes (Relative) - L CTRL | L CTRL | F11 | b System Reset to factory defaults L CTRL | L CTRL | F11 | r Enter Terminal-Mode L CTRL | R CTRL | t... -
Page 12: Copy And Paste
SEC TIONS Table of Contents oPERaTIon Copy & Paste COM Device Mode Transfer text and files between all the computers that are connected to the KVM through the KVM (no network connection is needed between • Copied data is stored on the KVM’s internal memory. parties). - Page 13 SEC TIONS Table of Contents oPERaTIon Copy & Paste Setup Copy & Paste Configuration once the installation is complete, right click the system tray Clipboard Note: for CoM port setup skip to step 3. Manger icon and select Setting to open the Clipboard Manager setting window.
- Page 14 Highseclabs.com ©2017 all rights reserved. HSl logo and product names are trademarks or service trademarks of HighSeclabs ltd (HSl). all other marks are the property of their respective owners. Images for demonstration purposes only. This document may contain confidential and/or proprietary information of HSl Corporation, and its receipt or possession does not convey any right to reproduce, disclose its contents, or to manufacture or sell anything that it may describe.
Need help?
Do you have a question about the SK21 N Series and is the answer not in the manual?
Questions and answers