Advertisement
Advertisement

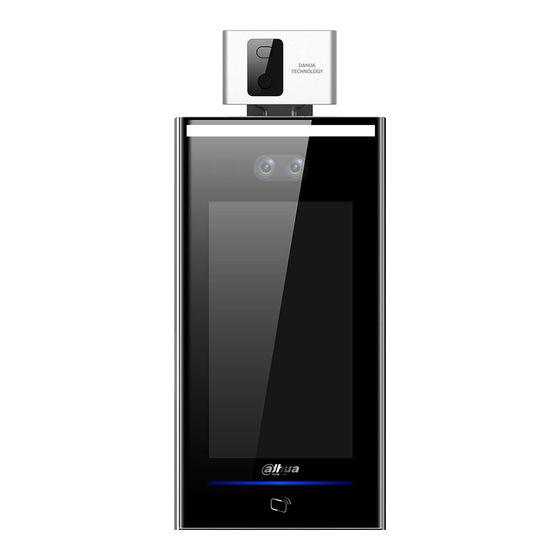
Related Manuals for Dahua DHI-ASI7213X-T


Summary of Contents for Dahua DHI-ASI7213X-T
- Page 1 Face Recognition Access Controller Quick Start Guide V1.0.0...
-
Page 2: Foreword
Foreword General This manual introduces the installation and basic operation of the Face Recognition Access Controller (hereinafter referred to as "access controller"). Safety Instructions The following categorized signal words with defined meaning might appear in the manual. Signal Words Meaning Provides additional information as the emphasis and supplement to the text. -
Page 3: Important Safeguards And Warnings
Important Safeguards and Warnings This chapter describes the contents covering proper handling of the access controller, hazard prevention, and prevention of property damage. Read these contents carefully before using the access controller, comply with them when using, and keep it well for future reference. Operation Requirement ... -
Page 4: Table Of Contents
Table of Contents Foreword ..............................I Important Safeguards and Warnings ..................... II 1 Dimensions and Components ......................1 2 Installation .............................. 6 Installation Notes........................... 6 Cable Connections ........................7 Installation ............................. 8 3 System Operation ..........................12 Initialization ..........................12 Adding New Users ........................ -
Page 5: Dimensions And Components
Dimensions and Components The access controller has two types: 7-inch and 10-inch access controllers. See Figure 1-1 to Figure 1-6. The 7-inch access controller has two models: model A and model B. See Figure 1-1 to Figure 1-4. 7-Inch Access Controller Figure 1-1 Dimensions and components of model A (1)(mm [inch]) Table 1-1 Component description (1) - Page 6 Figure 1-2 Dimensions and components of model A (2) (mm [inch]) Table 1-2 Component description (2) Name Name USB port IR light Dual camera White fill light Phototransistor Display Cable entry Card swiping area Fingerprint sensor Figure 1-3 Dimensions and components of model B (1) (mm [inch]) Dimensions and Components 2...
- Page 7 Table 1-3 Component description (3) Name Name Phototransistor Dual camera Display White fill light Card swiping area — — IR light Figure 1-4 Dimensions and components of model B (2)(mm [inch]) Table 1-4 Component description (4) Name Name Phototransistor Dual camera Display White fill light Card swiping area...
- Page 8 Figure 1-5 Dimensions and components (1) (mm [inch]) Table 1-5 Component description (1) Name Name IR light Phototransistor Dual camera White fill light Cable entry – – Display – – Card swiping area Dimensions and Components 4...
- Page 9 Figure 1-6 Dimensions and components (2) (mm [inch]) Table 1-6 Component description (2) Name Name IR light Phototransistor Dual camera White fill light Cable entry Display Fingerprint sensor – – Card swiping area Dimensions and Components 5...
-
Page 10: Installation
Installation Installation Notes If there is light source 0.5 meters away from the device, the minimum illumination should be no less than 100Lux. It is recommended that the device is installed indoors, at least 3 meters away from windows and doors and 2 meters away from lights. -
Page 11: Cable Connections
Places Not Recommended Figure 2-3 Places not recommended Cable Connections Check if the access control security module is enabled in Function > Security Module. If the security module is enabled, you need to purchase access control security module separately. The security module needs separate power supply to provide power. Once the security module is enabled, the exit button, lock control and firefighting linkage ... -
Page 12: Installation
Figure 2-4 Cable connection Table 2-1 Component description Name USB port Power port Ethernet port Ethernet port (only supported by 7-inch model B access controllers) USB port (only supported by 7-inch model B access controllers) Installation Installation method of model A and model B are the same. Make sure that the distance between the lens and ground is 1.4 meters. - Page 13 Figure 2-5 Installation height Figure 2-6 Installation diagram (1) Installation 9...
- Page 14 Figure 2-7 Installation diagram (2) Installation Procedure This document uses a 7-inch model A access controller as an example. Step 1 Drill seven holes (six bracket installation holes and one cable entry) in the wall according to holes in the bracket. Step 2 Fix the bracket on the wall by installing the expansion screws into the six bracket installation holes.
- Page 15 Figure 2-8 Applying silicon sealant Installation 11...
-
Page 16: System Operation
System Operation Initialization Administrator password and an email should be set the first time the access controller is turned on; otherwise the access controller cannot be used. See Figure 3-1. Figure 3-1 Initialization The administrator password can be reset through the email address you entered if the password is forgotten. - Page 17 Figure 3-2 New user Step 2 Configure parameters on the interface. See Table 3-1. Table 3-1 New user parameter description Parameter Description You can enter user IDs. The IDs consist of 32 characters (including numbers User ID and letters), and each ID is unique. You can enter names with at most 32 characters (including numbers, symbols, Name and letters).
- Page 18 Parameter Description You can register five cards for each user. On the card registration interface, enter your card number or swipe your card, and then the card information will be read by the access controller. You can enable the Duress Card function on the card registration interface. Card Alarms will be triggered if a duress card is used to unlock the door.
-
Page 19: Web Operation
Web Operation The access controller can be configured and operated on the web. Through the web you can set parameters including network parameters, video parameters, and access controller parameters; and you can also maintain and update the system. Login You need to set a password and an email address before logging in to the web for the first time. Password you set is used to log in to the web, and the email is used to retrieve passwords. -
Page 20: Appendix 1 Notes Of Face Recording/Comparison
Appendix 1 Notes of Face Recording/Comparison Before Registration Glasses, hats, and beards might influence face recognition performance. Do not cover your eye brows when wearing hats. Do not change your beard style greatly if you will use the device; otherwise face ... - Page 21 Do not shake your head or body, or the registration might fail. Avoid two faces appear in the box at the same time. Face Position If your face is not at the appropriate position, face recognition effect might be influenced. Appendix figure 1-2 Appropriate face position Requirements of Faces Make sure that the face is clean and forehead is not covered by hair.
- Page 22 too far from the camera. Appendix figure 1-3 Head position Appendix figure 1-4 Face distance When importing face images through the management platform, make sure that image resolution is within the range 150×300–600×1200; image pixels are more than 500×500; image size is less than 75KB, and image name and person ID are the same.
-
Page 23: Appendix 2 Fingerprint Record Instruction
Appendix 2 Fingerprint Record Instruction Notice Make sure that your fingers are clean and dry before recording your fingerprints. Press your finger to the fingerprint recording area, and make your fingerprint is centered on the recording area. Do not put the fingerprint sensor at places with intense light, high temperature, and high ... - Page 24 Appendix figure 2-2 Correct finger pressing Incorrect method Appendix figure 2-3 Wrong finger pressing Fingerprint Record Instruction 20...
-
Page 25: Appendix 3 Cybersecurity Recommendations
Appendix 3 Cybersecurity Recommendations Cybersecurity is more than just a buzzword: it’s something that pertains to every device that is connected to the internet. IP video surveillance is not immune to cyber risks, but taking basic steps toward protecting and strengthening networks and networked appliances will make them less susceptible to attacks. - Page 26 Change Default HTTP and Other Service Ports We suggest you to change default HTTP and other service ports into any set of numbers between 1024~65535, reducing the risk of outsiders being able to guess which ports you are using. Enable HTTPS We suggest you to enable HTTPS, so that you visit web service through a secure communication channel.
- Page 27 The network should be partitioned and isolated according to the actual network needs. If there are no communication requirements between two sub networks, it is suggested to use VLAN, network GAP and other technologies to partition the network, so as to achieve the network isolation effect. ...
Need help?
Do you have a question about the DHI-ASI7213X-T and is the answer not in the manual?
Questions and answers