Table of Contents
Advertisement
Advertisement
Table of Contents

Subscribe to Our Youtube Channel
Related Manuals for UTC Fire and Security Interlogix NX-8E

Summary of Contents for UTC Fire and Security Interlogix NX-8E
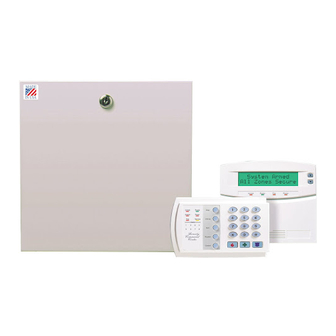
- Page 1 NX-8E Control Panel Installation Manual P/N I-NX8E-IM • REV C • ISS NOV12...
- Page 2 Copyright © 2012 UTC Fire & Security Americas Corporation, Inc. Interlogix is part of UTC Climate Controls & Security, a unit of United Technologies Corporation. All rights reserved. This document may not be copied in w hole or in part or otherw ise reproduced without prior w ritten consent from UTC Fire &...
-
Page 3: Table Of Contents
Content Important information ii Chapter 1 Introduction 1 Product overview 2 Board installation 3 Wiring 3 Module list 6 Chapter 2 Programming 9 LED keypad programming 11 Control panel programming 14 Programming locations 18 Chapter 3 Troubleshooting 59 General diagnosis 60 Trouble conditions 60 Voltage tables 63 Specifications 64... -
Page 4: Important Information
Important information This is the NX-8E Control Panel Installation Manual. This document includes an overview of the product and detailed instructions explaining how to install the NX- 8E board inside the enclosure and how to program the control panel. To use this document effectively, you should have the following minimum qualifications: •... -
Page 5: Introduction
Chapter 1 Introduction Summary This chapter provides an overview of your NX-8E Control Panel, including basic installation and terminal connections. Content Product overview 2 Product contents 2 Board installation 3 Wiring 3 Terminal descriptions 5 Module list 6 NX-8E Control Panel Installation Manual... -
Page 6: Product Overview
Chapter 1: Reporting codes Product overview The NX-8E Control Panel is a residential security and alarm system and provides the following features: • Sophisticated software allowing up to 240 users to interface with up to 192 zones and eight partitions. •... -
Page 7: Board Installation
Chapter 1: Reporting codes Board installation Inside the metal enclosure, there are slots for board insertions. These allow the PC board to be positioned vertically (Figure 2 below). When you slide the board between the grooves of the slots, make sure the terminal strip is toward the front opening (toward you) to allow for the wire connections. - Page 8 Chapter 1: Reporting codes Figure 3: NX-8E wiring diagram NX-8E Control Panel Installation Manual...
-
Page 9: Terminal Descriptions
Chapter 1: Reporting codes Terminal descriptions Table 2 below describes the terminals shown in the wiring diagram. Table 2: NX-8E terminals Terminal Description House telephone ring (gray). Telephone ring (red) Telephone tip (green) House telephone tip (brown) EARTH Earth ground. Connect to a cold water pipe or a 6 to 10 ft. driven rod. AC input. -
Page 10: Module List
Chapter 1: Reporting codes Terminal Description RELAY2 C = Closed dry contact rated 1 amp at 30 volts. NO = Normally open dry contact rated 1 amp at 30 volts. Note: These terminals can be set for 12 VDC. Install J12 for AUX1 and J13 for AUX2. - Page 11 Chapter 1: Reporting codes Part number Description NX-548E 48-zone wireless receiver. NX-591E-GSM Cell interface. NX-870E Fire supervison module NX-1192E 192-zone LCD keypad. NX-1208E 8-zone LED keypad. NX-1248E 48-zone LCD keypad. NX-1308E 8-zone LED door design keypad. NX-1316E 16-zone LED door design keypad. NX-1324E 24-zone LED door design keypad.
-
Page 13: Programming
Chapter 2 Programming Summary This chapter provides basic programming instructions and a description of the programming locations. Content LED keypad programming 11 Keypad options 11 Keypad number and partition 12 Elapsed increments 12 System date 12 System clock 13 User codes 13 User authority level 13 Control panel programming 14 Programming data types 16... - Page 14 Chapter 2: Reporting codes Location 44 - Duress code 37 Locations 45 to 50 - Auxiliary outputs programming 37 Location 51 - Autotest control 40 Locations 52 to 55 - Times and days 41 Locations 56 to 83 - 4+2 format communicator codes 42 Location 84 - Daylight saving time 44 Locations 88 to 109 - Partition account codes and features.
-
Page 15: Led Keypad Programming
Chapter 2: Reporting codes LED keypad programming This section describes how to program the address of each LED keypad, as well as the options that are available. The keypad must be addressed for control panel supervision of that keypad. Programming defaults include: •... -
Page 16: Keypad Number And Partition
Chapter 2: Reporting codes Keypad feature enabled Enable multiple partition viewing. Enable temporary viewing of all partitions by pressing *, 1, partition number. Keypad number and partition To set the keypad number and partition: 1. Enter *, 9, 4, program code. The Service LED and the Instant LED will flash. 2. -
Page 17: System Clock
Chapter 2: Reporting codes System clock To set the system clock: 1. Enter *, 9, 7, master code. The Service LED begins flashing. 2. Enter the clock time (military time). Hour: 00 through 23, where 00 is midnight, 01 is 1:00 a.m., 23 is 11:00 p.m. Minutes: 00 to 59. For example, 3.25 a.m. -
Page 18: Control Panel Programming
Chapter 2: Reporting codes assigned authority levels to all user numbers, or you can press # to exit assigning authority level programming. Table 5: LED features Attributes if LED 8 is off Attributes if LED 8 is on Reserved Activate output 1 Armed only Activate output 2 Arm only after close window... - Page 19 Chapter 2: Reporting codes To enter program mode: 1. Press *, 8. The five function LEDs (Stay, Chime, Exit, Bypass, and Cancel) begin flashing. 2. Enter the go to program code (default 9, 7, 1, 3). If the go to program code entry is valid, the Service LED flashes, and the five function LEDs illuminate.
-
Page 20: Programming Data Types
Chapter 2: Reporting codes You are now ready to enter another programming location. If you attempt to program and invalid entry for a particular segment, the keypad beeps three times indicating an error and remains in that segment awaiting a valid entry. To exit program mode: 1. -
Page 21: Loading Factory Defaults
Chapter 2: Reporting codes Feature selection data Feature selection data displays the current condition (on or off) for eight features associated with the programming location and segment selected. Pressing a button on the touchpad (1 to 8) that corresponds to the feature number within a segment toggles (on/off) that feature. -
Page 22: Programming Locations
Chapter 2: Reporting codes Programming locations This section describes all the programming options for the control panel. Quick start programming For most routine installations, the quick start locations allow you to enable a majority of the options available with the NX-8E (when communicating in Contact ID or SIA formats). - Page 23 Chapter 2: Reporting codes Caution: A call-waiting cancel on a non call-waiting line prevents successful connection to the central station. Location 1 Phone 1 account code Location 1 has six segments of numerical data. Use this location to program the account code sent when phone 1 is dialed.
- Page 24 Chapter 2: Reporting codes Data Format Description 4+2 express Two-digit event code DTMF transmission. 4+2 fast Two-digit event code 1900 Hz transmit 1400 Hz handshake double round parity 20 pps. DTMF (see “Reporting Ademco Contact ID transmissions” on page Ademco contact Frequency shift keys (see “Reporting fixed codes in Contact ID and SIA”...
- Page 25 Chapter 2: Reporting codes Segment 1 1. Alarms and alarm restores. 2. Opening and closings. 3. Zone bypass and bypass restore. 4. Zone trouble and trouble restores. 5. Power fail, low battery, power restore, and low battery restore. 6. Bell cut, telephone line cut, bell cut restore, telephone line restore. 7.
- Page 26 Chapter 2: Reporting codes Location 8 - Phone 2 communicator format Location 8 has one segment of numerical data. Use this location to program the communicator format used to transmit to the receiver connected to phone 2. Refer to your central station receiver documentation to determine which format is compatible.
- Page 27 Chapter 2: Reporting codes Segment 1 1. Alarms and alarm restores. 2. Opening and closings. 3. Zone bypass and bypass restore. 4. Zone trouble and trouble restores. 5. Power fail, low battery, power restore, and low battery restore. 6. Bell cut, telephone line cut, bell cut restore, telephone line restore. 7.
- Page 28 Chapter 2: Reporting codes Location 14 - Phone 3 communicator format Location 14 has one segment of numerical data. Use this location to program the communicator format used to transmit to the receiver connected to phone 3. Refer to your central station receiver documentation to determine which format is compatible.
- Page 29 Chapter 2: Reporting codes Segment 1 1. Alarms and alarm restores. 2. Opening and closings. 3. Zone bypass and bypass restore. 4. Zone trouble and trouble restores. 5. Power fail, low battery, power restore, and low battery restore. 6. Bell cut, telephone line cut, bell cut restore, telephone line restore. 7.
-
Page 30: Locations 19 To 22 - Downloading
Chapter 2: Reporting codes Segment 1 1. On for 1800 Hz transmit; off for 1900 Hz. 2. On for 2300 Hz handshake; off for 1400 Hz. 3. On for cksum parity; off for double round parity. 4. On for two-digit event code; off for one-digit event code. 5. - Page 31 Chapter 2: Reporting codes Segment 1 1. On enables two call answering machine defeat. 2. On enables tone sniff answering machine defeat. 3. On requires call back before download session. 4. Shutdown. (Can only be activated with the download software). 5.
-
Page 32: Locations 23 And 24 - Partition Features
Chapter 2: Reporting codes Locations 23 and 24 - Partition features Location 23 - Feature report selection/partition feature selection Location 23 has five segments of feature selection data. Use this location to enable certain features that are accessed or visible to the user from the system keypad. -
Page 33: Locations 25 To 36 - Zone Type And Partition Selection
Chapter 2: Reporting codes Location 24 - Entry/exit times Location 24 has six segments of numerical data. Use this location to program the entry/exit times (there are two separate entry/exit times). Segment 1 - Entry time 1. Entry time used when a delay 1 zone type initiates an entry delay. Default is 30, valid entries 30 to 255 seconds. - Page 34 Chapter 2: Reporting codes Zone type Description 6. Instant Creates an instant alarm whenever it is tripped and the armed LED is 7. 24-hour silent Creates an instant silent alarm regardless of the armed state of the control panel. It does not display on the keypad. 8.
- Page 35 Chapter 2: Reporting codes Zone type Description 21. Gas detection Creates an instant alarm regardless of the armed state of the control panel. It displays on the keypad and activates the keypad sounder. 22. Low temperature Creates an instant silent alarm regardless of the armed state of the detection control panel.
- Page 36 Chapter 2: Reporting codes Location 25 Location 25 has eight segments of numerical data. Use this location to Zones 1 to 8 zone type program the zone type for zones 1 to 8. Use segment 1 for zone 1, segment 2 for zone 2, etc. The segment defaults are 3, 5, 6, 6, 6, 6, 6, Location 26 Location 26 has eight segments of feature selection data.
- Page 37 Chapter 2: Reporting codes Location 35 Location 35 has eight segments of numerical data. Use this location to Zones 41 to 48 zone program the zone type for zones 41 to 48. Use segment 1 for zone 41, types segment 2 for zone 42, etc. The segment defaults are 6, 6, 6, 6, 6, 6, 6, 6.
-
Page 38: Location 37 - Siren And System Supervision
Chapter 2: Reporting codes Location 37 - Siren and system supervision Location 37 has seven segments of feature selection data. Use this location to enable various system feature and reporting options. Segment 1 1. On if siren sounds for telephone line cut when armed. 2. -
Page 39: Location 38 - Swinger Shutdown Count
Chapter 2: Reporting codes 4. On allows two trips on same cross zone to activate an alarm. 5. On will not allow zones that are force armed to report bypass. 6. Reserved. 7. On makes the clock use the internal crystal. Only use if the panel is solely powered by DC 8. -
Page 40: Location 41 - Special Features
Chapter 2: Reporting codes Segment 3 - Power up delay in seconds, 0 to 60 (0 = no power up delay). Default is 60. Segment 4 - Siren time in minutes, 1 to 254. Default is 8. Segment 5 - Telephone line cut delay in seconds, 0 to 255 (0 = no monitoring). Default is 0. Segment 6 - Cross zone time in minutes, 0 to 255 (0 = no cross zoning). - Page 41 Chapter 2: Reporting codes Location 43 - Go to program code and authorization Location 43 has two segments of feature selection data. The go to program code can be used as a standard arm/disarm code. When using the code to arm or disarm, the user ID is 255.
- Page 42 Chapter 2: Reporting codes Location 46 - Auxiliary outputs 1 to 4 special timing Location 46 has four segments of feature selection data. Use this location to program the special timing feature activation for the four auxiliary outputs. Segment 1 corresponds to output 1, segment 2 to output 2, etc. Segment 1 to 4 - Outputs 1 to 4 1.
- Page 43 Chapter 2: Reporting codes Location 50 - Auxiliary output 4 event and times Location 50 has two segments of numerical data. Segment 1 - Use Table 8 below to select the event that activates auxiliary output 4. Segment 2 - Program the timing from 0 to 255 (minutes or seconds, depending on data programmed in Location 46, segment 1).
- Page 44 Chapter 2: Reporting codes 44 = Any short 45 = Any fault (short on nonfire zone) 46 = Any alarm (includes 24-hour zones but not 47 = Beeping keypad keypad panics) 48 = Code entry 49 = Key fob function 1 50 = Key fob function 2 51 = Always on 52 = Alarm flash...
- Page 45 Chapter 2: Reporting codes Locations 52 to 55 - Times and days Location 52 - Opening/automatic disarm time Location 52 has two segments of numerical data. Use this location to program the time (24-hour format) in which the NX-8E enables codes designated as arm only after closing.
- Page 46 Chapter 2: Reporting codes Location 55 - Days of week each partition will automatically arm Location 55 has eight segments of feature selection data. Use this location to select which days each partition (1 to 8) will autoarm. If a zone is faulted when the panel tries to autoarm, the zone bypasses.
- Page 47 Chapter 2: Reporting codes Location 56 Program the event code for any zone restore for a 4+2 Restore communicator code format for each partition (1 to 8). Location 57 Program the event code for a zone bypass for a 4+2 Bypass communicator code format for each partition (1 to 8).
- Page 48 Chapter 2: Reporting codes Location 72 Program the digits sent for a 4+2 format if telephone Telephone line cut/restore line cut reporting is enabled. communicator code Segments 1 and 2 = telephone line cut reporting Segments 3 and 4 = telephone line cut restore. Location 73 Program the digits sent for a 4+2 format if ground fault Ground fault/restore communicator...
- Page 49 Chapter 2: Reporting codes day programmed. The default is to begin daylight saving time on the second Sunday in March and end on the first Sunday in November. Segment 1 Daylight saving time starting month (1 to 12). Default is 3. Segment 2 Daylight saving time starting Sunday (1 to 4, first to fourth).
- Page 50 Chapter 2: Reporting codes Locations 88 Location 88 has six segments of numerical data. If the Partition 1 account code account code is less than six digits, program a 10 in the segment immediately after the last digit of the account number.
- Page 51 Chapter 2: Reporting codes Location 98 Location 98 has six segments of numerical data. If the Partition 5 account code account code is less than six digits, program a 10 in the segment immediately after the last digit of the account number.
- Page 52 Chapter 2: Reporting codes number. If the account code is six digits long, program all six segments. Location 108 Location 108 has five segments of feature selection Partition 8 feature and reporting data. Use this location to enable certain features that selection are accessed or visible to the user from the system keypad.
- Page 53 Chapter 2: Reporting codes Segment 2 1. On if zone type beeps the keypad for alarm. 2. On if zone type sounds the yelping siren for alarm. 3. On if zone type sounds the temporal siren for alarm. 4. On if zone type chimes. 5.
- Page 54 Chapter 2: Reporting codes Location Zone Description Default type Alarm code Feature selection 0, 1245, 5678, 0, 0 Alarm code Feature selection 2, 0, 78, 0, 0 Alarm code Feature selection 1, 13, 378, 0, 0 Alarm code Feature selection 6, 1245, 5678, 0, 0 Alarm code Feature selection...
- Page 55 Chapter 2: Reporting codes Location Zone Description Default type Feature selection 24, 15, 78, 0, 0 Alarm code Feature selection 24, 15, 78, 0, 0 Alarm code Feature selection 1, 13, 378, 0, 0 Alarm code Feature selection 248, 45, 0, 0, 0 Alarm code Feature selection 467, 125, 5678, 0, 0...
- Page 56 Chapter 2: Reporting codes Location 174 Location 174 has eight segments of numerical data. Use this location Zones 65 to 72 zone to program the zone type for zones 65 to 72. Use segment 1 for zone types 65, segment 2 for zone 66, etc. The segment defaults are 6, 6, 6, 6, 6, 6, 6, 6.
- Page 57 Chapter 2: Reporting codes Location 184 Location 184 has eight segments of numerical data. Use this location Zones 105 to 112 zone to program the zone type for zones 105 to 112. Use segment 1 for types zone 105, segment 2 for zone 106, etc. The segment defaults are 6, 6, 6, 6, 6, 6, 6, 6.
- Page 58 Chapter 2: Reporting codes Location 194 Location 194 has eight segments of numerical data. Use this location Zones 145 to 152 zone to program the zone type for zones 145 to 152. Use segment 1 for types zone 145, segment 2 for zone 146, etc. The segment defaults are 6, 6, 6, 6, 6, 6, 6, 6.
- Page 59 Chapter 2: Reporting codes Location 204 Location 204 has eight segments of numerical data. Use this location Zones 185 to 192 zone to program the zone type for zones 185 to 192. Use segment 1 for types zone 185, segment 2 for zone 186, etc. The segment defaults are 6, 6, 6, 6, 6, 6, 6, 6.
- Page 60 Chapter 2: Reporting codes Location 209 - Home automation protocol Location 209 has one segment of numerical data. The NX-8E home automation protocol can operate in one of two possible modes, binary or ASCII. Consult the home automation application information to determine the proper mode for your application and program it in Location 209.
- Page 61 Chapter 2: Reporting codes Location 211 - Command/request enables Location 211 has four segments of feature selection data. The NX-8E has the ability to perform a variety of commands asked of it by the home automation system. For examle, it is possible to allow arming and disarming of the security system, programming of the security system, or bypassing zones by the home automation system.
- Page 62 Chapter 2: Reporting codes Location 212 - LCD keypad address Location 212 has one segment of numerical data. Certain commands in the NX-8E require it to know the location of at least one LCD keyupad (if one exists in the system). If your system has an LCD keypad, we recommend that you place it in partition 1 keypad 1.
-
Page 63: Troubleshooting
Chapter 3 Troubleshooting Summary This chapter provides product specifications and information to help you troubleshoot the product. Content General diagnosis 60 Trouble conditions 60 Voltage tables 63 Specifications 64 NX-8E Control Panel Installation Manual... -
Page 64: General Diagnosis
Chapter 3: Reporting codes General diagnosis Trouble conditions are diagnosed by viewing the detailed information in the event log, using an LCD keypad. To view the event log: 1. Enter *, 9, 0 at the keypad. 2. Enter the master or installer code. The most recent event displays. 3. - Page 65 Chapter 3: Reporting codes 3. The backup battery is shorted internally or is defective. Remove the battery. If the overcurrent disappears, install a new battery. The Fire LED is flashing. Press *, 7. This clears most trouble conditions and resets the smoke detectors. The control panel is in communication fail.
- Page 66 Chapter 3: Reporting codes The siren does not work. The control panel has a built in siren driver. If the system uses self-contained sirens instead of speakers, go to Location 37, Segment 2, and turn on bit 1. This converts the driver output to voltage output. The interior zones are bypassing themselves.
-
Page 67: Voltage Tables
Chapter 3: Reporting codes Voltage tables The following tables show normal values for control panel voltages. if these values are incorrect, you may experience trouble or fault conditions. Table 11: Phone or power voltage values Phone or power voltage Value T to R and T1 to R1 50 VDC not communicating (on hook) T to R... -
Page 68: Specifications
Chapter 3: Reporting codes Specifications Operating power 16.5 VAC 40 or 50 VA transformer Auxiliary power with 40 or 50 VA transformer 12 VDC regulated 2 A with NX-320E power supply 12 VDC regulated 2 A plus control panel power Loop resistance Standard loop 300 ohms max. -
Page 69: Appendix A Reporting Codes
Appendix A Reporting codes Summary This appendix provides tables for various events and transmissions associated with the NV-8V2 control panel Content Reporting fixed codes in Contact ID and SIA 66 Reporting zone codes in Contact ID and SIA 68 Reporting Ademco Contact ID transmissions 69 Device numbers for reporting expander troubles 70 Zone ID or user ID hex digit for 4+2 formats 72 NX-8E Control Panel Installation Manual... -
Page 70: Reporting Fixed Codes In Contact Id And Sia
Appendix A: Reporting codes Reporting fixed codes in Contact ID and SIA The NX-8E can report SIA level 1 transmissions to either or both phone numbers. Each report consists of an event code and a zone ID (the zone number that is in alarm) or user ID. - Page 71 Appendix A: Reporting codes Contact ID event Description Keypad panic (audible) Keypad panic (silent) Keypad tamper Low battery (device number) Low battery restore (device number) Manual test Open (user number) Recent close (user number) RF sensor lost (zone number) RF sensor restore (zone number) CleanMe restore Sensor battery restore (zone number) Sensor low battery (zone number)
-
Page 72: Reporting Zone Codes In Contact Id And Sia
Appendix A: Reporting codes Reporting zone codes in Contact ID and SIA The NX-8E has the ability to report SIA transmissions to either or both phone numbers. Each report in SIA consists of an event code and a zone ID (the number of the zone that is in alarm) or user ID. -
Page 73: Reporting Ademco Contact Id Transmissions
Appendix A: Reporting codes Reporting Ademco Contact ID transmissions The NX-8E has the ability to report Ademco Contact ID transmissions. Each report in Contact ID consists of an event code and a zone ID (the number of the zone that is in alarm). The event codes are described in the following table and are programmed in the zone type event code (Locations 110 to 169). -
Page 74: Device Numbers For Reporting Expander Troubles
Appendix A: Reporting codes Device numbers for reporting expander troubles The tables below list the device numbers that will be reported for trouble conditions. Table 16: Device numbers that report trouble conditions Device Name Number Control panel/modules NX-8E control panel Device address 0 NX-534E two-way listen in Device address 64... - Page 75 Appendix A: Reporting codes Device Name Number Zone 177 (switch 2, 3, 5 on) Expander number reported 110 Zone 185 (switch 1, 2, 3, 5 on) Expander number reported 111 Remote power supply (NX- All switches off Device address 84 320E) Switch 1 on Device address 85...
-
Page 76: Zone Id Or User Id Hex Digit For 4+2 Formats
Appendix A: Reporting codes Keypad Partition number Zone ID or user ID hex digit for 4+2 formats Zone or user ID hex digits only apply to slow formats (Locations 56 to 83, lower digit). The digits programmed in these locations are sent as the upper hex digit in place of the alarm event code. - Page 77 Appendix A: Reporting codes Zone/user ID = Hex digit Zone/user ID = Hex digit Zone/ID = Hex digit 52 = 7 53 = 8 54 = 9 55 = A 56 = B 57 = C 58 = D 59 = E 60 = F 61 = 1 62 = 2...
- Page 78 Appendix A: Reporting codes Zone/user ID = Hex digit Zone/user ID = Hex digit Zone/ID = Hex digit 154 = 4 155 = 5 156 = 6 157 = 7 158 = 8 159 = 9 160 = A 161 = B 162 = C 163 = D 164 = E...
-
Page 79: Appendix B Programming Worksheet
Appendix B Programming worksheet Summary This appendix provides a programming worksheet that shows location defaults and provides space to record your installation settings. Content Programming worksheet 76 Zone worksheet 98 NX-8E Control Panel Installation Manual... -
Page 80: Programming Worksheet
Appendix B: Reporting codes Programming worksheet Use the following worksheet to check location defaults and record location settings. Locations with multiple segments will show defaults as multiple numbers separated by commas. Defaults are shown in bold. Table 19: Location defaults and settings Loc. - Page 81 Appendix B: Reporting codes Loc. Description Default Setting Phone 3 account code 10, 10, 10, 10, 10, 10 Phone 3 communicator format Phone 3 dial attempts Backup control Phone 3 events reported Segment 1 Segment 2 1 = Alarms and restores 1 - Tampers 2 = Open/close 2 = Short circuit and ground fault...
- Page 82 Appendix B: Reporting codes Loc. Description Default Setting Segment 3 Segment 4 1 = Open/close 1 = Late to close/early to open 2 = Bypass 2 = Auto arm in stay mode 3 = Restore 3 = Disables door delays in night mode 4 = Trouble 4 = Bypass disabled for force arm zones 5 = Tamper...
- Page 83 Appendix B: Reporting codes Loc. Description Default Setting Zones 33 to 40 partitions Segment 1 = 1 2 3 4 5 6 7 8 Segment 5 = 1 2 3 4 5 6 7 8 Segment 2 = 1 2 3 4 5 6 7 8 Segment 6 = 1 2 3 4 5 6 7 8 Segment 3 = 1 2 3 4 5 6 7 8 Segment 7 = 1 2 3 4 5 6 7 8...
- Page 84 Appendix B: Reporting codes Loc. Description Default Setting Keypad sounder control Segment 1 1 = Keypad sounds for telephone line cut w hen in the armed state 2 = Keypad sounds for telephone line cut w hen in the disarmed state 3 = Keypad sounds upon AC pow er failure 4 = Keypad sounds upon low battery detection 5 = Keypad sounds during cross zone trip time...
- Page 85 Appendix B: Reporting codes Loc. Description Default Setting Go to program code and authorization Segment 1 Segment 2 1 = Reserved 1 = Enable go to program code for partition 1 2 = Enable go to program code as an arm only code 2 = Enable go to program code for partition 2 3 = Enable go to program code as an arm only after 3 = Enable go to program code for partition 3...
- Page 86 Appendix B: Reporting codes Loc. Description Default Setting Segment 1 = Event number for output 3 2 (24-hour alarm) Segment 2 = Timing for output 3 10 (seconds) Auxiliary output 4 event/times Segment 1 = Event number for output 4 21 (armed state) Segment 2 = Timing for output 4 0 (follow condition)
- Page 87 Appendix B: Reporting codes Loc. Description Default Setting 1 = Sunday 2 = Monday 3 = Tuesday 4 = Wednesday 5 = Thursday 6 = Friday 7 = Saturday 8 = Disable retry timer Restore communicator code Segment 1 = Partition 1 restore code Segment 2 = Partition 2 restore code Segment 3 = Partition 3 restore code Segment 4 = Partition 4 restore code...
- Page 88 Appendix B: Reporting codes Loc. Description Default Setting Segment 8 = Partition 8 tamper code Trouble communicator code Segment 1 = Partition 1 trouble code Segment 2 = Partition 2 trouble code Segment 3 = Partition 3 trouble code Segment 4 = Partition 4 trouble code Segment 5 = Partition 5 trouble code Segment 6 = Partition 6 trouble code Segment 7 = Partition 7 trouble code...
- Page 89 Appendix B: Reporting codes Loc. Description Default Setting AC fail/restore communicator code 0, 0, 0, 0 Low battery/restore communicator code 0, 0, 0, 0 Power short/restore communicator code 0, 0, 0, 0 Bell tamper/restore communicator code 0, 0, 0, 0 Telephone line cut/restore com.
- Page 90 Appendix B: Reporting codes Loc. Description Default Setting Reserved Partition 1 account code 10, 10, 10, 10, 10, 10 Partition 2 account code 10, 10, 10, 10, 10, 10 Partition 2 feature and reporting selection Segment 1 Segment 2 1 = Quick arm 1 = LED extinguish enable 2 = Re-exit 2 = Require user code by bypassing zones...
- Page 91 Appendix B: Reporting codes Loc. Description Default Setting Segment 3 Segment 4 1 = Open/close 1 = Late to close/early to open 2 = Bypass 2 to 8 = Reserved 3 = Restore 4 = Trouble 5 = Tamper Segment 5 = Reserved 6 = Cancel 7 = Recent closing 8 = Exit error...
- Page 92 Appendix B: Reporting codes Loc. Description Default Setting Partition 5 feature and reporting selection Segment 1 Segment 2 1 = Quick arm 1 = LED extinguish enable 2 = Re-exit 2 = Require user code by bypassing zones 3 = Auto bypass 3 = Bypass sounder alert 4 = Silent panic 4 = AC pow er/low battery sounder alert...
- Page 93 Appendix B: Reporting codes Loc. Description Default Setting Partition 6 entry and exit times Segment 1 = Entry time 1 Segment 2 = Exit time 1 Segment 3 = Entry time 2 Segment 3 = Exit time 2 Segments 5 and 6 = Reserved Partition 7 account code 10, 10, 10, 10, 10, 10 Partition 7 feature and reporting selection...
- Page 94 Appendix B: Reporting codes Loc. Description Default Setting Segment 1 Segment 2 1 = Quick arm 1 = LED extinguish enable 2 = Re-exit 2 = Require user code by bypassing zones 3 = Auto bypass 3 = Bypass sounder alert 4 = Silent panic 4 = AC pow er/low battery sounder alert 5 = Audible panic...
- Page 95 Appendix B: Reporting codes Loc. Description Default Setting Segment 3 Segment 4 1 = Fast loop response 1 = Zone activity monitor 2 = Double end of loop tamper zone 2 = End of line resistor defeat 3 = Trouble zone (day zone) 3 = Zone acts as request to exit input 4 = Cross zone 4 = Zone acts as access entry point (do not enable this...
- Page 96 Appendix B: Reporting codes Loc. Description Default Setting Zone type 15 feature select 457, 1256, 5678, 0, 0 Zone type 16 alarm event code Zone type 16 feature select 0, 12456, 5678, 0, 0 Zone type 17 alarm event code Zone type 17 feature select 5, 1245, 25678, 0, 0 Zone type 18 alarm event code...
- Page 97 Appendix B: Reporting codes Loc. Description Default Setting Zones 49 to 56 partitions Segment 1 = 1 2 3 4 5 6 7 8 Segment 5 = 1 2 3 4 5 6 7 8 Segment 2 = 1 2 3 4 5 6 7 8 Segment 6 = 1 2 3 4 5 6 7 8 Segment 3 = 1 2 3 4 5 6 7 8 Segment 7 = 1 2 3 4 5 6 7 8...
- Page 98 Appendix B: Reporting codes Loc. Description Default Setting Zones 105 to 112 partitions Segment 1 = 1 2 3 4 5 6 7 8 Segment 5 = 1 2 3 4 5 6 7 8 Segment 2 = 1 2 3 4 5 6 7 8 Segment 6 = 1 2 3 4 5 6 7 8 Segment 3 = 1 2 3 4 5 6 7 8 Segment 7 = 1 2 3 4 5 6 7 8...
- Page 99 Appendix B: Reporting codes Loc. Description Default Setting Zones 161 to 168 partitions Segment 1 = 1 2 3 4 5 6 7 8 Segment 5 = 1 2 3 4 5 6 7 8 Segment 2 = 1 2 3 4 5 6 7 8 Segment 6 = 1 2 3 4 5 6 7 8 Segment 3 = 1 2 3 4 5 6 7 8 Segment 7 = 1 2 3 4 5 6 7 8...
- Page 100 Appendix B: Reporting codes Loc. Description Default Setting Serial port baud rate 0 = 2400 (2.4K) 1 = 4800 (4.8K) 2 = 9600 (9.6K) 3 = 19200 (19.2K) 4 = 38400 (38.4K) 5 to 7 = Reserved Home automation protocol Segment 1 - LED Off = binary, LED ON = ASCII Segment 2 - On enables serieal port supervision Segments 3 to 8 - Reserved...
- Page 101 Appendix B: Reporting codes Part 1 Part 2 Part 3 Part 4 Part 5 Part 6 Part 7 Part 8 NX-8E Control Panel Installation Manual...
-
Page 102: Zone Worksheet
Appendix B: Reporting codes Zone worksheet NX-8E Control Panel Installation Manual... - Page 103 Appendix B: Reporting codes 100. 101. 102. 103. 104. 106. 107. 108. 109. 110. 111. 112. 113. 114. 115. 116. 117. 118. 119. 120. 121. 122. 123. 124. 125. 126. 127. 128. 129. 130. 131. 132. 133. 134. 135. 136. 137.
-
Page 105: Glossary
Glossary Abort In enabled, the NX-8E waits the number of seconds programmed in Location 40 prior to sending an alarm. During this delay time, the Cancel LED flashes. To abort the report, type in a code and press the Cancel key. The LED extinguishes. If the report is not aborted within the allotted time, the LED extinguishes when the report is sent (a dialer delay must be enabled). - Page 106 Glossary Automatic cancel/abort If enabled, the cancel and/or abort features are automatic (pressing the Cancel button is not required). The cancel and abort features in Locations 23 and 40 must be enabled to permit this auto feature to work. For proper operation of these features a dialer delay must be enabled.(Locations 40, 41, and 110 to 169) Autotest...
- Page 107 Glossary Dual/split/multiple reports The NX-8E sends communication reports to three different phone numbers for dual, split, or multiple reports selectable by event or partition. (Locations 4, 10, 16, and 18) Duress code If programmed, the NX-8E sends a duress signal whenever the panel is armed or disarmed with this code.
- Page 108 Glossary Fail to communicate The NX-8E illuminates the Service LED if a report fails to reach the central station. If enabled, when the next report is successfully communicated, a fail to communicate code is reported. (Location 37) Fire alarm verification When enabled, the NX-8E verifies a fire alarm by requiring more than one trip on a smoke detector within a specified time before creating an alarm (Location 40)
- Page 109 Glossary Manual test If programmed, the NX-8E performs a bell and/or communicator test when *, 4, 4 is entered while the system is in the disarmed state. (Location 37) Night mode This mode applies to NX-1208E/1248E keypads. In this mode, the control panel bypasses all zones that have the entry guard feature enabled.
- Page 110 Glossary Swinger shutdown This feature allows a zone or zones to be automatically bypassed after a specified number of alarms. When a zone is tripped, the alarm counter reflects 1 in memory. If a new (first) alarm is detected in a different zone, the counter remains at 1. If an alarm is detected on a previously tripped zone, the count increments to 2.
- Page 111 Glossary Zone activity monitor This feature sends a report to the central station when a particular zone does not change conditions within a specified number of days programmed. (Locations 40 and 110 to 169) Enable Location 37, Segment 6, Option 3 to change form days to hours.
Need help?
Do you have a question about the Interlogix NX-8E and is the answer not in the manual?
Questions and answers