Table of Contents
Advertisement
Quick Links
Advertisement
Table of Contents

Related Manuals for Lafayette Accu-Rise Operating System


Summary of Contents for Lafayette Accu-Rise Operating System
- Page 1 Installation Instructions Parasol Cellular Shades Accu-Rise ™ Operating System...
-
Page 2: Table Of Contents
CONTENTS Getting Started: Product View ..............1 Tools and Fasteners Needed .......... 2 Installation: Installation Overview ............ 3 Mounting Types and Window Terminology ....... 3 Mount the Installation Brackets — Inside Mount ..... 4 Mount the Installation Brackets — Outside Mount ..5 Mount the Installation Brackets —... -
Page 3: Getting Started
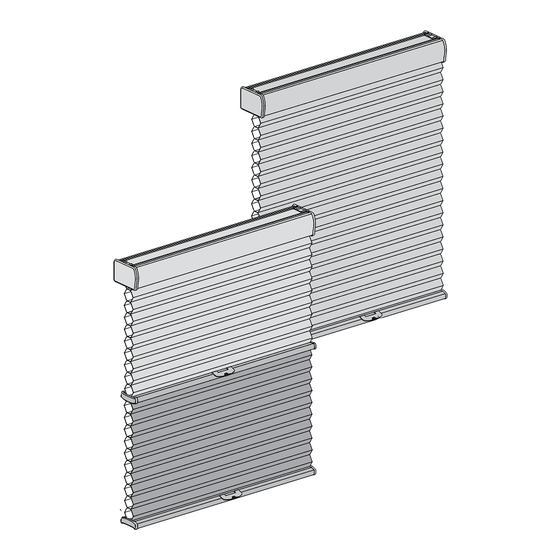
GETTING STARTED Product View Installation Brackets Headrail Standard Bottom-Up Shade Day/Night Shade Handle Middle Rail Not Shown: Bottom-Up/Top-Down Shade Bottom Rail... -
Page 4: Tools And Fasteners Needed
GETTING STARTED Thank you for purchasing cellular shades. With proper installation, operation, and care, your new shades will provide years of beauty and performance. Please thoroughly review this instruction booklet before beginning the installation. Tools and Fasteners Needed Flat blade and Phillips screwdriver Level (laser level is recommended) ■... -
Page 5: Installation
INSTALLATION Installation Overview Your order will include the correct number of installation brackets for your shade width, as ■ shown in the table. Shade Brackets There are two sizes of installation brackets, one for ➤ Width Required " and " pleat sizes and a larger one for the 1 "... -
Page 6: Mount The Installation Brackets - Inside Mount
INSTALLATION Mount the Installation Brackets — Inside Mount Measure 2" from each jamb for bracket location. ■ If more than two installation brackets came with your order, space additional bracket(s) ➤ evenly between the two end brackets and mark their location. Mount into wood whenever possible. -
Page 7: Mount The Installation Brackets - Outside Mount
INSTALLATION Mount the Installation Brackets — Outside Mount Center the headrail over the window opening at the desired height. Use a pencil to lightly ■ mark each end of the headrail on the mounting surface. Alternatively, measure the width of the headrail and use that width to mark the headrail ➤... - Page 8 INSTALLATION Attach the installation or extension brackets using the screws provided. ■ IMPORTANT: The front edges of the installation brackets must be level and aligned to each other. If using spacer blocks, first attach the installation ■ bracket to the "...
-
Page 9: Mount The Installation Brackets - End Mount
INSTALLATION Mount the Installation Brackets — End Mount End mount the headrail when conventional mounting techniques will not work — for example, in an arched window opening. Position the end mount brackets so that the top of the attached installation brackets equal "... -
Page 10: Install The Shade
INSTALLATION Install the Shade The front of the bracket fits under the groove. Fit the front channel on top of the headrail onto the ■ Bracket front lip of the installation brackets. Push the headrail up and back until it snaps into ■... -
Page 11: Install The Handle(S)
INSTALLATION Install the Handle(s) Using the handle provides touch of finger ease and convenient shade operation. IMPORTANT: For shades over 60" wide, two handles will be provided. Space these handles evenly across the rail. Attach the handle at the center of the bottom rail. ■... -
Page 12: Operation
OPERATION Operate the Shade For better support and smoother operation, use the handle when raising and lowering the shade. To Raise the Shade Slowly and steadily push up on the bottom rail handle. Allow ■ the shade to stack evenly. To Lower the Shade Slowly and steadily pull down on the bottom rail handle. -
Page 13: Troubleshooting
OPERATION Troubleshooting Problem The shade is hard to raise or lower, or will not raise or lower. Solution Make sure that the shade fabric is not caught between the installation bracket and the headrail. Check that the headrail and installation brackets are level and aligned. Shim the installation brackets to level the headrail, if necessary. -
Page 14: Care
CARE Removing the Shade (If Necessary) Lower the shade approximately 4". ■ Bracket While holding the headrail, push ■ back on the bottom tab of Back of Headrail the installation bracket to Shade release the bottom edge of the headrail. After releasing the bottom edge, Bottom ■... - Page 16 18-67IN-18 3/14...
Need help?
Do you have a question about the Accu-Rise Operating System and is the answer not in the manual?
Questions and answers