Stober POSIDRIVE MDS 5000 Mounting Instructions
Hide thumbs
Also See for POSIDRIVE MDS 5000:
- Projecting manual (140 pages) ,
- Operation manual (132 pages) ,
- Manual (590 pages)

Subscribe to Our Youtube Channel
Related Manuals for Stober POSIDRIVE MDS 5000


Summary of Contents for Stober POSIDRIVE MDS 5000
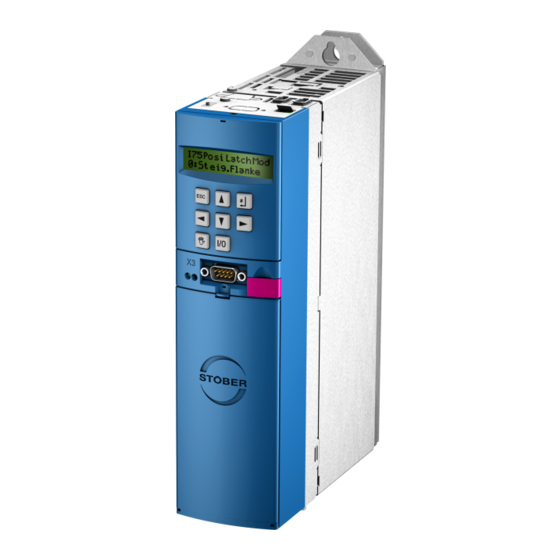
- Page 1 POSIDRIVE ® MDS 5000 Mounting Instructions CONNECTION MOUNTING V 5.3 01/2008 Field- POSI Applications Switch ®...
-
Page 2: Table Of Contents
POSIDRIVE ® MDS 5000 – Mounting Instructions STÖBER ANTRIEBSTECHNIK Table of Contents TABLE OF CONTENTS 1. Notes on Safety 7. Accessories Hardware Accessory overview Software Brake resistor 7.2.1 FZM(U), FZZM and VHPR 2. Technical Data 7.2.2 FZT, FZZT, FZDT and FGFT Electrical 7.2.3 Bottom brake resistor RB 5000... -
Page 3: Notes On Safety
5th Generation of STÖBER Inverters STÖBER ANTRIEBSTECHNIK 1. Notes on Safety NOTES ON SAFETY This manual contains information which must be adhered to in order to prevent personal injury and property damage. This information is graduated by degree of damage as shown below. -
Page 4: Hardware
5th Generation of STÖBER Inverters STÖBER ANTRIEBSTECHNIK 1. Notes on Safety Hardware WARNING To ensure that avoidable problems do not occur during commissioning and/or operation, be sure to read these installation and commissioning instructions before installation and commissioning. In the sense of DIN EN 50178 (formerly VDE 0160), the FDS and MDS model series of ®... -
Page 5: Software
5th Generation of STÖBER Inverters STÖBER ANTRIEBSTECHNIK 1. Notes on Safety The motor must have an integral temperature monitor with basis insulation as per EN 61800-5-1 or external motor overload protection must be used. Only suitable for use on supply current networks which cannot deliver more than a maximum symmetric, nominal, short-circuit current of 5000 A at 480 Volt. - Page 6 POSIDRIVE ® MDS 5000 – Mounting Instructions STÖBER ANTRIEBSTECHNIK 2. Technical Data TECHNICAL DATA Model key MDS 5075/L Designation Auxiliary voltage, control electronics /L ... Low level, 24 V external 5th generation /H ... High level, DC link Power 075 = 7.5 kW Electrical General (for all sizes) Output voltage...
-
Page 7: Technical Data
POSIDRIVE ® MDS 5000 – Mounting Instructions STÖBER ANTRIEBSTECHNIK 2. Technical Data Size 0 / BG 0 MDS 5004 Device Type MDS 5007 MDS 5008 MDS 5015 Under preparation ID no. 44556 44555 44557 44558 Recommended motor 0.75 kW 0.37 kW 0.75 kW 1.5 kW power... - Page 8 POSIDRIVE ® MDS 5000 – Mounting Instructions STÖBER ANTRIEBSTECHNIK 2. Technical Data Size 1 / BG 1 Device Type MDS 5040 MDS 5075 ID no. 44560 44561 Recommended 4.0 kW 7.5 kW motor capacity (L1-L3) 3 x 400 V +32%/-50% 50 Hz Connection voltage (L1-L3) 3 x 480 V +10%/-58% 60 Hz Power fuses...
- Page 9 POSIDRIVE ® MDS 5000 – Mounting Instructions STÖBER ANTRIEBSTECHNIK 2. Technical Data Size 2 / BG 2 Device Type MDS 5110 MDS 5150 ID no. 44562 44563 Recommended 11 kW 15 kW motor capacity (L1-L3) 3 x 400 V +32%/-50% 50 Hz Connection voltage (L1-L3) 3 x 480 V +10%/-58% 60 Hz Power fuses...
- Page 10 POSIDRIVE ® MDS 5000 – Mounting Instructions STÖBER ANTRIEBSTECHNIK 2. Technical Data Size 3 / BG 3 Device Type MDS 5220 MDS 5370 MDS 5450 ID no. 44564 44566 44567 Recommended 22 kW 37 kW 45 kW motor capacity (L1-L3) 3 x 400 V +32%/-50% 50 Hz Connection voltage (L1-L3) 3 x 480 V +10%/-58% 60 Hz Power fuses...
-
Page 11: Mechanical
POSIDRIVE ® MDS 5000 – Mounting Instructions STÖBER ANTRIEBSTECHNIK 2. Technical Data Mechanical BG 0 / BG 1 BG 2 EMC shield plate For position, designation and allocation of the terminals, see chap. 5. Dimensions in mm BG 0 BG 1 BG 2 Height Height... - Page 12 POSIDRIVE ® MDS 5000 – Mounting Instructions STÖBER ANTRIEBSTECHNIK 2. Technical Data Size 3 / BG 3 BG 3 Dimensions in mm MDS 5220 MDS 5370 MDS 5450 Height 382.5 Inverter Width base plate Depth Vertical (distance) Vertical position Mounting holes on the base plate Horizontal (distance) Without packaging...
-
Page 13: Mechanical Installation
POSIDRIVE ® MDS 5000 – Mounting Instructions STÖBER ANTRIEBSTECHNIK 3. Mechanical Installation MECHANICAL INSTALLATION This chapter gives you complete information on the subject of mechanical installation. Only specialized personnel who are qualified for this task may install, commission and operate the device. Installation Location •... -
Page 14: With Bottom Brake Resistor
POSIDRIVE ® MDS 5000 – Mounting Instructions STÖBER ANTRIEBSTECHNIK 3. Mechanical Installation 3.2.2 With Bottom Brake Resistor Available for BG 0 to BG 2. The "brake resistor RB 5000" substructure is the ideal solution when space is limited. It is placed between mounting surface and MDS 5000. This increases the mounting depth by approx. -
Page 15: Installation Of Accessories
POSIDRIVE ® MDS 5000 – Mounting Instructions STÖBER ANTRIEBSTECHNIK 3. Mechanical Installation Installation of Accessories Only specialized personnel who are qualified for this task may install accessories (cf. chap. 7). Suitable measures must be provided against damage by electrostatic discharging (in accordance with DIN EN 50082-2). Before installation, the device must be disconnected from the power and, with the MDS 5xxx/L series, the 24 V power must be turned off. -
Page 16: Ethercat (Ecs 5000)
POSIDRIVE ® MDS 5000 – Mounting Instructions STÖBER ANTRIEBSTECHNIK 3. Mechanical Installation 3.3.1.2 EtherCAT (ECS 5000) • Make sure that the device is without power. Wait ≥ 5 min. for the DC link capacitors to discharge after turning off the power supply voltage. -
Page 17: Electrical Installation
POSIDRIVE ® MDS 5000 – Mounting Instructions STÖBER ANTRIEBSTECHNIK 4. Electrical Installation ELECTRICAL INSTALLATION This chapter gives you complete information on the subject of electrical installation. Only specialized personnel who are qualified for this task may install, commission and control the device. This chapter contains general information on EMC-suitable installation. -
Page 18: Brake Module For 24 V Brake
POSIDRIVE ® MDS 5000 – Mounting Instructions STÖBER ANTRIEBSTECHNIK 4. Electrical Installation Brake Module for 24 V Brake The relay in the basic device for brake control is equipped with hardgold contacts. This relay is designed for control of an electro-magnetic brake. -
Page 19: Dc Link Coupling
POSIDRIVE ® MDS 5000 – Mounting Instructions STÖBER ANTRIEBSTECHNIK 4. Electrical Installation DC Link Coupling If you are using axes in a plant which operate in a network of generators and motors, the DC link coupling (DC coupling) can be advantageous. -
Page 20: Combinations
POSIDRIVE ® MDS 5000 – Mounting Instructions STÖBER ANTRIEBSTECHNIK 4. Electrical Installation 4.5.2 Combinations The following table shows the possible combinations for the DC-link coupling. A total of 15 combinations are available. Example: Combination no. 7 This combination lets you combine one size-1 inverter in group 1 with two size-0 devices in group 2. There is no group 3. The power fuse must have a nominal current of 20 A. -
Page 21: Safety Function „Safe Torque Off
POSIDRIVE ® MDS 5000 – Mounting Instructions STÖBER ANTRIEBSTECHNIK 4. Electrical Installation Safety function „safe torque off“ NOTE The certified version of the safety function is available for designs BG 0 to BG 2 as per EN 954-1 category 3. You will find the certificate under www.stoeber.de The ASP 5001 may only be installed and repaired by STÖBER ANTRIEBSTECHNIK. - Page 22 POSIDRIVE ® MDS 5000 – Mounting Instructions STÖBER ANTRIEBSTECHNIK 4. Electrical Installation WARNING 1. Switchoff distance may not take effect. If you deviate from a standard configuration, you must ensure that the 1st switchoff distance (i.e., the enable) always takes effect. WARNING 1.
- Page 23 POSIDRIVE ® MDS 5000 – Mounting Instructions STÖBER ANTRIEBSTECHNIK 4. Electrical Installation Remember that you must monitor the time between the enable switchoff and the high signal of the enable response message. The maximum time for this step is: = 1s + regular time between enable switchoff and the high signal of the enable response message. When this time is exceeded without receiving a response message from the inverter, you must always activate starting lockout! The external safety circuit must monitor the addressing of the enable and the relay coil as well as the resulting signals of the enable response message and the response message contact of the ASP 5001.
-
Page 24: Function Test
POSIDRIVE ® MDS 5000 – Mounting Instructions STÖBER ANTRIEBSTECHNIK 4. Electrical Installation Switching on the inverter with the option "ASP 5001 starting lockout" Activation relay Proceed as follows (Figure 4-4 Timing diagram): of ASP 5001 (X12.3, X12.4) Deactivate the starting lockout by turning on the 24 V signal on terminals X12.3 and X12.4. -
Page 25: Cable Fabrication
POSIDRIVE ® MDS 5000 – Mounting Instructions STÖBER ANTRIEBSTECHNIK 4. Electrical Installation Cable Fabrication 4.7.1 Motor Cables Ready-to-use motor cables can be ordered from STÖBER ANTRIEBSTECHNIK. The following modifications must be made for connection to the different model sizes. BG 0 without / with brake module BG 1 / BG 2 without brake module Core end sleeves... -
Page 26: Installation After Storage Period
POSIDRIVE ® MDS 5000 – Mounting Instructions STÖBER ANTRIEBSTECHNIK 4. Electrical Installation Installation after storage period WARNING Capacitors are installed in the inverter. After storage times of one year and longer, the capacitors must be formed. If no forming is performed, substantial property damage may occur when the inverter is turned on. Following a longer storage period, the capacitors of the inverter must be reformed. -
Page 27: Connection Allocation
POSIDRIVE ® MDS 5000 – Mounting Instructions STÖBER ANTRIEBSTECHNIK 5. Connection Allocation CONNECTION ALLOCATION This section discusses the position, designation and allocation of the terminals. Terminal Overview BG 0 to BG 2 X12 Startup disable X10 Power (option) X200 Fieldbus (option) X11 24 V X102 Analog input 3 X10³ A I/O digital expansion... - Page 28 POSIDRIVE ® MDS 5000 – Mounting Instructions STÖBER ANTRIEBSTECHNIK 5. Connection Allocation Terminal Overview BG 3 X10 Power View A X12 Startup disable X10 Power (option) X11 24 V View A X20 Motor, brake resistor, DC link NOTE Further connections at the control unit cp. chap. 5.1 (BG 0 to BG 2)!
- Page 29 POSIDRIVE ® MDS 5000 – Mounting Instructions STÖBER ANTRIEBSTECHNIK 5. Connection Allocation Terminal Allocation This section presents and describes all interfaces. The exact position is shown in chap. 5.1. X1 – enable, relay 1 Signal / Function Description Circuiting Ready to run relay: Show readiness for operation of the control electronics.
- Page 30 POSIDRIVE ® MDS 5000 – Mounting Instructions STÖBER ANTRIEBSTECHNIK 5. Connection Allocation X4 – encoder For evaluation of EnDat , HTL, TTL and SSI encoders ® CAUTION X4 may not be plugged in or disconnected when the device is on! Otherwise the encoder may be destroyed! To ensure correct function of the motors and inverters, we recommend the use of on the system coordinated cables from STÖBER ANTRIEBSTECHNIK.
- Page 31 POSIDRIVE ® MDS 5000 – Mounting Instructions STÖBER ANTRIEBSTECHNIK 5. Connection Allocation X4 – encoder – connection EnDat -absolute value encoder, digital / SSI (10 – 30 V) ® Signal Clock+ Sense DATA- DATA+ Clock- DGND PIN X4 Motor yellow pink brown white green blue Cable²...
- Page 32 POSIDRIVE ® MDS 5000 – Mounting Instructions STÖBER ANTRIEBSTECHNIK 5. Connection Allocation X10 – power (single-phase), MDS 5007 Signal / Function Description Circuiting Plastic dummy plug L1 L1 Input voltage 230 V +20% / -55% 50/60 Hz Neutral conductor PE PE Protective conductor X10 –...
- Page 33 POSIDRIVE ® MDS 5000 – Mounting Instructions STÖBER ANTRIEBSTECHNIK 5. Connection Allocation X11 – 24 V, BG 0 to BG 2 Only for devices of the MDS 5xxx/L series Signal / Function Description Circuiting Auxiliary voltage (PELV) + 24 V 4 AT For powering the control electronics +24 V...
- Page 34 POSIDRIVE ® MDS 5000 – Mounting Instructions STÖBER ANTRIEBSTECHNIK 5. Connection Allocation X20 – motor, BG 0 to BG 2 Signal/Function Description Circuiting BG 0 BG 1 BG 2 Motor plug 1 Motor plug 1,5 Motor connection, phase U Motor connection, phase V Plug Cable...
- Page 35 POSIDRIVE ® MDS 5000 – Mounting Instructions STÖBER ANTRIEBSTECHNIK 5. Connection Allocation X20 – Motor, brake resistor, DC link, BG 3 Signal / Function Description Circuiting RB- RB- With cables longer than 30 cm between brake Connection, brake resistor and device, shielded cables must be resistor used.
- Page 36 POSIDRIVE ® MDS 5000 – Mounting Instructions STÖBER ANTRIEBSTECHNIK 5. Connection Allocation X100 – I/O analog (only in combination with I/O terminal module, standard (SEA 5000, SEA 5001), expanded (XEA 5001) or resolver (REA 5000)) Signal / Function Description Circuiting + Input of analog input AE1 Difference input voltage in relation to PIN 3;...
- Page 37 POSIDRIVE ® MDS 5000 – Mounting Instructions STÖBER ANTRIEBSTECHNIK 5. Connection Allocation X101 – I/O digital (only in combination with I/O terminal module, standard (SEA 5000, SEA 5001), expanded (XEA 5001) or resolver (REA 5000)) Signal / Function Description Circuiting Reference ground GND 18 V For 18 V Auxiliary voltage (PIN 19)
- Page 38 POSIDRIVE ® MDS 5000 – Mounting Instructions STÖBER ANTRIEBSTECHNIK 5. Connection Allocation Supplement for BE3 to BE5 Connection of incremental and stepper motor signals to BE3, BE4 and BE5 (Caution! Function must be parameterized on the inverter!) Incremental encoder Step motor signals Zero track Track A+ (Increments) freq.+...
- Page 39 POSIDRIVE ® MDS 5000 – Mounting Instructions STÖBER ANTRIEBSTECHNIK 5. Connection Allocation X103 B – I/O digital expansion (only in combination with I/O terminal module "expanded" (XEA 5001)) Signal / Function Description Circuiting Binary output BA7 = 50 mA; T * = 1 msec + 24V A max...
- Page 40 POSIDRIVE ® MDS 5000 – Mounting Instructions STÖBER ANTRIEBSTECHNIK 5. Connection Allocation X120 – encoder input/output (only in combination with I/O terminal module "expanded" (XEA 5001)) For evaluation and simulation of TTL or SSI encoders Signal / Function Description Circuiting Reference potential GND - ENC For PIN 2 - 7...
- Page 41 POSIDRIVE ® MDS 5000 – Mounting Instructions STÖBER ANTRIEBSTECHNIK 5. Connection Allocation X120 – encoder output (only in combination with I/O terminal module “resolver” (REA 5000)) For simulation of TTL encoder signals in reference to a resolver connected to X140 Signal / Function Description Circuiting...
- Page 42 POSIDRIVE ® MDS 5000 – Mounting Instructions STÖBER ANTRIEBSTECHNIK 5. Connection Allocation X200 – fieldbus CANopen (only in combination with fieldbus module CAN5000) Signal / Function Description Circuiting Not connected CAN-low CAN-low line Signal ground Not connected Not connected CAN-low line CAN-low Connected internally with PIN 2 Internal terminal resistance: 120 Ω...
- Page 43 POSIDRIVE ® MDS 5000 – Mounting Instructions STÖBER ANTRIEBSTECHNIK 5. Connection Allocation X200 – IN EtherCAT (only in combination with fieldbus module ECS5000) Signal / Function Description Circuiting TxData + Suitable connection cables are Ethernet patch cables or crossover cables in CAT5e EtherCAT communication TxData - quality.
- Page 44 POSIDRIVE ® MDS 5000 – Mounting Instructions STÖBER ANTRIEBSTECHNIK 5. Connection Allocation X300 – brake module for 24 V brake (optional) Signal / Function Description Circuiting 24 V power for brake activation +24 V Voltage range: 24 V -0% to 24 V +5% = 2 A E max Reference potential for 24 V power...
-
Page 45: Examples Of Connections
POSIDRIVE ® MDS 5000 – Mounting Instructions STÖBER ANTRIEBSTECHNIK 6. Examples of connections EXAMPLES OF CONNECTIONS General 6.1.1 Brake connection with BRM 5000 for 24 V DC brakes Power fuse Power cutoff 24 V X300 X302 X301 Enable Floating message contact, must be integrated in the safety circuit of the controller. -
Page 46: Brake Connection With Interface Relay For 230 V Ac Brakes
POSIDRIVE ® MDS 5000 – Mounting Instructions STÖBER ANTRIEBSTECHNIK 6. Examples of connections 6.1.2 Brake connection with interface relay for 230 V AC brakes Power fuse Power cutoff 24 V Enable Floating message contact, must be integrated in the safety circuit of the controller. -
Page 47: Brake Connection With Powerbox
POSIDRIVE ® MDS 5000 – Mounting Instructions STÖBER ANTRIEBSTECHNIK 6. Examples of connections 6.1.3 Brake connection with Powerbox Power fuse Power fuse Power cutoff 24 V PBox Enable Floating message contact, must be integrated in the safety circuit of the controller. M 3~ Option Only motors with DC brake... -
Page 48: Terminals
POSIDRIVE ® MDS 5000 – Mounting Instructions STÖBER ANTRIEBSTECHNIK 6. Examples of connections Terminals 6.2.1 Example 1 • Potentiometer on AE1 (terminals X100.1, X100.3, X100.8) with voltage supply 18 V (terminal X100.19) and voltage divider. • Potentiometer on AE2 (terminals X100.4 and X100.5, X100.8) with voltage supply 10 V via AA1 with F41 analog output. Offset = 10 V (terminal X100.6). - Page 49 POSIDRIVE ® MDS 5000 – Mounting Instructions STÖBER ANTRIEBSTECHNIK 7. Accessories ACCESSORIES Accessory Overview ID No. Designation Remarks 49576 I/O terminal module, standard (SEA 5001) Chap. 3.3.2 in this instruction 2 analog inputs (11 bits + sign) 2 analog outputs (±10 bits) 5 binary inputs 2 binary outputs 49015 I/O terminal module, expanded (XEA 5001)
- Page 50 POSIDRIVE ® MDS 5000 – Mounting Instructions STÖBER ANTRIEBSTECHNIK 7. Accessories ID No. Designation Remarks ® ® 44573 4-fold axis switch, POSISwitch AX 5000 POSISwitch documentation: Permits operation of up to four servo motors on one Publ. no. 441669 (D) ®...
- Page 51 POSIDRIVE ® MDS 5000 – Mounting Instructions STÖBER ANTRIEBSTECHNIK 7. Accessories ID No. Designation Remarks 49313 EtherCAT cable (0.21 m) Chap. 5.3 EtherNet patch cable CAT5e, yellow No image available 49314 EtherCAT cable (0.38 m) Chap. 5.3 EtherNet patch cable CAT5e, yellow Starting lockout ASP 5001 Chap.
-
Page 52: Brake Resistor
POSIDRIVE ® MDS 5000 – Mounting Instructions STÖBER ANTRIEBSTECHNIK 7. Accessories Brake Resistor 7.2.1 Brake resistor FZM(U), FZZM and VHPR Allocation to MDS 5000 FZMU FZZM VHPR VHPR 330x35 400x65 400x65 400x65 400x65 VHPR150V VHPR150V VHPR500V VHPR600V 250 W 600 W 600 W 1200 W 1200 W... - Page 53 POSIDRIVE ® MDS 5000 – Mounting Instructions STÖBER ANTRIEBSTECHNIK 7. Accessories 7.2.2 Brake resistor FZT, FZZT, FZDT and FGFT Allocation to MDS 5000 FZZT FZDT FGFT 400x65 400x65 500x65 3111202 600 W 1200 W 2500 W 6000 W 22 Ω 20 Ω...
- Page 54 POSIDRIVE ® MDS 5000 – Mounting Instructions STÖBER ANTRIEBSTECHNIK 7. Accessories 7.2.3 Bottom brake resistor RB 5000 Allocation to MDS 5000 RB 5022 RB 5047 RB 5100 RB 5200 100 W 60 W 60 W 40 W 22 Ω 47 Ω 100 Ω...
- Page 55 POSIDRIVE ® MDS 5000 – Mounting Instructions STÖBER ANTRIEBSTECHNIK 7. Accessories Output Deraters Technical Data WARNING Danger of fire! When the output deraters are used outside the nominal data (cable length, current, frequency, and so on), the output deraters may overheat. Always operate the output deraters within their nominal data.
- Page 56 POSIDRIVE ® MDS 5000 – Mounting Instructions STÖBER ANTRIEBSTECHNIK 7. Accessories Dimensions Ø D Screwed Connection Weight Type (mm) (mm) (mm) (mm) (mm) (mm) Glands (mm²) [kg] 62.5 MDB-G0 3x4-3000 MDB-G1 3x16-900 MDB-G2 3x32-500...
- Page 58 • Service Network International • STÖBER Subsidiaries: • Austria France STÖBER ANTRIEBSTECHNIK GmbH STOBER DRIVES INC. STÖBER S.a.r.l. Fabriksplatz 1 1781 Downing Drive 131, Chemin du Bac à Traille 4662 Steyrermühl Maysville, KY 41056 Les Portes du Rhône Fon +43 7613 76000...
- Page 59 Notes STÖBER ANTRIEBSTECHNIK ______________________________________________________________________________________________________ ______________________________________________________________________________________________________ ______________________________________________________________________________________________________ ______________________________________________________________________________________________________ ______________________________________________________________________________________________________ ______________________________________________________________________________________________________ ______________________________________________________________________________________________________ ______________________________________________________________________________________________________ ______________________________________________________________________________________________________ ______________________________________________________________________________________________________ ______________________________________________________________________________________________________ ______________________________________________________________________________________________________ ______________________________________________________________________________________________________ ______________________________________________________________________________________________________ ______________________________________________________________________________________________________ ______________________________________________________________________________________________________ ______________________________________________________________________________________________________ ______________________________________________________________________________________________________ ______________________________________________________________________________________________________ ______________________________________________________________________________________________________ ______________________________________________________________________________________________________ ______________________________________________________________________________________________________ ______________________________________________________________________________________________________ ______________________________________________________________________________________________________ ______________________________________________________________________________________________________ ® ® SMS, POSIDYN and POSIDRIVE are protected names of © 2008 STÖBER ANTRIEBSTECHNIK GmbH + Co. KG STÖBER ANTRIEBSTECHNIK GmbH + Co.
- Page 60 PK Right Angle Planetary Gear Units PHKX Right Angle Planetary Gear Units PHK Right Angle Planetary Gear Units Motors AC Motors MGS System Motors Servo Motors EK Servo Motors www.stoeber.de ED Servo Motors Visit also: www.stober.com (STOBER DRIVES INC., USA)
Need help?
Do you have a question about the POSIDRIVE MDS 5000 and is the answer not in the manual?
Questions and answers