Table of Contents
Advertisement
Available languages
Available languages
Advertisement
Table of Contents

Subscribe to Our Youtube Channel
Related Manuals for TMC Aquarium REEF-Skim PRO 500

Summary of Contents for TMC Aquarium REEF-Skim PRO 500
- Page 1 FOR ADVANCED AQUARISTS FOR ADVANCED AQUARISTS ®...
- Page 3 (mm) REEF-Skim PRO 300 REEF-Skim PRO 500 REEF-Skim PRO 1000 REEF-Skim PRO 1500 REEF-Skim PRO 2000...
- Page 4 INSTRUCTIONS FOR INSTALLATION AND USE Important Safety Information - Please Read Carefully - Always isolate from the mains electricity before installing or carrying out any maintenance to the REEF-Skim PRO unit. - Power to the REEF-Skim PRO unit must be supplied through a Residual Current Device (RCD) with a rated residual operating current not exceeding 30mA.
-
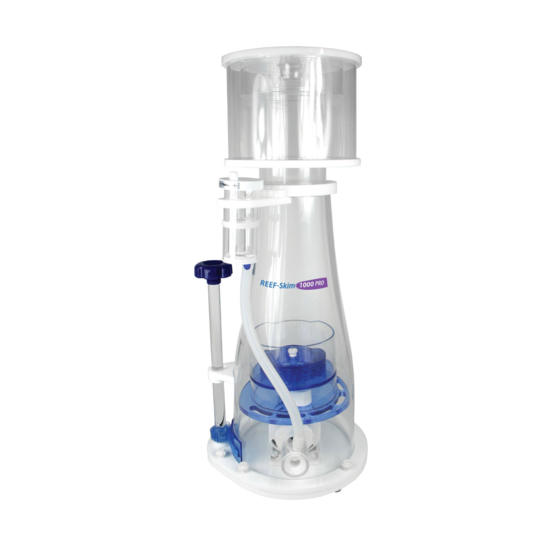
Page 5: Parts List
PARTS LIST Main skimmer body 17. Collection cup drain assembly Water outlet 18. Pump Water level adjustment knob 19. Bubble diffuser Air Silencer 20. Bubble diffuser mounting plate Ozone nipple 21. Venturi Air silencer inlet 22. Venturi air nipple Air line connection nipple 23. - Page 6 FULL SKIMMER ASSEMBLY/RE-ASSEMBLY REEF-Skim PRO 300 The REEF-Skim PRO 300 comes almost fully assembled. For initial set up or re-assembly after maintenance/cleaning follow photos below. Make sure the bubble stop sponge is attached to the outlet before use and regularly clean or replace it to ensure optimum performance.
- Page 7 FULL SKIMMER ASSEMBLY/RE-ASSEMBLY REEF-Skim PRO 500/1000/1500/2000 For initial set up or re-assembly after maintenance/cleaning follow photos below.
-
Page 8: Installation
INSTALLATION The REEF-Skim PRO unit is designed to be used in-sump only and ideally positioned as close to the aquarium drain pipe as possible to ensure the best possible pick up of organics and other waste. To ensure that the collection cup can be easily removed for cleaning, allow at least 50mm clearance above the collection cup lid. -
Page 9: Initial Operation
INITIAL OPERATION Caution: Fully open the air adjustment dial and turn the water level adjustment dial ANTI-CLOCKWISE as far as you can (to lower the water level as far as possible) BEFORE turning on the skimmer. REEF-Skim PRO units have very powerful pumps and flooding can occur quickly if air and water levels are not correctly set. -
Page 10: Maintenance
USE WITH OZONE REEF-Skim PRO Protein Skimmers and the supplied pump are suitable for use with ozone. To use with ozone, simply connect the outlet of the ozone generator to the ozone injection nipple (this will be covered with a small cap) on the bottom of the air silencer. Turn the air adjustment dial so as much air as possible is sucked through the ozone unit, but without affecting bubble production performance. -
Page 11: Troubleshooting
TROUBLE SHOOTING Problem: The skimmer is not removing any waste 1. Possible Cause: Water level is too low or skimmer is positioned in water that is too shallow. Solution: Alter water level adjustment dial accordingly or raise skimmer in sump. 2. - Page 12 INSTRUCTIONS POUR L'INSTALLATION ET L'UTILISATION Informations importantes de sécurité – Veuillez lire attentivement - Isolez toujours l'unité REEF-Skim PRO du réseau électrique avant de l'installer ou d'effectuer un entretien sur celle-ci. - L'unité REEF-Skim PRO doit être alimentée par un dispositif à courant différentiel résiduel (DCR) ayant un courant de fonctionnement résiduel nominal n'excédant pas 30 mA.
-
Page 13: Liste Des Pièces
LISTE DES PIÈCES Corps de l'écumeur 17. Ensemble de vidange du godet de collecte Sortie d'eau 18. Pompe Bouton de réglage du niveau d'eau 19. Diffuseur de bulles Silencieux d'admission 20. Plaque de montage du diffuseur de bulles Mamelon d'ozone 21. - Page 14 MONTAGE/REMONTAGE COMPLET DE L'ÉCUMEUR REEF-Skim PRO 300 Le REEF-Skim PRO 300 est livré presque entièrement assemblé. Pour la première mise en service ou pour un remontage après une opération d'entretien/nettoyage, suivez les photos ci-dessous. 1. Assurez-vous avant utilisation que l'éponge d'arrêt des bulles est fixée à la sortie et nettoyez-la ou remplacez-la régulièrement pour garantir des performances optimales.
- Page 15 MONTAGE/REMONTAGE COMPLET DE L'ÉCUMEUR REEF-Skim PRO 500/1000/1500/2000 Pour la première mise en service ou pour un remontage après une opération d'entretien/ nettoyage, suivez les photos ci-dessous.
- Page 16 INSTALLATION L'unité REEF-Skim PRO est conçue pour être utilisée seulement à l'intérieur d'une cuve et dans l'idéal placée aussi près que possible du tuyau d'évacuation de l'aquarium pour assurer la meilleure collecte possible des matières organiques et autres déchets. Pour garantir que le godet de collecte puisse être facilement retiré...
-
Page 17: Première Mise En Service
PREMIÈRE MISE EN SERVICE Attention : Ouvrez à fond le bouton de réglage d'air et tournez le bouton de réglage de niveau d'eau DANS LE SENS INVERSE DES AIGUILLES D'UNE MONTRE aussi loin que vous pouvez (pour abaisser le niveau d'eau autant que possible) AVANT d'allumer l'écumeur. -
Page 18: Entretien
UTILISATION AVEC DE L'OZONE Les écumeurs à protéine REEF-Skim PRO et la pompe fournie conviennent à une utilisation avec de l'ozone. Pour les utiliser avec de l'ozone, il suffit de raccorder la sortie du générateur d'ozone au mamelon d'injection d'ozone (qui sera recouvert d'un petit bouchon) sur le fond du silencieux d'air. Tournez le bouton de réglage d'air afin qu'autant d'air que possible soit aspiré... -
Page 19: Dépannage
DÉPANNAGE Problème : L'écumeur n'élimine aucun déchet 1. Cause possible : Le niveau d'eau est trop faible ou l'écumeur est placé dans une eau qui est trop peu profonde. Solution : Modifiez la position du bouton de réglage du niveau d'eau en conséquence ou remontez l'écumeur dans la cuve. -
Page 20: Installations- Und Bedienungsanleitung
INSTALLATIONS- UND BEDIENUNGSANLEITUNG Wichtige Sicherheitshinweise – Bitte sorgfältig lesen - Trennen Sie die Anlage immer vom Stromnetz, bevor Sie die REEF-Skim PRO-Einheit installieren oder warten. - Die Stromversorgung der REEF-Skim PRO-Einheit muss über eine Fehlerstrom- Schutzeinrichtung mit einem Fehler-Betriebsnennstromwert von nicht mehr als 30 mA erfolgen. - Page 21 TEILELISTE Abschäumergehäuse 18. Pumpe Wasserauslass 19. Blasendiffusor Wasserstandsregelknopf 20. Blasendiffusor-Befestigungsplatte Luftschalldämpfer 21. Venturidüse Ozonnippel 22. Luftstutzen der Venturidüse Luftschalldämpfer-Einlass 23. Luftleitung Luftleitungs-Anschlussstutzen 24. Sicherungsschrauben Luftregler 300 - x4, 500 - x5, 1000 - x7, 1500 - x7, 2000 - x8 Wasserstandsreglerbaugruppe 25 Schwamm 10.
- Page 22 VOLLSTÄNDIGER ZUSAMMENBAU/WIEDERZUSAMMENBAU DES ABSCHÄUMERS REEF-Skim PRO 300 Das REEF Skim 300 ist bei Lieferung schon fast vollständig zusammengebaut. Angaben zur Ersteinrichtung bzw. zum Wiederzusammenbau nach einer Wartung/Reinigung finden Sie nachfolgend in den Fotos. 1. Achten Sie darauf, dass der Blasenauffangschwamm vor der Verwendung am Auslass befestigt wird, und reinigen Sie diesen regelmäßig bzw.
- Page 23 VOLLSTÄNDIGER ZUSAMMENBAU/WIEDERZUSAMMENBAU DES ABSCHÄUMERS REEF-Skim PRO 500/1000/1500/2000 Beachten Sie bei der Ersteinrichtung bzw. beim Wiederzusammenbau nach einer Wartung/ Reinigung die folgenden.
- Page 24 INSTALLATION Die REEF-Skim PRO-Einheit ist ausschließlich für eine Verwendung im Becken ausgelegt und sollte so nahe wie möglich am Ablauf des Aquariums positioniert werden, damit organische und andere Abfälle so effektiv wie möglich entfernt werden können. Um sicherzustellen, dass der Auffangbehälter bei der Reinigung einfach ausgebaut werden kann, lassen Sie über dem Deckel des Auffangbehälters einen Abstand von mindestens 50 mm.
- Page 25 INBETRIEBNAHME UND ERSTER EINSATZ Achtung: Öffnen Sie den Luftregler vollständig und drehen Sie den Wasserstandsregler so weit es geht GEGEN DEN UHRZEIGERSINN (um den Wasserstand so weit wie möglich abzusenken), BEVOR Sie den Abschäumer einschalten. REEF-Skim PRO-Einheiten haben sehr leistungsstarke Pumpen, und es kann schnell zu einer Überflutung kommen, wenn Luftstrom und Wasserstand nicht korrekt eingestellt werden.
-
Page 26: Wartung
EINSATZ MIT OZON REEF-Skim PRO-Proteinabschäumer und die mitgelieferte Pumpe sind für einen Einsatz mit Ozon geeignet. Wenn Sie Ozon verwenden, schließen Sie einfach den Auslass des Ozongenerators an den Ozonzuführungsnippel (dieser ist mit einer kleinen Kappe abgedeckt) an der Unterseite des Luftschalldämpfers an. -
Page 27: Problembehandlung
PROBLEMBEHANDLUNG Problem: Der Abschäumer sondert keine Abfallstoffe ab 1. Mögliche Ursache: Der Wasserstand ist zu niedrig, oder der Abschäumer wurde in zu flaches Wasser eingesetzt. Lösung: Stellen Sie den Wasserstandsregler entsprechend ein, oder heben Sie den Abschäumer innerhalb des Beckens an. 2. - Page 28 MONTAGE- EN GEBRUIKSAANWIJZING Belangrijke veiligheidsinformatie - lees deze zorgvuldig - Trek altijd de stekker uit het stopcontact voordat u de REEF-Skim PRO-afschuimer installeert of onderhoud eraan pleegt. - De elektrische installatie waarop de REEF-Skim PRO-afschuimer wordt aangesloten, dient te zijn voorzien van een aardlekschakelaar met een aardlekstroom van max. 30mA. - Vermogen pomp: 100-240 V, 50/60Hz tenzij anders aangegeven.
-
Page 29: Lijst Van Onderdelen
LIJST VAN ONDERDELEN Huis afschuimer 17. Afvoereenheid opvangbeker Waterafvoer 18. Pomp Afstelknop waterpeil 19. Bellendiffusor Luchtdemper 20. Montageplaat bellendiffusor Ozonnippel 21. Venturi Inlaat luchtdemper 22. Venturi-luchtnippel Aansluitnippel luchtslang 23. Luchtslang Afstelknop luchtstroom 24. Bevestigingsschroeven Afsteleenheid waterpeil 300 - x4, 500 - x5, 1000 - x7, 1500 - x7, 2000 - x8 10. - Page 30 COMPLETE MONTAGE/HERMONTAGE AFSCHUIMER REEF-Skim PRO 300 De REEF-Skim PRO 300 wordt bijna volledig gemonteerd geleverd. Zie foto's hieronder voor eerste montage of hermontage na onderhoud/reiniging. 1. Breng de spons voor het stoppen van luchtbellen aan de afvoer aan en reinig of vervang deze regelmatig voor optimale prestaties.
- Page 31 COMPLETE MONTAGE/HERMONTAGE AFSCHUIMER REEF-Skim PRO 500/1000/1500/2000 Zie onderstaande foto's voor eerste montage of hermontage na onderhoud/reiniging.
- Page 32 INSTALLATIE De REEF-Skim PRO-afschuimer is uitsluitend ontworpen voor gebruik in de pompbak en dient zo dicht mogelijk bij de afvoer van het aquarium te worden geplaatst zodat organisch materiaal en ander afval zo goed mogelijk wordt verwijderd. Laat ten minste 50mm vrij boven de deksel van de opvangbeker zodat deze gemakkelijk kan worden verwijderd voor reiniging.
-
Page 33: Eerste Gebruik
EERSTE GEBRUIK Waarschuwing: Draai de afstelknop voor de luchtstroom helemaal open en draai de afstelknop voor het waterpeil zover mogelijk LINKSOM (voor een zo laag mogelijk waterpeil) ALVORENS de afschuimer in te schakelen. REEF-Skim PRO- afschuimers hebben erg krachtige pompen en als de lucht- en waterwaarden niet juist zijn ingesteld, kan dit snel tot overstroming leiden. - Page 34 GEBRUIK MET OZON REEF-Skim PRO-eiwitafschuimers en de meegeleverde pomp zijn geschikt voor ozon. Sluit voor gebruik met ozon de uitvoer van de ozongenerator aan op de ozoninjectienippel (afgesloten door een dopje) aan de onderzijde van de luchtdemper. Stel de afstelknop voor de luchtstroom zo in dat zoveel mogelijk lucht door de ozoneenheid wordt aangezogen, maar let erop dat het aantal geproduceerde belletjes gelijk blijft.
-
Page 35: Problemen Oplossen
PROBLEMEN OPLOSSEN Probleem: De afschuimer verwijdert geen afval 1. Mogelijke oorzaak: Waterpeil is te laag of de afschuimer bevindt zich in water dat te ondiep is. Oplossing: Verdraai de afstelknop voor het waterpeil naar behoefte of breng de afschuimer hoger in de pompbak aan. 2. - Page 36 ISTRUZIONI PER L'INSTALLAZIONE E L'USO Informazioni importanti per la sicurezza - Leggere attentamente - Prima di procedere all'installazione o ad interventi di manutenzione sull'unità REEF-Skim PRO, isolarla sempre dalla rete elettrica. - L'unità REEF-Skim PRO deve essere alimentata elettricamente per mezzo di un dispositivo di protezione differenziale (RCD) con corrente differenziale di funzionamento nominale non superiore a 30 mA.
-
Page 37: Elenco Componenti
ELENCO COMPONENTI Corpo principale schiumatoio 17. Complessivo drenaggio bicchiere di raccolta Uscita acqua 18. Pompa Manopola di regolazione livello acqua 19. Diffusore bolle Silenziatore aria 20. Piastra di montaggio diffusore bolle Nipplo per ozono. 21. Sistema a effetto Venturi Ingresso silenziatore aria 22. - Page 38 ASSEMBLAGGIO/RIASSEMBLAGGIO COMPLETO DELLO SCHIUMATOIO REEF-Skim PRO 300 Il REEF-Skim PRO 300 viene fornito quasi completamente assemblato. Per la predisposizione iniziale o il riassemblaggio in seguito a manutenzione/pulizia, fare riferimento alle foto riportate di seguito. 1. Accertarsi che la spugna elimina bolle sia applicata all'uscita prima dell'uso e pulirla o sostituirla con regolarità...
- Page 39 ASSEMBLAGGIO/RIASSEMBLAGGIO COMPLETO DELLO SCHIUMATOIO REEF-Skim PRO 500/1000/1500/2000 Per la predisposizione iniziale o il riassemblaggio in seguito a manutenzione/pulizia, fare riferimento alle foto riportate di seguito.
-
Page 40: Installazione
INSTALLAZIONE L'unità REEF-Skim PRO è concepita esclusivamente per l'utilizzo all'interno della vasca di raccolta, posizionandola preferibilmente il più vicino possibile al tubo di drenaggio dell'acquario al fine di garantire il miglior prelievo possibile di materiale organico e altri rifiuti. Per avere la certezza che sia possibile rimuovere agevolmente il bicchiere di raccolta ai fini della pulizia, lasciare libero uno spazio di almeno 50 mm al di sopra del coperchio del bicchiere di raccolta. - Page 41 PRIMA MESSA IN FUNZIONE INIZIALE Attenzione: PRIMA di accendere lo schiumatoio, ruotare la manopola di regolazione dell'aria in posizione di completa apertura e ruotare quanto più possibile la manopola di regolazione del livello dell'acqua IN SENSO ANTIORARIO (per diminuire il più possibile il livello dell'acqua). Poiché le unità REEF-Skim PRO sono dotate di pompe molto potenti, se i livelli dell'aria e dell'acqua non sono impostati correttamente può...
-
Page 42: Manutenzione
IMPIEGO CON OZONO Gli schiumatoi di proteine REEF-Skim PRO e la pompa fornita a corredo sono adatti all'impiego con ozono. Per l’impiego con ozono, basta collegare l’uscita del generatore di ozono al nipplo di iniezione dell'ozono (che sarà coperto con un piccolo cappuccio) in fondo al silenziatore aria. Ruotare la manopola di regolazione dell'aria in modo da fare aspirare quanta più... -
Page 43: Risoluzione Dei Problemi
RISOLUZIONE DEI PROBLEMI Problema: lo schiumatoio non elimina alcun rifiuto 1. Causa possibile: il livello dell'acqua è troppo basso o lo schiumatoio è posizionato in acqua troppo bassa. Rimedio: agire opportunamente sulla manopola di regolazione del livello dell’acqua o innalzare lo schiumatoio nella vasca di raccolta. 2. - Page 44 INSTRUCCIONES DE INSTALACIÓN Y USO Información de seguridad importante - Por favor, lea cuidadosamente - Desconecte siempre el sistema de llenado de la red eléctrica antes de instalar o llevar a cabo tareas de mantenimiento sobre la unidad REEF-Skim PRO. - La alimentación eléctrica de la unidad REEF-Skim PRO debe ser suministrada a través de un interruptor diferencial con una corriente de disparo no mayor de 30 mA.
-
Page 45: Lista De Piezas
LISTA DE PIEZAS Carcasa principal del espumador 17. Conjunto de drenaje del vaso colector Salida de agua 18. Bomba Perilla de ajuste del nivel de agua 19. Difusor de burbujas Silenciador de aire 20. Placa de montaje del difusor de burbujas Boquilla de ozono 21. - Page 46 MONTAJE/REMONTAJE COMPLETO DEL ESPUMADOR REEF-Skim PRO 300 La unidad REEF-Skim PRO 300 viene casi completamente montada. Para el montaje inicial o para volver a montar la unidad tras realizar tareas de mantenimiento o limpieza, siga las fotos mostradas más abajo. 1.
- Page 47 MONTAJE/REMONTAJE COMPLETO DEL ESPUMADOR REEF-Skim PRO 500/1000/1500/2000 Para el montaje inicial o para volver a montar la unidad tras realizar tareas de mantenimiento o limpieza, siga las fotos mostradas más abajo.
-
Page 48: Instalación
INSTALACIÓN La unidad REEF-Skim PRO está diseñada para usarse únicamente en el sumidero y debe colocarse idealmente lo más cerca posible de la tubería de drenaje del acuario para garantizar la mejor recogida posible de residuos orgánicos o de otro tipo. Para asegurarse de poder quitar fácilmente el vaso colector para limpiarlo, deje un espacio mínimo de 50 mm por encima de la tapa del vaso colector. -
Page 49: Puesta En Marcha Inicial
PUESTA EN MARCHA INICIAL Precaución: Abra completamente la perilla de ajuste del aire y gire todo lo que pueda la perilla de ajuste del nivel de agua EN SENTIDO CONTRARIO AL DE LAS AGUJAS DEL RELOJ (para reducir al máximo el nivel de agua) ANTES de poner en marcha el espumador. -
Page 50: Mantenimiento
UTILIZACIÓN CON OZONO Los espumadores de proteínas REEF-Skim PRO y la bomba suministrada se pueden usar con ozono. Para una utilización con ozono, bastará con conectar la salida del generador de ozono a la boquilla de inyección de ozono (está cubierta con una pequeña tapa) en la parte inferior del silenciador de aire. -
Page 51: Solución De Problemas
SOLUCIÓN DE PROBLEMAS Problema: el espumador no elimina residuo alguno 1. Causa posible: el nivel de agua en el acuario es demasiado bajo o el espumador está colocado en agua poco profunda. Solución: ajuste la perilla de nivel de agua según sea necesario o coloque el espumador más arriba en el sumidero. - Page 52 INSTRUÇÕES DE INSTALAÇÃO E UTILIZAÇÃO Informação de segurança importante - Leia atentamente - Isole sempre da alimentação elétrica da rede antes de instalar ou de realizar qualquer trabalho de manutenção na unidade REEF-Skim PRO. - A alimentação elétrica para a unidade REEF-Skim PRO tem de ser fornecida através de um dispositivo de corrente residual (RCD) com uma corrente de operação residual nominal não superior a 30 mA.
-
Page 53: Lista De Peças
LISTA DE PEÇAS Corpo principal do escumador 17. Conjunto de drenagem do copo coletor Saída de água 18. Bomba Botão de regulação do nível de água 19. Difusor de bolhas Silenciador de ar 20. Placa de montagem do difusor de bolhas Bico de ozono 21. - Page 54 MONTAGEM/REMONTAGEM COMPLETA DO ESCUMADOR REEF-Skim PRO 300 O REEF-Skim PRO 300 vem quase totalmente montado. Para a configuração inicial ou remontagem após manutenção/limpeza, siga as fotos abaixo. Certifique-se de que a esponja de paragem das bolhas está ligada à saída antes de utilizar e limpe-a ou substitua-a regularmente para garantir um desempenho ideal.
- Page 55 MONTAGEM/REMONTAGEM COMPLETA DO ESCUMADOR REEF-Skim PRO 500/1000/1500/2000 Para a configuração inicial ou remontagem após manutenção/limpeza, siga as fotos abaixo.
- Page 56 INSTALAÇÃO A unidade REEF-Skim PRO foi concebida para ser utilizada apenas dentro do tanque e idealmente posicionada tão próximo do tubo de drenagem do aquário quanto possível, para garantir a melhor recolha possível de resíduos orgânicos e outros resíduos. Para garantir que o copo coletor possa ser facilmente removido para limpeza, deixe uma folga de, pelo menos, 50 mm por cima da tampa do copo coletor.
- Page 57 PRIMEIRA VEZ E FUNCIONAMENTO INICIAL Cuidado: Abra totalmente o indicador de regulação de ar e rode o indicador de regulação do nível de água NO SENTIDO CONTRÁRIO AOS PONTEIROS DO RELÓGIO o máximo que conseguir (para descer o nível de água o máximo possível) ANTES de ligar o escumador.
- Page 58 UTILIZAÇÃO COM OZONO Os Escumadores de Proteínas REEF-Skim PRO e a bomba fornecida são adequados para utilização com ozono. Para utilizar com ozono, ligue simplesmente a saída do gerador de ozono ao bico de injeção de ozono (este estará coberto com uma tampa pequena) no fundo do silenciador de ar. Rode o indicador de regulação de ar para que a maior quantidade de ar possível seja aspirada através da unidade de ozono, mas sem afetar os resultados da produção de bolhas.
-
Page 59: Resolução De Problemas
RESOLUÇÃO DE PROBLEMAS Problema: O escumador não está a remover nenhuns resíduos 1. Causa possível: O nível de água está demasiado baixo ou o escumador está posicionado em água muito pouco profunda. Solução: Altere o indicador de regulação do nível de água em conformidade ou suba o escumador no tanque. - Page 60 ® Tropical Marine Centre, Solesbridge Lane, Chorleywood, Hertfordshire,WD3 5SX. Technical Information Lines Tel: +44 (0) 1923 284151 Fax: +44 (0) 1923 285840 Open between 9am - 5pm Monday to Thursday/9am - 12pm Friday. www.tropicalmarinecentre.co.uk tmc@tropicalmarinecentre.co.uk v.1/2017...
Need help?
Do you have a question about the REEF-Skim PRO 500 and is the answer not in the manual?
Questions and answers